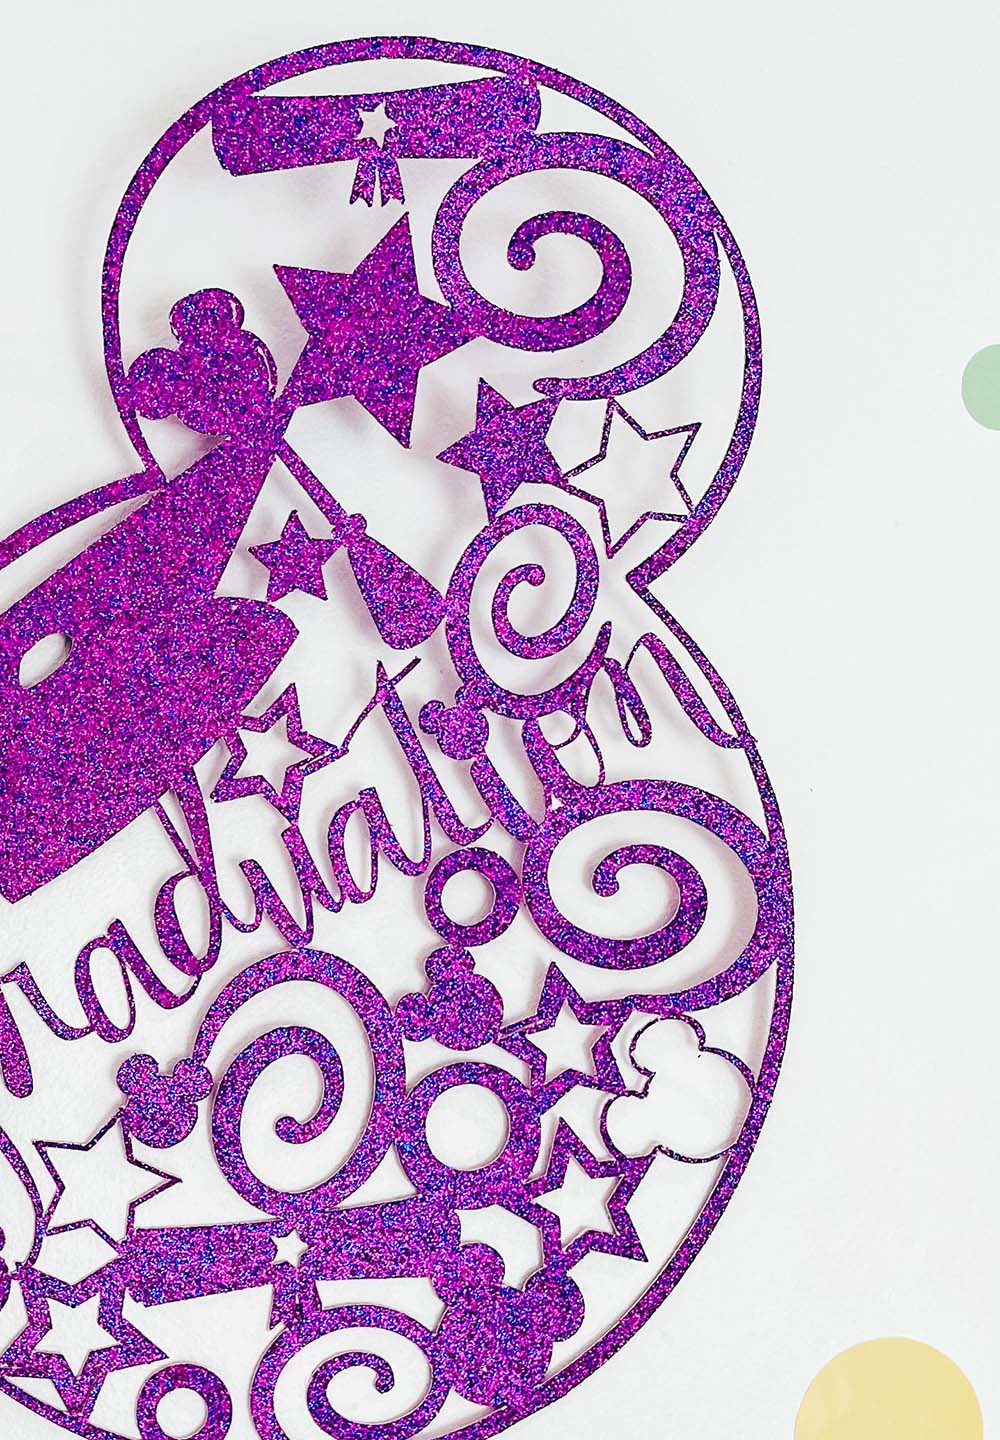
You know I am obsessed with Disney and Mickey Mouse? I love nothing more than creating a Mickey cut file and truly believe there is a Mickey for every occasion. Honestly, what situation is there in life, where he wouldn’t fit? Which is exciting, as I could create these little dudes forever and a day. Todays creation is this super cute Mickey Graduation SVG for crafting, card making and scrapbooking. Also do check out my graduation alphabet.
Graduation day is such a huge deal, years of work, dedication and effort finally being recognised and celebrated and of course it should be celebrated and marked. My little Mickey Graduation SVG files are perfect for making banners, cards and gifts.

What You Will Find Here
Project Ideas For Using My Mickey Graduation SVG Cut Files.
- Scrapbooks
- Graduation T Shirts
- Framing As Wall Art
- Decorating Graduation Parties
- Back Packs
- Cricut Mugs
- Cushion Covers
- Cards
- Infusible Ink Coasters
- Window Cling
- Wall Decals
To Make A Mickey Graduation SVG Paper Cut
You Will Need
- Cricut Maker
- Cricut Design Space
- Cutting Mat
- 12x 12 plain or glitter card stock
- Brayer and weeding tools
- Blank cards and envelopes if you want to make a card
- Double sided tape

If You Want To Use This Cut File For DIY Disney Themed Projects?
Simply click here or on the image below to get my free Mickey Graduation cut file download and I will pop them across to you in PNG and SVG form.
However, make sure your pop-up blocker is turned off. Here’s how you upload the files to Cricut Design Space.

If You’re Having Problems?
Check out my trouble shooting page, hopefully it will answer any questions you may have.
How To Upload Your Cricut Mickey Mouse Graduation SVG Files To Cricut Design Space
Firstly click upload at the bottom of the left hand bar and click browse to find your chosen SVG file on your MAC, Phone or PC. Find the file and click upload.
Next you will see is the image below, click on the image and press upload in the bottom right corner.

It will now appear in uploads in Cricut Design Space. From there you can pull it into design space and use for creating graduation gift. Do remember to mirror if you are using with iron on vinyl or Infusible Ink.
Creating A Back File For Your Graduation Mickey
If you want to frame your Mickey, make multiple Mickey’s for a banner or make a card then creating a solid back file is a great way to make you art work pop.
To do this start by right clicking and duplicating your Mickey. Put one to one size and click on contour in the bottom right hand corner.

The contour tool enables you to remove any open spaces on your image. To make a back file you will need to click hide all contours. This will make your Mickey one solid image exactly the same size as your cut file.

To make your background slightly bigger but still in proportion click on your image then select offset in the top tool bar. Here you can choose how large you want your background to be by sliding the distance bar.

Once the size is decided you can line up with your cut file ready to cut.

If You Want To Create A Mickey Shaped Graduation Card
Start by right clicking and duplicating your back file, once duplicated line up so they are exactly in line. Now select a square in shapes, unlock it by clicking the lock on the left hand corner of the square and drag to a rectangle to create a solid join, right click and press weld.

To make your card able to stand you need to remove the bottom, do this by pulling another rectangle across the bottom of your welded image. Position, right click to select all and click slice.

Now select a score line, position, right click, select all and click attach.

You can now check the sizing and cut your card.

Cutting Your Cricut Mickey Graduation Scrapbooking And Craft Cut File
When you send your Mickey Cut File to your Cricut to cut, ensure you use your brayer to roll the paper, vinyl or card to adhere to the mat. Movement will affect the cut. If your cutting mat looses its stickiness this will affect the quality of cut. Also make sure your mat is in good condition, it is vital for cutting intricate cuts.
Additionally, make sure you set the material and cut pressure correctly to match whatever Cricut materials you’re cutting to get a clean cut. If you have any problems cutting check the mat, pressure and material settings as generally this is where the problem will lie.
I used glitter card for this project so used the glitter card setting and set my pressure on more.
Also please do pop over to Instagram, and give me a follow and if you make a project tag me! I love seeing everyone else’s makes and chatting crafting. I could do that all day!
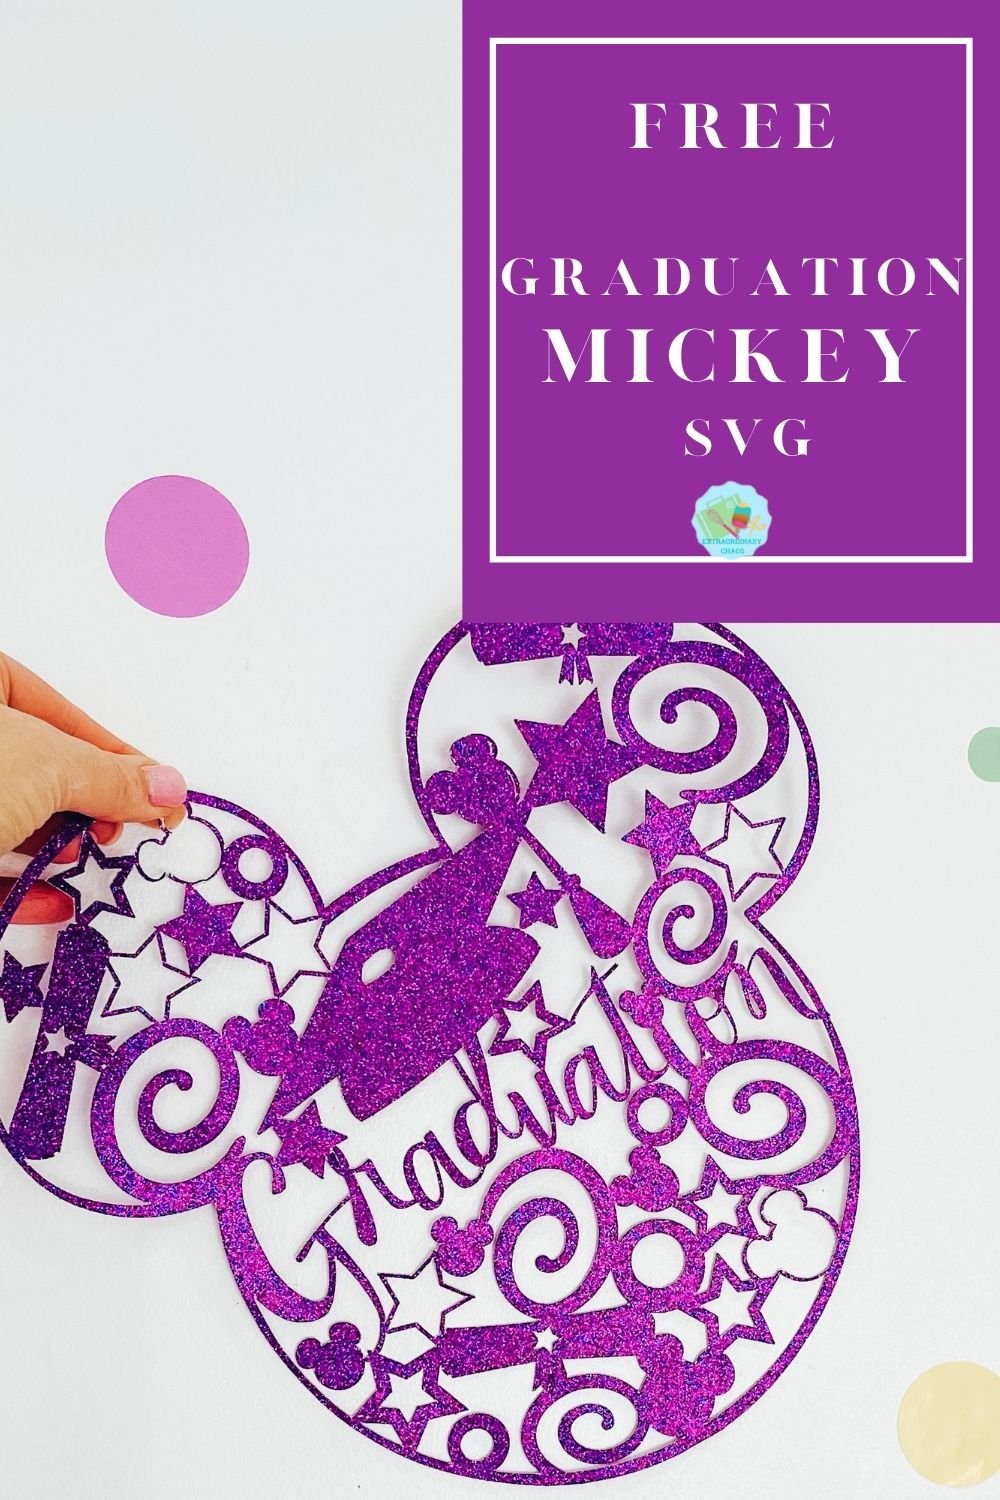

Mickey Graduation Card And cut File
Free Mickey Graduation SVG for making DIY Graduation gifts and cards, framed artwork and Graduation scrapbooking Layouts.
Materials
- 12x 12 plain or glitter card stock
- Blank cards and envelopes if you want to make a card.
- Double Sided Tape
Tools
- Cricut Maker
- Cricut Design Space
- Cutting Mat
- Brayer and weeding tools
Instructions
- How To Upload Your Cricut Mickey Mouse Graduation SVG Files To Cricut Design Space.
Firstly click upload at the bottom of the left hand bar and click browse to find your chosen SVG file on your MAC, Phone or PC. Find the file and click upload. Next you will see is the image below, click on the image and press upload in the bottom right corner. It will now appear in uploads in Cricut Design Space. From there you can pull it into design space and use for creating graduation gift. Do remember to mirror if you are using with iron on vinyl or Infusible Ink.
 - Creating A Back File For Your Graduation Mickey. If you want to frame your Mickey, make multiple Mickey’s for a banner or make a card then creating a solid back file is a great way to make you art work pop.
To do this start by right clicking and duplicating your Mickey. Put one to one size and click on contour in the bottom right hand corner. The contour tool enables you to remove any open spaces on your image. To make a back file you will need to click hide all contours. This will make your Mickey one solid image exactly the same size as your cut file.
- To make your background slightly bigger but still in proportion click on your image then select offset in the top tool bar. Here you can choose how large you want your background to be by sliding the distance bar. Once the size is decided you can line up with your cut file ready to cut.

- If You Want To Create A Mickey Shaped Graduation Card
Start by right clicking and duplicating your back file, once duplicated line up so they are exactly in line. Now select a square in shapes, unlock it by clicking the lock on the left hand corner of the square and drag to a rectangle to create a solid join, right click and press weld. To make your card able to stand you need to remove the bottom, do this by pulling another rectangle across the bottom of your welded image. Position, right click to select all and click slice.
  Now select a score line, position, right click, select all and click attach.
  You can now check the sizing and cut your card.
- Cutting Your Cricut Mickey Graduation Scrapbooking And Craft Cut File
When you send your Mickey Cut File to your Cricut to cut, ensure you use your brayer to roll the paper, vinyl or card to adhere to the mat. Movement will affect the cut. If your cutting mat looses its stickiness this will affect the quality of cut. Also make sure your mat is in good condition, it is vital for cutting intricate cuts.
Additionally, make sure you set the material and cut pressure correctly to match whatever Cricut materials you’re cutting to get a clean cut. If you have any problems cutting check the mat, pressure and material settings as generally this is where the problem will lie.
I used glitter card for this project so used the glitter card setting and set my pressure on more.
Notes
Project Ideas For Using My Mickey Graduation SVG Cut Files.
Scrapbooks
Graduation T Shirts
Framing As Wall Art
Decorating Graduation Parties
Back Packs
Cricut Mugs
Cushion Covers
Cards
Infusible Ink Coasters
Window Cling
Wall Decals
Recommended Products
As an Amazon Associate and member of other affiliate programs, I earn from qualifying purchases.


Thank you so much! This is just so cute! I love any and everything Mickey and Disney really. Now that I found you, I’ll be busy searching through all your posts and everything. I love that you not only gave away a very cute svg file, but then you have very detailed info on how to make so many projects with it! That blew away, cuz I’m not a newbie, but still need ideas and instructions sometimes. Your directions are detailed and easy to follow, so thank you! As someone who started a personal blog and abandoned it mostly, I know how much work it is to be this detailed. Plus, great project ideas. Anyways, long winded, but I really thank you!
-New Fan aka Tiffany
Hi Tiffany, thank you so much, you have no idea how much I needed to hear this at the moment what a great comment to wake up to x
I totally agree with Tiffany’s comment – I am so happy that I found your blog! Not only are the free Mickey files Amazing, but your tutorials are fantastic. I bought my Cricut Explorer Air 2 about a year ago, and there is so much to learn! Your tutorials “teach by example” and are easy to understand. I can go back-and-forth between reading your instructions, then working in Design Space to actually try what you are doing. Thanks for all you do.
Rose thank you so much I so appreciate this lovely comment x