Cricut design space is incredible, there’s not much you can’t find in there. However what if you want to cut an image thats not available in design space? Or indeed want to add your Childs artwork to Cricut Design Space, a custom design you have bought from Etsy or one of my free SVG files then follow this easy tutorial to help you step by step How To Upload Images To Cricut Design Space. Even better I have created a printable guide for you to print and save for later. Also check out my post on uploading fonts, glyphs and special characters to Cricut Design Space.
How To Upload Images To Cricut Design Space
What Images Can I Upload To Cricut Design Space?
There is a wealth of options available and endless crafting opportunities once you know how to add your own images to Cricut Design Space. Think of all the custom Cricut projects you can make as gifts or indeed if you are a small business making your own custom products to sell at craft fairs and markets.
If you want to see me create my projects, follow me on Tik Tok and Instagram.
What File Types Can I Add To Cricut Design Space
- PNG files, these single layer files work fine for me, but some say they can go a little grainy
- SVG and dxf files are vector images and are better for resizing and making larger as they are clearer, they can also upload in layers
- Screenshots and basic images your own work
- PNG photos
- bmp
- jpg
- gif files
- Colour patterns and images for print then cut image files.
A Few Ideas Of Images You Can Add To Cricut Design Space
- Children’s art work or school pictures.
- Baby or children’s hand prints or footprints
- Custom designs from Pic Monkey or Canva
- Photos
- Custom files you have permission to use.
- Printable stickers and pdf files made in Canva (You can’t add the pdf, however you can screen shot the pdf and add the screen shot. Just make sure you make the background a different colour)
What Files Can’t I Add To Cricut Design Space
Anything you don’t own or have permission to use. These images are protected by copyright, which is a huge deal.
There are companies set up to find people using non copyright images and I know people who have used images without realising they were copyright protected who have had hefty fines.
If you purchase a file from ETSY it will state usage rights, as does Cricut Design Space in its Angel Policy and apps like Canva have a usage policy. However do check out the details as brands such a Disney can not be made and sold and are for personal use only.
Can I Create And Cut My Own Images To Upload To Cricut Design Space?
Surprisingly, being able to insert images design space to cut your own images is incredibly easy. Some projects may require a little patience. But the process is a simple one and the easier the design the more simple adding an image to Cricut Design Space is.
How To Upload Images To Cricut Design Space
Basic Image Upload To Cricut Design Space
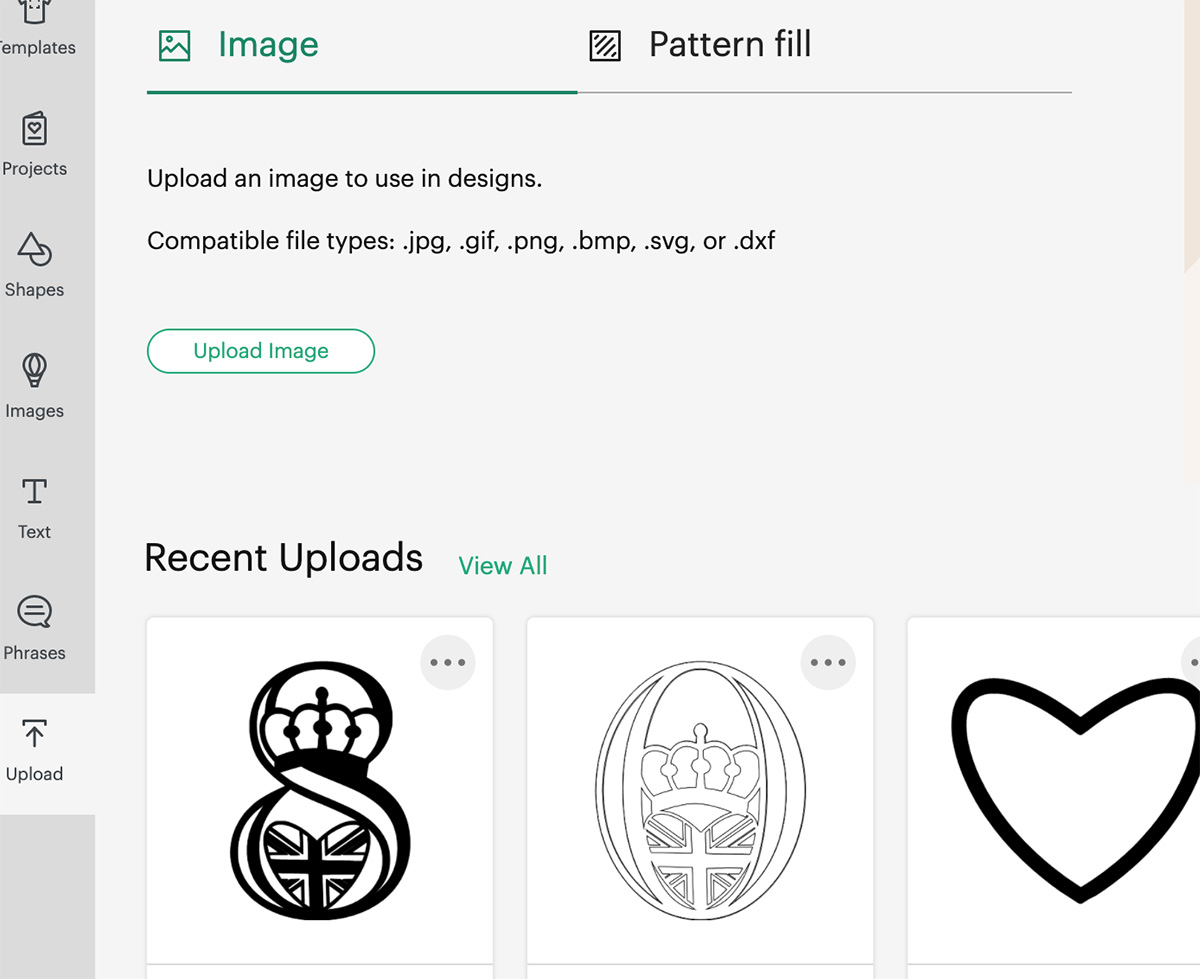
Start a new project and you will be brought to the Cricut Design screen. Click upload at the bottom of the left hand bar, browse for the images, vector image or basic image to upload. Click upload and find the image you want to add, if you have downloaded this file from the Internet it is probably be in the downloads file on your pc or MAC (even screenshots work) and click upload. Ensure you observe copyright laws, however personal images are fine.
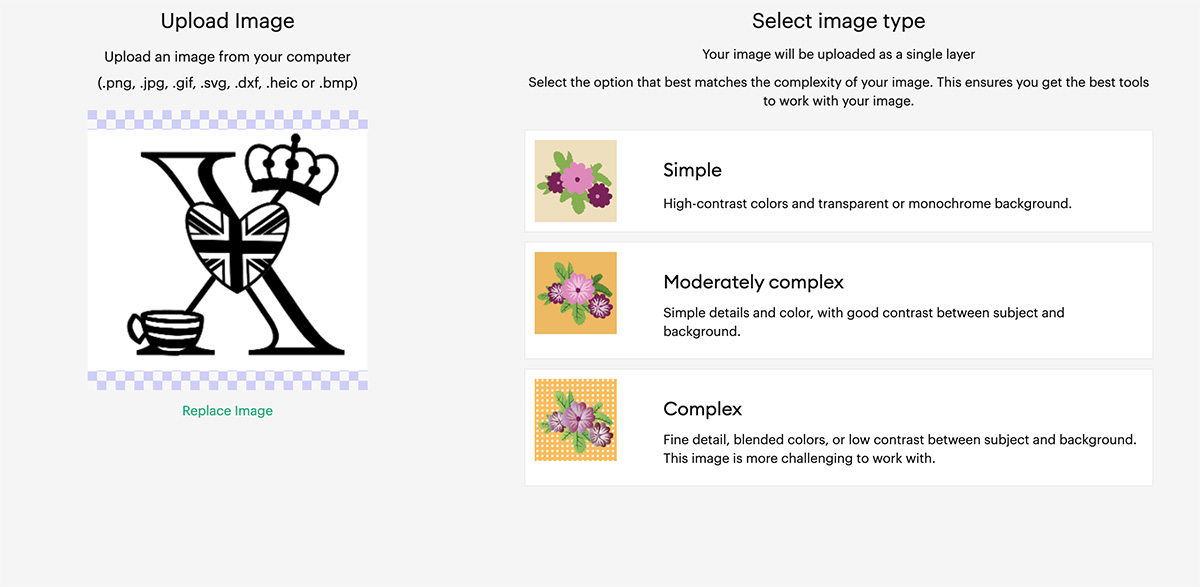
Select Complex Image
Your image will open in this window and you have options at the bottom of the screen, I always choose complex image, one you select you are taken to the next window with a checkerboard background.
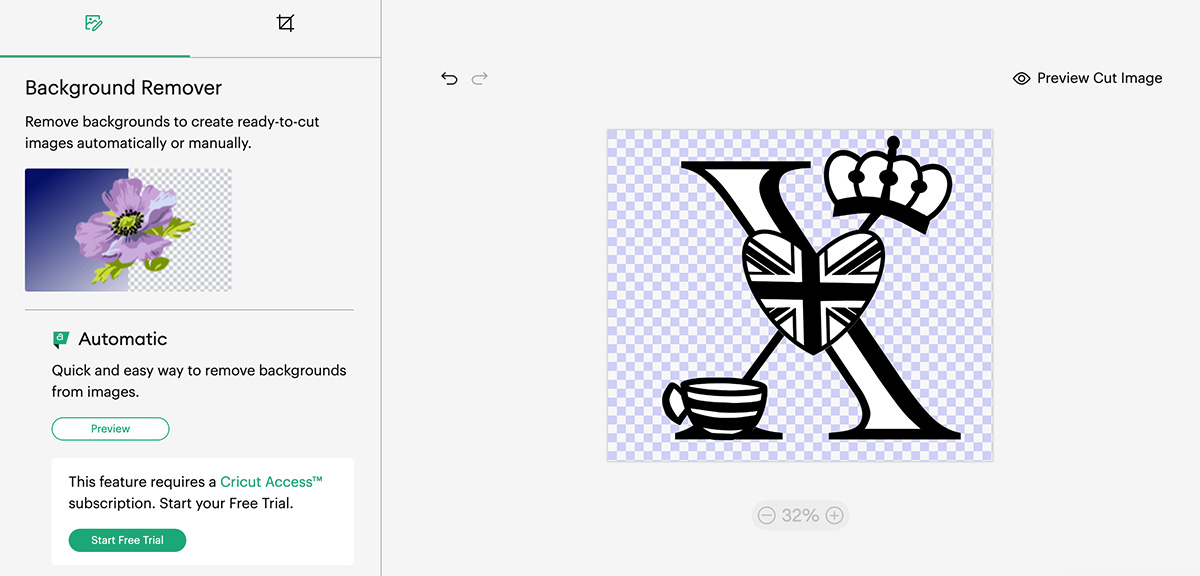
Edit Your Image To Remove The Background.
On this window you can remove the any unwanted background if you are uploading a screenshot, this is easier if its a simple image. If you have design space access you can use the automatic button.
However if you don’t, you have the option to select and erase parts of your image by clicking the star to drag the eraser tool over areas to be removed. ( If you download any images from my site I have done this for you)
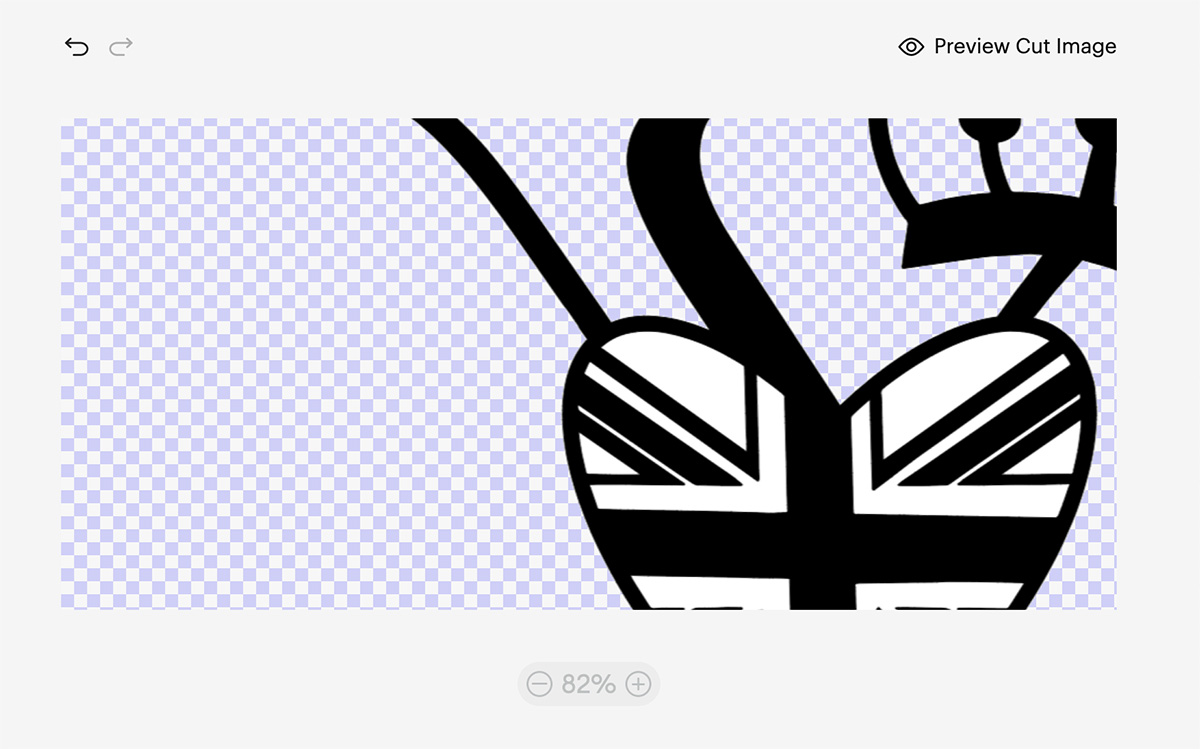
Keep going until you are happy with the entire image, however if you make a mistake just re-click to remove or correct. ( You can also create vector files in illustrator)
Its also good to remember that if the image is intricate you can scroll in and our using the % plus and minus slider bar under the image to make it larger and easier to see. It is also an option to use the crop tool to remove any unwanted areas.
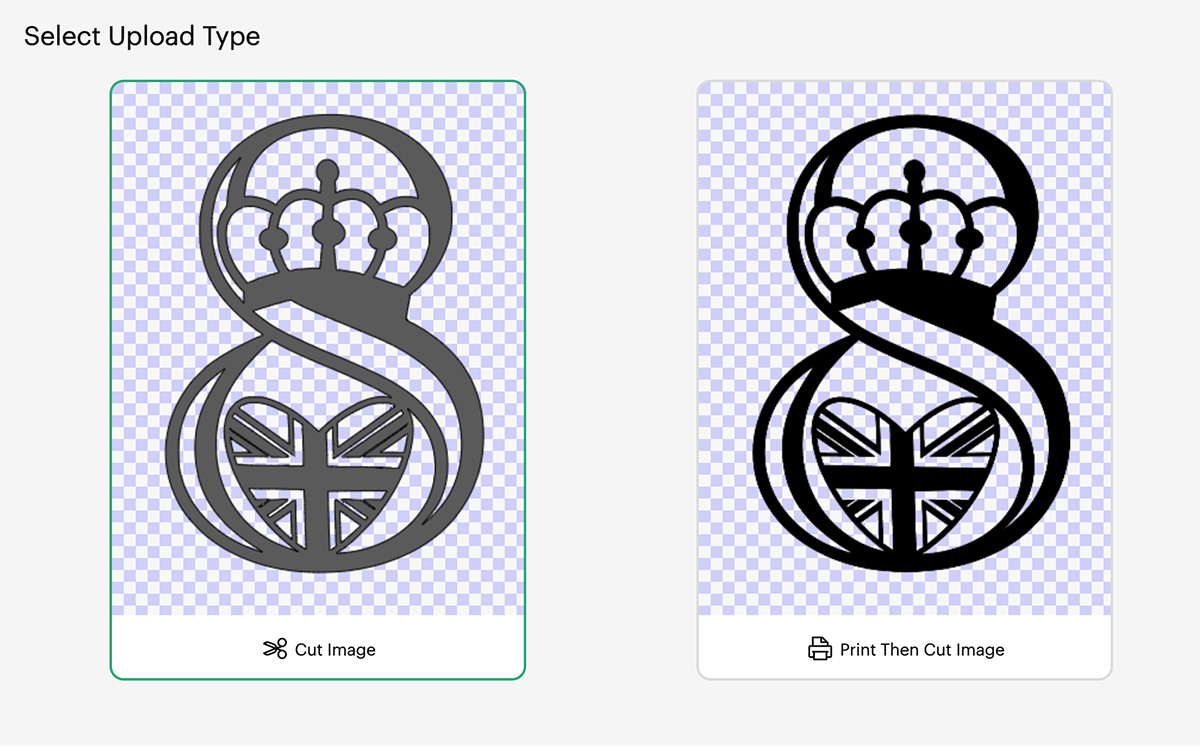
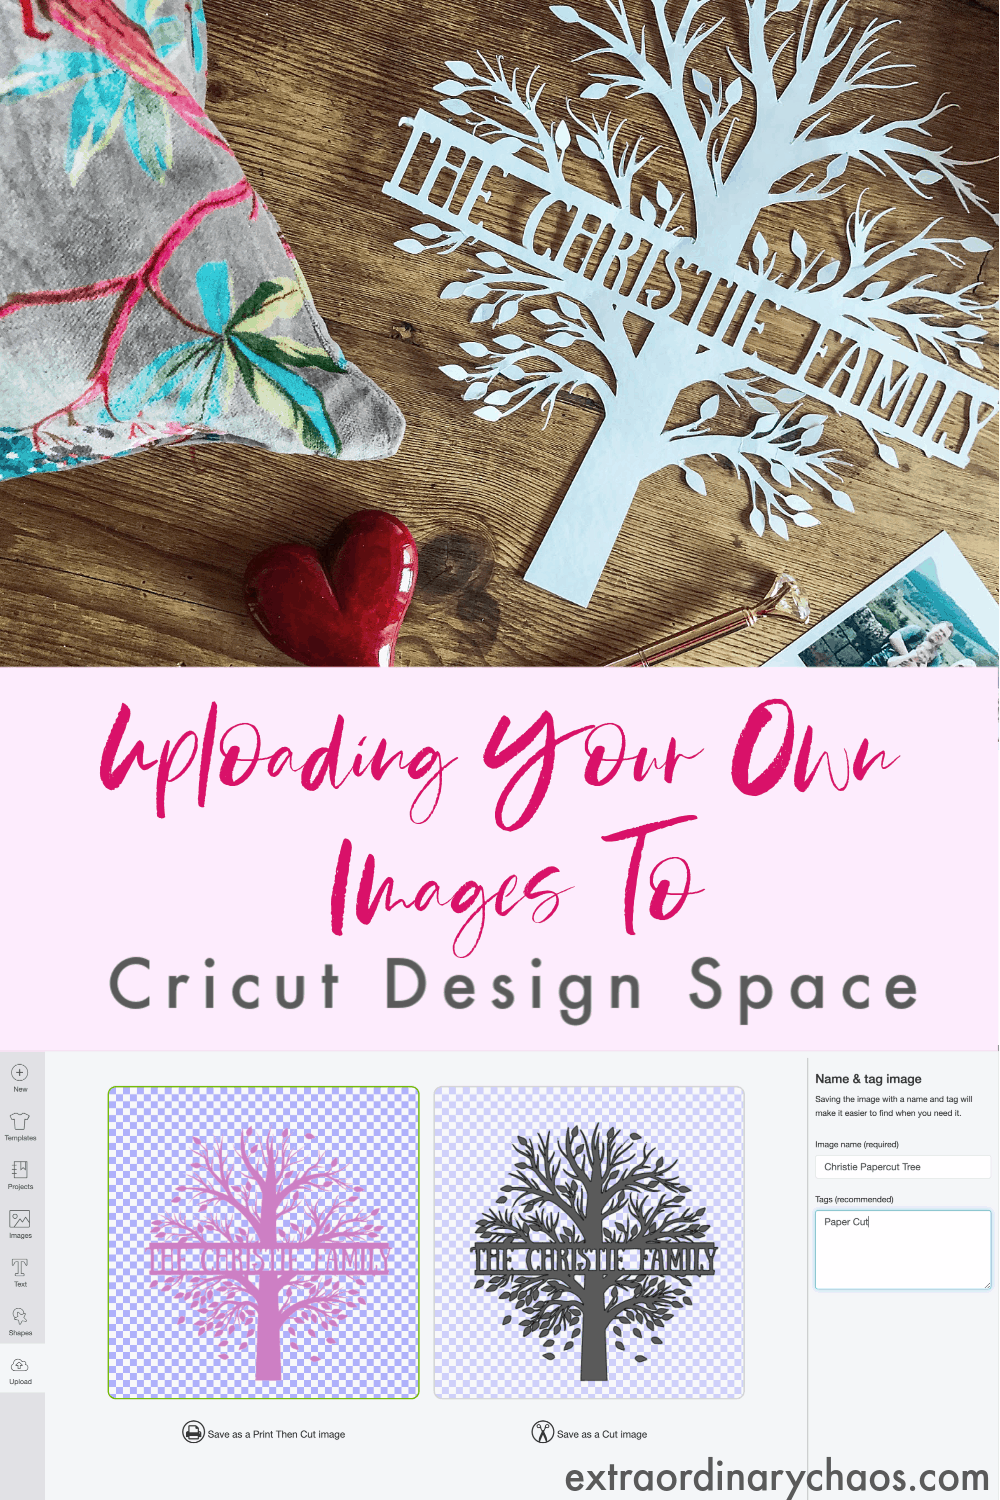
Once the background is removed you are left with a cut image, you now have the option of saving as a cut file or print and cut which can be changed in design space.
You can now upload the image and use it in design space there will be a box to the right which enables you to name your upload to save it to the image library for future use. Now start uploading a new image if you wish.
How To Add A Vector, SVG, PNG Image Upload To Cricut Design Space
Click new project in Design Space, click upload in the side bar and choose upload image. This will open a browse button here you can browse files on your pc or Mac, again any files downloaded with most probably be in your download files.
Select the file and click open. If the file is an SVG file it will upload straight to your image library.
If it’s a PNG file choose complex this will take you to the background remover window, however if it’s an SVG or PNG file the background should be removed for you. Click apply and continue, in the next window click save as a cut image.
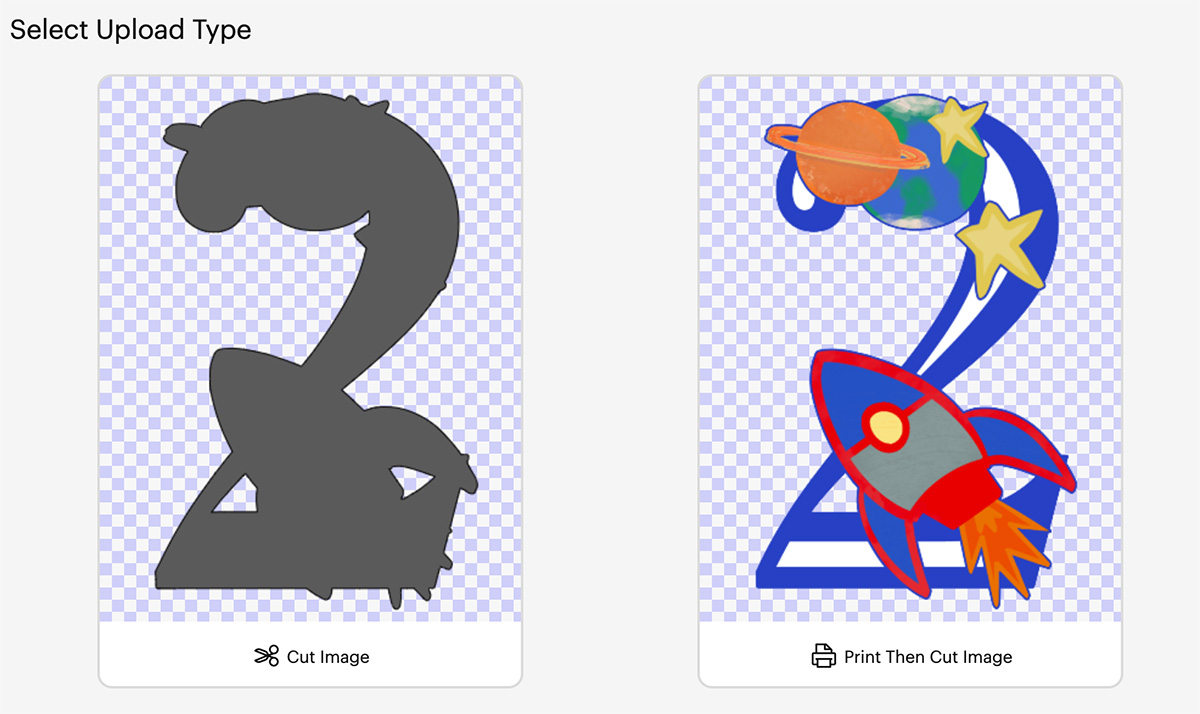
If Your Image Is A Print And Cut Image?
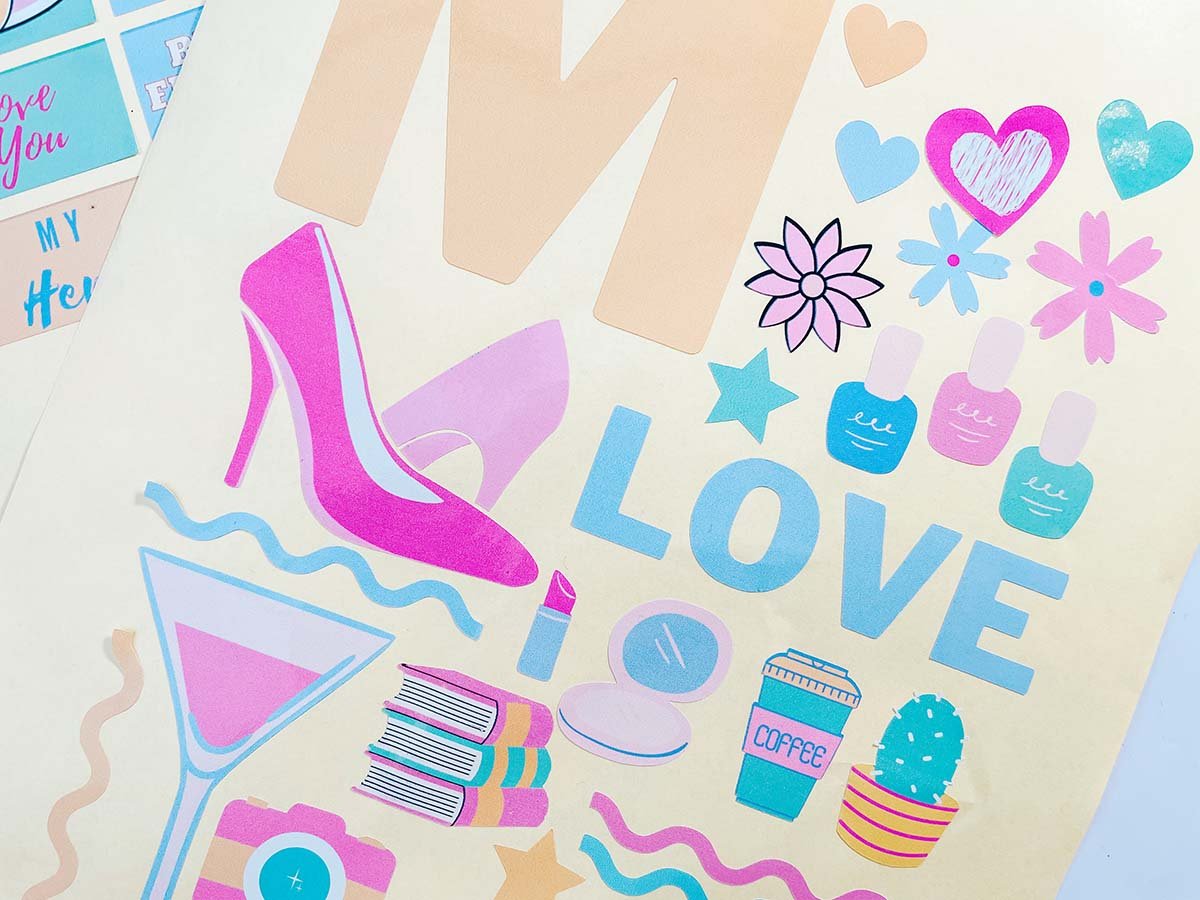
If the image you are uploading to Cricut Design Space is a printable image, follow the same procedure. However you must save it as a print and cut image to retain the colour detail.
How To Get My Designs To Upload To Cricut Design Space
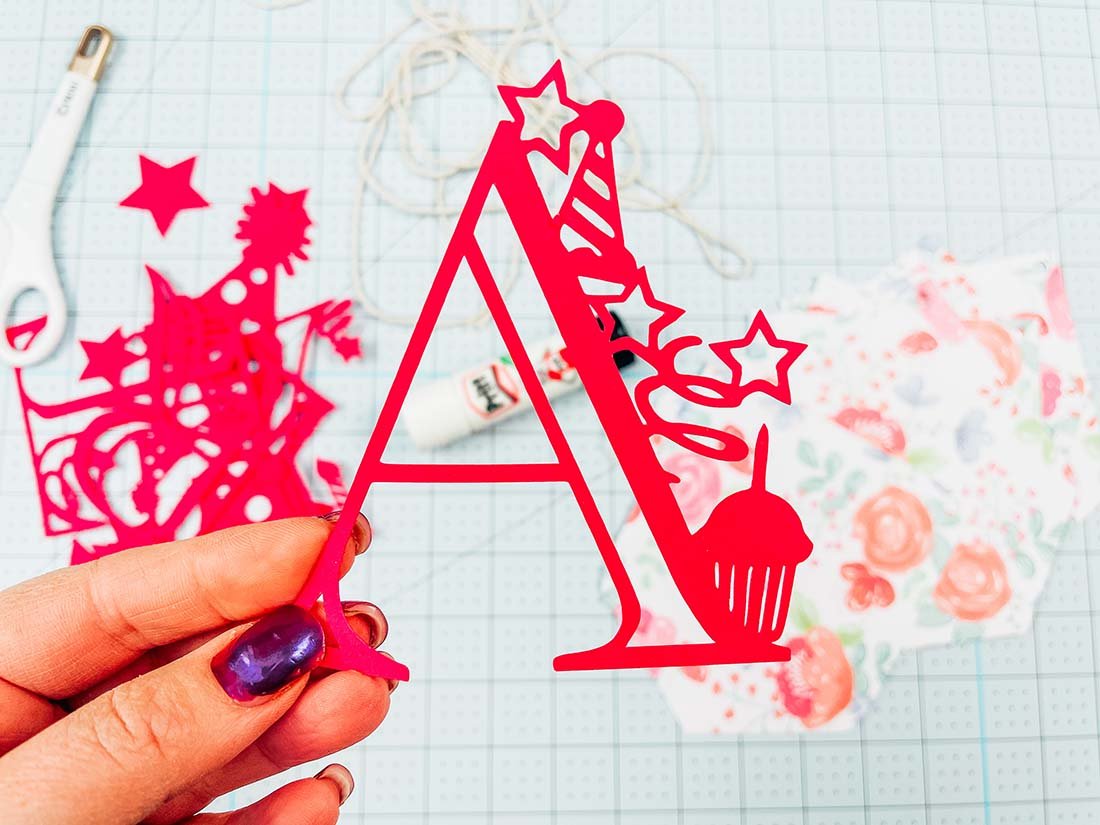
If you’re on this page looking for the download of a free alphabet? Go back to the project page and look for the banner image that says subscribe here, get the files here or words to that effect.
Click on the banner and a link will open to my free download shop. From here if you subscribe you are able to sign up and download my free images ready to upload and drag into Cricut Design Space.
Please note I am a busy mum and we are all on different time so this will not be immediately.

Creating Free Images For Cricut In PicMonkey
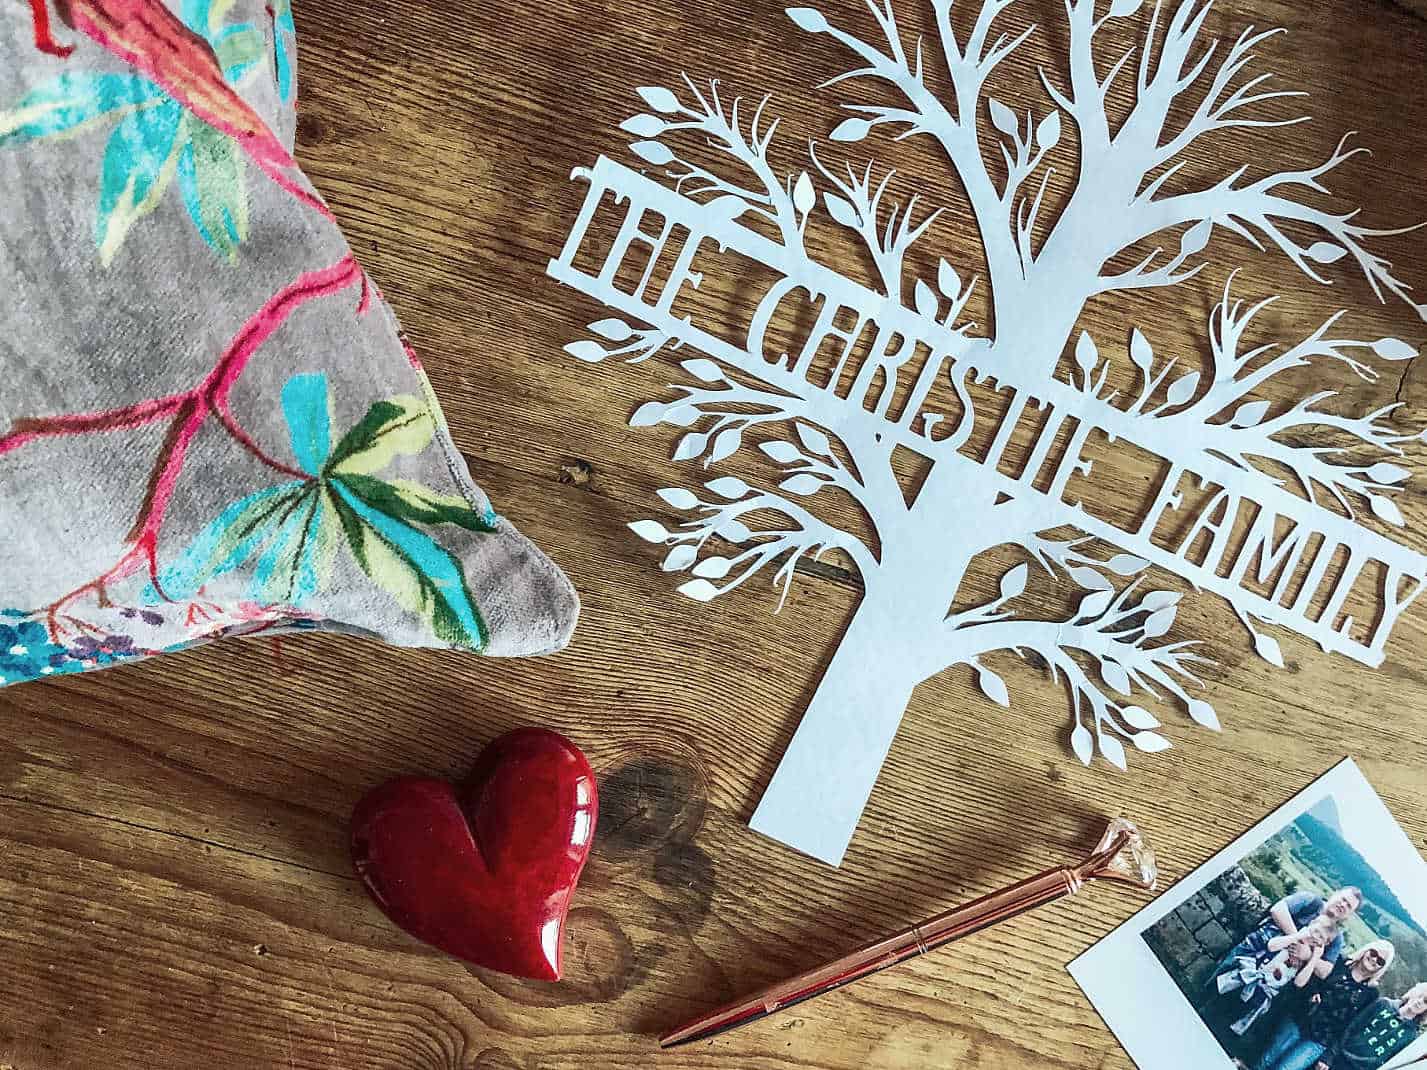
I sometimes like to create paper cuts or stickers in PicMonkey and transfer these to design space. Notably its very simple to create images and paper cuts in PicMonkey.
Simply design your image with a transparent background. Thus when you upload to Design Space it will upload ready to print or cut without a background. However if your image does have a background it’s easy to remove.
I made the cut file below by choosing a tree in images. Then duplicate and crop both images, one at the top and one at the bottom to create two halves a top and a bottom of a tree.
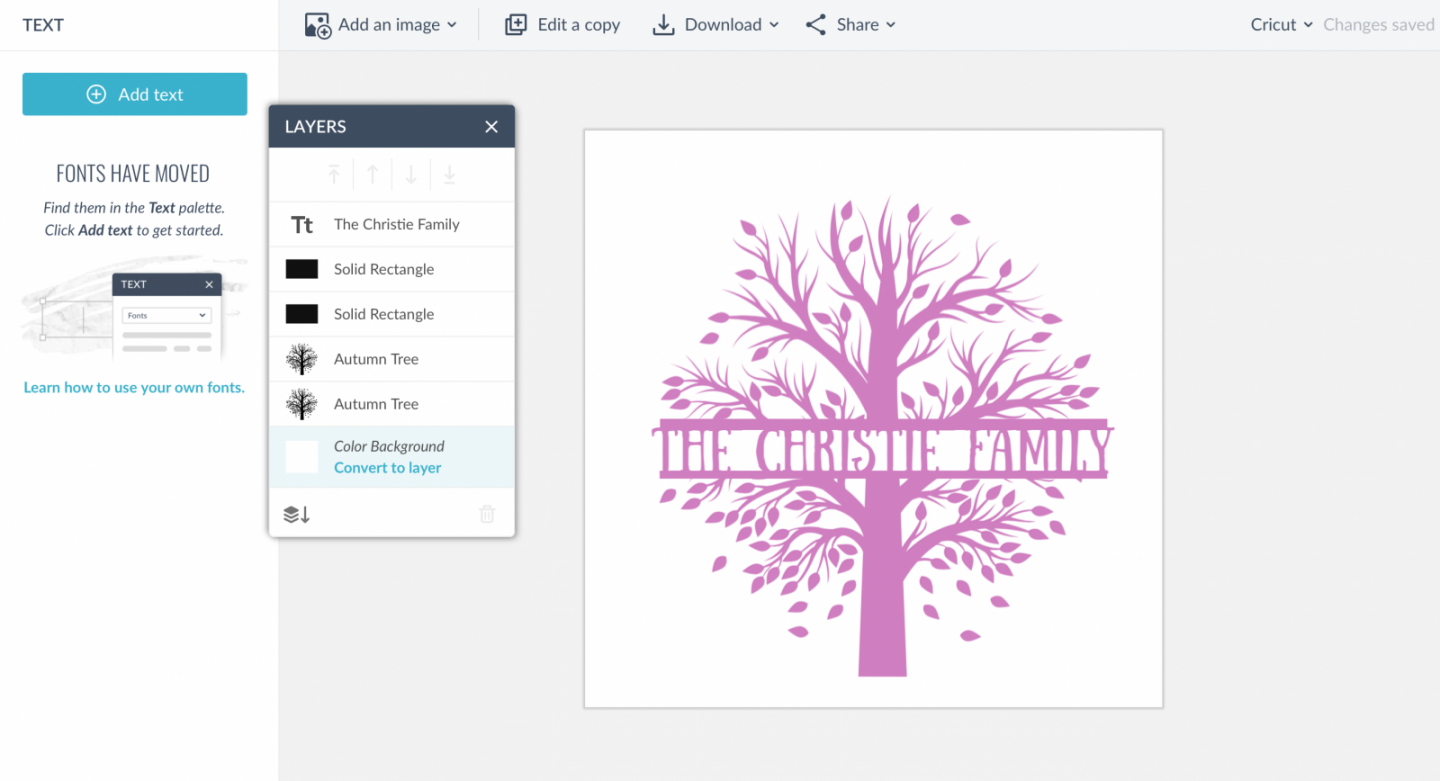
Next add two rectangle lines to frame your text and add text. Now save either with or without a background.
For more Cricut Tips And Tutorials check out my Cricut section.

How To Upload Images To Cricut Design Space.
How To Upload Images To Cricut Design Space, remove backgrounds on any images in design space and upload to cut.
Materials
- Cricut card stock, vinyl or infusible ink
Tools
- Cricut design space
- Cricut machine
- Cutting mat
Instructions
- Select Images To Upload To Cricut Design Space
Click upload at the bottom of the left hand bar and find the image you want to add, (even screenshots work) and click upload. Ensure you observe copyright laws, however personal images are fine.
- Edit Your Image To Remove The Background.
On this window you can remove the background. If you have design space access you can use the automatic button.
However if you don’t, you have the option to select and erase parts of your image by clicking the star on areas to be removed. ( If you download any images from my site I have done this for you)
Keep going until you are happy, however if you make a mistake just re-click to remove or correct.
- Its also good to remember that if the image is intricate you can scroll in and our using the % plus and minus bar under the image.

- Once the background is removed you are left with a cut image, you now have the option of saving as a cut file or print and cut which can be changed in design space.

- If Your Image Is A Printable Image?
If the image you are uploading to Cricut Design Space is a printable image then you must save it as a print and cut image to retain the colour detail.
You can now upload the image and use it in design space.
Notes
What Images Can I Upload To Cricut Design Space?
There is a wealth of options available and endless crafting opportunities once you know how to add your own images to Cricut Design Space. Think of all the custom Cricut projects you can make as gifts or indeed if you are a small business making your own custom products to sell at craft fairs and markets.
A Few Ideas Of Images You Can Add To Cricut Design Space
Children’s art work or school pictures.
Baby or children’s hand prints or footprints
Custom designs from Pic Monkey or Canva
Photos
Custom files you have permission to use.
Printable stickers and pdf files made in Canva (You can’t add the pdf, however you can screen shot the pdf and add the screen shot. Just make sure you make the background a different colour)
What Files Can I Add To Cricut Design Space
PNG files, these work file for me, but some say they can go a little grainy
SVG are vector files and are better for resizing and making larger as they are clearer
Screenshots of your own work
PNG photos
Jpeg photos
What Files Can’t I Add To Cricut Design Space
Anything you don’t own or have permission to use. These images are protected by copyright, which is a huge deal.
There are companies set up to find people using non copyright images and I know people who have used images without realising they were copyright protected who have had hefty fines.
If you purchase a file from ETSY it will state usage rights, as does Cricut Design Space in its Angel Policy and apps like Canva have a usage policy. However do check out the details as brands such a Disney can not be made and sold and are for personal use only.
Recommended Products
As an Amazon Associate and member of other affiliate programs, I earn from qualifying purchases.
Love the alphabet cut outs but can’t find free templates, nor the font.
Hi Connie right click and save the images and them there is a link in the post that explains how to add them to design space. Its not a font I searched the letters in images in design space, hope that helps x
But you need to go back to this post for the images, this is the post that tells you how to add them https://extraordinarychaos.com/2020/04/free-paper-cut-alphabet-templates.html
Hi SarahJChristie.
Thank you so much for these beautiful designs. I have downloaded the albabet and numbers, but realize that there is no R or V in the alphabet and no 0 in the numbers.
Is there a secret there. Lol
Thanks again
Robyn
Hi Robyn
Which Alphabet is it so sorry ? I will have to check and add it,
Thanks
Sarah
ooh found it, I have added to the file, I cant believe I missed them! Thank you so much for letting me know,. x
You are welcome. Thank you so much.
I have tried to download these letters and have not been able to get anything to come up…could you please let me know how I may do so…..Thank you. Designs are beautiful.
Hi Vicki did you confirm you email? It might be in spam? What alphabet is it and I will send you the link and thanks so much x
Hello There
I am new here and new cricut designer.I was wondering if anyone can speak hungary here to help me work things out,as I am not speak English well 🙁
Thank you
Best regards Gitta
Hi Gitta I am so sorry I dont speak Hungarian however am going to look into a translate plug in that would help, I will let you know on here when its live x
Hi Gitta I have added a translate button with Hungarian as an option in the side bar I hope that helps, Sarah x
I have tried to download these letters and have not been able to get anything to come up…could you please let me know how I may do so…..Thank you. Designs are beautiful.
Hi Dee, which Alphabet was it? You have to click onto the big banners that say downloads, of that is not working you must have a pop up blocker, if thats the case tell the the alphabet you want and I will subscribe you and send the link from this end, thanks Sarah x
I have tried several times and cannot download the cake numbers help please thank you
Hi Karen I have emailed you, Sarah x
Hi,
I still cant figure out how to download the alphabets. They are so beautiful but I cant find the download button to get them.
Thanks,
Dimple
Hi Dimple, I can subscribe you from this end and send you the members link, I just need your permission to do so xx
I cannot find the letters, and nothing came to my email
Hi Sarah I have emailed you, if you don’t get the files let me know and I will send you a link x
Can this be downloaded to the cricut joy? If so can you please help me im new. I want the floral letters
Hi Devon yes if you follow the instructions in the post it works exactly the same on the Cricut Joy x
I am absolutely loving these fonts thank you so much for sharing them.
Do I have to subscribe for every alphabet ? Sorry if you getting lots of emails from me ????
Ha ha no worries at all Carol, no you don’t if you check my emails, search for Extraordinary Chaos and they should come up in you in box there is a link to the members area, you can access them there x
Ich mag die Alphabete. Am liebsten hätte ich alle 🙂
Vielen Dank, Sie können sie alle kostenlos herunterladen. Klicken Sie einfach auf das Download-Bild
Parabéns!
Seu trabalho é lindo!
Estou desesperado porque não consigo baixar as letras. Sou novato e não sei usar ainda o DS (como dizem).
Quero guardar tudo para aproveitar também essas oportunidades.
Obrigado, você precisa se inscrever na área de membros, se você me der sua permissão e e-mail eu posso te inscrever x
Bonjour Christie j’ai téléchargé l’abc baby et mariage mais impossible de les trouver sur ma tablette ???y a t’il une solution… naissance dans 10jours suis en retard ! ?? Merci !
Hi, when you upload to design space have you tried searching the name if the files ie baby alphabet or by my name as all files are named this might help you to find them. Have you got a downloads folder they should be there. Thanks Sarah
Hi! Love the stork alphabet and letters you’ve created! I was able to upload onto Cricut, however, with the layers, do I just need to do the offset for the rest of the layers or am I missing something?
Thank you!
Hi Jen thank you, and here is a tutorial which teaches you how to create the layers https://extraordinarychaos.com/how-to-make-a-layered-cake-topper-with-cricut.html