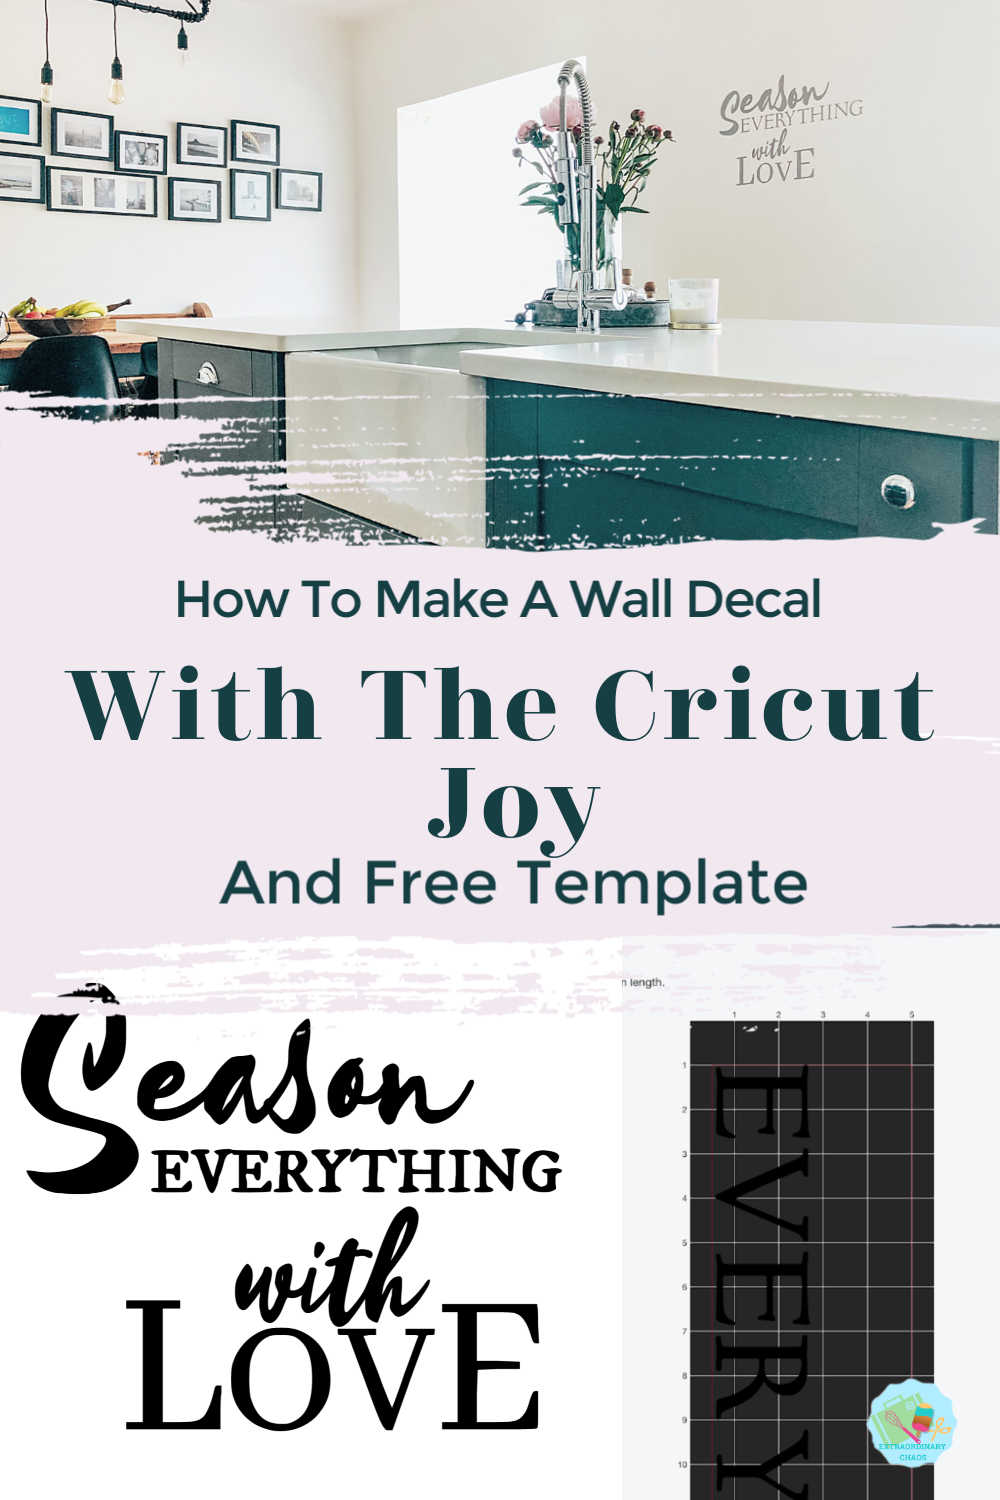
I was chatting the other week about how obsessed I have become with Cricut Removable Vinyl. I just love it when I find new uses for a product. Thus last week I decided to have a go at making a Vinyl Wall Decal With Cricut Joy and omg it is sooooo easy.
How To Make A Large Vinyl Wall Decal With Cricut Joy
Before we start, I could have also easily made this vinyl wall decal with my Cricut Maker. (Although it is still bigger that one mat so you will need to apply the same principles when cutting) However I love exploring what the Cricut Joy can do. Because quite honestly, for me I don’t think it has to many limitations. Cutting large items and words on the Joy is easy if you know how.
If you want to see me create my projects, follow me on Tik Tok and Instagram.
What You Will Need For This Project
- Cricut Joy
- Cricut Removable Vinyl (68.25 inches = 2 rolls)
- Spirit Level
- Cricut scissors and weeding tool
- Pencil
Measure Your Wall
Start by working out how much area you want to cover and measure where you want your Vinyl Wall Decal to be positioned.
Decide On A Saying
This for me was the hardest bit, I didn’t want it to be to soppy. I also knew I wanted my wall saying to be simple in effect. The greatest place for inspiration is Pinterest. Which is by far my favourite social media platform filled with loveliness and inspiration.
Choose Lettering
I had seen something similar but had to work the wording and lettering out myself. However couldn’t find all the fonts I wanted in Design Space. I decided to make my Cricut Vinyl Wall Decal With Pic Monkey, save the image and them uploaded it to Cricut Design Space and remove the background. This is simple if you follow these instructions.
If You Want To Use This Vinyl Wall Decal With Your Cricut?
This decal is free for you to use, simply right click, drag into Cricut Design Space using the instruction above. But keep reading as this guide will also show you how I broke it all down to cut on the Joy.

How To Cut A Large Vinyl Wall Decal Saying With Cricut Joy
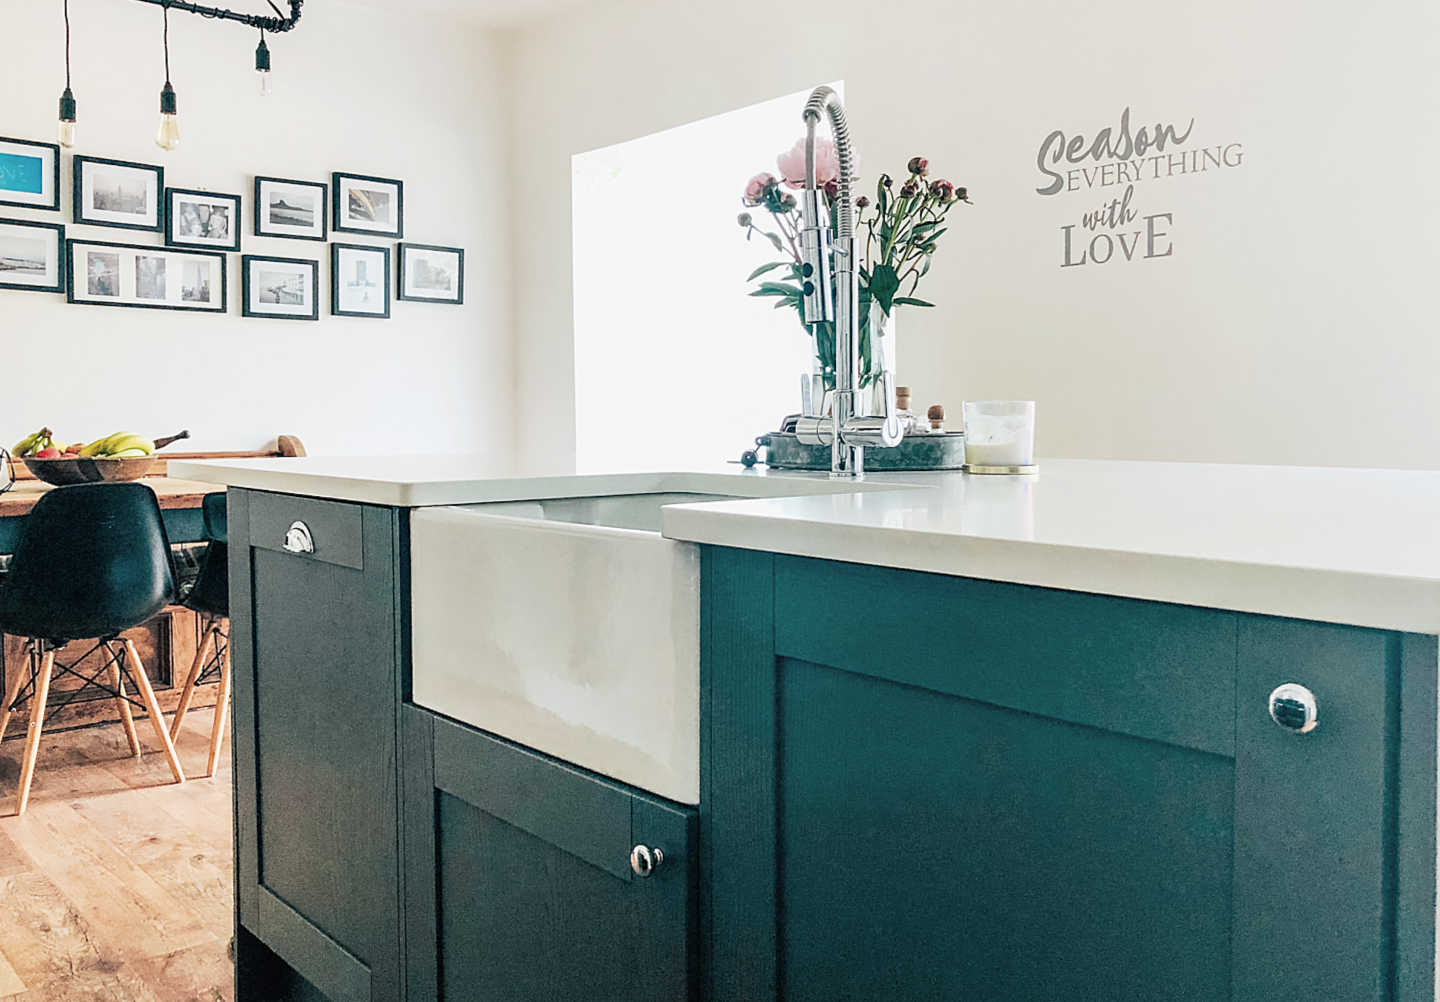
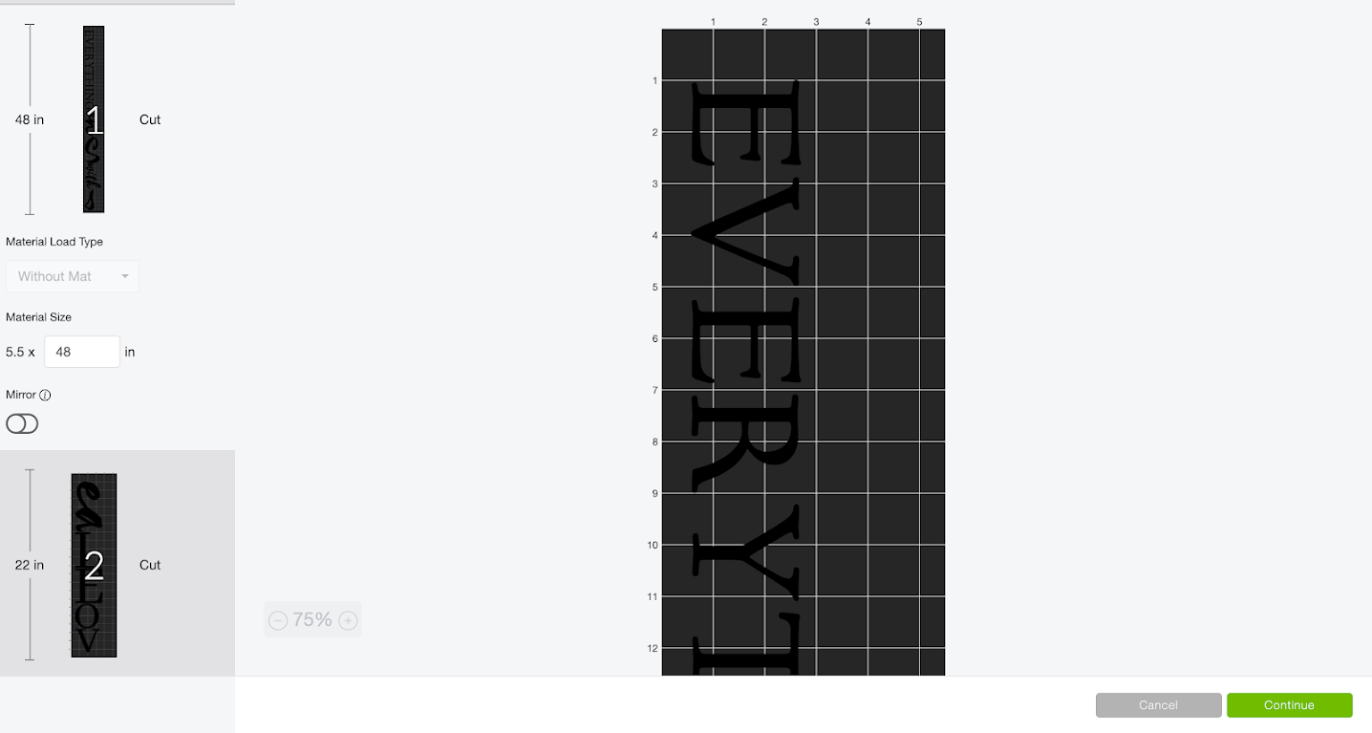
This saying spans 27″ by 17″, thus the perfect way to cut it is on a long roll of smart vinyl, it makes the process so much easier. I used 2 rolls of silver smart vinyl for this project. I use my 12 x 12 cutting mat as a guide on the wall then corresponded this to design space to ensure my sizing was correct.
If you create a wall sign in Cricut Design Space you simply need to ungroup all the letters to larger words so they fit on the vinyl.
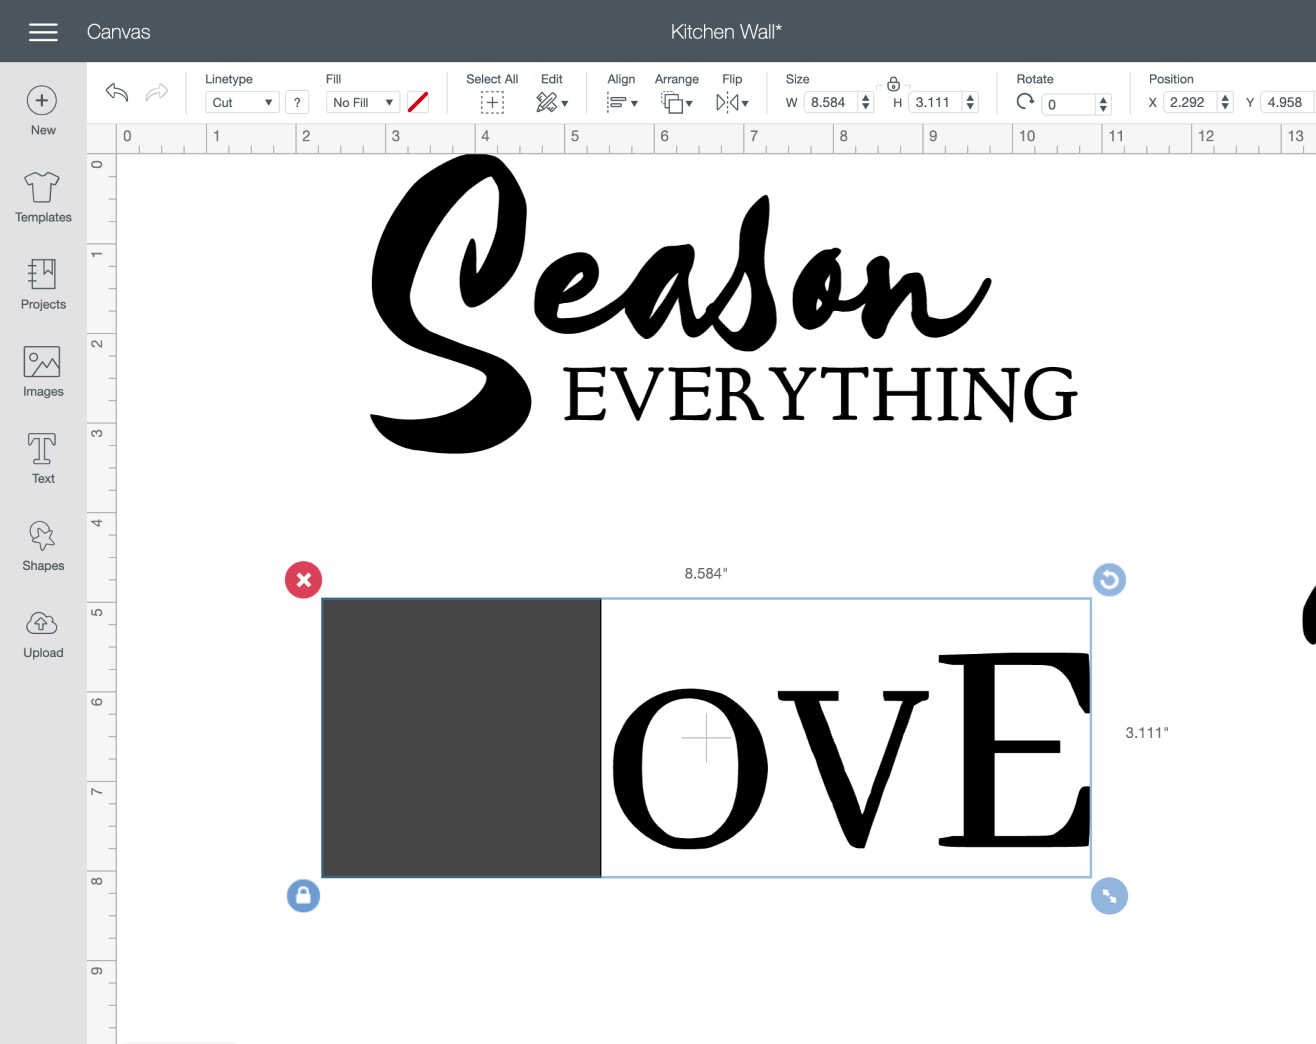
However if you are dragging a file if any words are to large you will get a warning message in the right hand corner saying your wall decal is too big to cut with the Cricut Joy. This is not a problem, you just need to break down your word so it fits on your mat/ vinyl.
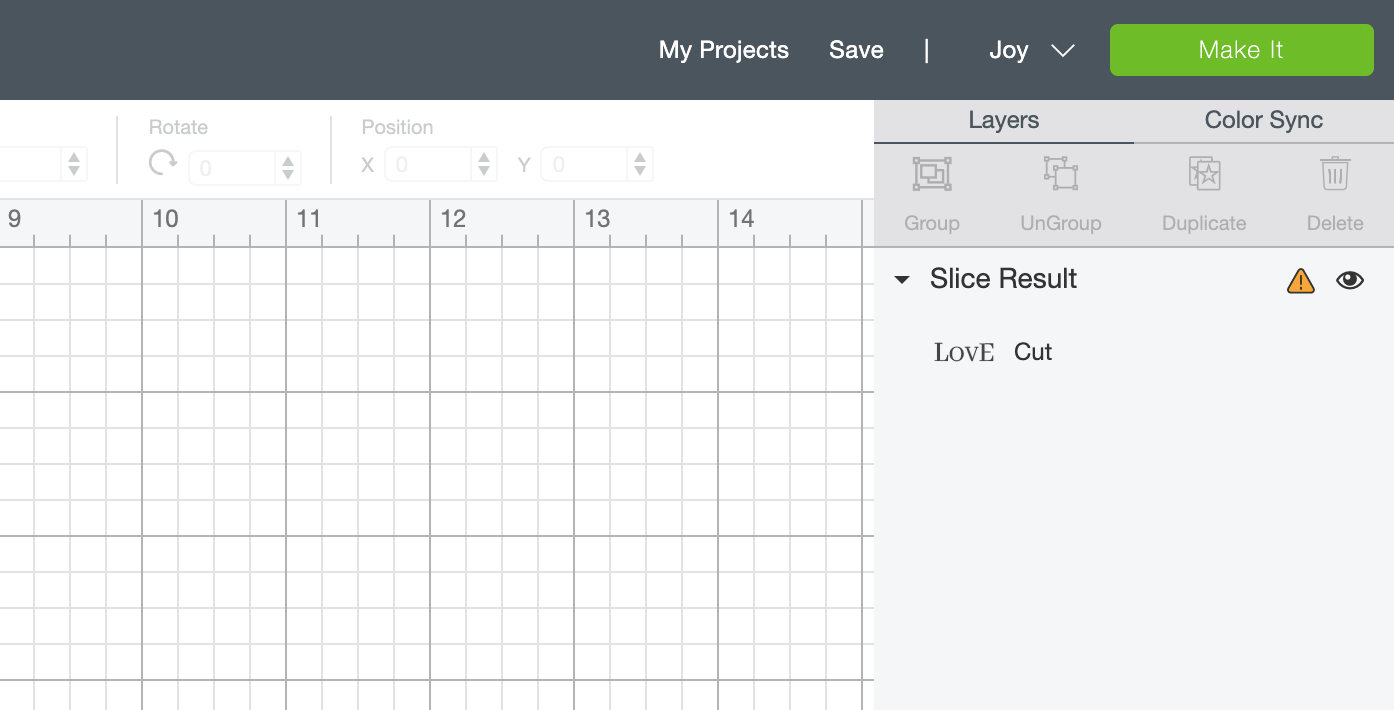
Slice Large Words To Make Them Fit On Smart Vinyl On The Cricut Joy
Simply work through every large word and slice out each letter so they are individual. I had to do this on the large S, and break down the word love. Just keep going until you stop getting the warning message in the right corner of Cricut Design Space.
I also sliced out “EVERYTHING” as one separate word which fit perfectly onto the vinyl.
Send Your Wall Decal To Your Cricut Joy To Cut
When the cut window opens you will notice that your words and letter have been sorted to fit the vinyl. Also that the length of the project is longer than a standard role of smart vinyl. This project is 68.25″ long, however my vinyl was 48″.
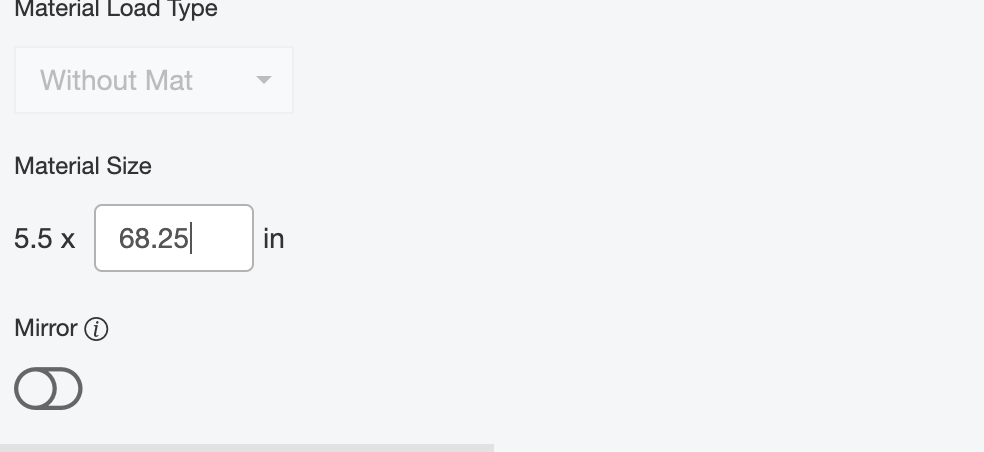
This is easy to remedy, you just need to change the material size box to 48″ and press return. Design Space with then re-sort the project over 2 cuts. You can now press cut.
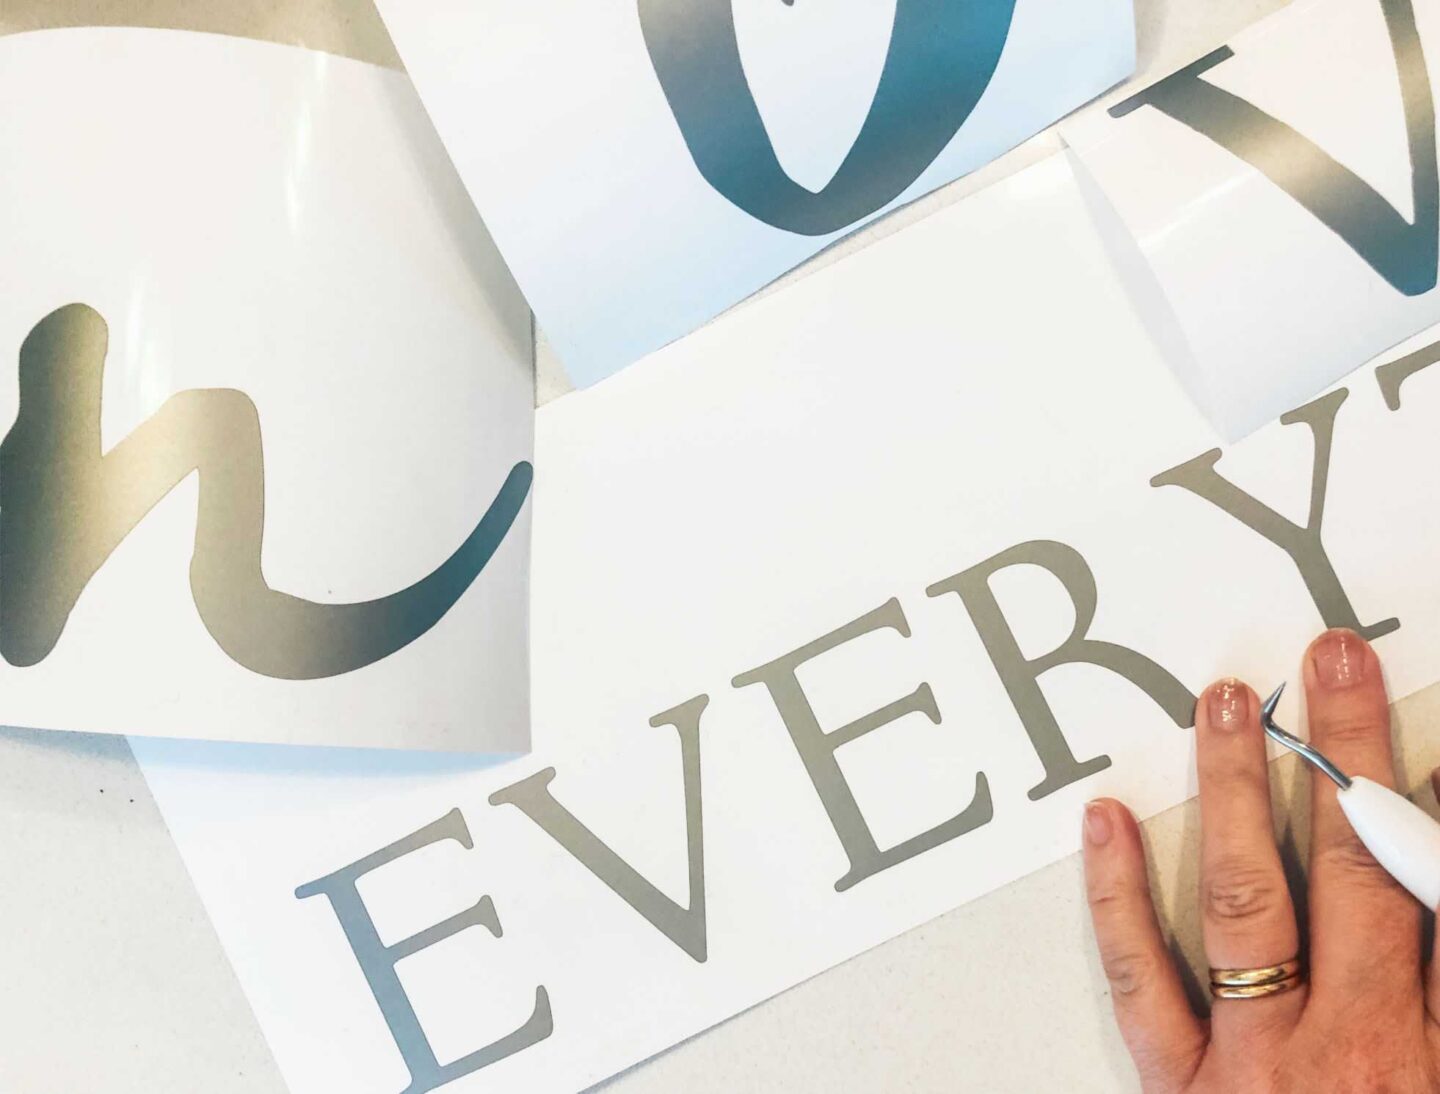
Weed And Cut Your Project.
Weed away any excess vinyl and cut all the letters so you can arrange them to see how you are going to lay out the project.
Transfer Your Cricut Joy Vinyl Wall Decals To The Wall
Because the letters are large, I didn’t bother with transfer tape. Using a sprit level I marked out where the bottom word should be and make that out. I found working from the bottom and working upwards the easiest way to work and get my project level.
Lift each letter with your weeding tool and gently place on the wall, smooth it down but dont over press until you finish the whole saying. You can see on the image below my letter L was slightly out, because I hadn’t done a final press to the wall I was able to lift it with my weeding tool and re apply it.

Once you are happy you can keep building your words. I felt an extra pair of hands was useful and asked my Husband Chris to hold the spirit level as I built the longest word to ensure it was even.
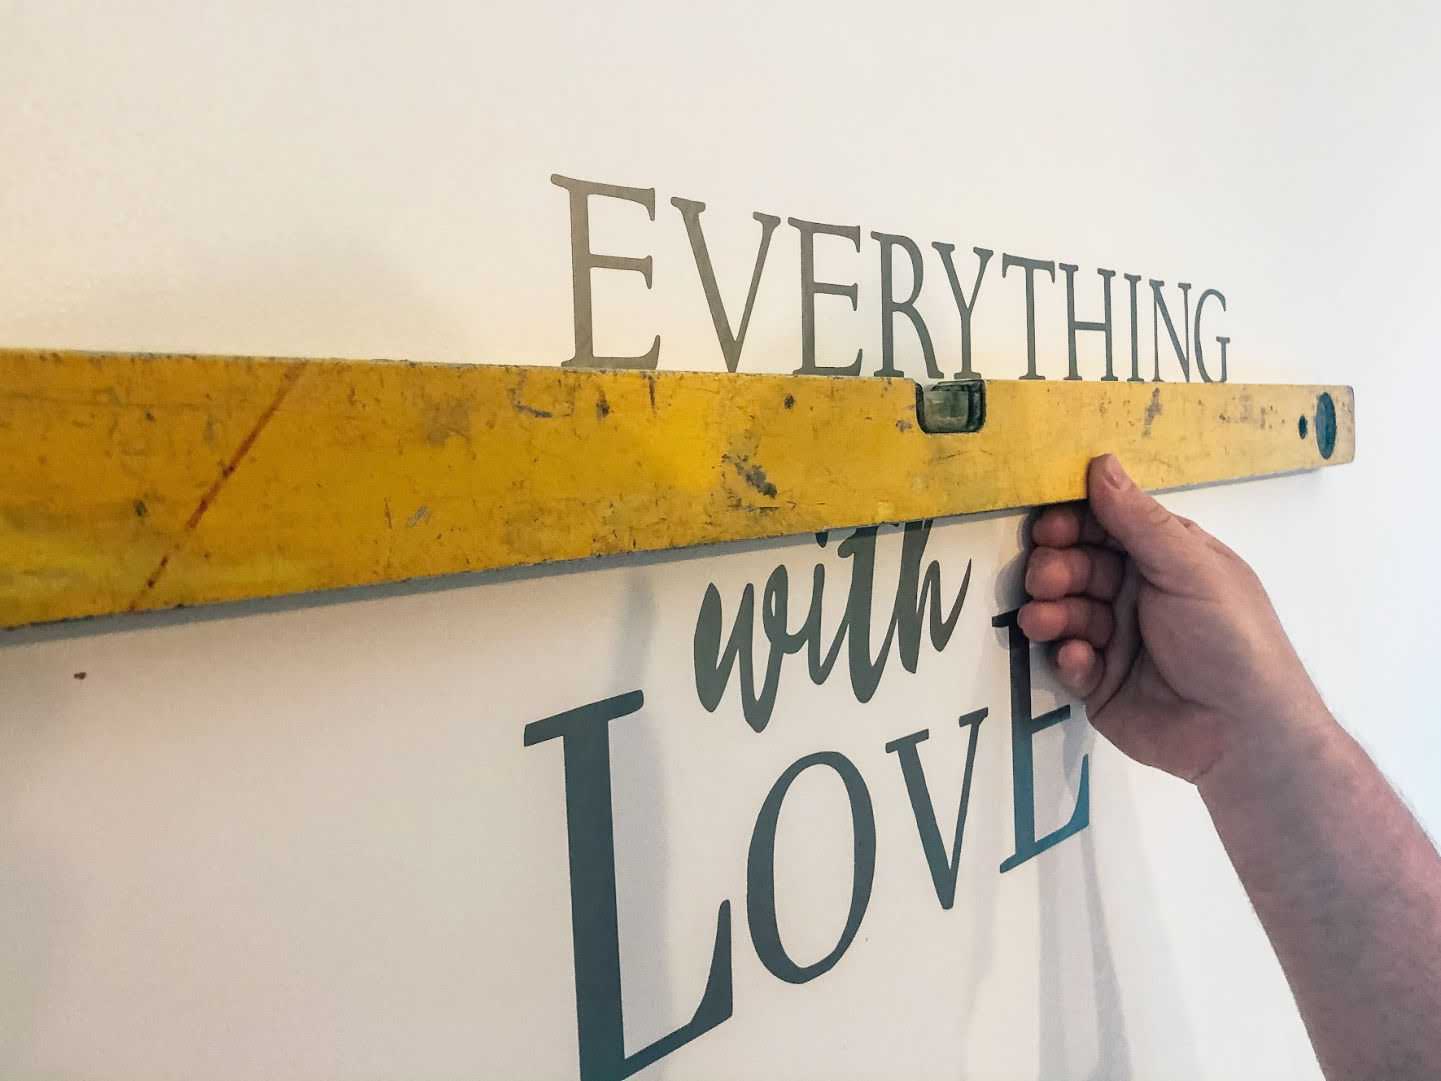
When you are happy you can press the letters down with a cloth to ensure they are well adhered to the wall.
Please note I was gifted the
Other Home Project Ideas With Cricut
- Print and cut kitchen labels
- How to make a reversible Sequin Cushion
- Ceramic door number with Infusible Ink
This is gorgeous! What a fab idea. I have been looking at a vinyl sticker for our bathroom and they’re so expensive. I bet it’s much cheaper to make your own x
I’m getting an error message that your link has either been set to private or deleted, how do I access this on Cricut Design Space link?
Hi Kristin sorry it looks like Cricut have removed access however you can right click and save on the image in this post and upload to design space. Thanks
Sarah