I adore my Cricut machine there is so much you can do with it! One of my favourite projects is making Cake toppers. However planner stickers is also a huge favourite of mine, I love the fact that you can create anything you want. You can make so many great print then cut projects such as party accessories and decorations for any holiday with your Cricut Maker. So I wanted to share this super easy tutorial on How To Print And Cut On Cricut and take you step by step through the entire process. Because if you feel confident to print and cut with your Cricut Machine you can make anything.
What You Will Find Here
How To Print And Cut On Cricut

It’s just a matter of uploading your printable images and creating in Design Space with your home printer, Cricut Maker or Cricut Explore. Thus meaning, if you use my free alphabets you can make any personalised card, banner or cake topper.
What Materials Can You Print And Cut On?
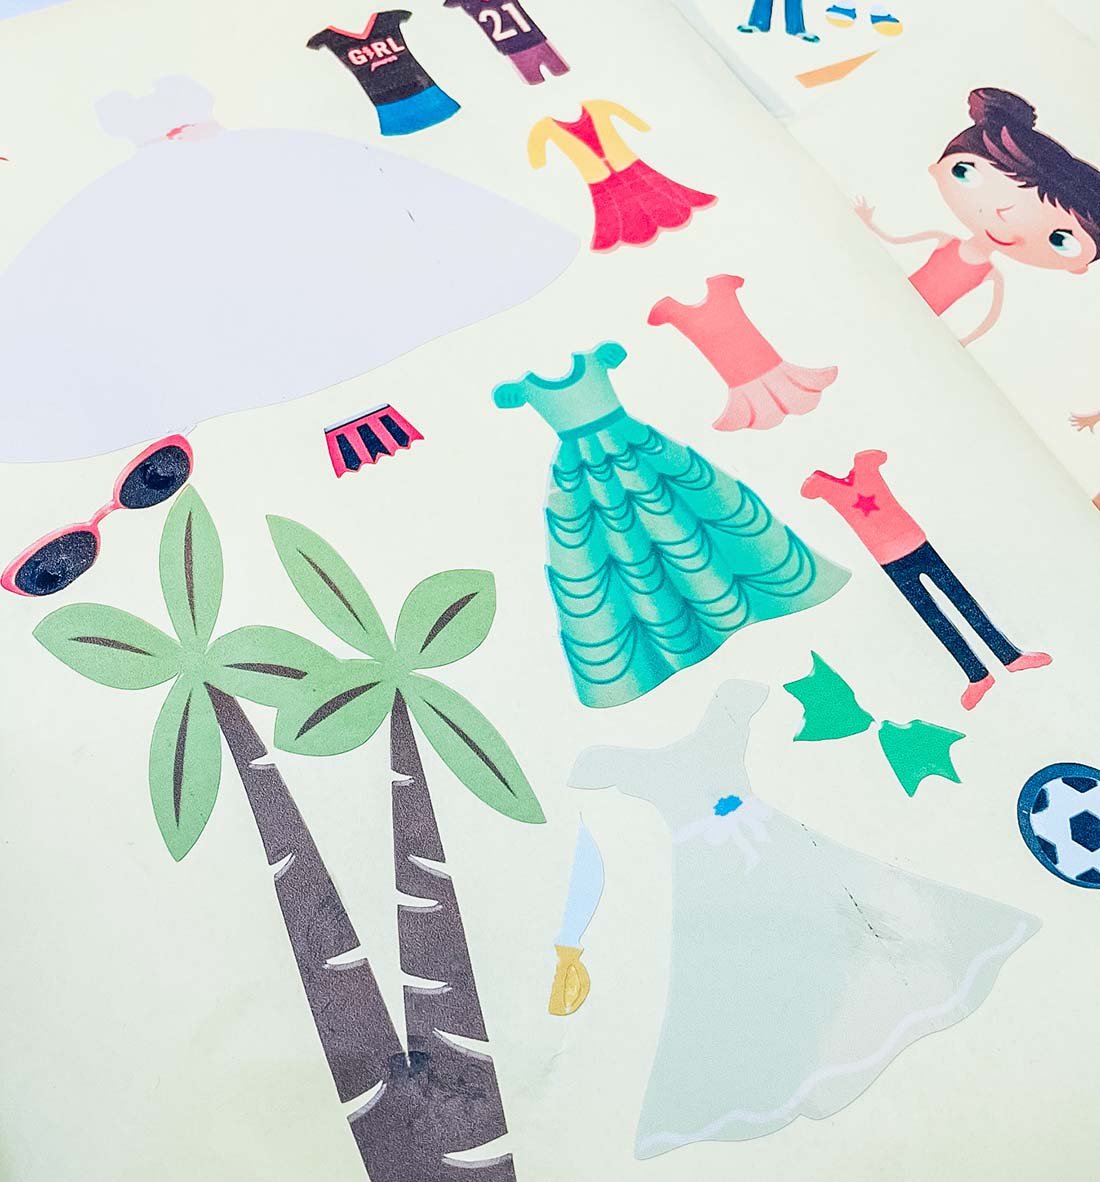
Here is a list of some of the materials you can use Cricut’s print then cut with. Thus making print and cut on Cricut a super versatile method that enables you to make so many different projects. Check out my travel dollies they are great for holiday packs printed on stickers or magnetic paper. You can also create themed parties, making everything from personalised chocolate bars to banners. And most of the materials you will need are all available on Amazon.
- Printable Sticker Paper
- A4 Cardstock
- Printable Vinyl
- Magnetic Paper
- Medium Colored Papers
- Paper
- Holographic Sticker Paper
- There Are Other Printable Material Types Available
To Make A Print And Cut Project You Will Need

- Printer, (Make sure you calibrate your printer to your Cricut before using for the first time, you will find the calibration button by clicking on the 3 lines next to CANVAS in the top left corner of Design Space)
- Glossy sticker printer paper, printable vinyl, white A4 card or Printable Magnetic Paper
- Cricut Maker
- Cutting Mat
- Cricut Tool Kit
- Or Any Sublimation Ink, Tools and Blanks.
Start By Calibrating Your Cricut Maker Machine Or Cricut Explore Machine To Design Space

This will ensure precise cutting of your print then cut design and calibrate the device to your printer to ensure the cutting process is guided by the sensor marking on the machine.
To do this click on the 3 dots in the top left corner of Design Space and choose callibate printer. Cricut will print off a calibration sheet with registration marks. Simply feed this into your Cricut machine and run it through as if you would a print then cut image. This process will prompt you to check and identify which markers are more accurately cut to ensure the print then cut feature is cutting clearly.
How To Upload Your Print And Cut Project Or Image To Cricut Design Space.

Start by clicking upload in the bottom left-hand corner of Cricut Design Space, a box will appear where you can select browse. Now find your download file to your mac or pc and choose the SVG or PNG folder, these are the files you will need for design space.
Select the Printable PNG file you require one at a time. When you choose your file you will see the box below. Select complex and click continue in the bottom right corner.
Remove The Back Off The File

Next you’ll be taken to a screen where you can remove the back off the file, however I have done this for you on my alphabets, click continue in the bottom left corner.
Now, You Will Get The Choice To Save Your Printable Alphabet As A Cut File
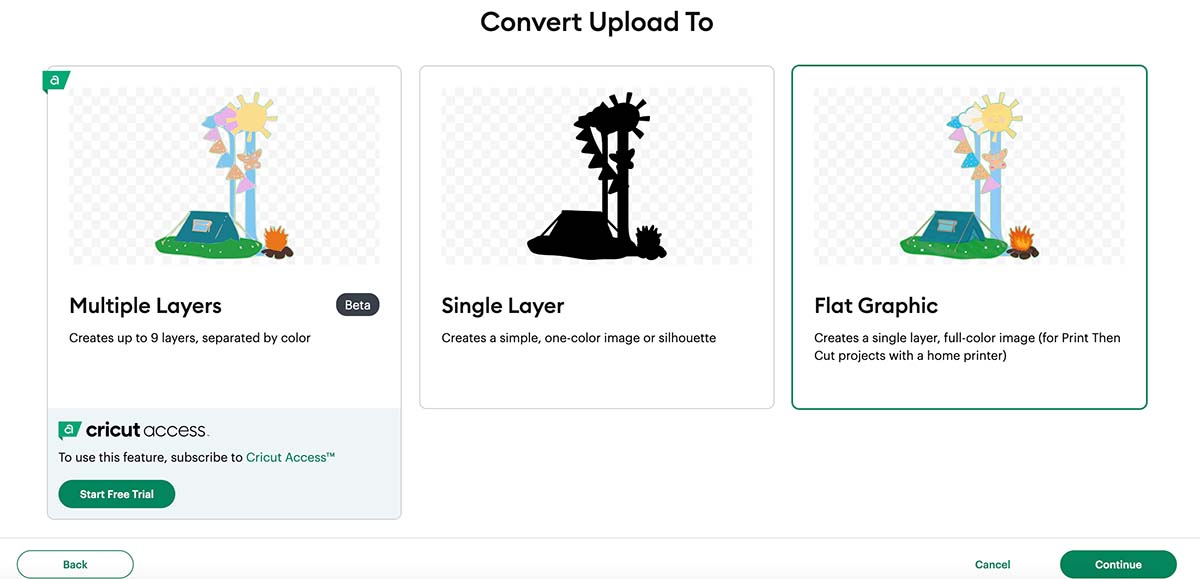
A flat print, then a cut file, or multiple layers. These are good for cutting out with vinyl. For printable images, I recommend saving as a print and then cutting.
You can now bulk select the letters and numbers for your print and cut project to pull into Cricut Design Space.
Alternatively Choose a Printable Image From The Cricut Image Library
This can be either a print and cut image, or you can also use layered cut images from Design Space. Its handy to know you can also change the color of the layers by selecting the layer in the layers panel clicking on the color selector to change.
Next, simply use the flatten tool in the bottom left corner to flatten the image first. This will convert it to a print then cut image.
You can also make a small border around the image by using the offset tool.
How To Create Printable Projects To Print And Cut On Cricut

Once you have your print and cut images uploaded you can arrange them. In the picture below I have started to layer the images, it’s important that all of the layers are print and cut. You can also save any cut image as a print and cut image by clicking on action on the top bar and changing from cut to print and cut. If its a layered image also select all and flatten.
For this image I am making a banner, before I added the letter, I attached all the Images and copied my floral flag as a template, then add the letters to each banner 1 by one.
Flatter Your Banner

Once you are happy with the position right click to select all images on each individual banner and click flatten in the bottom right corner. This will flatten the image so it prints as seen. If you don’t flatten it it will print and separate images.
How To Print Your Print And Cut PNG File On Cricut

Once you are happy with your choice and sizes, click on the corner and drag the attached images until they are the correct size to print and cut. They need to be 6.75.x 9.25 or less to fit within the cut sensor marks and use the print and cut feature.
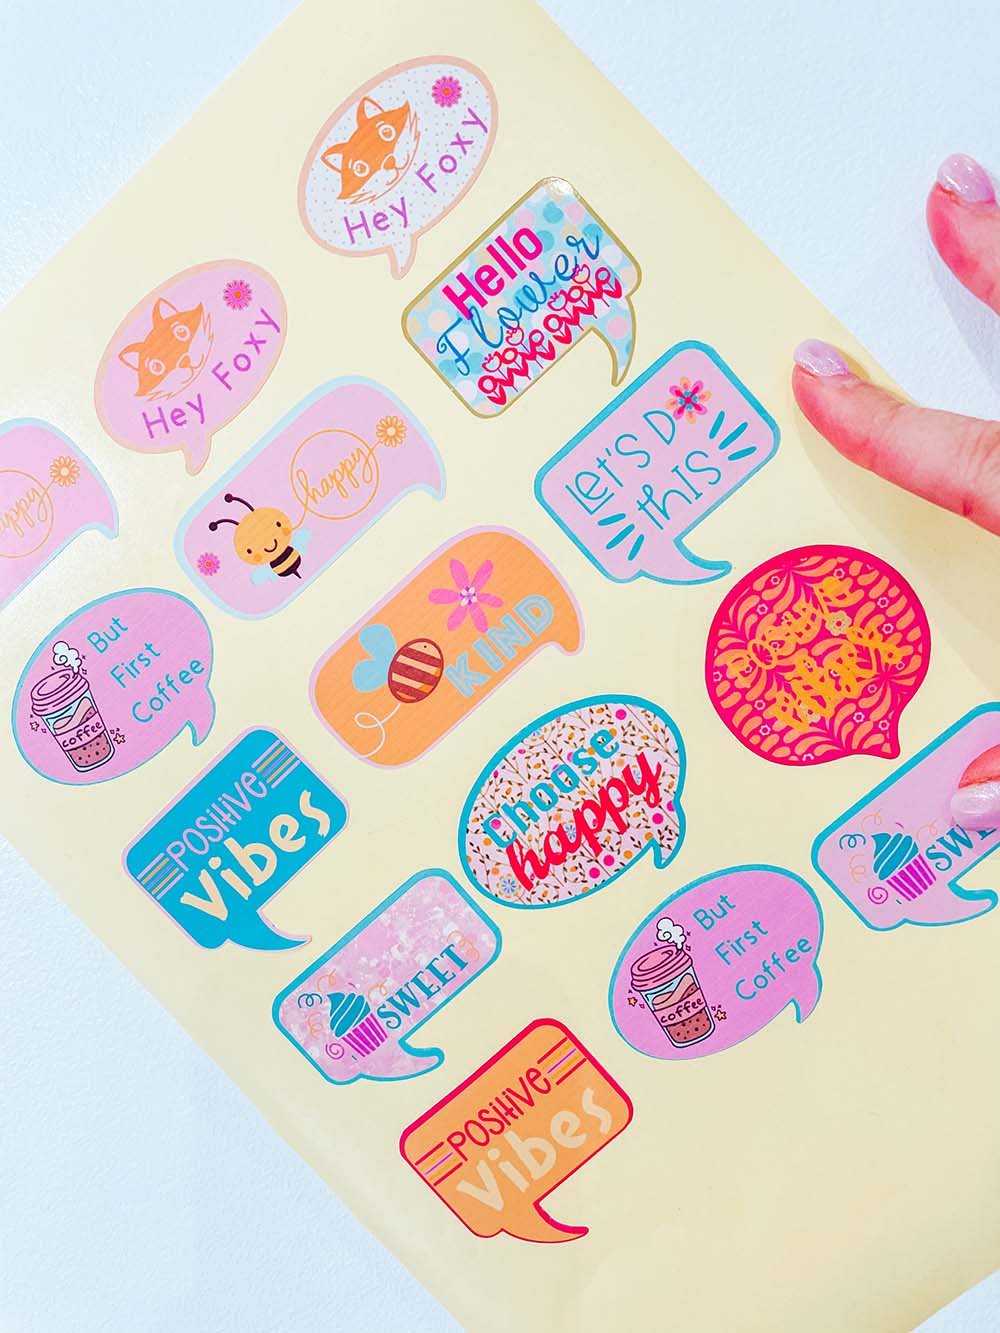
I find arranging your letters or numbers together, selecting all and flattening the whole lot together so it is one big image is the best way to avoid wastage. As long as you have white space between the letters they will still cut separately. This way you can move letters upside down to fit more into your printing space. See below on the image of how I have organised my element stickers.
Flags take up more space so its more difficult to do this.
Now Click Make It

This will take you to the project preview screen, I click on the printer icon and choose use system dialog here. Now if the box doesn’t pop up which often happens, simply click to reduce your screen down and it will be sitting behind it. For some reason the system dialog box appears behind design space and not in front.
Ensure you feed your sticker paper is the correct way into the printer and press print. When you unload to your printer avoid touching the black guide line around the edge of the printed stickers as I find this smudges easily on sticker paper and vinyl.
If You Are Using SVG Files?
You will need to ensure you flatten the SVG file to a print then cut image.
Once printed, gently put the project sheet on your cutting mat, I don’t roll it with a brayer as I usually would, simply gently press around the edge. But always ensure I use a sticky mat and ensure the edges are well stuck down.
What Cut Settings Should I Use For Print And Cut?

You will now be taken to the cut screen, here you can choose your material settings. I always use the printable vinyl or washi setting for stickers, this successfully cuts the top sticker layer only with the default pressure setting. If I am using card I will use regular card setting I always use for card stock. There is also a setting for magnetic paper.
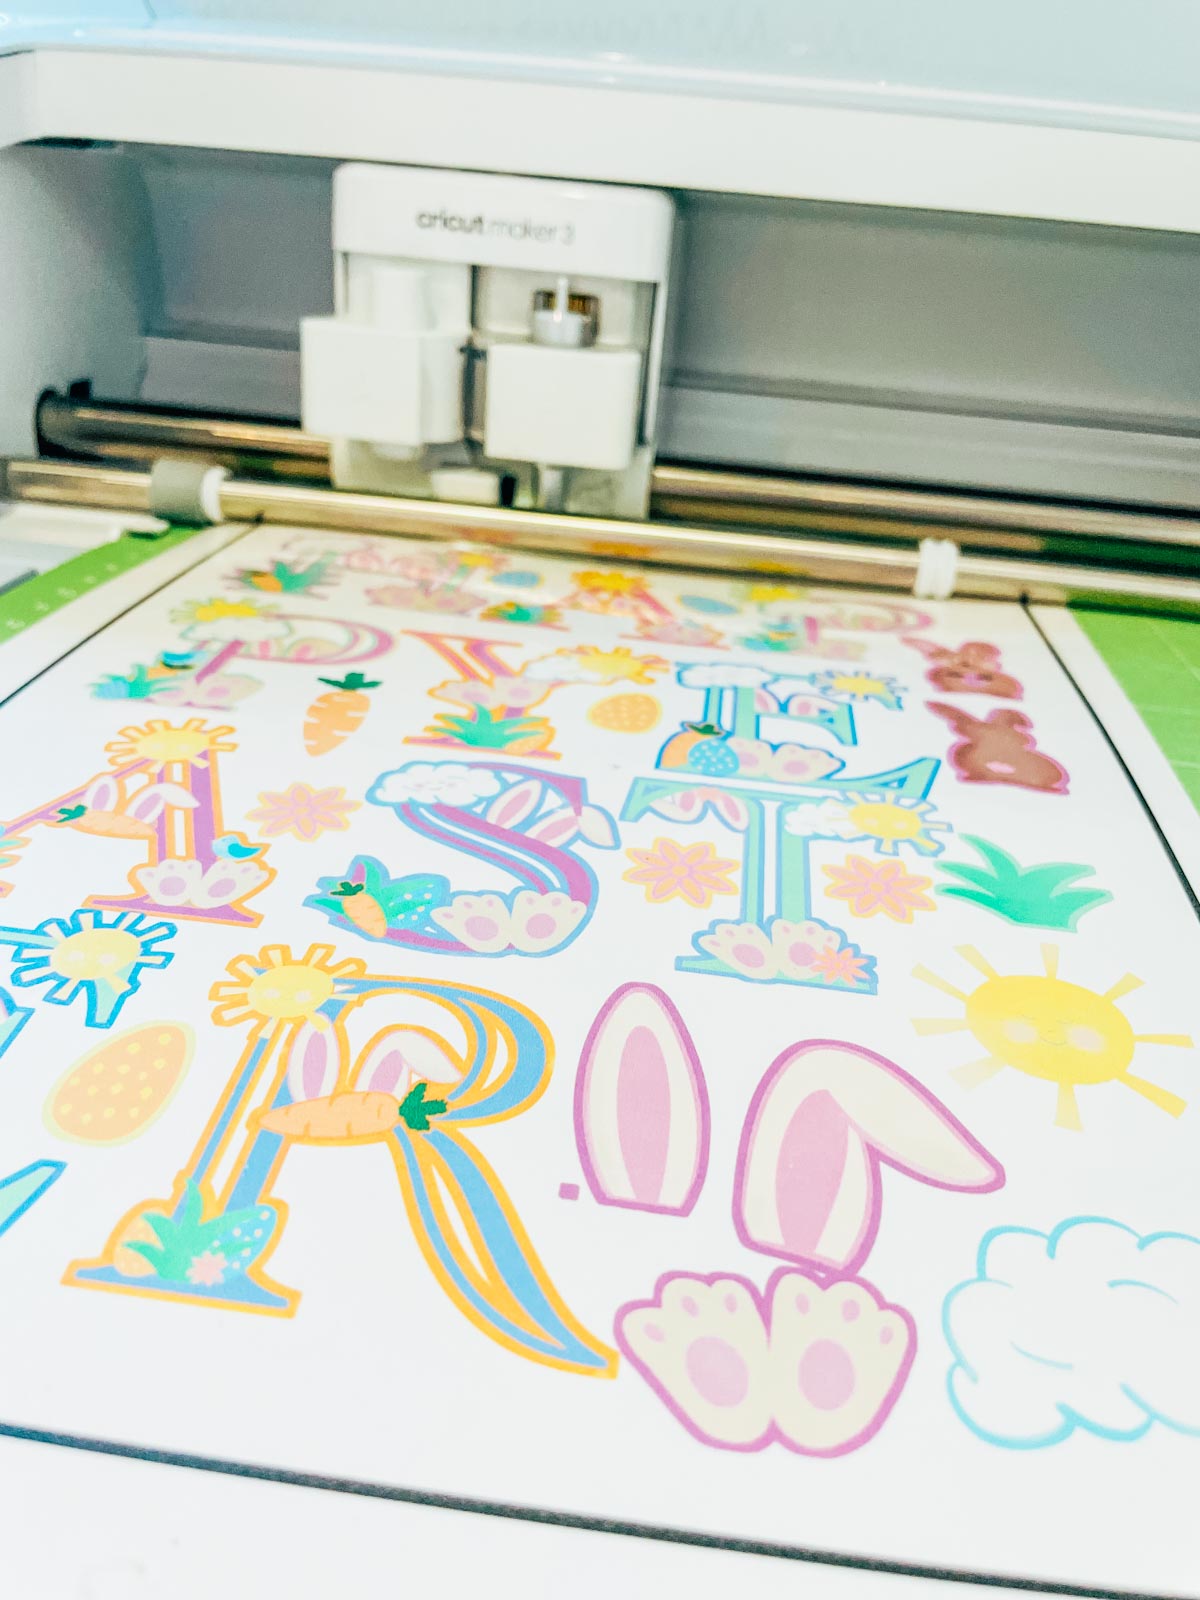
When you are ready press go on your Cricut, making sure your image is loading in exactly the same way as it appears on your Design Space screen.
To Weed Your Print And Cut Project.

Flip the mat over and gently peel your projects of the mat, this will remove it from the mat without curling the card or paper.
Cricut Print And Cut Trouble Shooting

The reason people avoid Cricut print and cut is that things can go wrong. But it’s trial and error at first and once you have a routine things rarely go wrong.
Images Don’t Cut Correctly Or Are Wrongly Aligned.

Check the light, I have found if there are any bright lights shining on my machine it can’t read the lines properly. Especially spot lights and filming lights. Remove the light source and try again this usually remedies the problem.
If not try re calibrating print and cut. To do this click on the 3 lines in the top left corner and choose calibrate and Design Space will take you through the process.
Your Cricut Cuts Right Through Sticker Sheets

I found my original maker needed to be on the printable vinyl setting for stickers, yet my Maker 3 cuts better on the Washi settings. Play with the settings and less and more settings to get the right set up for your machine. I know one size should fit all, but that’s not always the case and it may depend on the brand of paper you are using.
You Get Cricut Can’t Read The Lines Message

I find this happens when the line is printed near the edge of the paper. Try lifting the sheet and moving on the mat so it’s slightly in the guidelines, rather than up to the edge. If one side has a large margin simply slice a little off. However be sure not to go right up to the black guide line.
If You Want To Use My Free Cricut Printable PNG Alphabets?

Simply click on the image below to get a link to my free member area. If you are already a subscriber the link to the page is in your members email. However, make sure your pop-up blocker is turned off, if the email doesn’t land check your spam folder. Here’s how you upload the files to Cricut Design Space.
Can I Use The Print And Cut Feature On The Cricut Joy? No Cricut Joy does not print and cut, however you can make vinyl cut stickers with the Cricut Joy.
Tips And Advice For Using Cricut

- Cricut Design Space Guide
- How to upload to Cricut Design Space
- How To Make Print And Cut Stickers In Cricut Design Space
- Where Else To Get Free SVG Files
Also please do pop over to Instagram, or TikTok and give me a follow and if you make a project please do tag me! I love seeing everyone else’s makes and chatting crafting. I could do that all day! This is also where I share all my projects in progress.
Sarah, I NEED TO BE ABLE TO MAKE SOME STICKERS in design space, you make it look so easy. Thanks for all your help.
Thanks so much Yvonne, I really appreciate your support x