I adore pretty and themed papers, they make crafting so much easier. Also to have everything you need to hand is a joy. And recently when I designed an ice cream cone cut file to match some gorgeous paper, I realised that what I need is papers to match my cut files. So I have started with this Digital Dinosaur Themed Paper set For DIY Crafts And Parties.
These are designed to go with my Dinosaur Alphabet, Cake Toppers and Mandala. Because it was glaringly obvious I needed this, however for some reason just never saw it! Crazy right? But sometimes the obvious can be under your nose for so long.

What You Will Find Here
How To Create Dinosaur Themed Birthday Parties With My Free Digital Paper
Free Digital Resources To Create A Dinosaur Themed Party
I have been steadily creating dinosaur themed projects for months to enable you to create your own DIY Dinosaur Party and this is the final price in the jigsaw.
- Dinosaur Mandal Alphabet for creating gifts and cards
- Dinosaur Alphabet for invitations cards and gift tags
- Number Dinosaur Cake Toppers
- Egg Holders for party favours and table decorations
- Printable Dinosaur Themed Paper.
What Can My Digital Dinosaur Themed Paper Be Used For?
- Creating party hats
- Upload to Cricut Design Space and create stickers and party flags
- Banners
- Birthday cards
- Dinosaur party invites
- Dino themed gift tags
- Scrapbooking layouts
- Explosion boxes

How To Download My Files To Create DIY Parties
Simply click here or the image below to get your free downloadable Digital Dinosaur themed patterns in jpeg.
However, make sure your pop-up blocker is turned off. Here’s how you upload the files to Cricut Design Space.

If You’re Having Problems?
Check out my trouble shooting page, hopefully it will answer any questions you may have.
To Make Cards, Flag Straws And Stickers You Will Need
- Printer
- Cricut Design Space
- Cricut Maker
- Dinosaur Alphabet
- Glossy sticker printer paper.
- Plain white card stock
- Card templates
- Scissors
- Brads
- Sticky pads and double sided tape
- Colourful straws

To Make Dinosaur Cards And Tags With My Digital Dinosaur Themed Paper
Choose you chosen Dinosaur letter or number from my free set and pull into design space. My alphabet post explains how to upload the svg files to Cricut Design Space.
Choose a square and tag in design space and layer and size all the images to the size of your card blank.
Open my patterned digital papers and print onto the card stock.

Now transfer the printed card to a cutting mat to cut the back square and tag in 2 different patterns, also cutting the dinosaur letter or number on plain card.
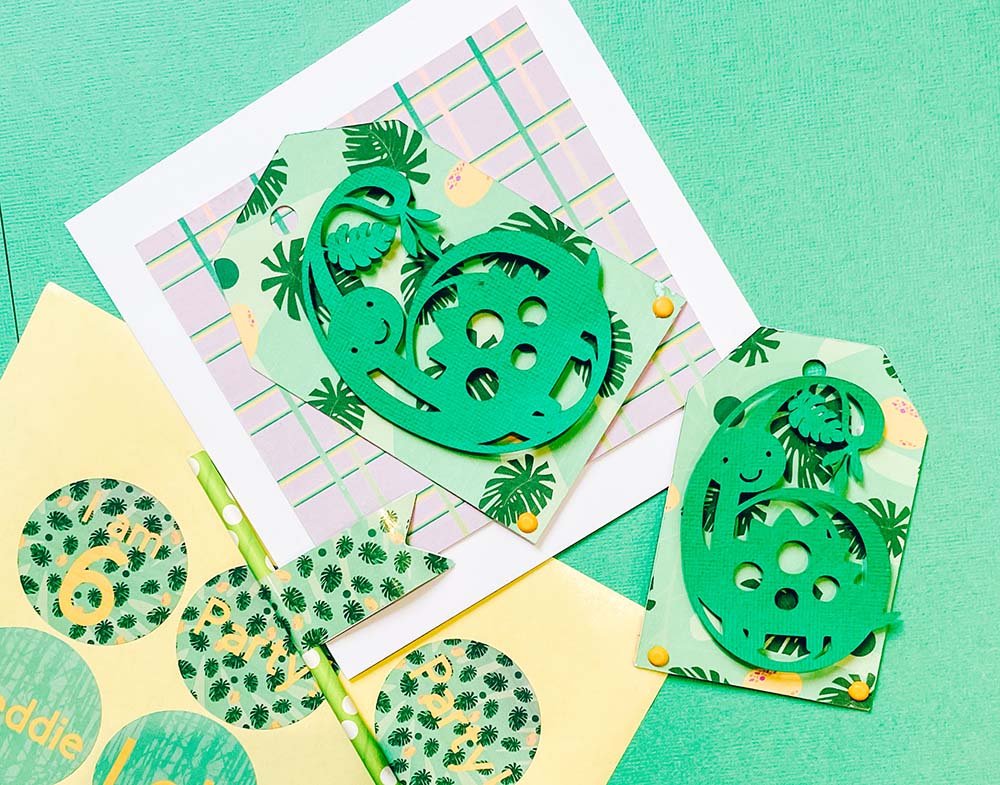
Add the brads to the tag for detail and use sticky pads to add the background printed layer to your card. Now add the tag with double sided tape. Lastly add the dinosaur with sticky pads.

To Make Party Straws And Stickers With My Digital Dinosaur Pattern
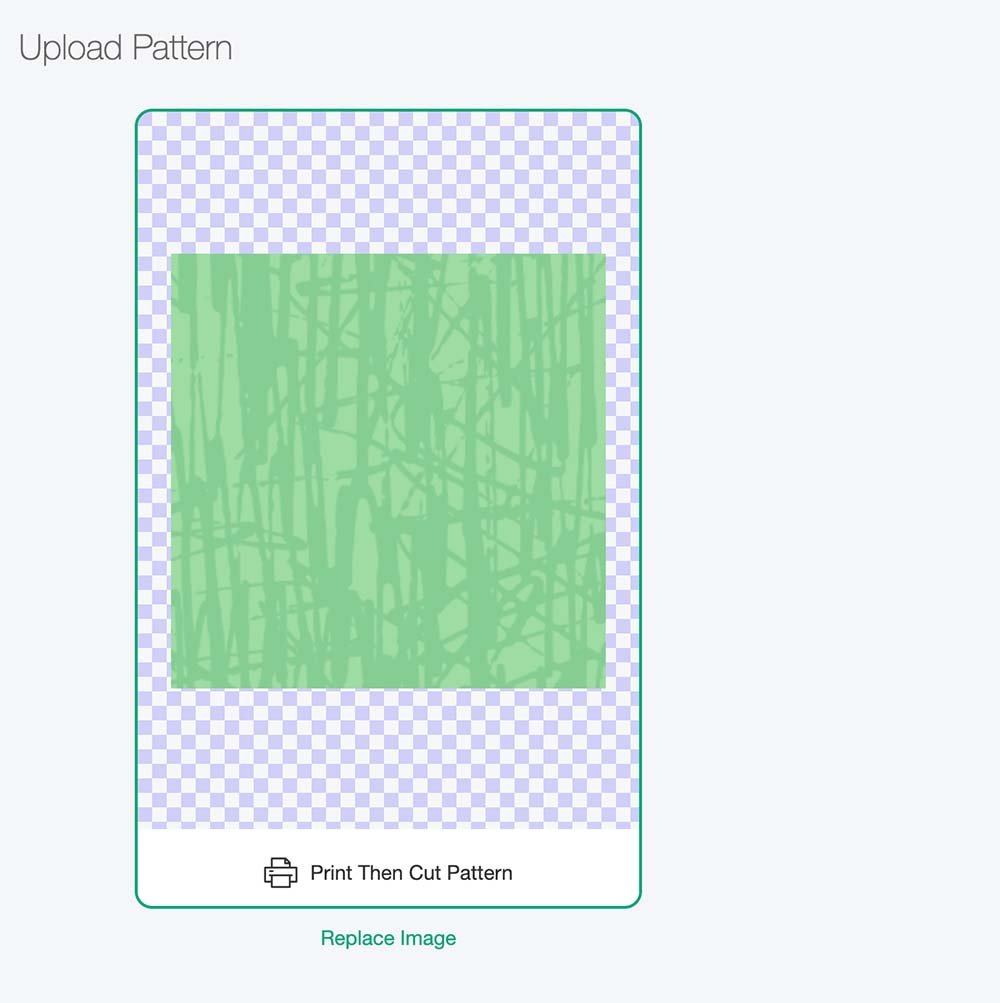
Start by uploading my Dinosaur pattern to Cricut Design Space, to add a pattern click upload and choose the upload pattern box on the right.
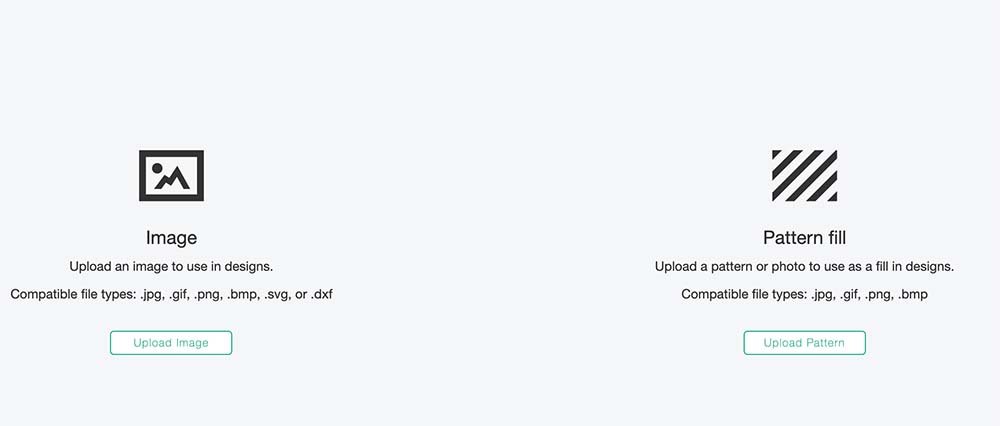
Now select the pattern and upload, it will seem to disappear, however this is because it has uploaded to sit in the pattern section.
To make your flag choose 2 flag shapes and mirror so they sit back to back. Now slide them together and weld. you will also need circles for the stickers, these can be found in shapes on the left hand side.

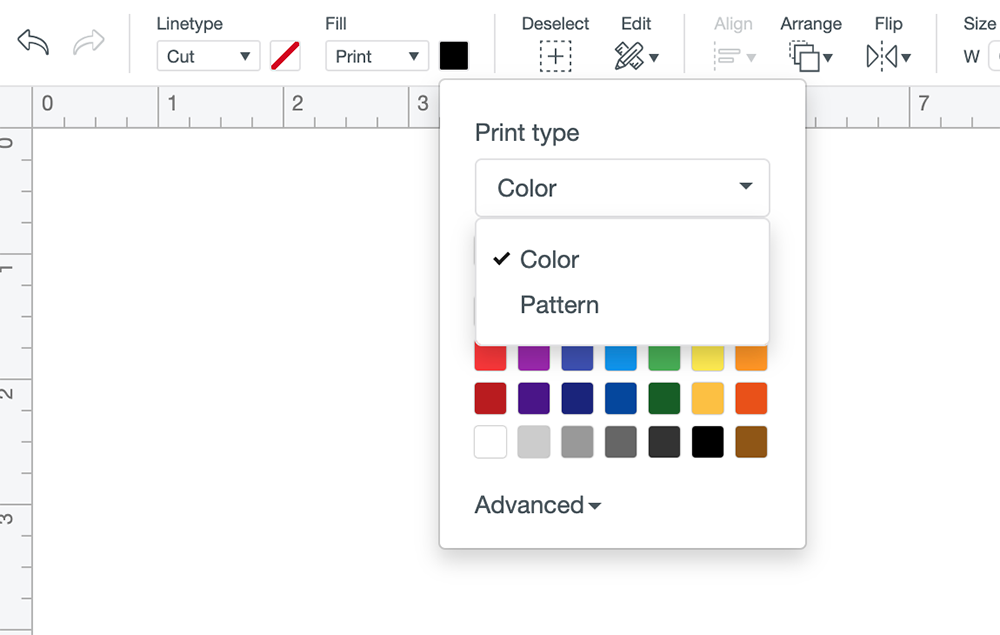
Now click on fill and choose pattern, here you will find your uploaded dinosaur themed patterns, choose the pattern you want for your stickers and flags.
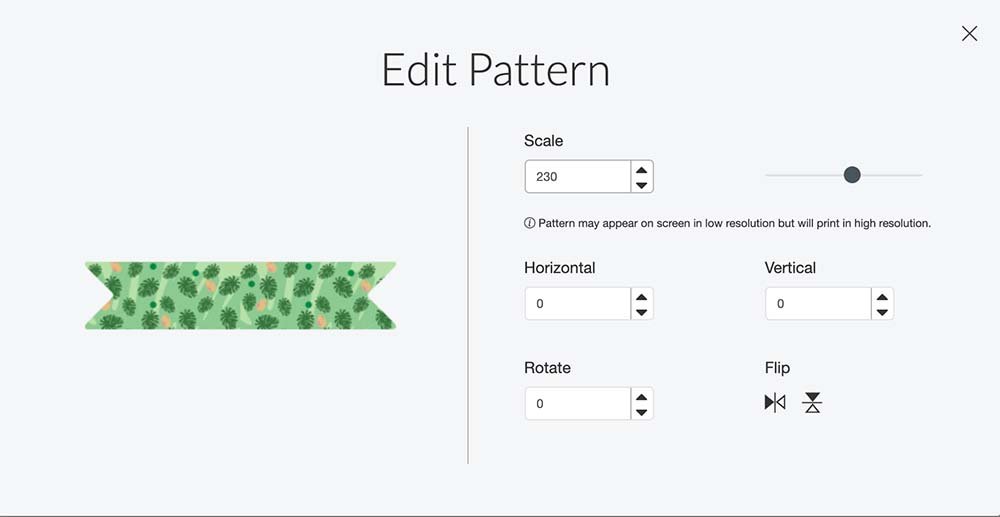
To edit your pattern select edit pattern on the pattern box, you can now scale it the make it bigger, smaller and rotate.
For your stickers you can choose phrases, names and ages, whatever fits your party. Choose and position the text, choose a colour, then select all and click flatten on the bottom right hand corner. This is now ready to print and cut.

Now size and duplicate the flags and stickers, arrange close together, select all and click attach together. You need to cover 6.553 by 9.237 to fill a full sticker sheet, but can position as many as possible close together with minimum gaps. However you can go smaller if you want your stickers to be smaller or cut less.
You can now send your project to print, before cutting on your Cricut.

A Few Useful Tips And Hints For Using Cricut Print And Cut
- To save time calibrate your printer before using with you Cricut.
- Load your paper the correct way into the printer. Obvious I know, but I have made that mistake many times.
- When you cut these flag make sure you load them into your Cricut in the same direction as design space dictates or the cut will be wrong.

To Make The Dinosaur Party Flags
Simply place the straw in the centre of the flag and gently wrap it over and stick together and you are all set for a dinosaur themed party.


Dinosaur Party Cards, Flags And Stickers
Free Digital Dinosaur Themed Paper For creating DIY Crafts And Parties to upload to Cricut to make stickers, cards and scrapbooks layouts.
Materials
- Dinosaur Alphabet
- Glossy sticker printer paper.
- 10 sheets for £2.99
- Or 50 for £8.99
- Plain white card stock
- Card templates
- Brads
- Sticky pads and double sided tape
- Colourful straws
Tools
- Printer
- Cricut Design Space
- Cricut Maker
- Cricut Brayer and Weeding Tools
Instructions
- To Make Dinosaur Cards And Tags With My Digital Dinosaur Themed Paper
Choose you chosen Dinosaur letter or number from my free set and pull into design space. My alphabet post explains how to upload the svg files to Cricut Design Space.
Choose a square and tag in design space and layer and size all the images to the size of your card blank.
Open my patterned digital papers and print onto the card stock. Now transfer the printed card to a cutting mat to cut the back square and tag in 2 different patterns, also cutting the dinosaur letter or number on plain card.
Add the brads to the tag for detail and use sticky pads to add the background printed layer to your card. Now add the tag with double sided tape. Lastly add the dinosaur with sticky pads. - To Make Party Straws And Stickers With My Digital Dinosaur Pattern
Start by uploading my Dinosaur pattern to Cricut Design Space, to add a pattern click upload and choose the upload pattern box on the right. Now select the pattern and upload, it will seem to disappear, however this is because it has uploaded to sit in the pattern section.
- To make your flag choose 2 flag shapes and mirror so they sit back to back. Now slide them together and weld. you will also need circles for the stickers, these can be found in shapes on the left hand side.
 Now click on fill and choose pattern, here you will find your uploaded dinosaur themed patterns, choose the pattern you want for your stickers and flags.
  To edit your pattern select edit pattern on the pattern box, you can now scale it the make it bigger, smaller and rotate.
- For your stickers you can choose phrases, names and ages, whatever fits your party. Choose and position the text, choose a colour, then select all and click flatten on the bottom right hand corner. This is now ready to print and cut.
 Now size and duplicate the flags and stickers, arrange close together, select all and click attach together. You need to cover 6.553 by 9.237 to fill a full sticker sheet, but can position as many as possible close together with minimum gaps. However you can go smaller if you want your stickers to be smaller or cut less.
 - You can now send your project to print, before cutting on your Cricut.
Notes
What Can My Digital Dinosaur Themed Paper Be Used For?
Creating party hats
Upload to Cricut Design Space and create stickers and party flags
Banners
Birthday cards
Dinosaur party invites
Dino themed gift tags
Scrapbooking layouts
Explosion boxes
A Few Useful Tips And Hints For Using Cricut Print And Cut
To save time calibrate your printer before using with you Cricut.
Load your paper the correct way into the printer. Obvious I know, but I have made that mistake many times.
When you cut these flag make sure you load them into your Cricut in the same direction as design space dictates or the cut will be wrong.
Recommended Products
As an Amazon Associate and member of other affiliate programs, I earn from qualifying purchases.

