Today we are going to look at How To Make Homemade Stickers With Canva, that you can print off as PDFs or PNG files for crafting, cutting out by hand for Cricut or Silhouette. And even better you can do it with the free version of Canva. Although there is the option to upgrade to get an amazing collection of graphics.
Stickers are a fun and versatile way to express your creativity for crafting or scrapbooking or promote your business or brand. Whether you’re looking to add a personal touch to your belongings or create marketing materials for your business?
If you want to see me create my projects, follow me on Tik Tok and Instagram.
Being able to make your own custom stickers can be a fun and rewarding experience. And with Canva, a popular graphic design platform, creating custom stickers has never been easier.
This post may contain affiliate links. Which means I may receive a small commission if you click a link and purchase something that I have recommended at no extra cost to yourself. As an Amazon Associate in the Amazon Services LLC Associates Program , Canva and Cricut and Glowforge associate, I earn from qualifying purchases.
A Bit About Canva
In this tutorial, we will provide a step-by-step guide on how to make your own home made stickers with Canva. From choosing a template to customizing your design and downloading your final product.
We will cover all the basics to help you create high-quality, professional-looking stickers that are unique to you. So, whether you’re a seasoned Cricut creator or a beginner just starting out, read on to discover how to make your own stickers with Canva! But let’s start with the basics.
What Is Canva?
Canva is a graphic design platform that allows users to create a variety of visual content, including presentations, posters, stickers, social media graphics, and more.
Is Canva Free To Use?
Canva offers both free and paid plans. The free plan provides basic features, while the paid plan offers more advanced features and templates.
Do I Need To Be A Graphic Designer To Use Canva?
No, Canva is designed for users of all skill levels. Its user-friendly interface and drag-and-drop functionality make it easy for anyone to create professional-looking designs.
Can I Sell The Stickers That I Design In Canva On Etsy?
You can sell designs made in Canva, as long as you stick to the Permitted Uses when you’re using their Content. For example, you can legally sell your design on printed merchandise like t-shirts, posters, stickers, tote bags and the like. You can also design and sell certain digital products like e-books and magazines, or create designs for your clients (e.g. a social media post) and transfer the rights to them (see section 4A of our Licence).
Although it’s not OK to sell Canva Content on a standalone basis (e.g. put one of our template designs on a t-shirt and sell it as-is). Your designs should always be your own creations.
How To Make Homemade Stickers In Canva For Cricut or Silhouette
What Materials Do You Need To Make Your Own Stickers?
- Laser Printer or Inkjet Printer, (Make sure you calibrate your printer to your Cricut before using for the first time, you will find the calibration button by clicking on the 3 lines next to CANVAS in the top left corner of Design Space)
- Glossy sticker printer paper, printable vinyl
- Cricut Maker, Brother Scan N Cut, Silhouette or xTool
- Cricut Design Space to Silhouette Studio
- Cutting Mat
- Cricut Tool Kit
Start With An A4 Document In Canva
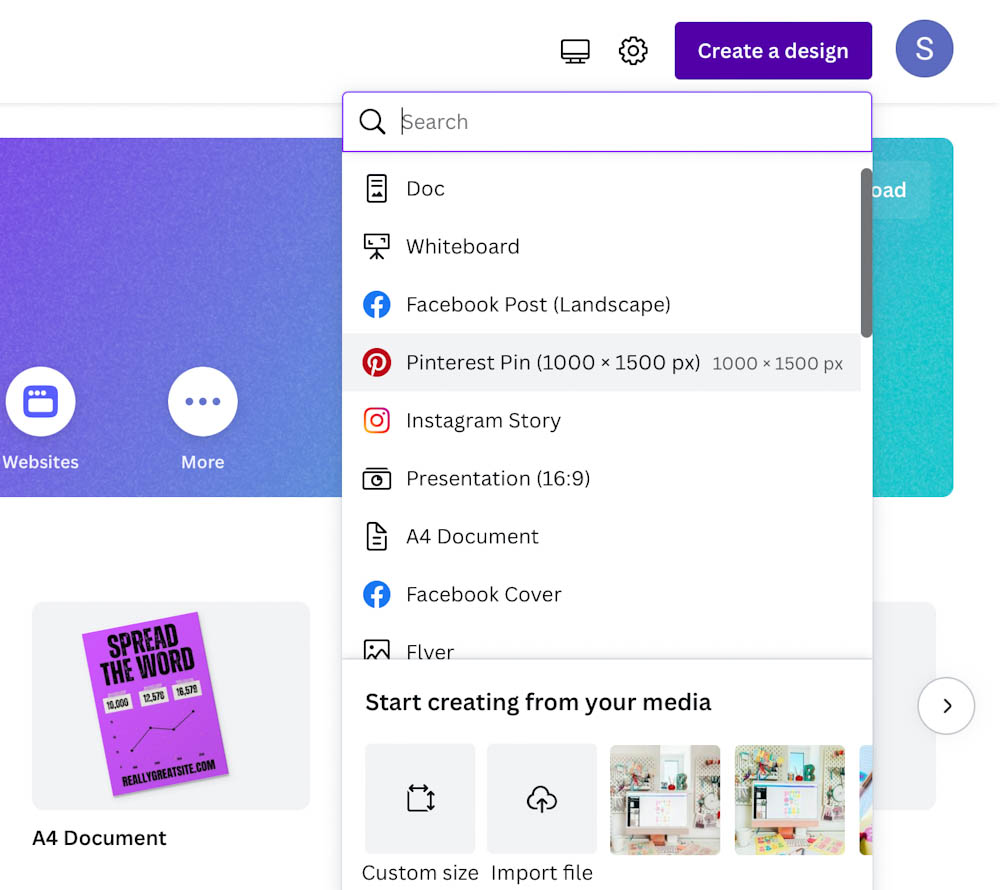
Click on the top left hand side of the search bar and click create deign. A drop down box will appear, here you can choose A4. You will be taken to an A4 page ready to start creating your homemade stickers.
Add A Custom Word To Create A Themed For Your Homemade Stickers In Canva
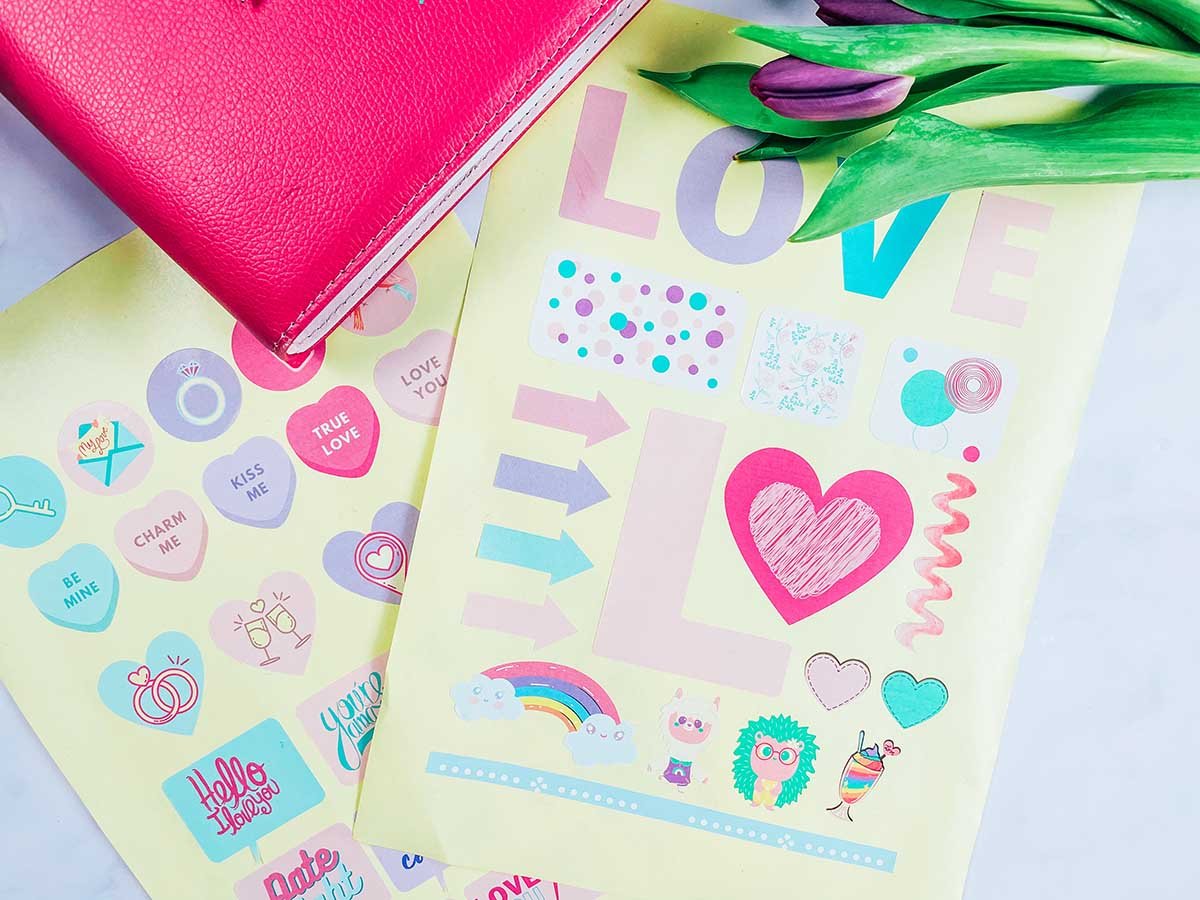
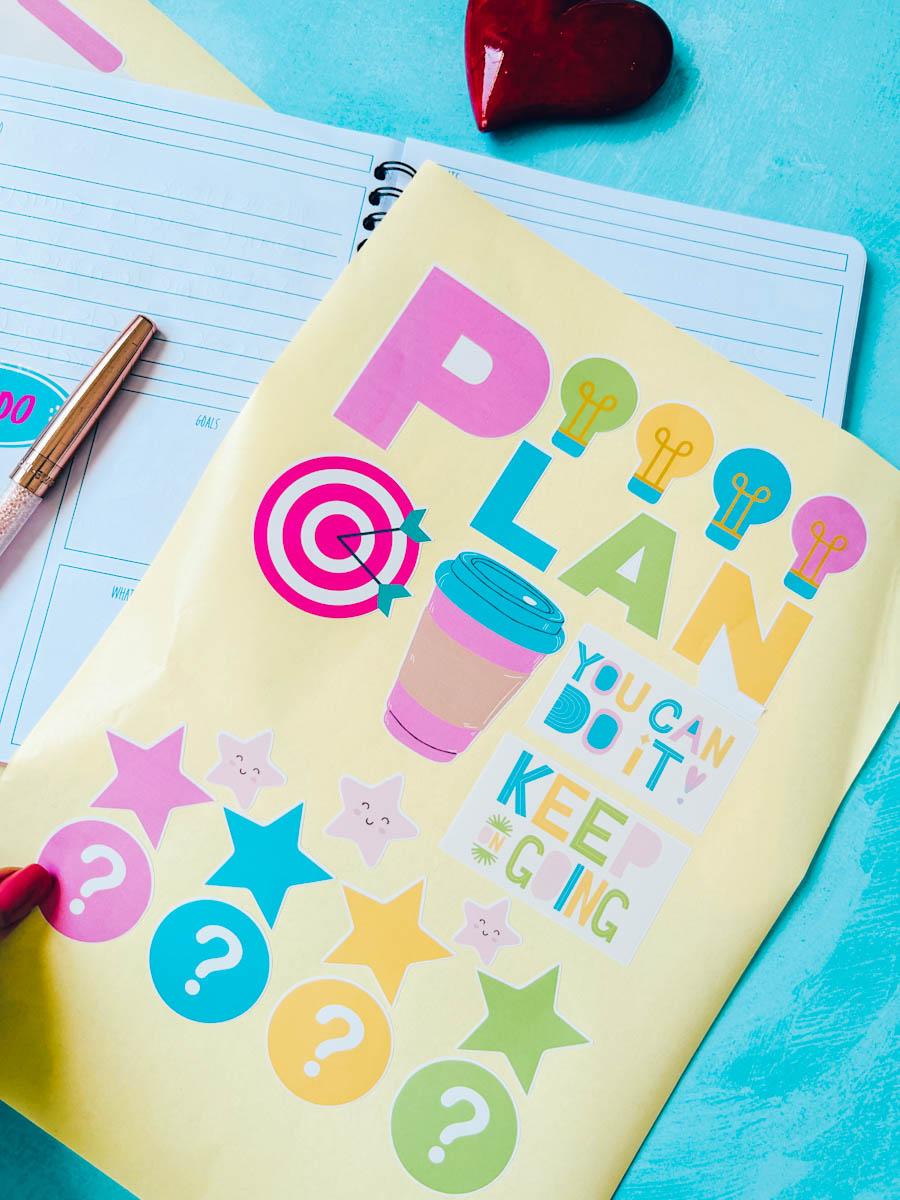
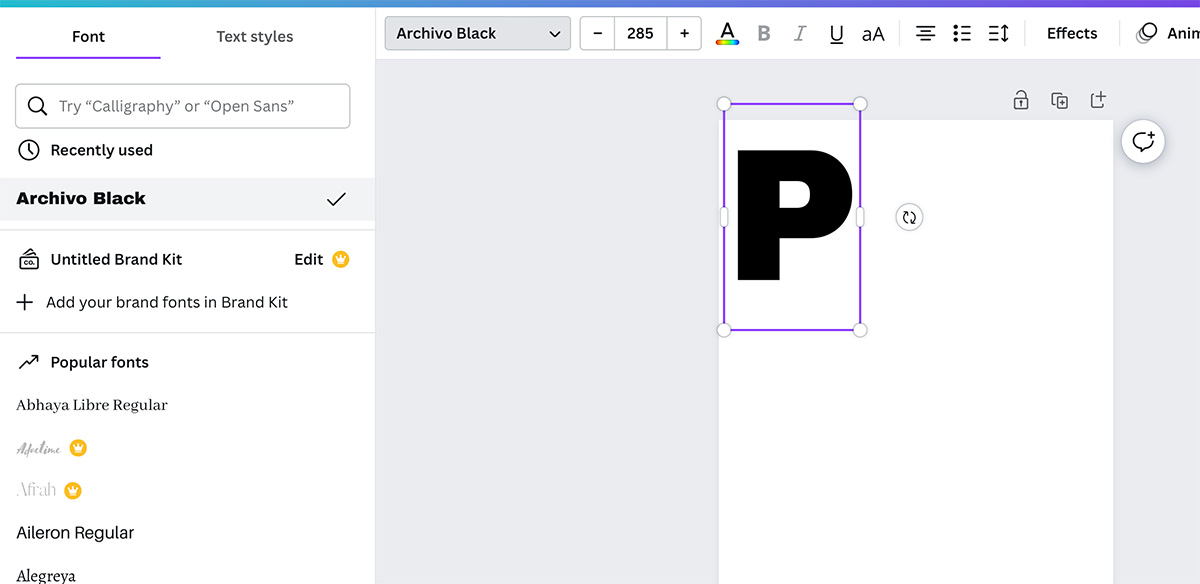
I usually start with a word, you don’t have to use a word but it’s how I start to form my theme. See my gardening, love, mothers day and Easter themes to get more of an idea. Once you have a word, (I used Archive Black font) for this word. Decide on the size of your stickers. I usually make the first letter bigger, of course this is personal choice.
Decide On A Colour Scheme For Your Canva Stickers
Now it’s time to decide on a colour scheme for your homemade stickers. I have to say I am a sucker for pastels and brights! Colour each letter a different colour or choose a main colour for the overriding theme. And here’s the exciting thing, you can choose any colours you like, this is your creation.
Choose Your Images And Re Colour Your Homemade Stickers
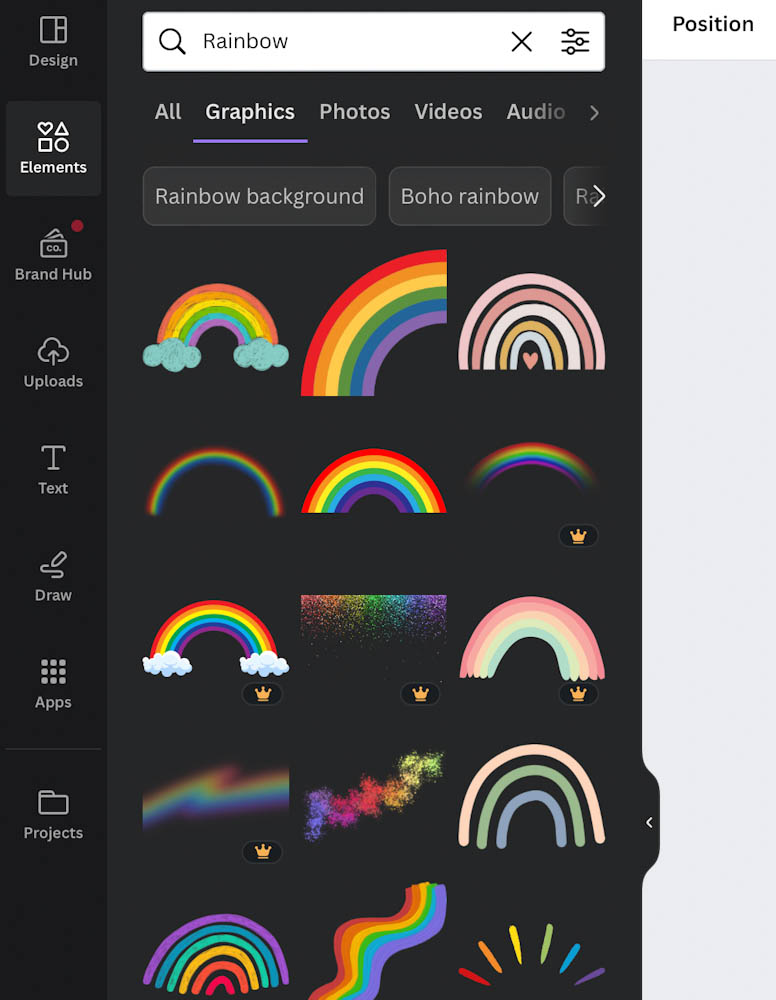
Next go to the Image bar in the right hand side and click on elements. This is where you will find shapes and images for your home made sticker designs. You can see below in this search for rainbows it brings up all available images. The ones with the crown are part of Canva Pro, if there is no crown or pound sign they are free to use.
There are thousands of designs available with Canva Pro, however there is also a limited amount available on the free plan.
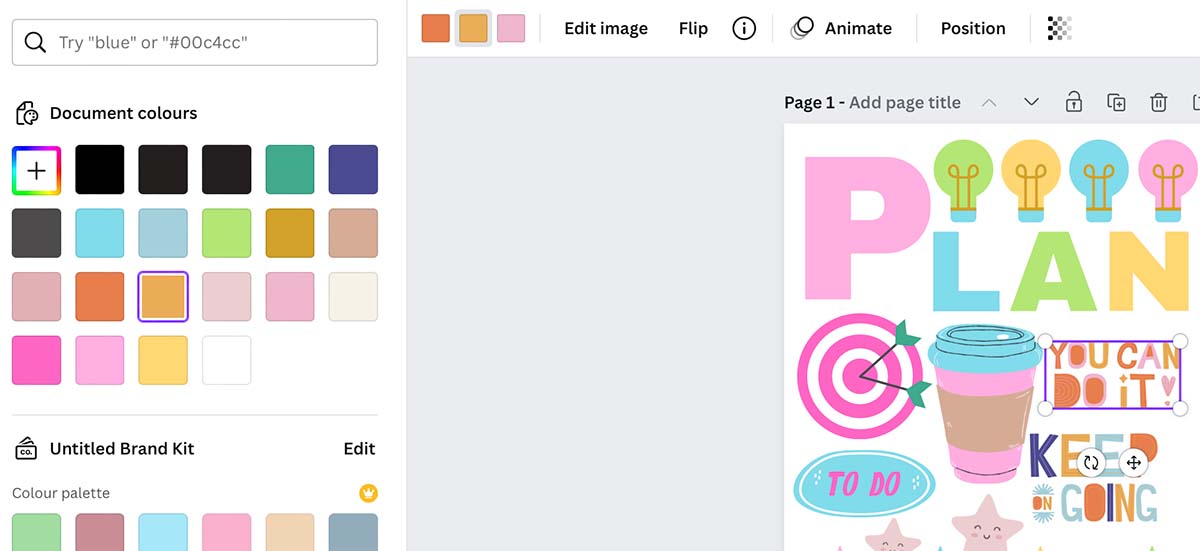
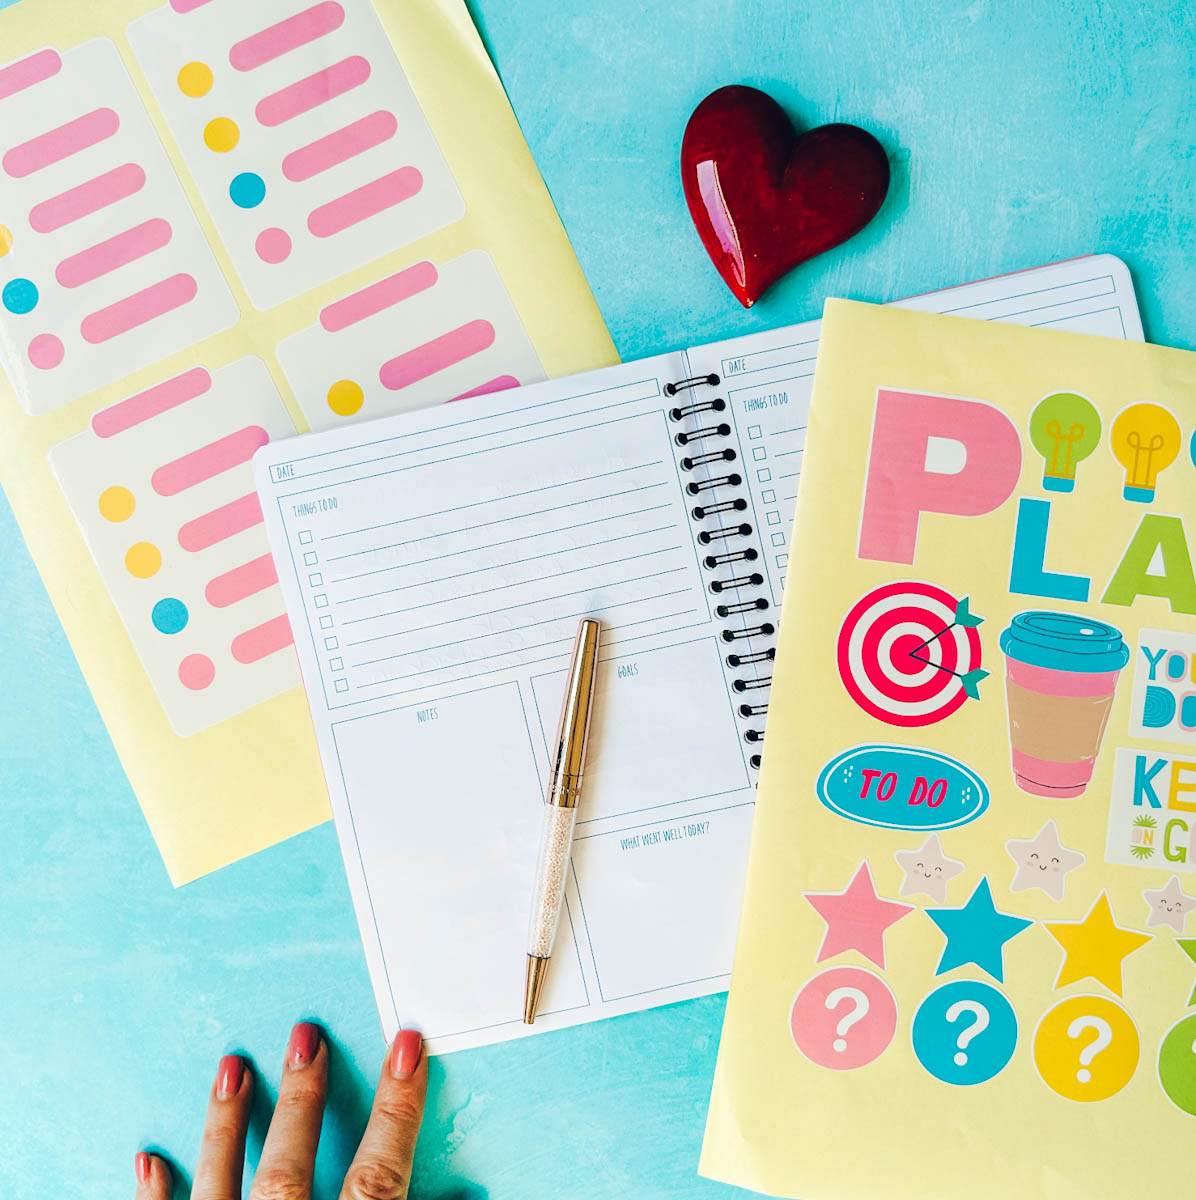
Once you have selected you first image head to the top bar to see if you are able to edit the colours. If you are able to, a mini colour bar will pop up, these represent the colour of the different layers. Click on any colour to change the colour of that layer.
You can see in the “Keep Going” and “You Can Do It” stickers below one is the original colour, one is the colour of my theme. However simply remember as long as the colour squares appear on the top bar when you click the image, then you can change the colour.
Think About Your Home Made Sticker Layout?
Once you are happy with the layout of your stickers, you can think about how they will print and cut. These stickers printed quite large, I could have definitely made them smaller. However also look the the words, “Keep Going” and “You Can Do It” above?
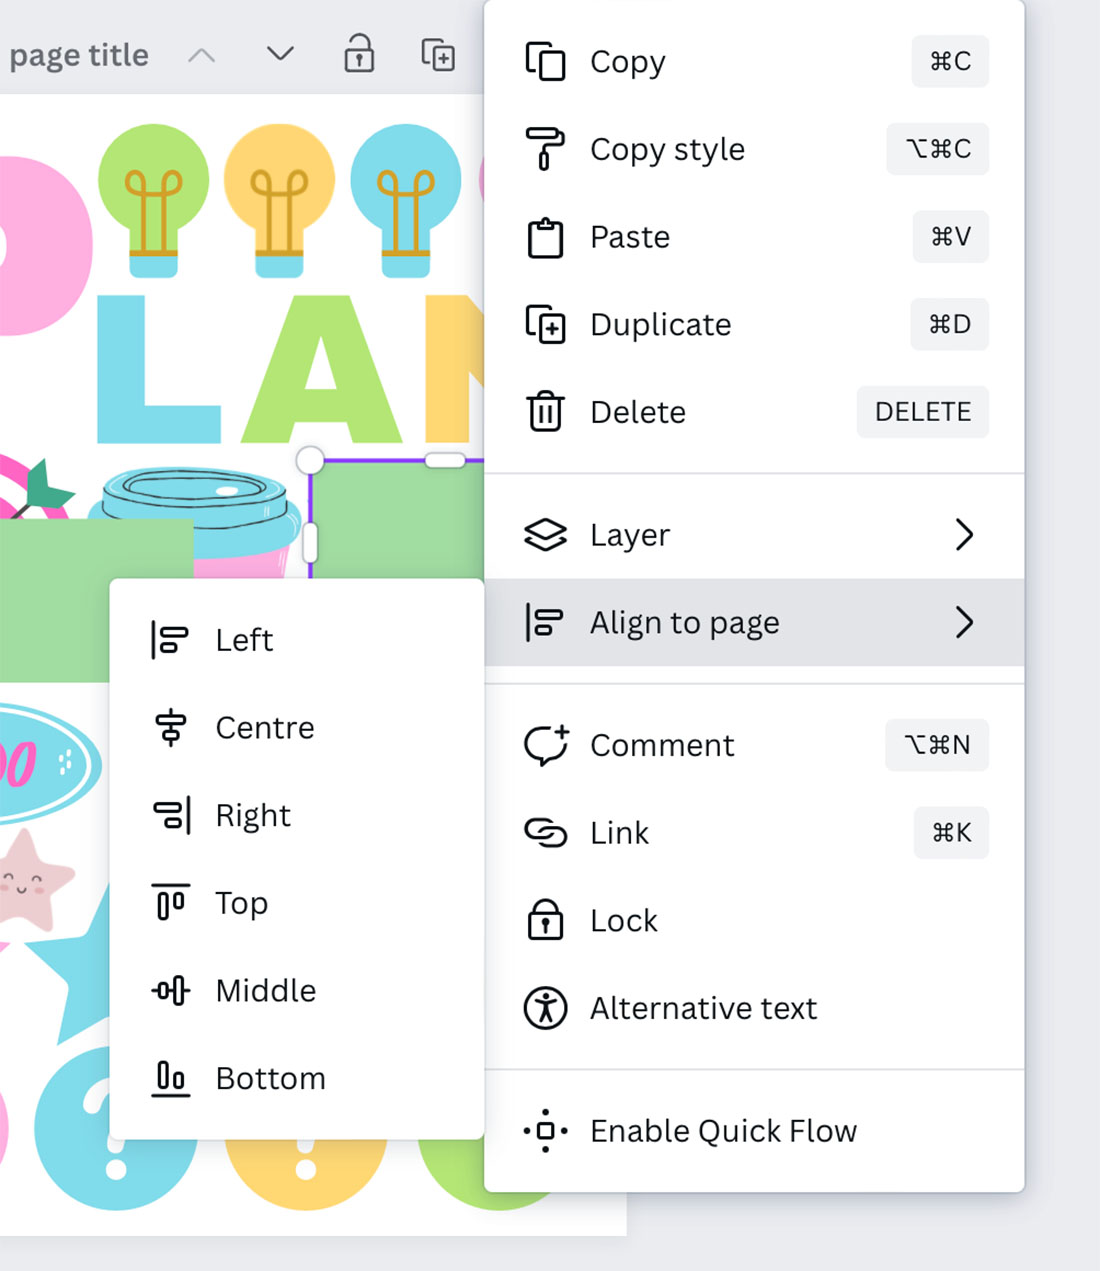
These are ok if you are cutting out by hand, but if you plan to print and cut on Cricut you will need some sort of outline and background. To do this simply head to to the element section in the left hand bar and select a shape. These can be dragged to change the size and shape.
Position your shape over the word, right click to get the actions bar below and click layer, you can now move your layer backwards to sit behind the words a create base.
Which File Type Should I Save My Custom Stickers As?
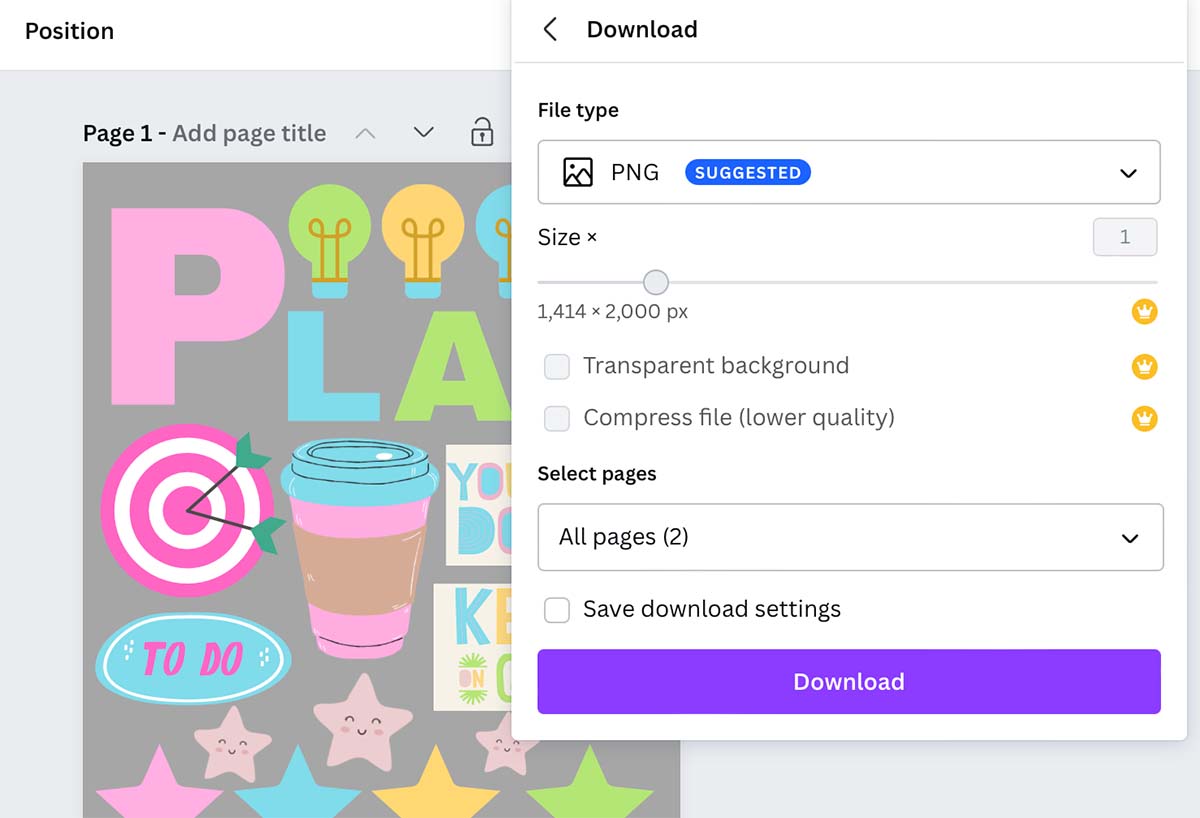
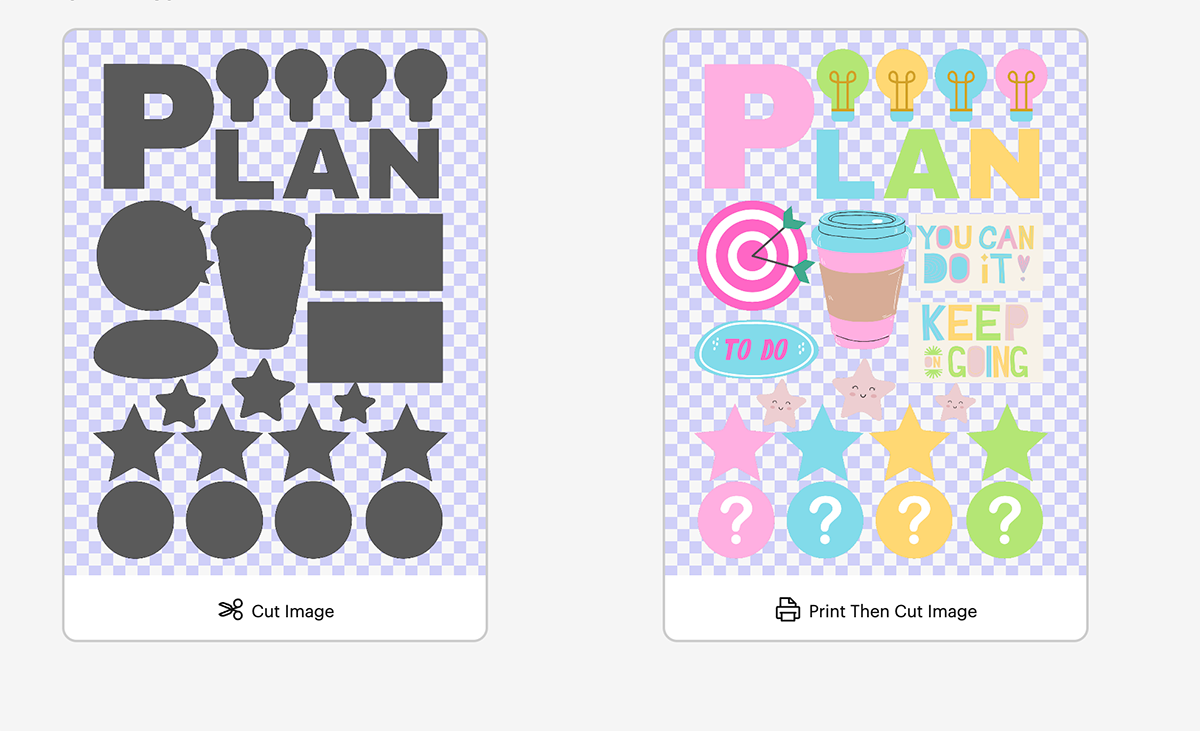
Finally when you are happy download your stickers. If you are going to cut our by hand keep the background white and download as a PDF. However if you want to upload these images to Cricut you will need to think about the background.
If I upload this set of stickers to Design Space when I use the background remover it will also remove the off white background from my word stickers. However, if I change the background to grey? As there are no grey images the background remover will only remove the grey layer. You need to save this as a PNG file. Note, if you have Canva Pro Version you there is the option to remove the background transparency before you download your stickers.
Uploading Your Canva Homemade Stickers To Cricut Design Space
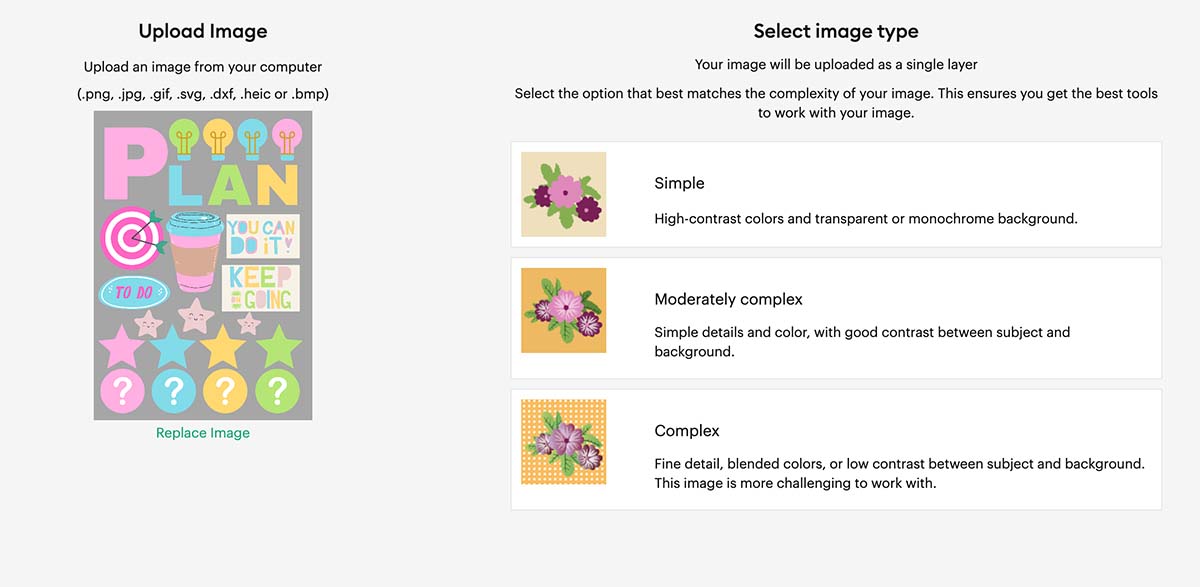
To upload your stickers to Design Space. Start a new project and click upload in the bottom of the left hand bar. Click upload and find you sticker set. You will now be brought to this window. Select complex and you will be taken to the background remover window.
Removing The Background Off The Stickers
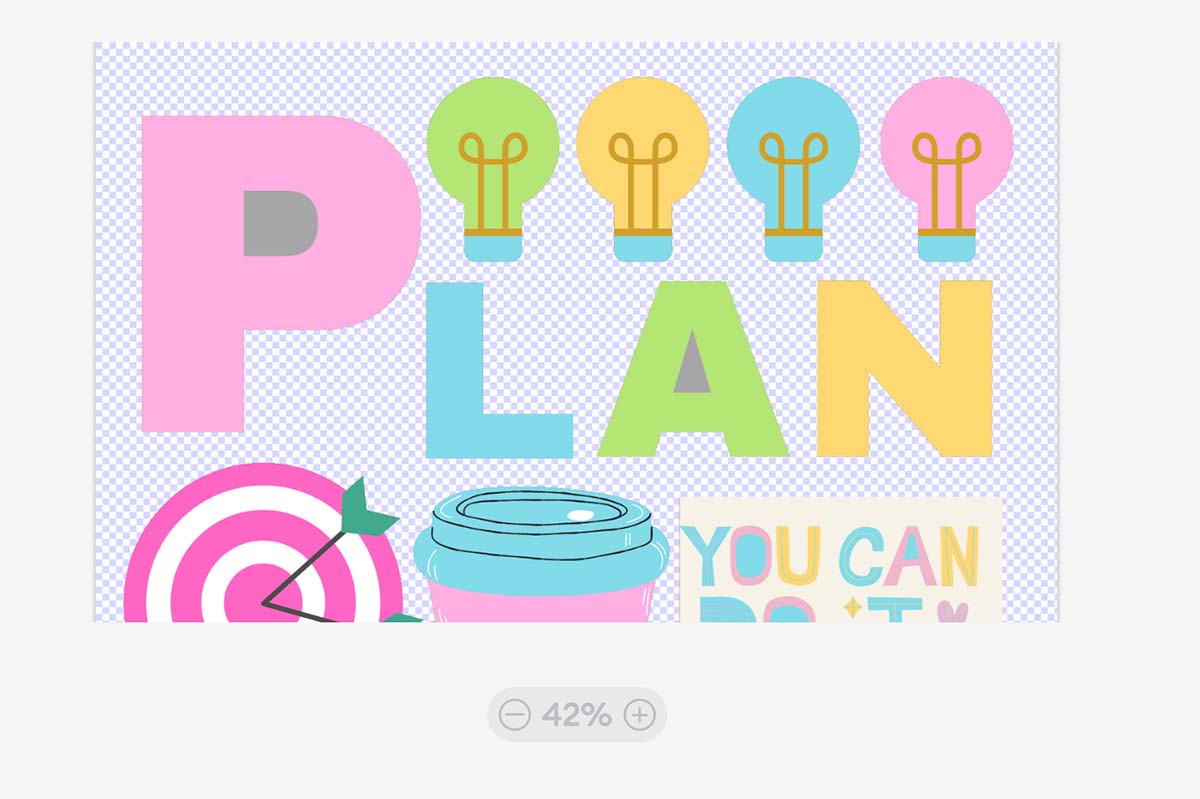
The next window will allow you to remove the background, simply click on the background and it will disappear. However, do be mindful of any letters, check out the P and A you will need to click on those get areas to remove them.
Choose How To Save Your Stickers In Cricut Design Space
Next you are able to choose how to save your home made stickers. You need to click the print and cut option. This will now save your stickers to Cricut Design Space under you images or stuff.
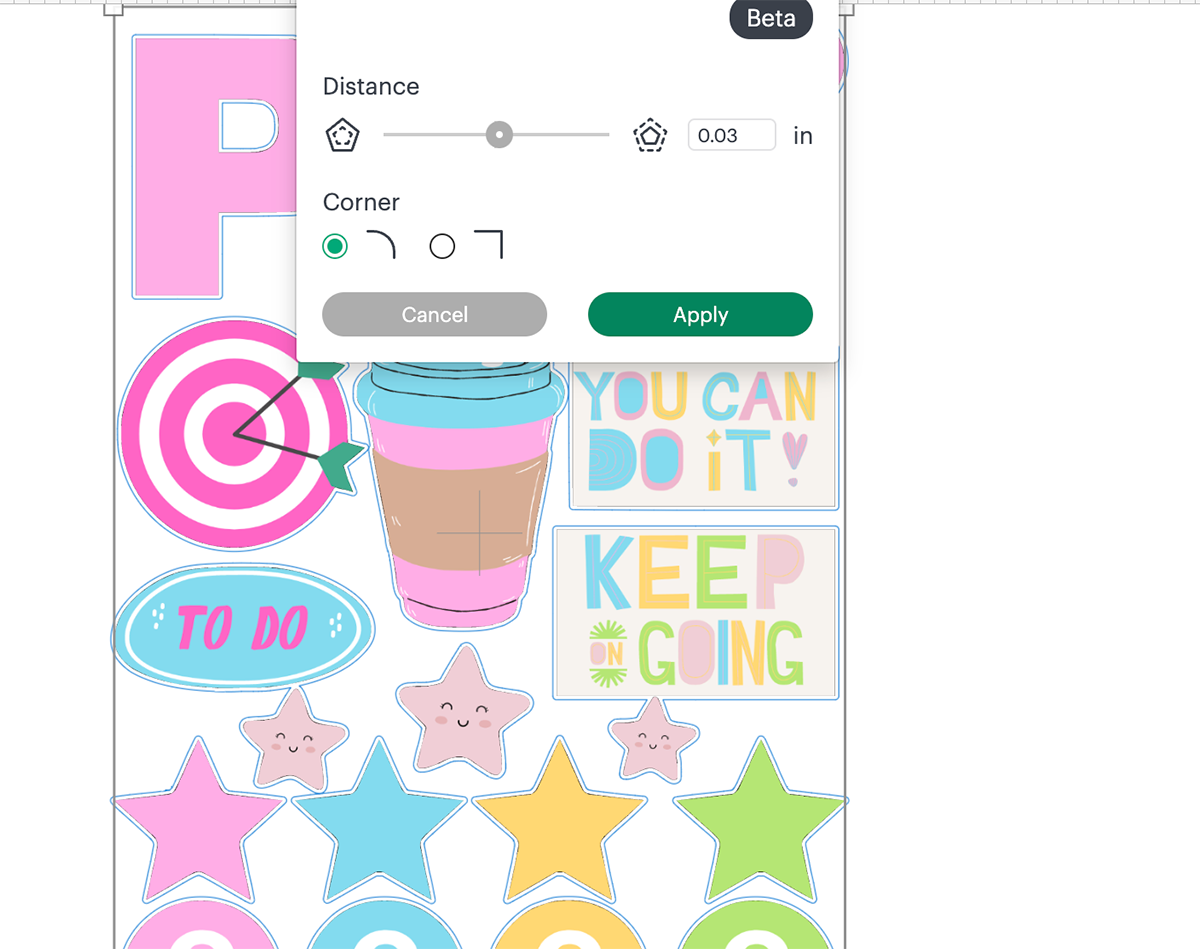
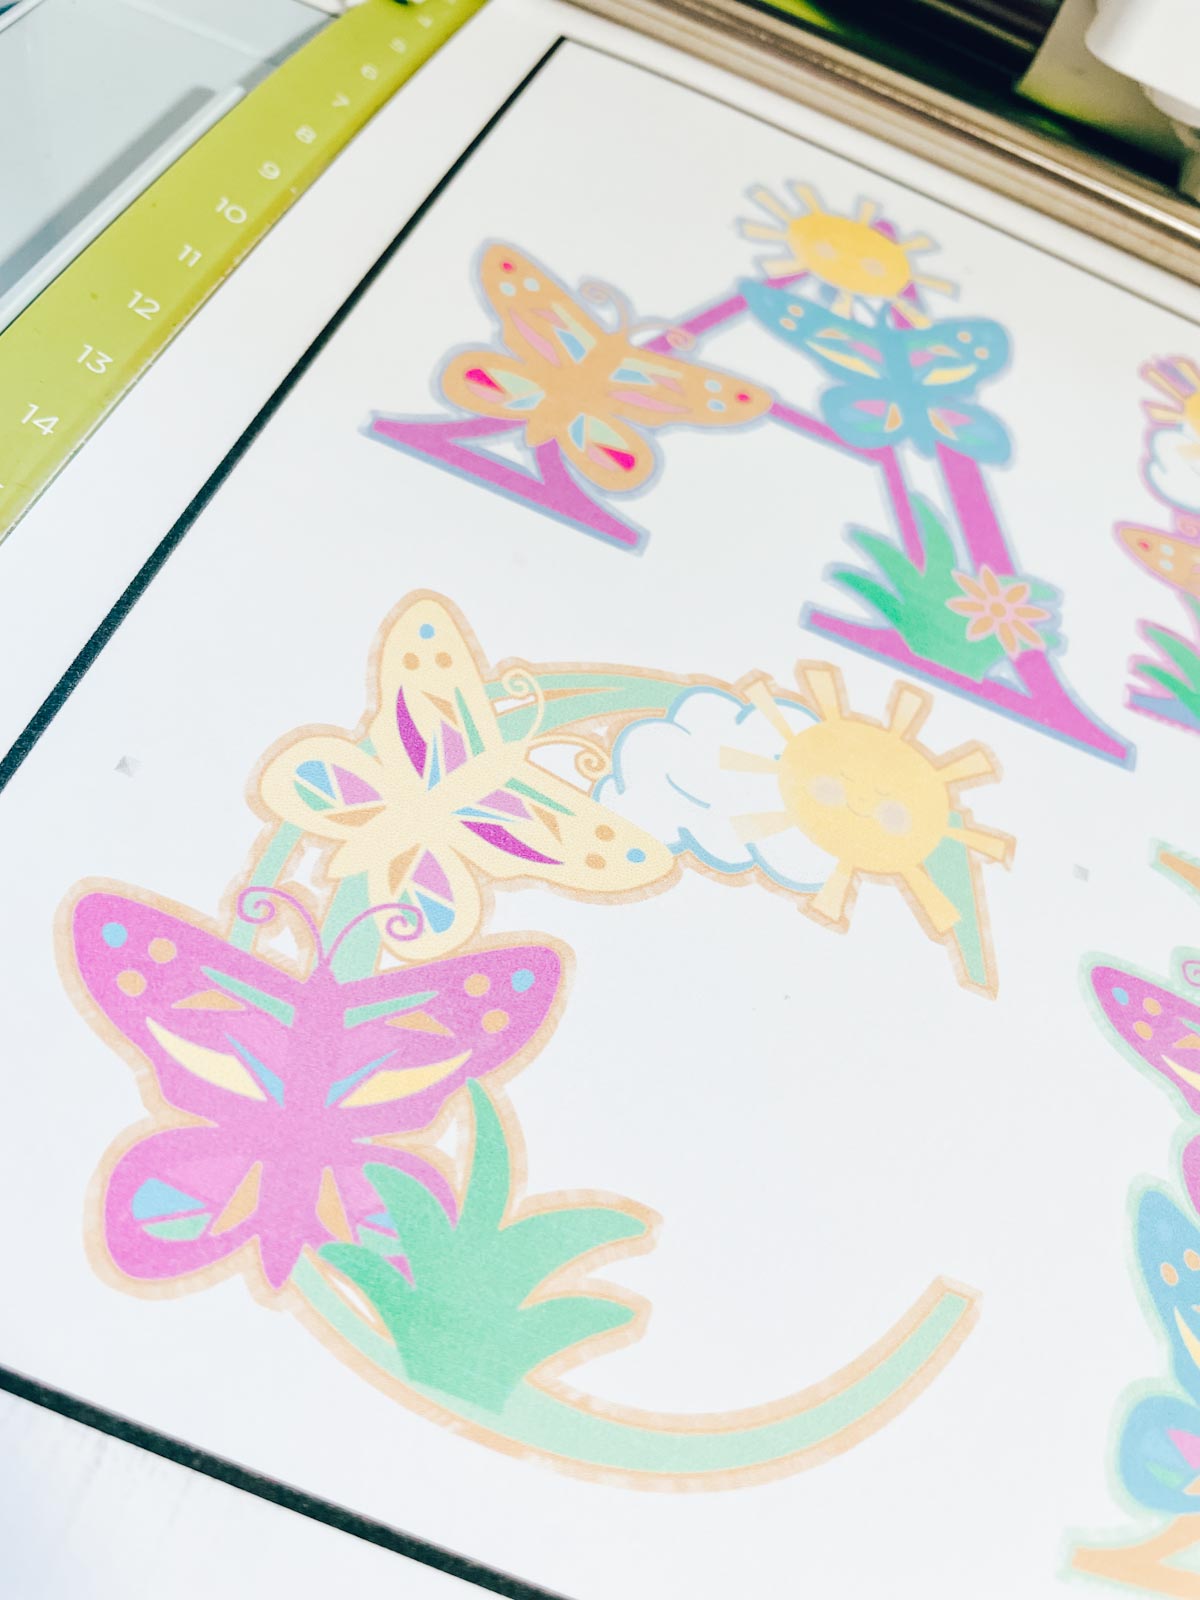
Create An Offset On Your Homemade Stickers
Once uploaded to your design area you have the choice to add an offset to your stickers. I find it finishes off the design and looks more professional.Simply click the offset tool on the top bar and set the distance at 0.03! But do make sure none of your stickers overlap.
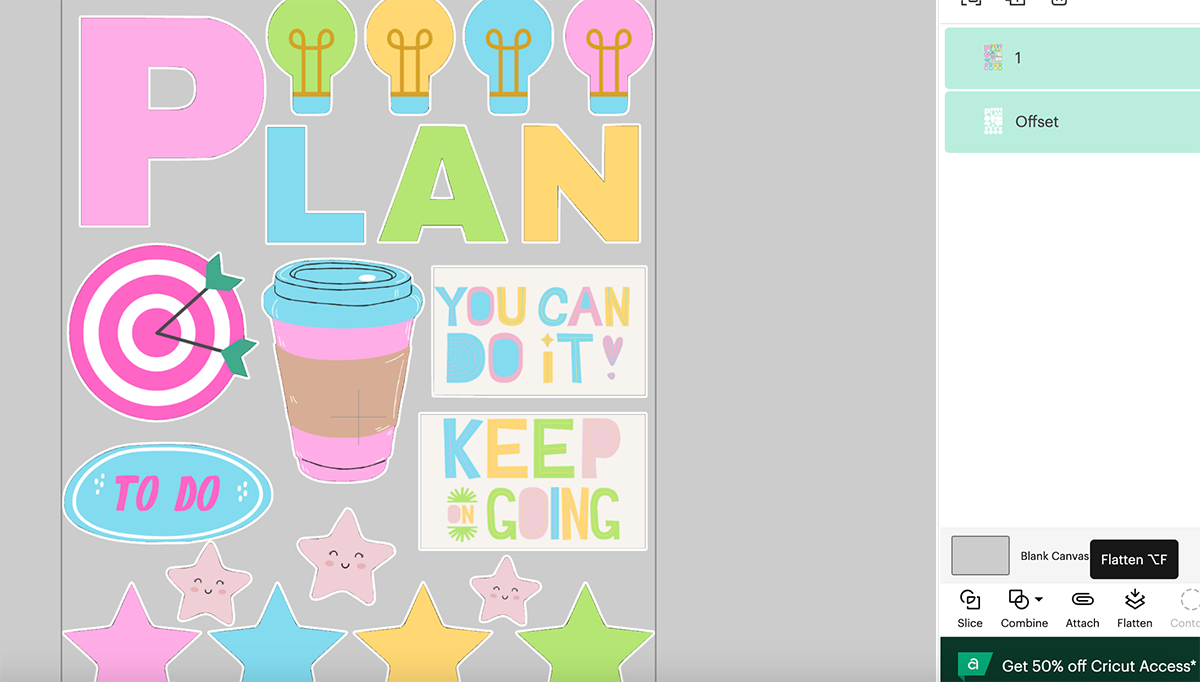
I have changed my background here so you can see, but the offset finishes of the stickers. Lastly select all layers and click flatten on the bottom right hand bar to flatten your image and your stickers are ready to cut.
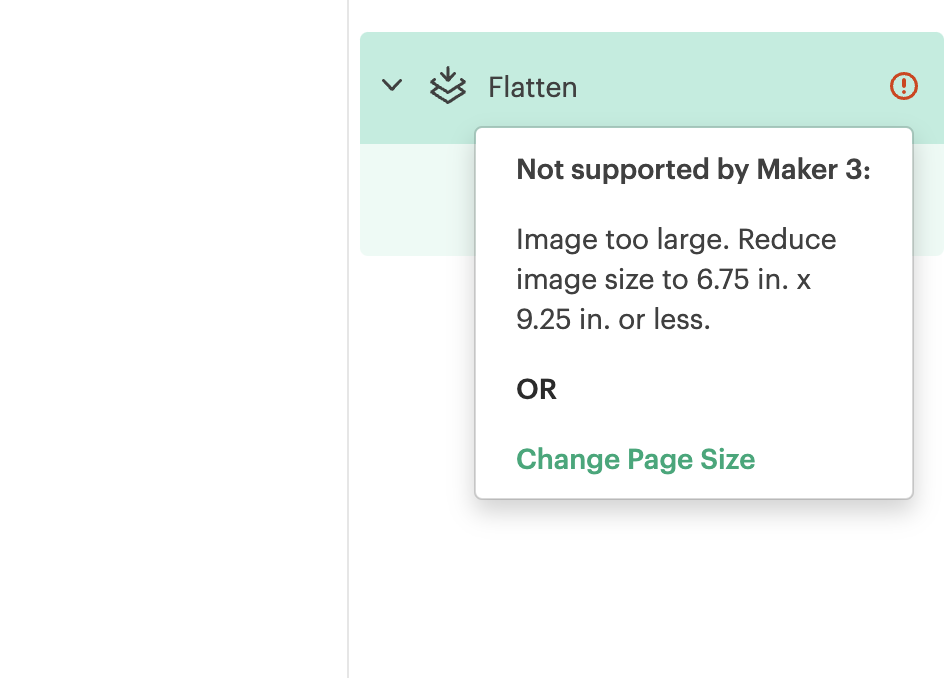
However do ensure each sticker sheet is smaller than 9.25 x 6.75 to be sent to print and cut.
Send Your Stickers To Print And Cut
Now click make it, your stickers will appear in a preview screen, choose your settings. I usually use the printable vinyl setting so my stickers kiss cut the vinyl.

Load your printer with the sticker paper. Print your design using your printer. Make sure to select the highest quality print setting and to set the size of your printable material correctly. Click on system dialogue button to see the printer settings, you will want to change this to fine or best. If the box doesn’t appear, reduce design space and the box will be behind it. Now press print.
Once the design is printed, place it on the cutting mat and load it into the Cricut machine. Make sure to align the design with the cutting mat and to smooth out any wrinkles or bubbles. But be careful not to smudge the black guidelines. (Image just for illustration, not the actual stickers)
Select the correct material setting on the Cricut machine. This will ensure that the machine cuts your design at the right depth and speed.
Press the “Go” button on your Cricut machine, and it will begin to cut your design.
Once the machine has finished cutting your design, unload the cutting mat and remove your finished project from the mat and remove the excess sticker paper to reveal your stickers. Or alternatively use a guillotine to remove the black guidelines from the edge.
More Questions About Canva
Can I Use My Own Images And Logos In Canva?
Yes, you can upload your own images and logos to use in your designs, or you can choose from Canva’s extensive library of stock photos and graphics.
Am I Able To Collaborate With Others On A Canva Design?
Yes, Canva allows users to collaborate on designs in real-time with other Canva users. You can invite team members or clients to edit and comment on your designs.
Can I Download My Designs From Canva?
Yes, you can download your designs in a variety of file formats, including JPG, PNG, and PDF.
In Conclusion
Making stickers with Canva and Cricut is a super easy creative project. By following our step by step instructions, you can create high-quality stickers that are perfect for personal use or for selling online. With a little creativity and attention to detail, you can create beautiful and functional stickers that people will love.