It’s probably the wrong time of the year for most to start spring cleaning cupboards and sharing tutorials of making kitchen labels of how to print and cut on Cricut.
However, with January looming, I thought it was a great time to start thinking about tidying out those kitchen cupboards and restoring a little order to life.
What You Will Find Here
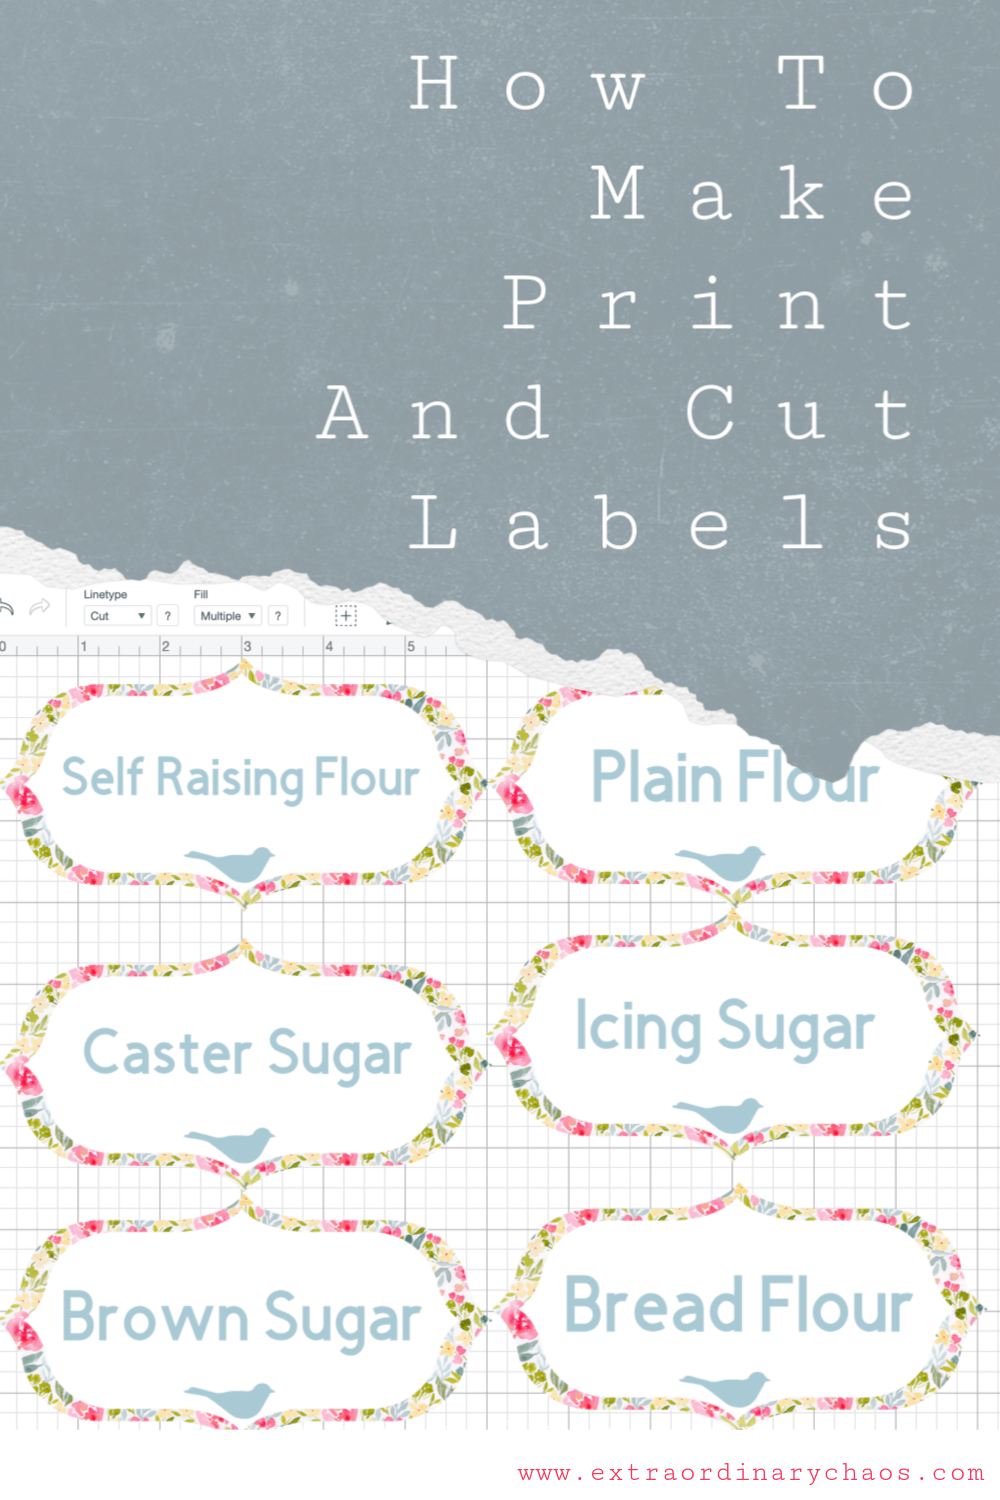
Making Kitchen Labels Via Print And Cut On The Cricut Maker

I decided to start with my baking cupboard, there is a lot to organise. However, the print and cut feature on Cricut is made for such projects, and I couldn’t wait to get started designing my own labels.
Free Printable Kitchen Labels

If you want to skip the tutorial use my template click here for a free downloadable kitchen label print and cut pdf of all the labels I have created, and also a blank label to customise. However if you want to have a go at personalising your own print and cut labels read on.
Choose A Sticker Shape For Your Kitchen Labels

Start by searching for labels in Cricut Design Space, there are lots of shapes to choose from. I went for a shape I could create a country style label with. There are also lots of pre designed labels all ready to customise.
Once you have a shape you are happy with, size it to get the correct size. I always check my size against my cutting matt to ensure I am happy with the actual size. Decide the size of your label now as it’s easier to duplicate finished labels to ensure they are all the same.
Now Create A Background For Your Label

Next duplicate your shape, make one slightly larger that the other before choosing and background pattern for your print and cut sticker.
I chose a floral background and a white inner sticker. When you are happy with the pattern and inner colour place one over the other to create a patterned border.
Flatten Your Label

Now right click and flatten to create the template for all of your stickers. This can be duplicated multiple times to create your labels.
Add Text And Any Images

Adding the text is simple, sizing depends on how many letters will appear on each label, I was fine with my text sizing being slightly different on each label.
Then I added a bird as an accent, there are lots of possibilities including spoons and cups the opportunities are endless. However this matched the whimsical effect I wanted to create.
The last step is re flattening your image before sending it to print and cut.
A Few Tips For Using Cricut Print And Cut

- Decide on the best paper to print on, I prefer printable printable vinyl sheets to sticker paper. Vinyl is thinner and produces a better overall effect.
- Calibrate your printer before using with you Cricut, this will save so much time and effort.
- Ensure you flatten your project before sending to print and cut.
Other Uses For Printable Stickers

- Gift tags
- Birthday party labels
- Planner stickers
- Activity packs for children
- Address labels
- Toy or craft room organisation labels
Please note this post contains an affiliate link.
Pin For Later

Oh Sarah these are beautiful, you are going to have the most organised, beautiful kitchen ever in the New year x