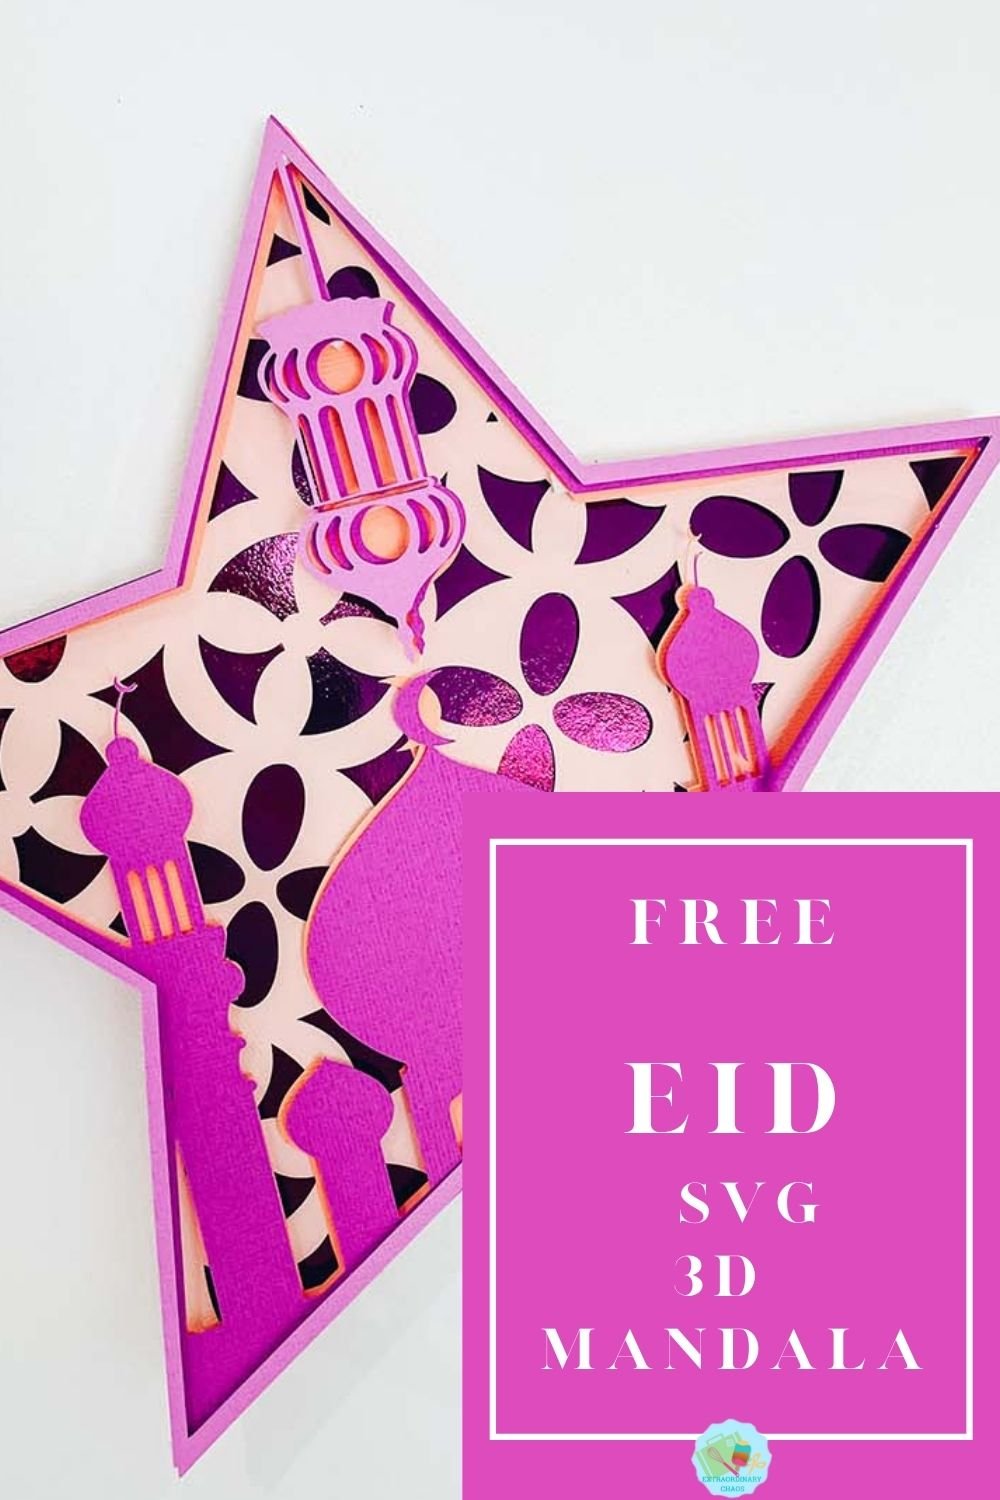
I am loving creating Mandalas, if you get the colours right they can be so effective, make great gifts and look incredible framed. This Free 3D Eid Mandala SVG has been created for my readers celebrating Eid, and created in beautiful warm and vibrant colours to hopefully reflect the event. Great for sending as a gift or using to decorate the home for the occasion. Additionally its super easy to cut out on the Cricut and assemble. Also check out my Eid Colouring Alphabet.

All designed in design space with design space elements its also easy to adapt, or if you want to make you own check out my Mandala tutorial here.
Although I did make a teeny mistake with the top layer and stuck it on the wrong way round eeek! But was able to rectify this after by gently twisting my moon around and sticking it.

What You Will Find Here
How To Make An Eid 3D Mandala
Project Ideas For My Free Eid Mandala Alphabet
- Framed Paper Cut Letters And Words
- Eid Monogram Cards
- Layered Vinyl Projects (You don’t need to use all the layers !)
- Layered Iron On Vinyl
- Eid Cake Toppers
- Framed Eid Art
- Scrapbooking Pages And Memory Books

You Will Need
- Cricut Maker Or Cricut Joy
- Cutting Mat
- Weeding Tool
- Brayer
- Tweezers
- Scraper
- Colour heavy paper, or light card stock in 5 different shades of your chosen colour. I used foil craft board for my back layer.
- Or vinyl
- Sticky Pads

How To Download The Free 3D Mandala Eid SVG Files?
Click here or the image below to get your free downloadable PNG/SVG files and follow these instructions to add your Eid files to Cricut Design Space. Don’t forget to turn off any pop up blockers.

If You’re Having Problems?
Check out my trouble shooting page, hopefully it will answer any questions you may have.
How To Upload Your Eid 3D Mandal SVG Files To Design Space
Firstly click upload at the bottom of the left hand bar and click browse to find your Eid Mandala SVG file on your MAC, Phone or PC.
Next you will see is the image below, click on the image and press upload in the bottom right corner.

Once your files are in design space click select and add all of the 5 layers.
Change the colour of each file so they will all cut different colours on separate mats when you send to cut.
Before cutting line up all the files, if any are slightly misshapen unlock the Mandala SVG by selecting the image and clicking the padlock on the bottom left corner. You can now drag the file to fit.

Cutting Your Eid Mandala SVG/PNG Cut Files
When you send your Eid Mandala SVG/PNG files to your Cricut to cut, ensure you use your brayer to roll the paper, vinyl or card to adhere to the mat. Movement will affect the cut.

Remember you are using 5 colours so have the card stock ready to hand and really thing about the colours. I chose a peach shade to represent the sunset behind the windows and the metallic background to reflect light.
If your cutting mat looses its stickiness this will affect the quality of cut. Also make sure your mat is in good condition, this is vital for cutting intricate cuts such as floral paper cuts.
Additionally, make sure you set the material and cut pressure correctly to match whatever Cricut materials you’re cutting to get a clean cut. If you have any problems cutting check the mat, pressure and material settings as generally this is where the problem will lie.

Assembling Your 3D Mandala
Start by laying out all 5 layers to ensure they line up.
I have suggested and order on the files which makes sense and the layers are numbered accordingly.
Start by placing the back layer face up, and sticking foam pads to the corners of the back of your layer 2.
Now flip the layer over and position onto the back layer, making sure its lines up.

Keep going layer by layer until you’ve finished. You can now mount in a box frame, or card.

Please do pop over to Instagram, and give me a follow and if you make a project tag me! I love seeing everyone else’s makes and chatting crafting. I could do that all day!

Eid 3d Mandala
Free Eid Mandala SVG Cut Files to cut on Cricut or Silhouette and make as Eid gifts to frame in a shadow box of Eid cards or decorations.
Materials
- Colour heavy paper, or light card stock in 5 different shades of your chosen colour. I used foil craft board for my back layer.
- Or vinyl
- Sticky Pads
Tools
- Cricut Maker Or Cricut Joy
- Cutting Mat
- Weeding Tool
- Brayer
- Tweezers
- Scraper
Instructions
- How To Upload Your Eid 3D Mandal SVG Files To Design Space
Firstly click upload at the bottom of the left hand bar and click browse to find your Eid Mandala SVG file on your MAC, Phone or PC.
Next you will see is the image below, click on the image and press upload in the bottom right corner. Once your files are in design space click select and add all of the 5 layers. Change the colour of each file so they will all cut different colours on separate mats when you send to cut.
Before cutting line up all the files, if any are slightly misshapen unlock the Mandala SVG by selecting the image and clicking the padlock on the bottom left corner. You can now drag the file to fit.
- Cutting Your Eid Mandala SVG/PNG Cut Files
When you send your Eid Mandala SVG/PNG files to your Cricut to cut, ensure you use your brayer to roll the paper, vinyl or card to adhere to the mat. Movement will affect the cut. Remember you are using 5 colours so have the card stock ready to hand and really thing about the colours. I chose a peach shade to represent the sunset behind the windows and the metallic background to reflect light.
If your cutting mat looses its stickiness this will affect the quality of cut. Also make sure your mat is in good condition, this is vital for cutting intricate cuts such as floral paper cuts.
Additionally, make sure you set the material and cut pressure correctly to match whatever Cricut materials you’re cutting to get a clean cut. If you have any problems cutting check the mat, pressure and material settings as generally this is where the problem will lie. - Assembling Your 3D Mandala
Start by laying out all 5 layers to ensure they line up.
I have suggested and order on the files which makes sense and the layers are numbered accordingly. Start by placing the back layer face up, and sticking foam pads to the corners of the back of your layer 2.
Now flip the layer over and position onto the back layer, making sure its lines up. Keep going layer by layer until you’ve finished. You can now mount in a box frame, or card.
Notes
Project Ideas For My Free Eid Mandala Alphabet
Framed Paper Cut Letters And Words
Eid Monogram Cards
Layered Vinyl Projects (You don’t need to use all the layers !)
Layered Iron On Vinyl
Eid Cake Toppers
Framed Eid Art
Scrapbooking Pages And Memory Books
Recommended Products
As an Amazon Associate and member of other affiliate programs, I earn from qualifying purchases.

