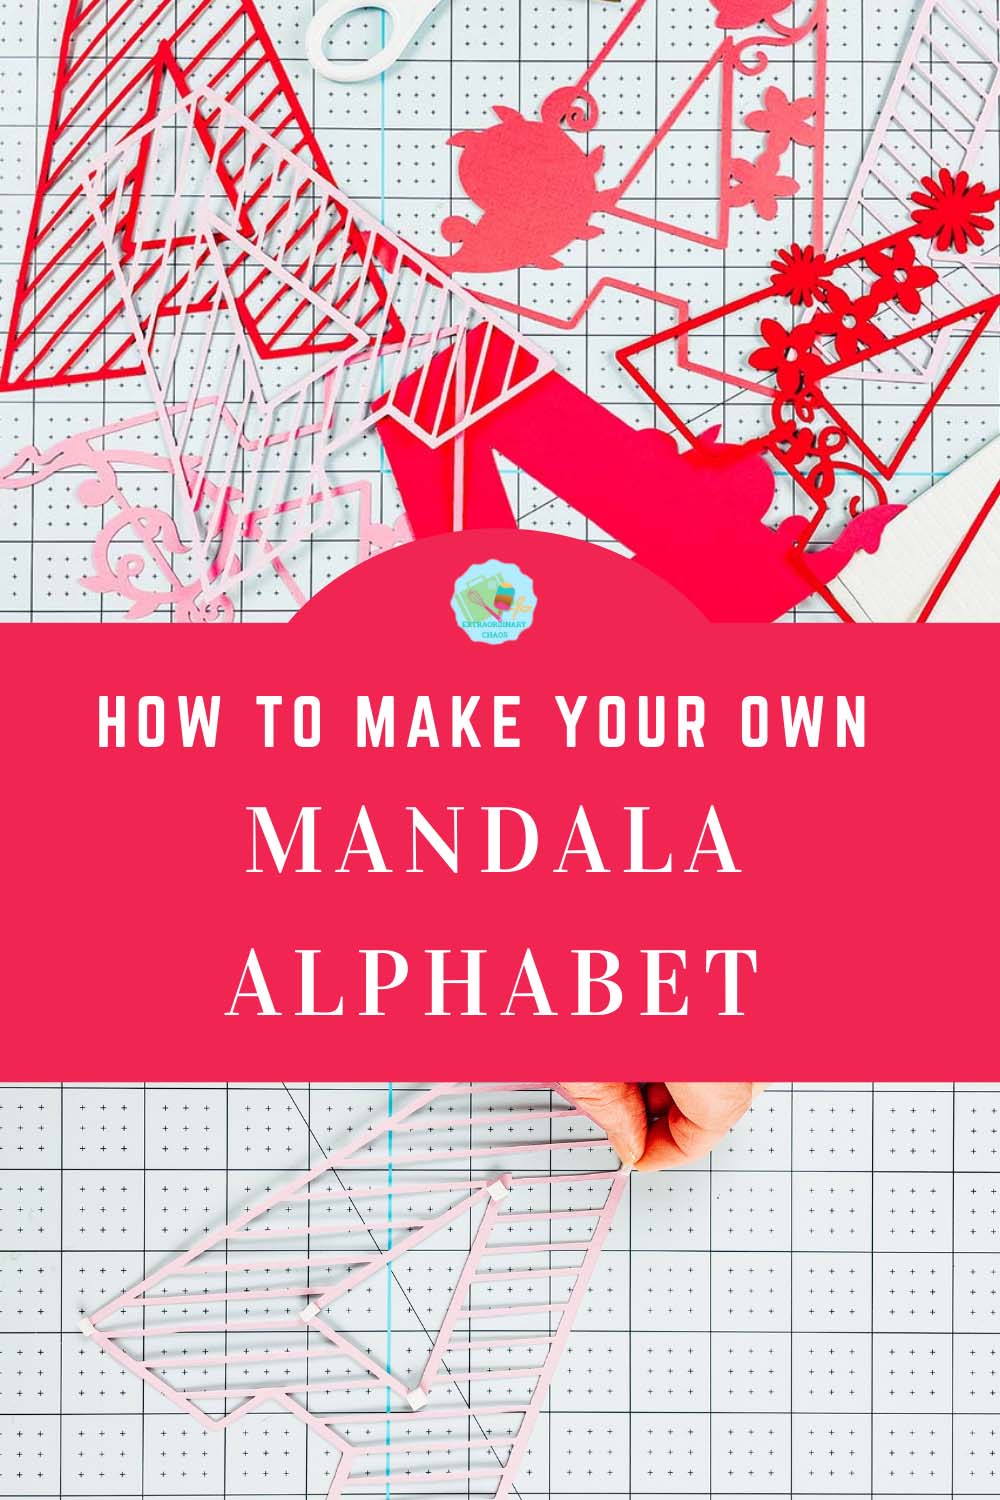
Last week I shared my Mandala Alphabet which was weeks in the making, however I am also aware that some of my lovely readers like to design and create their own art work and creations. And as such just need a little nudge in the right direction. So today I want to share my mandala secrets with you and help you to design and make A 3D Mandala Alphabet of your very own.
However, I am going to give you a head start and have put together a little Mandala starter kit. This will enable you the skip the preparation and start designing your own custom 3D mandala alphabet or single letters straight away.
What You Will Find Here
How To Make A 3D Mandala Alphabet
You can have as many layers as you want, my free SVG Mandala Alphabet has 6 layers. However it is totally up to you, it all depends on what you want to create?
This step by step tutorial will take you through uploading my base templates to design space, and how to use those to create your own Mandala letter cut file.
I have create a full set of alphabet templates, each set has 1 blank outline, this is your base. However I have also included 2 lined layers. These layers both point in different directions to create a cross hatch effect.
You can use one of the layers for a striped effect, or both for the hatch. I have have included these because this was the most tedious bit of the whole Mandala Alphabet design process. Designing the detail is the fun part and I want you to enjoy that.

You Will Need
- Cricut Maker Or Cricut Joy
- Cricut Design Space
- Cutting Mat
- Weeding Tool
- Brayer
- Tweezers
- Scraper
- Colour heavy paper, or light card stock in six different shades of your chosen colour
- Or vinyl
- Sticky Pads
Whats Comes In The Mandala Download?
You will find a base 3D mandala alphabet set and & sign in SVG and PNG files. The SVG files are all one one sheet per letter so can be uploaded to design space and ungrouped.
However the PNG files are in separate folder for each letter of the alphabet. Each set has 3 files. The outline and two background lined sections.
Uploading You Free Mandala Templates To Cricut Design Space
Firstly click upload at the bottom of the left hand bar and click browse to find your chosen Mandala SVG file on your MAC, Phone or PC. Find the file and click upload.
Next you will see is the image below, click on the image and press upload in the bottom right corner.

Once your files are in design space click select and then ungroup in the top right corner. Now your letters will be separated.
How To Make A 3D Mandala Alphabet In Cricut Design Space
Put the striped layers to one side you will need those later. Now duplicate the outline later so you have two.
Make The Main Layers
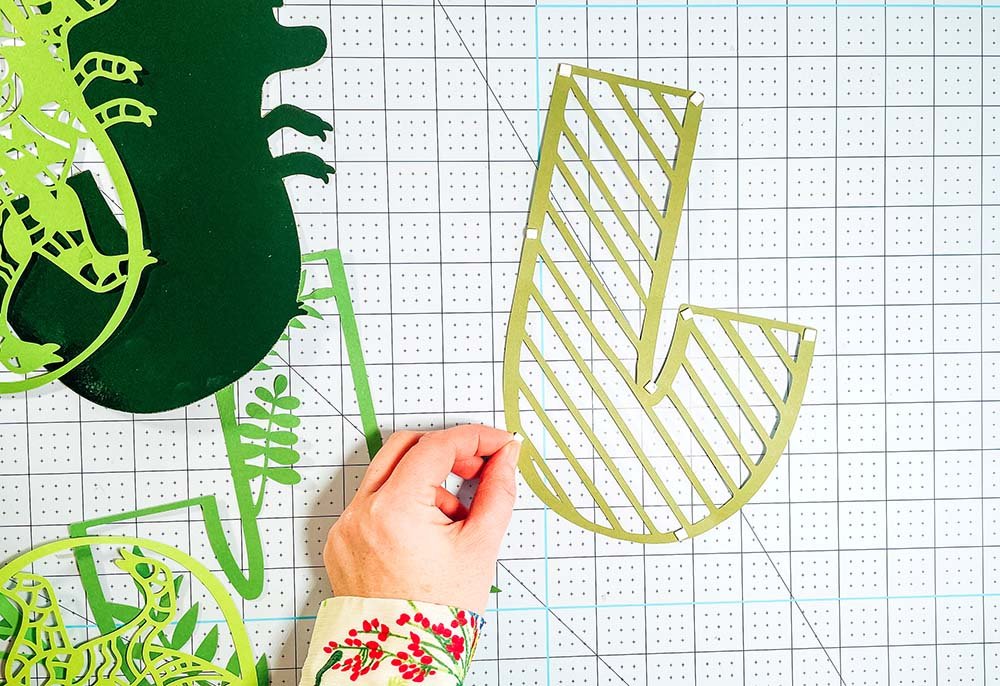
Pull one layer to one side and choose images for your Mandala Alphabet from design space images. For this post I have chosen to make a Dinosaur, although I feel I may have started something and need to now create the whole alphabet.

Once you have chosen you elements you need to decide on size and placement, as the dinosaur is so detailed I am going to use this as the main feature for 3 of the layers.

To ensure your letter is not distorted, position the dinosaur, right click and press slice in the bottom right corner.
This will slice into the dinosaur, now you can re position. Once in position,check if there are any areas you want to remove.
There’s a v shaped area which will overlap our letter as you can see in the image below. To remove, press contour and you can click on the unwanted areas before welding your image together. This will be the second layer of your mandala.

Duplicate this layer twice, you will need 3 layers in total. Starting with the back, click contour and click hide all contours on the bottom left corner. This will give you the back layer of your letter.

Do the same with the middle dinosaur layer, however this layer needs to sit somewhere between the from and back image. Remove contours that will make your mandala letter look great and create detail and depth.

Make The Top Mandala Layer
Now work on the top layer, this needs to be a contrast layer to add another dimension. For this I chose leaves and vines from design space images. Position the remaining outline layer over the top dinosaur later as a guide to build up the picture.

When you are happy, move the dinosaur away, right click, select all and weld. This will give you the top layer of your mandala letter.

Lastly position all the layers together, if any do not line up exactly, click the padlock to unlock and drag into shape.
Now colour each layer a different colour and group together, this makes it easier to resize the project in one go before sending to cut.

How To Cut Your Mandala Alphabet Letter
When you send your Monogram Mandala files to your Cricut to cut, ensure you use your brayer to roll the paper, vinyl or card to adhere to the mat. Movement will affect the cut.

Remember you are using 6 colours so have the card stock ready to hand.
If your cutting mat looses its stickiness this will affect the quality of cut. Also make sure your mat is in good condition, this is vital for cutting intricate cuts such as floral paper cuts.
Additionally, make sure you set the material and cut pressure correctly to match whatever Cricut materials you’re cutting to get a clean cut. If you have any problems cutting check the mat, pressure and material settings as generally this is where the problem will lie.

Assembling Your Mandala Monogram Letter
Start by laying out all 6 layers, make sure you get the hatch layers the correct way round on symmetrical layers to get the cross effect.
Place the back layer face up, and stick foam pads to the corners of the back of your chosen layer 2.
Keep going layer by layer until you’ve finished and have a complete letter ensuring it lines up correctly. You can now mount in a box frame, or card.
How To Download My 3D Mandala Templates?
Click here or the image below to get your free downloadable PNG/SVG files and follow these instructions to add to Cricut Design Space.
If You’re Having Problems?
Check out my trouble shooting page, hopefully it will answer any questions you may have.

Please do pop over to Instagram, and give me a follow and if you make a project tag me! I love seeing everyone else’s makes and chatting crafting. I could do that all day!


How To Make A 3D Mandala Alphabet
How To Make A 3D Mandala Alphabet, step by step tutorial to design and make a Mandala letter in Cricut Design Space with free templates.
Materials
- Colour heavy paper, or light card stock in six different shades of your chosen colour
- Or vinyl
- Sticky Pads
Tools
- Cricut Maker Or Cricut Joy
- Cricut Design Space
- Cutting Mat
- Weeding Tool
- Brayer
- Tweezers
- Scraper
Instructions
- Uploading You Free Mandala Templates To Cricut Design Space
Firstly click upload at the bottom of the left hand bar and click browse to find your chosen Mandala SVG file on your MAC, Phone or PC. Find the file and click upload.
Next you will see is the image below, click on the image and press upload in the bottom right corner. Once your files are in design space click select and then ungroup in the top right corner. Now your letters will be separated.
 - How To Make A 3D Mandala Alphabet In Cricut Design Space
Put the striped layers to one side you will need those later. Now duplicate the outline later so you have two. Pull one layer to one side and choose images for your Mandala Alphabet from design space images. For this post I have chosen to make a Dinosaur. Once you have chosen you elements you need to decide on size and placement, as the dinosaur is so detailed I am going to use this as the main feature for 3 of the layers.
  To ensure your letter is not distorted, position the dinosaur, right click and press slice in the bottom right corner.
This will slice into the dinosaur, now you can re position. Once in position,check if there are any areas you want to remove.
There’s a v shaped area which will overlap our letter as you can see in the image below. To remove, press contour and you can click on the unwanted areas before welding your image together. This will be the second layer of your mandala. Duplicate this layer twice, you will need 3 layers in total. Starting with the back, click contour and click hide all contours on the bottom left corner. This will give you the back layer of your letter.
  Do the same with the middle dinosaur layer, however this layer needs to sit somewhere between the from and back image. Remove contours that will make your mandala letter look great and create detail and depth.
 - Make The Top Mandala Layer. Now work on the top layer, this needs to be a contrast layer to add another dimension. For this I chose leaves and vines from design space images. Position the remaining outline layer over the top dinosaur later as a guide to build up the picture.
 When you are happy, move the dinosaur away, right click, select all and weld. This will give you the top layer of your mandala letter.
- Lastly position all the layers together,if any do not line up exactly, click the padlock to unlock and drag into shape.
Now colour each layer a different colour and group together, this makes it easier to resize the project in one go before sending to cut.
- How To Cut Your Mandala Alphabet Letter
When you send your Monogram Mandala files to your Cricut to cut, ensure you use your brayer to roll the paper, vinyl or card to adhere to the mat. Movement will affect the cut. Remember you are using 6 colours so have the card stock ready to hand.
If your cutting mat looses its stickiness this will affect the quality of cut. Also make sure your mat is in good condition, this is vital for cutting intricate cuts such as floral paper cuts.
Additionally, make sure you set the material and cut pressure correctly to match whatever Cricut materials you’re cutting to get a clean cut. If you have any problems cutting check the mat, pressure and material settings as generally this is where the problem will lie. - Assembling Your Mandala Monogram Letter
Start by laying out all 6 layers, make sure you get the hatch layers the correct way round on symmetrical layers to get the cross effect.
Place the back layer face up, and stick foam pads to the corners of the back of your chosen layer 2.
Keep going layer by layer until you’ve finished and have a complete letter ensuring it lines up correctly. You can now mount in a box frame, or card.
Please do pop over to Instagram, and give me a follow and if you make a project tag me! I love seeing everyone else’s makes and chatting crafting. I could do that all day!
Notes
Check out the blog for my floral mandala alphabet.
Recommended Products
As an Amazon Associate and member of other affiliate programs, I earn from qualifying purchases.


This is such a creative idea! I love how you’ve broken down the steps so clearly. I can’t wait to try making my own 3D mandala alphabet using your template. Thanks for sharing this!