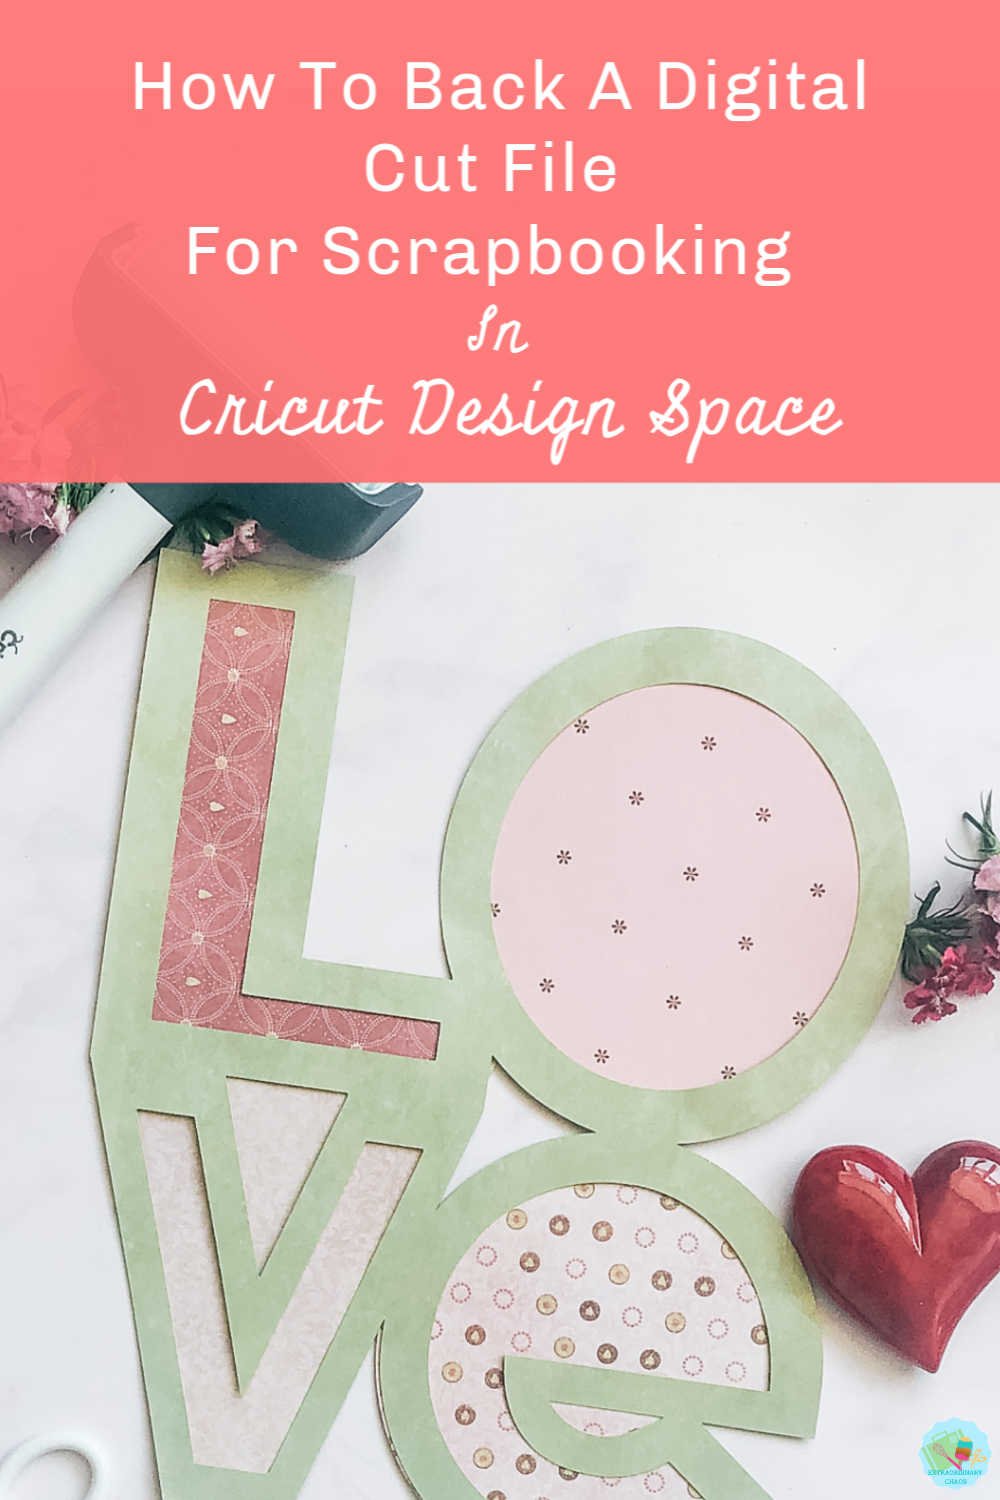
In my last post I talked about how to make word cut files for scrapbooking in Design Space. In this post I am going to show you How To Back A Scrapbooking Cut File In Cricut Design Space. Like all things it’s easy when you know how. If you follow these simple steps you will be able to back your cut files with a single solid image or multiple images.

What You Will Find Here
How To Back A Scrapbooking Cut File In Cricut Design Space
You Will Need…
- Cricut Maker or Joy
- Cricut Design Space
- 12x 12 plain card stock
- 12×12 patterned paper
- Scissors
- Cutting matt
- Brayer and weeding tools
- Double sided craft tape
Drag Your Desired Scrapbook Cut File Into Cricut Design Space And Duplicate It.
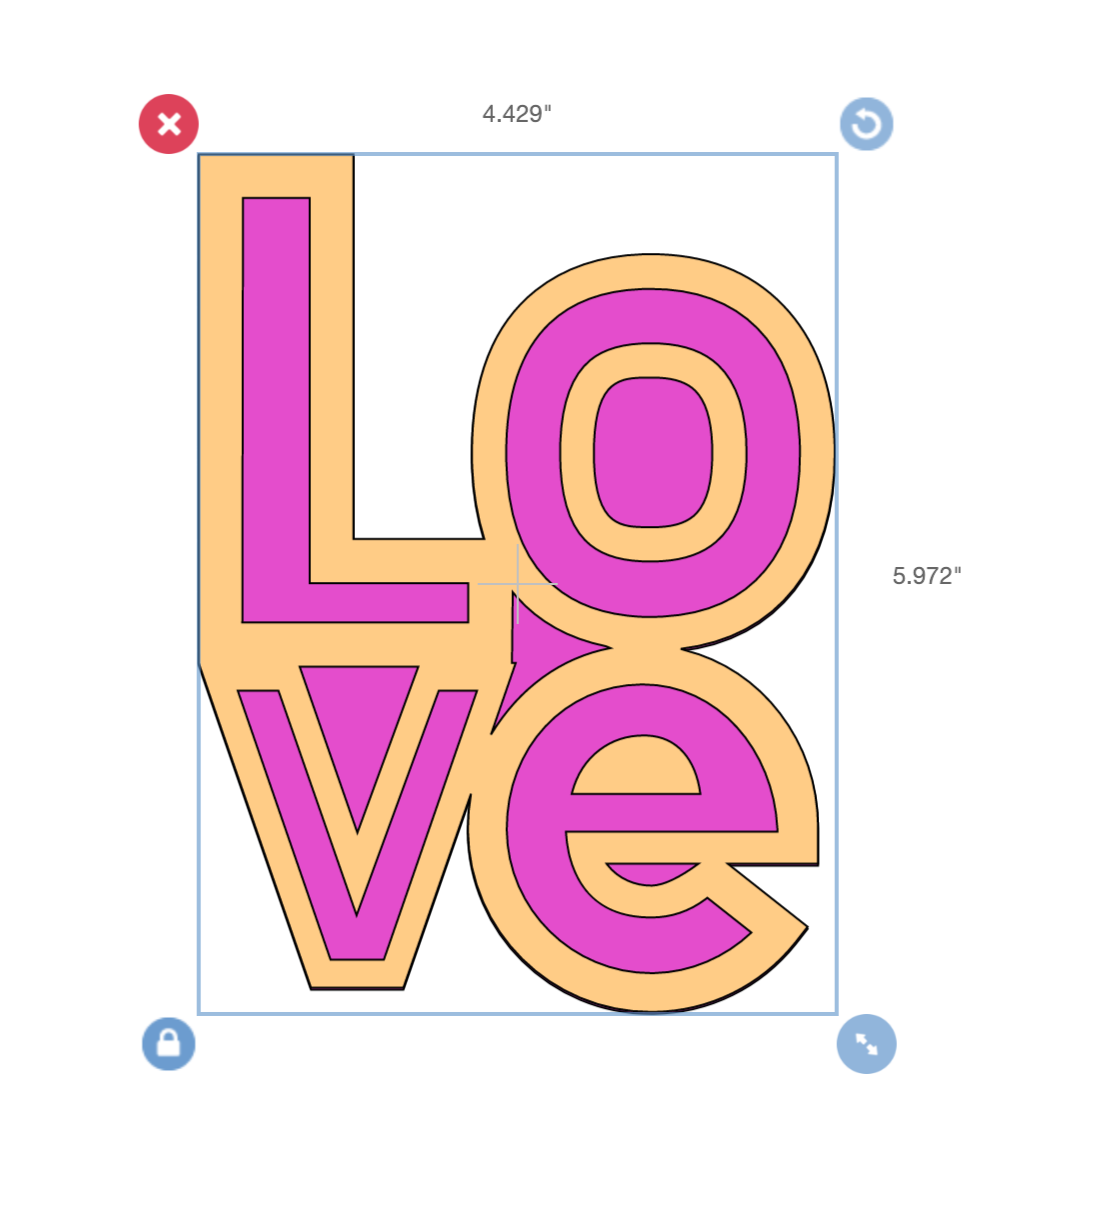
Whether it’s a project you created in Design Space, or an image you have uploaded to design space yourself, open the image.
I am going to show you two ways to back a cut file in Design Space. The 1st is backing the file with one solid background. The other is creating multiple backgrounds within the one cut file.
How To Back Your Cut File With One Solid Background.
1. Firstly right click on your cut file and duplicate it. Once you have duplicated your image, drag one to one side.
2. Next click onto the remaining image to highlight and select contour in the bottom right corner, a grey box will pop up.
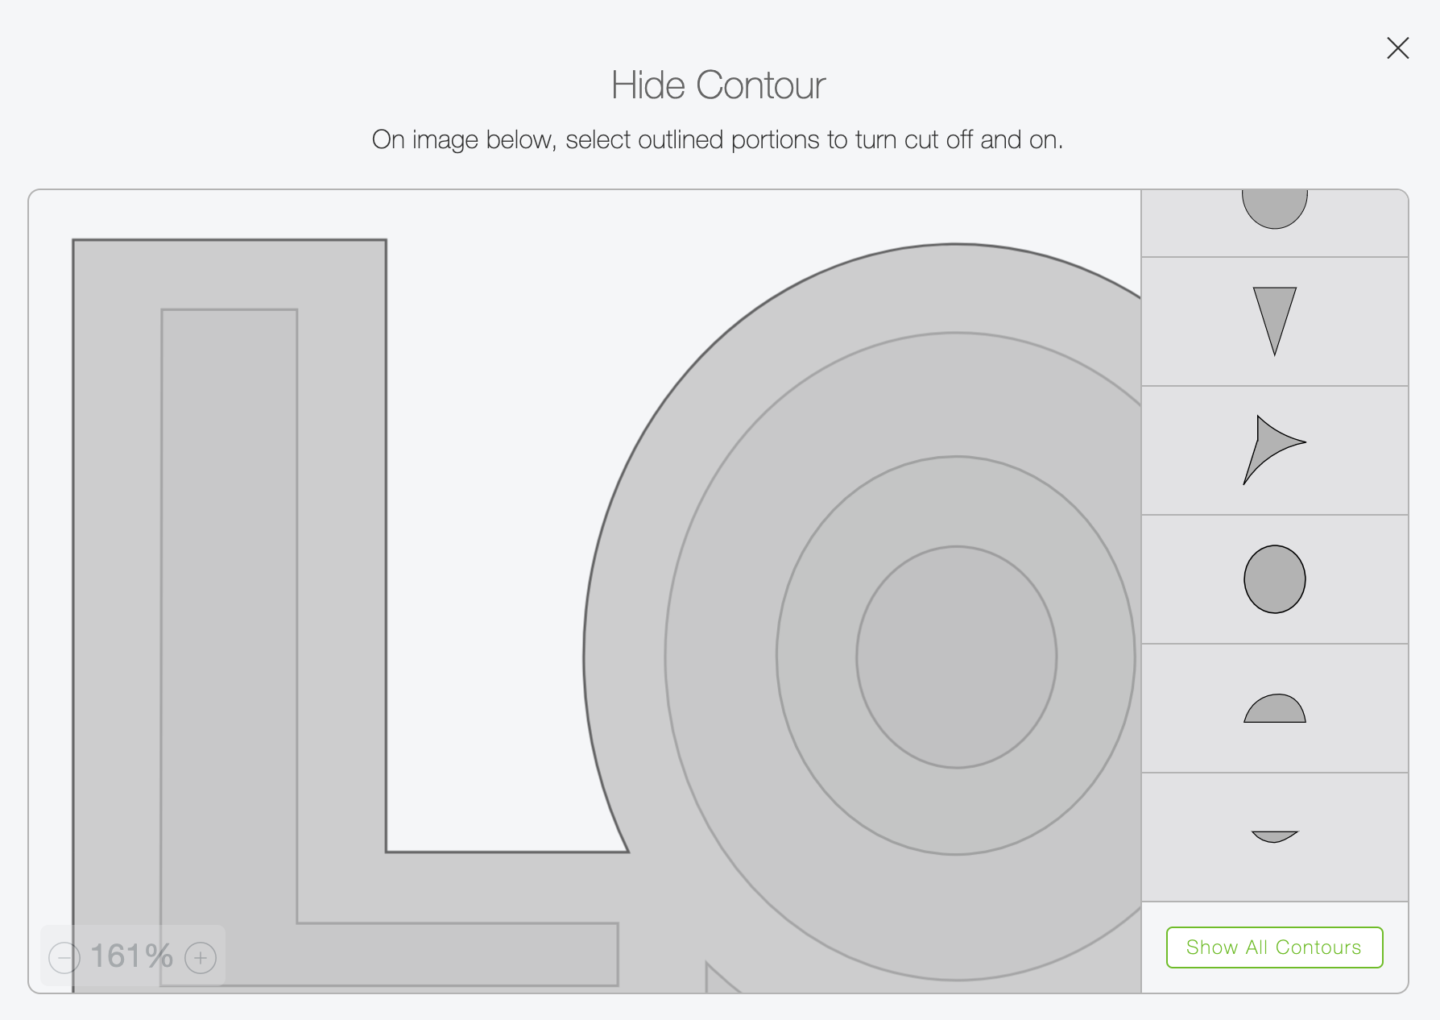
3. Now select hide all contours. This will make your image one solid image to back your scrapbook file.

4. Once you have one solid image cut file this will serve as a backing for your word cut file. Simply drag the background file to the size you want to cut, then also drag the top image file over the top to resize so the images fit together perfectly before sending to cut.
Please note, the back image should not be smaller as it needs to attach to the back of your cut file.

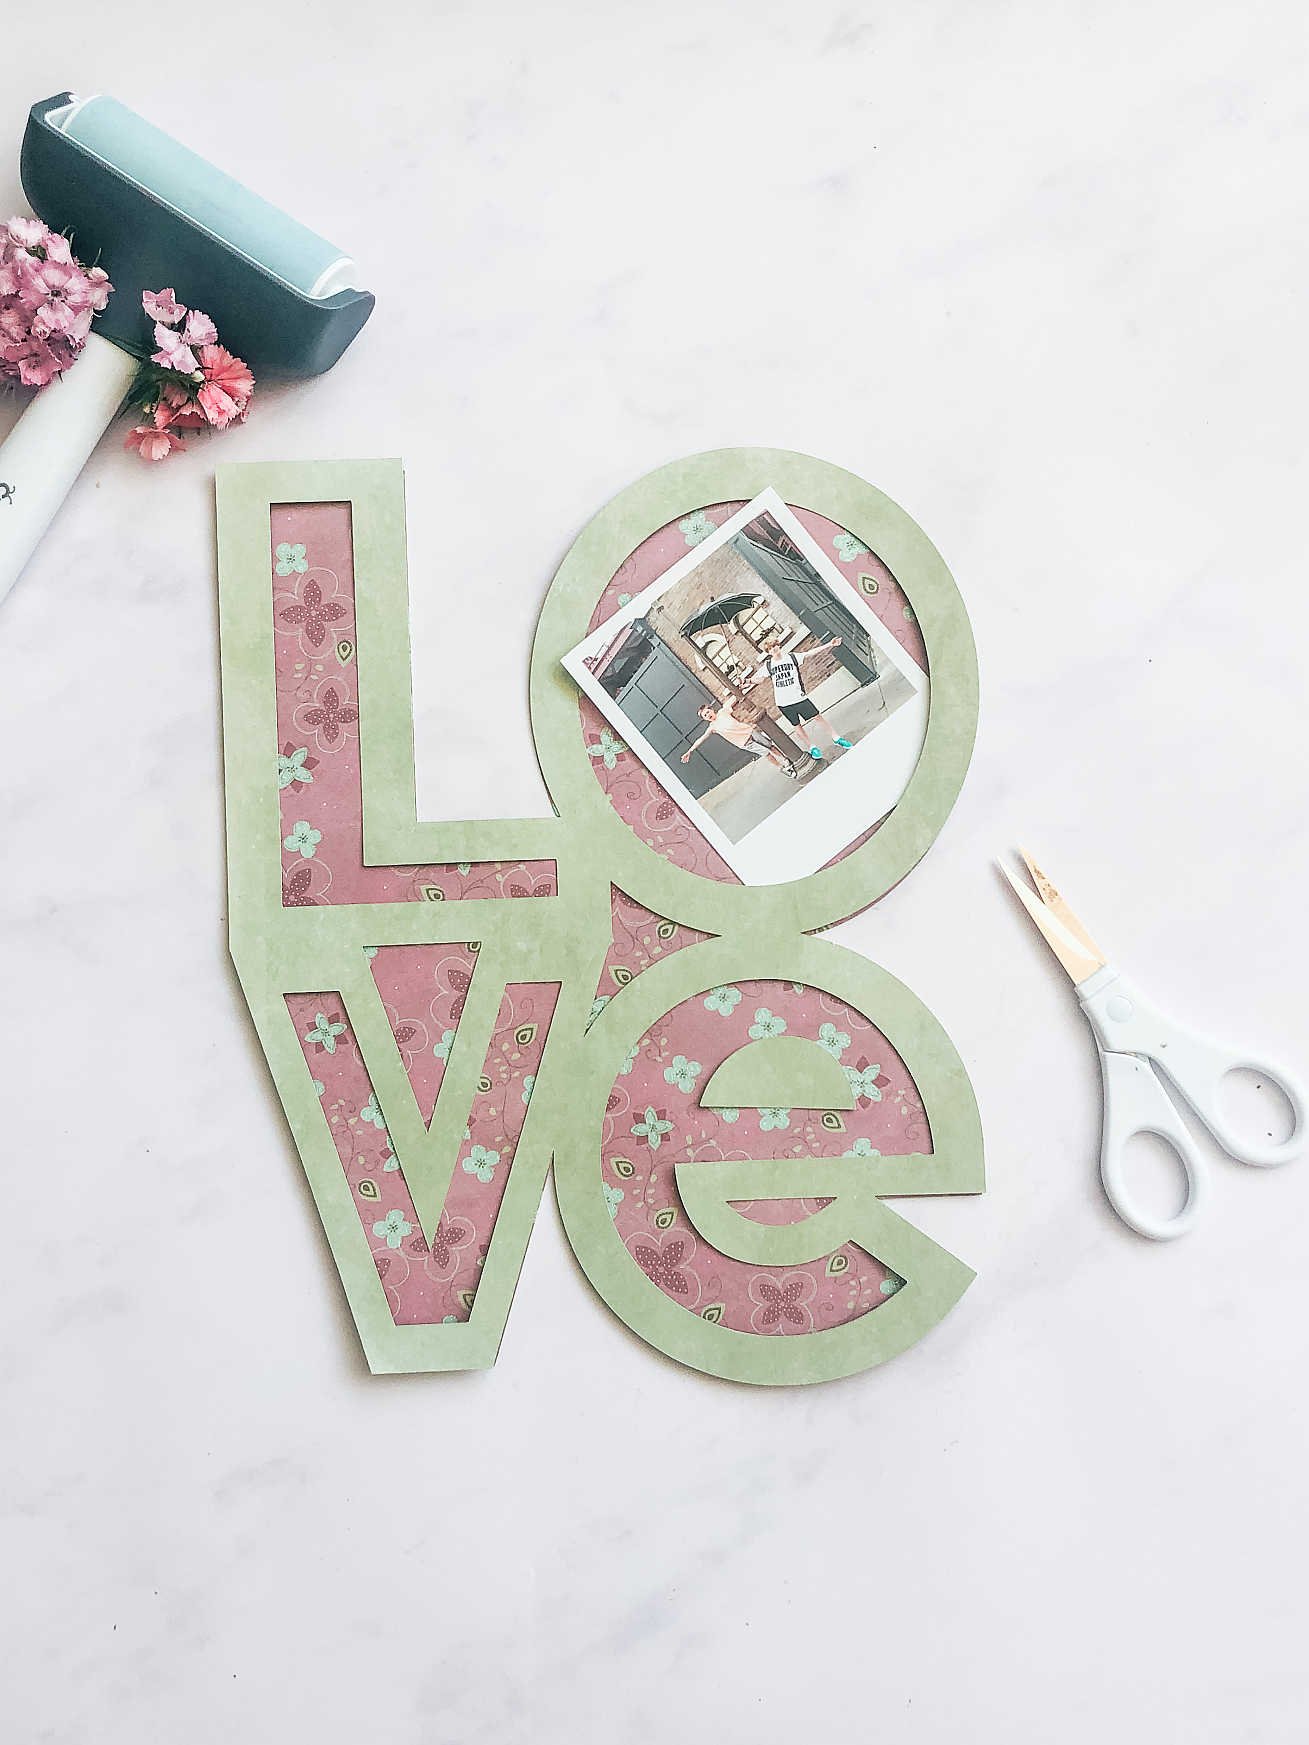
How To Back A Your Scrapbooking File With Separate Backgrounds And Patterns.
Backing a cut file with multiple images is a slightly different process and takes additional steps. However, this is still a simple process.
1. Follow steps 1,2 & 3 above.
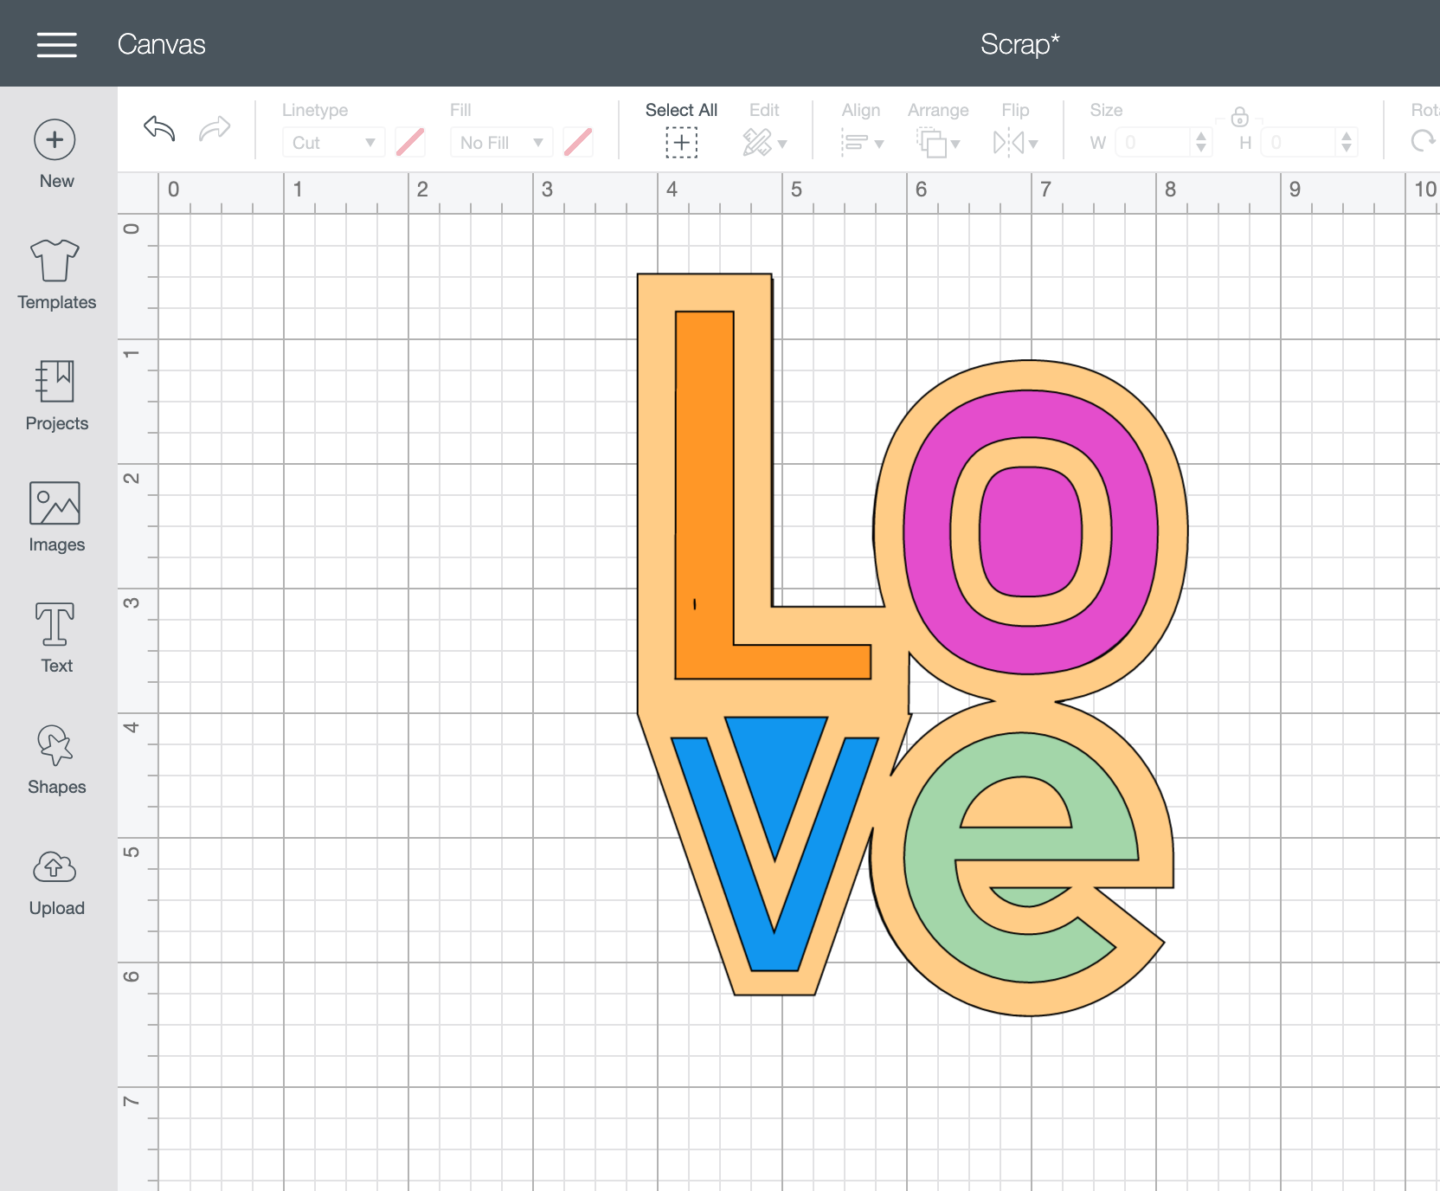
2. Once you created have one solid image by following the steps above. You need to decide how you are going to separate your file to individually. I have chosen to cut each letter of my word in a different paper.
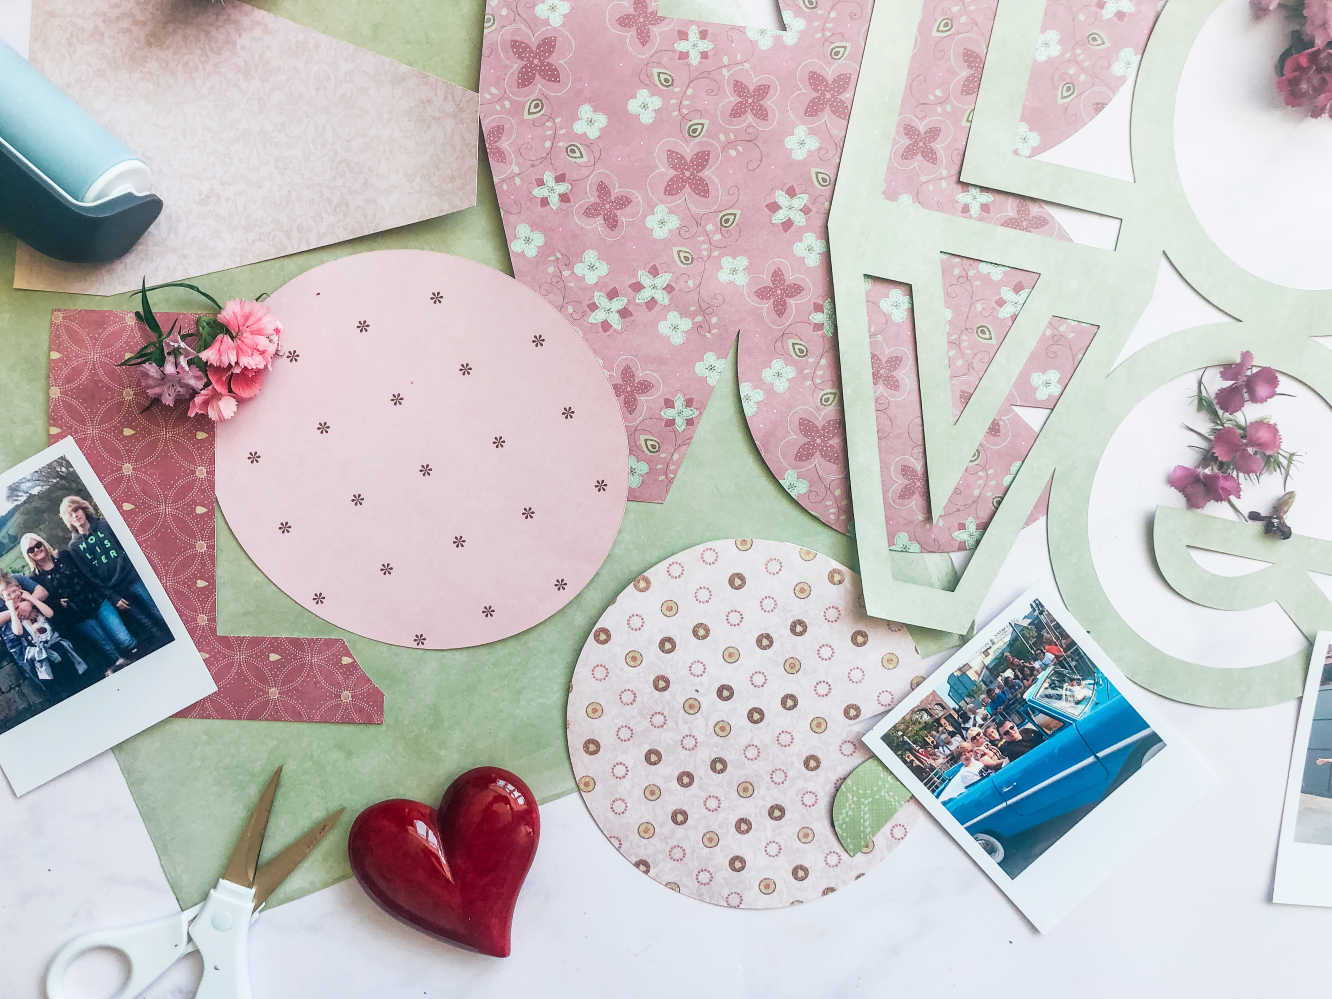
3. Decided on the first letter you want to use to back your cut file and choose a shape from the left hand shape bar hovering it over the area you want to cut out. I use circles for rounded shapes and also squares for shapes with more solid edges.
4. Now, right click and select slice to slice out your image from the solid background. Once you have your cut out shape recolour it, thus it will cut separately when you send it to cut.
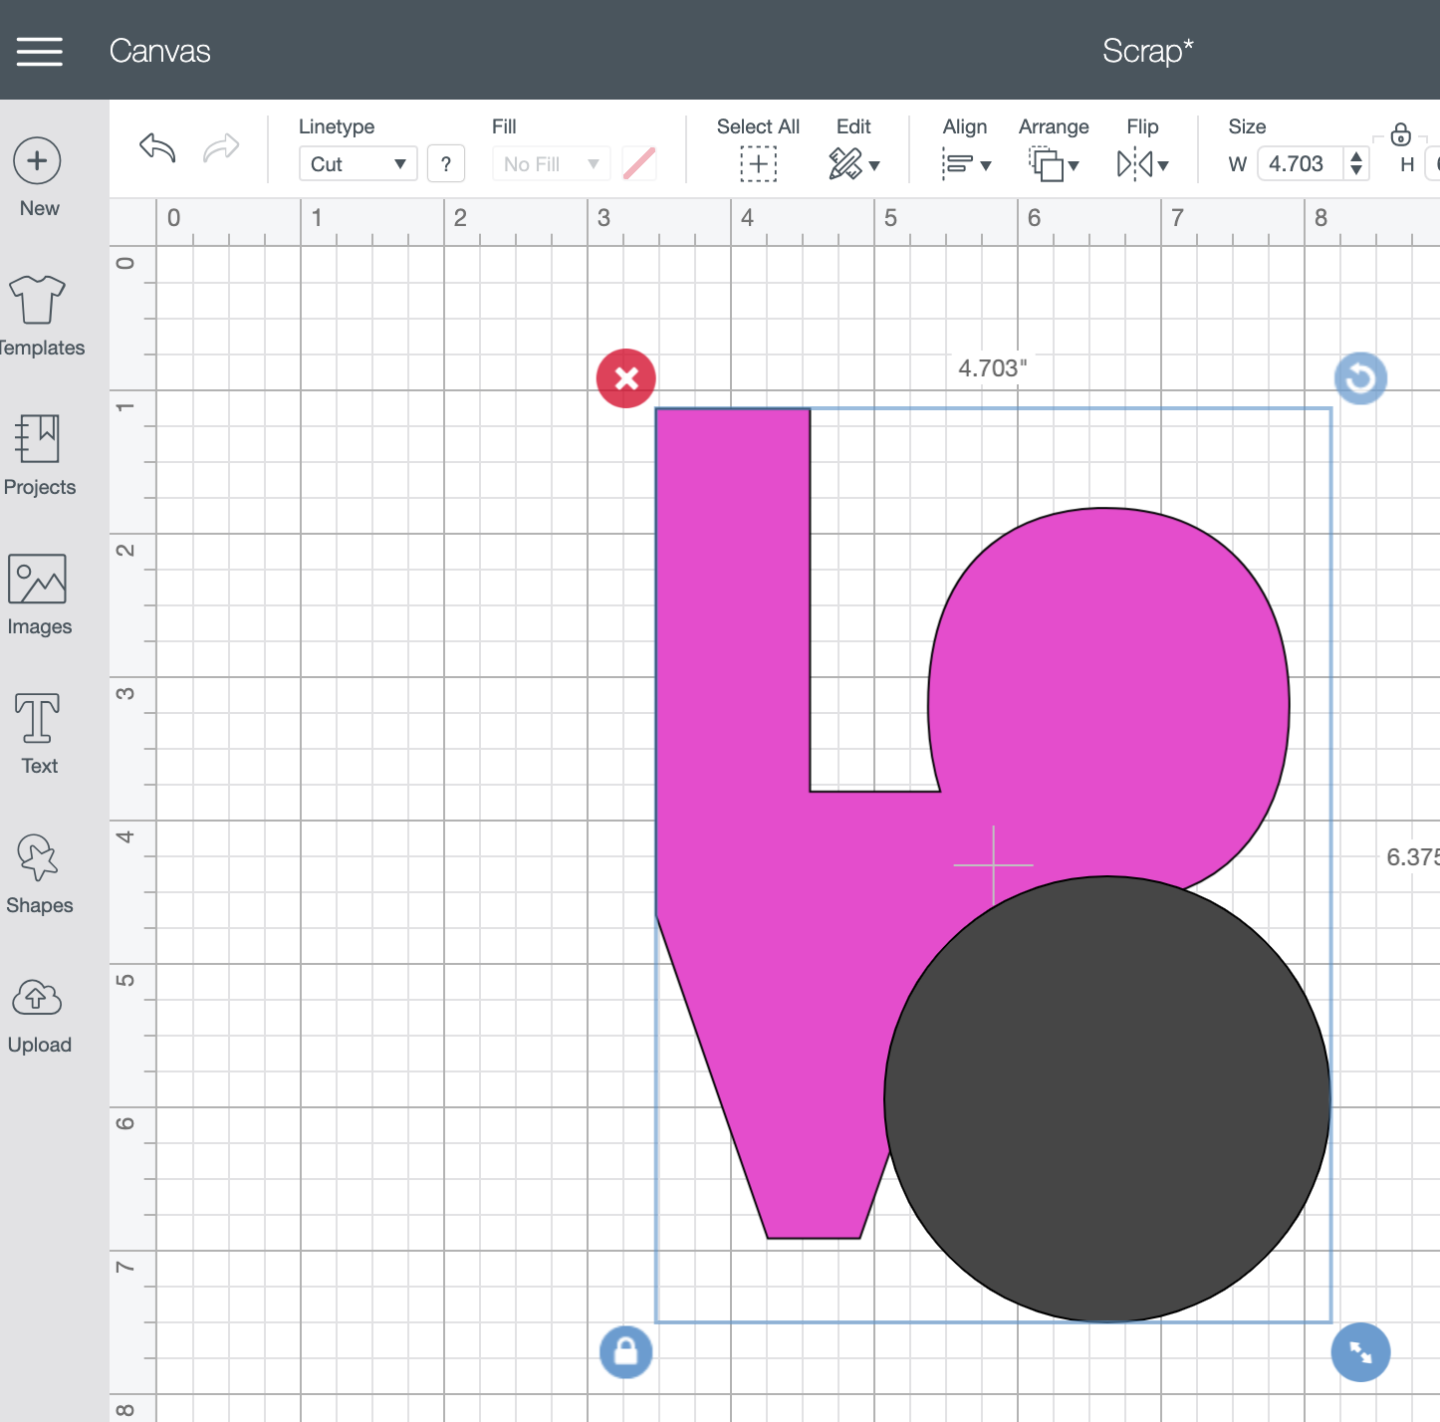
5. Keep going until you have all of your chosen shapes sliced out ensuring they are all different colours.
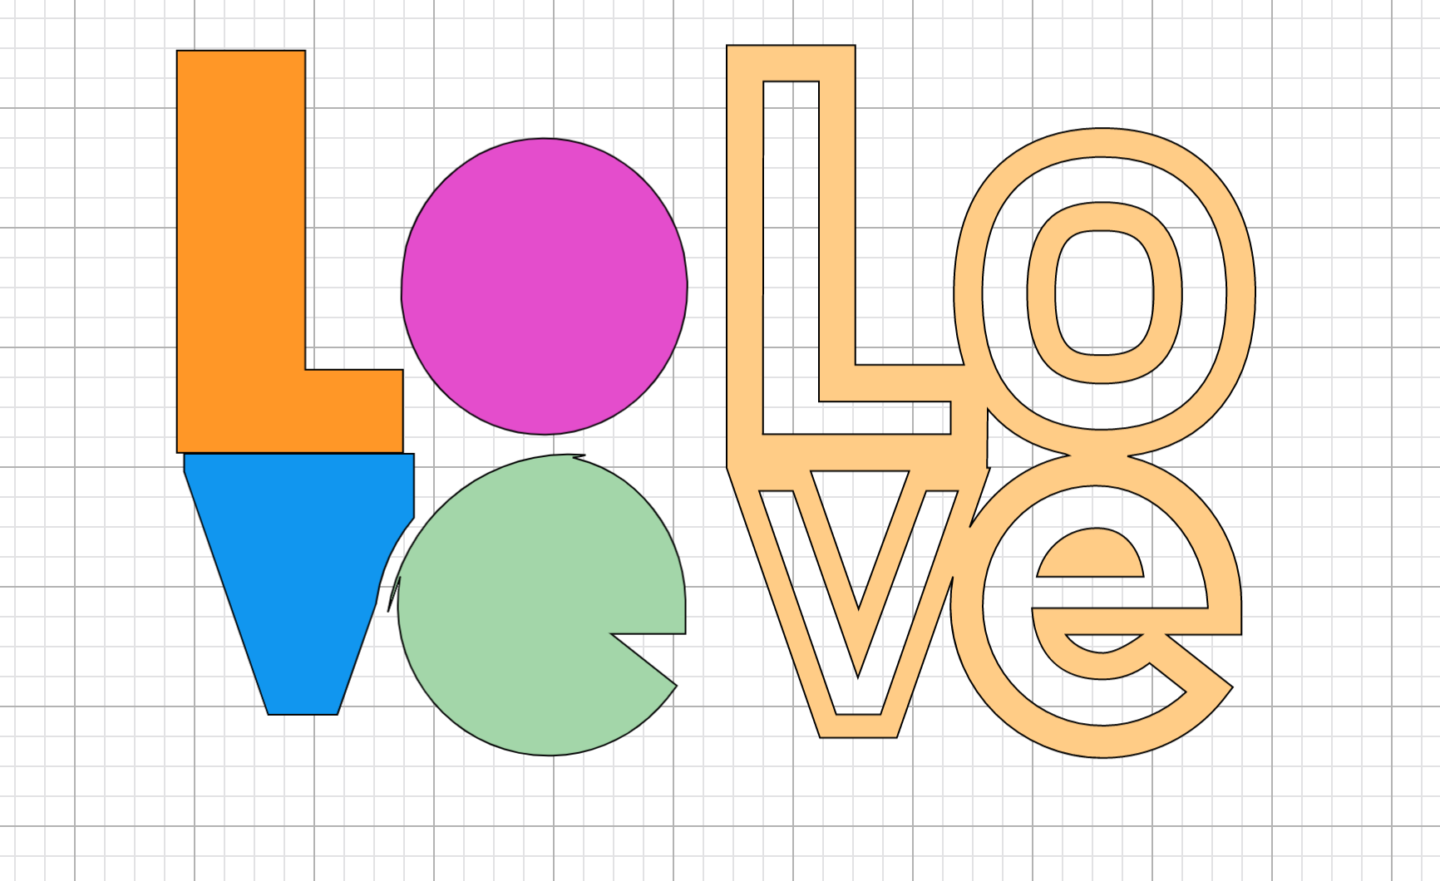
6. Lastly check the images fit together by laying your cut file over the top of the shapes. When you are happy with the size send to cut.
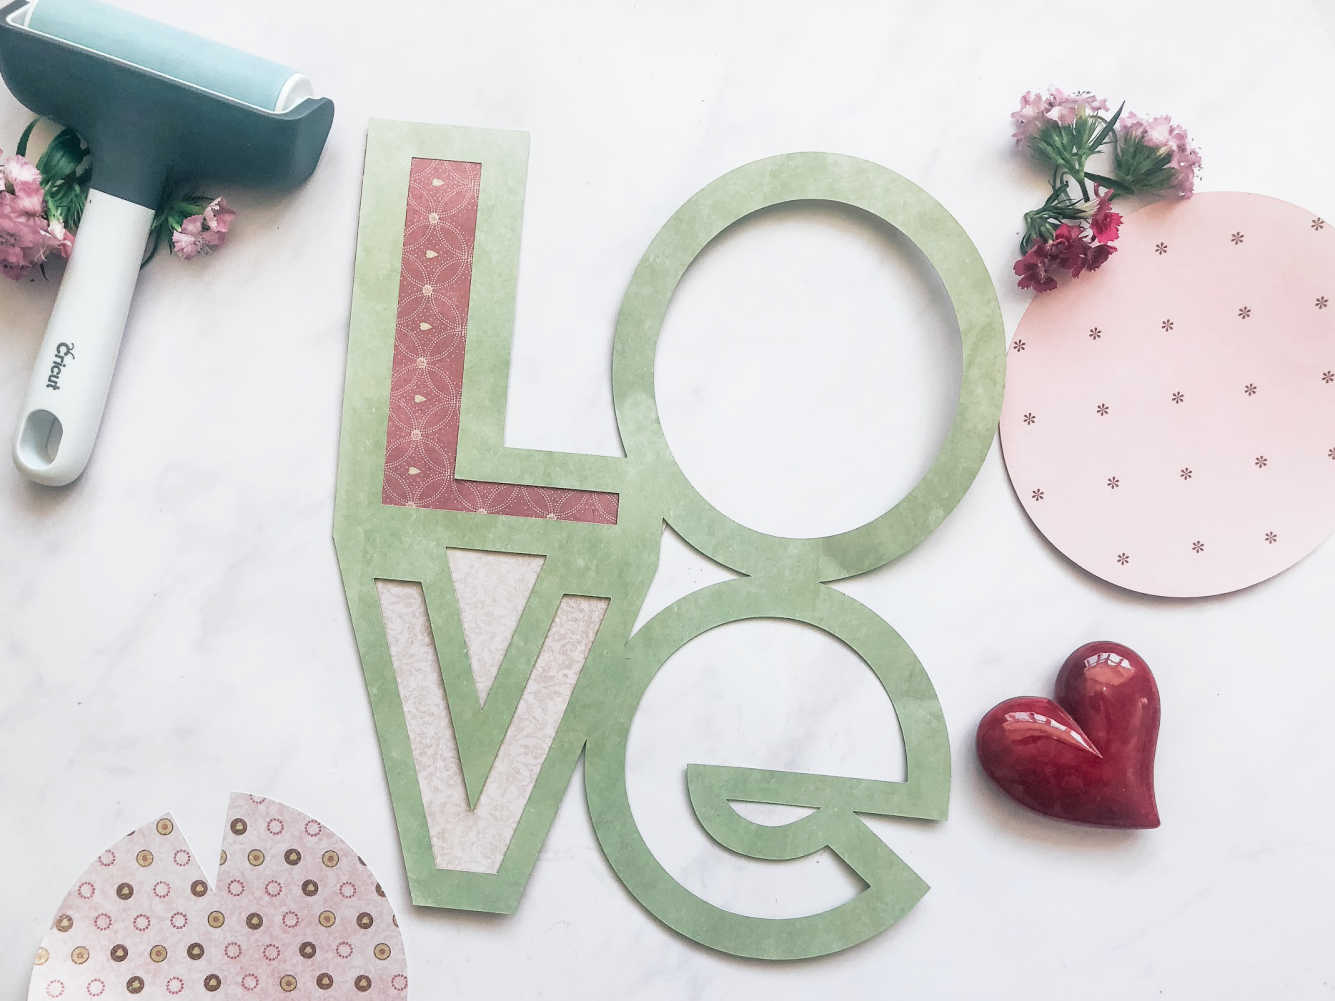
7. Once your shapes are cut out you can start to build your scrapbook page. Use double sided craft tape to attach your backings to the cut file.

More Cricut Paper Cutting Inspriation And Tutorials.