If you are a regular here you will know that alphabets are my thing, I have dozens of free Alphabet and Number SVG files all designed for different occasions and holidays. And all perfect for creating cards, scrapbooking layouts and gifts. Thus today I want to share How To Make Split Monogram Letters And Numbers In Cricut Design Space, because not only is it super easy, split monogram letters look amazing.
They also work perfectly with my alphabet fonts, and offering you a choice of themes to really personalise cards and gifts. So if there is anything you think I am missing please do pop me a line and I will see if I can design and get it started.

This post may contain affiliate links. Which means I may receive a small commission if you click a link and purchase something that I have recommended at no extra cost to yourself. As an amazon, Cricut and Glowforge associate, I earn from qualifying purchases.
What You Will Find Here
What Is A Split Monogram?
A split monogram is a letter that has been split in two and personalised. How you personalise your monogram letter totally up to you, however it could be to create a themed piece if art, add a name for a card or scrapbooking layout or use with Glowforge to create a hanging gift for a tree decoration or keepsake.

Project Ideas For Split Monogram Letters And Numbers
- Paper Cut Letters And Words
- Themed Parties
- Shaker Cake Toppers
- Monogram Cards
- T shirts

How To Make A Split Letters Or Numbers In Cricut Design Space
Upload Your Themed Letters In Cricut Design Space
To create your Split Monogram font firstly upload a letter or number of your choice to Cricut Design Space. To upload click upload in the bottom left hand corner, you can now choose either the SVG or PNG version of the letter. I also find SVGs are quicker and easier to uploading Cricut Design Space.
How To Split The Letters Or Numbers To Create A Monogram In Cricut Design Space
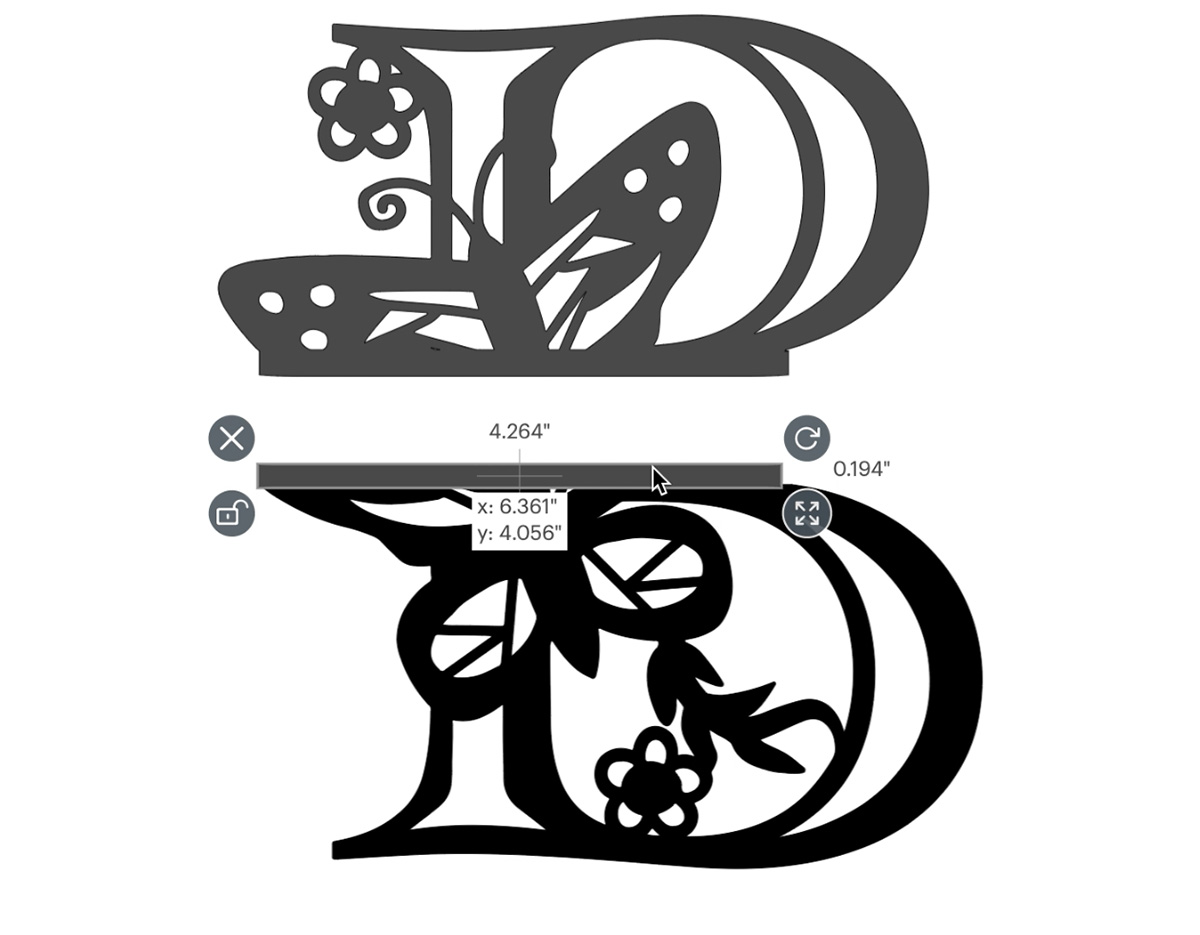
Once uploaded choose a square from shapes and drag it larger by clicking on the arrow on the corner, remember you need to cover half of your letter.

Now ensure you are splitting the letter exactly in half, before slicing the square into the letter. You will be left with two halves and can discard any excess. If you make a mistake click undo in the top left corner and try again.

Create An Edge On Your Split Monogram
Once you have two halves you will also want to create an edge or shelf to hold your words and also create a finish to the split monogram letter. To create this choose a square from the shapes bar, click on the padlock to unlock the square.
Now drag the square into a long oblong shape, you can see in the image below I have sized it to fit my shape perfectly. Once you are happy duplicate the oblong to also use on the bottom and size to fit the bottom of the letter.
Weld The Letters Together To Create A Monogram Letter
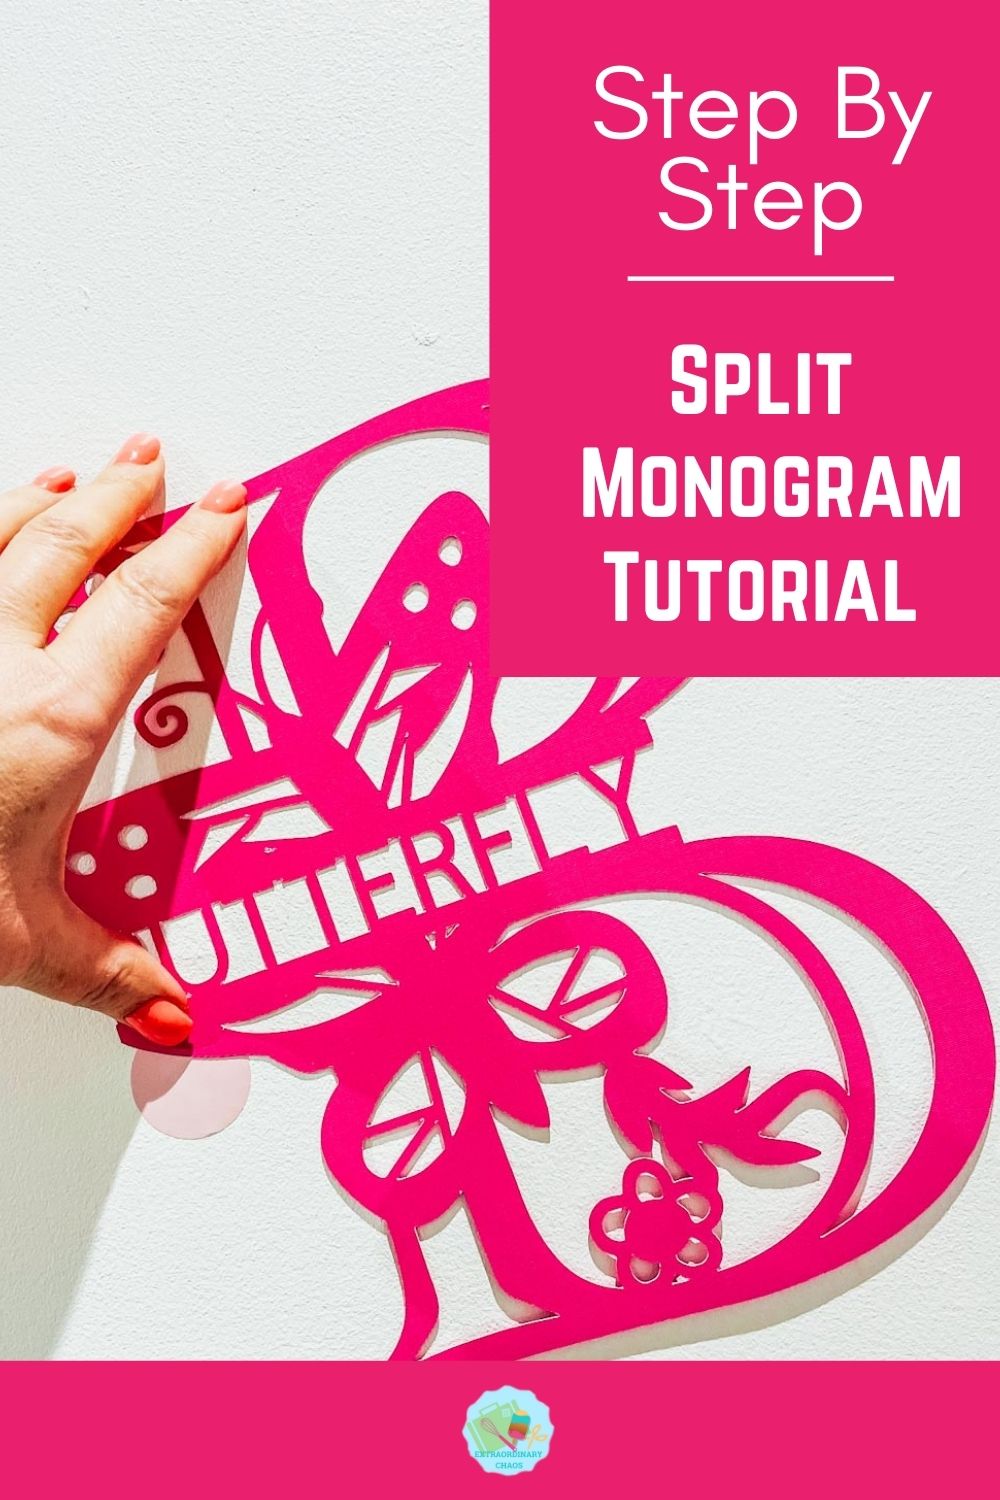
You will now need to weld the letters together. I suggest welding both halves separately, this gives you more flexibility when adding letters and words to personalise you’re split monogram. To weld, simply right click and drag over the images and click weld in the bottom right hand corner.
To add your letters and words simply select the text tool in the left hand bar. Type a name or word and choose a font. You will need to size this to fit between both halves of your monogram letters, I find using all capitals works betters for sizing.

Additionally when you do this ensure the top and bottom letters line up perfectly before right clicking and welding together. (You will find weld in the bottom right bar)
How To Get My SVG Alphabet and Number Files For Cricut And Glowforge
Click the image below to get your free downloadable SVG/PNG Alphabet letter and number files and follow these instructions to add to Cricut Design Space if you are using you Cricut Machine. Don’t forget to turn off any pop up blockers, and if your email doesn’t come through check your spam folder. Also don’t forget, if you are already a subscriber check the members area on the Alphabet page and the files are ready for you there. Note if you are using Glowforge you need SVG files to cut the image out of wood or acrylic. Or Png or SVG to engrave.

If You’re Having Problems?
Check out my trouble shooting page, hopefully it will also answer any questions you may have.
Tips And Advice For Using Your Downloads For Cricut
This alphabet is also perfect to make cards and cake toppers with your Cricut. Check out my guides below.
- Cricut Design Space Guide
- How To Slice And Weld In Cricut Design Space
- How to upload to Cricut Design Space
- Using Iron On Vinyl
- Where Else To Get Free SVG Files
Also please do pop over to TikTok or Instagram, and give me a follow and if you make a project tag me! I love seeing everyone else’s makes and chatting crafting. I could do that all day! This is also where I share videos of my makes.

How To Make A Split Monogram In Cricut Design Space
Step by step how To make a Split Monogram In Cricut Design Space, and free letters and number themed fonts to create custom monograms.
Materials
- Card Stock
Tools
- Cricut Cutting Mat
- Weeding Tools
- Brayer
- Cricut Machine
Instructions
- To create your Split Monogram font firstly upload a letter or number of your choice to Cricut Design Space. To upload click upload in the bottom left hand corner, you can now choose either the SVG or PNG version of the letter. I also find SVGs are quicker and easier to uploading Cricut Design Space.
- Once uploaded choose a square from shapes and drag it larger by clicking on the arrow on the corner, remember you need to cover half of your letter.

- Now ensure you are splitting the letter exactly in half, before slicing the square into the letter. You will be left with two halves and can discard any excess. If you make a mistake click undo in the top left corner and try again.

- Once you have two halves you will also want to create an edge or shelf to hold your words and also create a finish to the split monogram letter. To create this choose a square from the shapes bar, click on the padlock to unlock the square. Now drag the square into a long oblong shape, you can see in the image below I have sized it to fit my shape perfectly. Once you are happy duplicate the oblong to also use on the bottom and size to fit the bottom of the letter.
 You will now need to weld the letters together. I suggest welding both halves separately, this gives you more flexibility when adding letters and words to personalise you're split monogram. To weld, simply right click and drag over the images and click weld in the bottom right hand corner.
 - To add your letters and words simply select the text tool in the left hand bar. Type a name or word and choose a font. You will need to size this to fit between both halves of your monogram letters, I find using all capitals works betters for sizing.

- Additionally when you do this ensure the top and bottom letters line up perfectly before right clicking and welding together. (You will find weld in the bottom right bar).
Notes
Project Ideas For Split Monogram Letters And Numbers
Paper Cut Letters And Words
Themed Parties
Shaker Cake Toppers
Monogram Cards
T shirts
Recommended Products
As an Amazon Associate and member of other affiliate programs, I earn from qualifying purchases.


This does not have to do with making a split Monogram. I am in love with two animals. Flamingos and Llamas. In fact for Christmas I decorate one tree with both animals and call it my Llamingo tree. So since you have Butterfly Alphabet can you do a Flamingo and a Llama Alphabet, Not the two animals together but two separate Alphabets. I also love Gnomes. I have your Valentine Gnome Alphabet but one of just Gnomes would be awesome.
Hi Judi of course I will add them to the list, it will take a while as the alphabets take ages to design but will get started. Thanks Sarah x