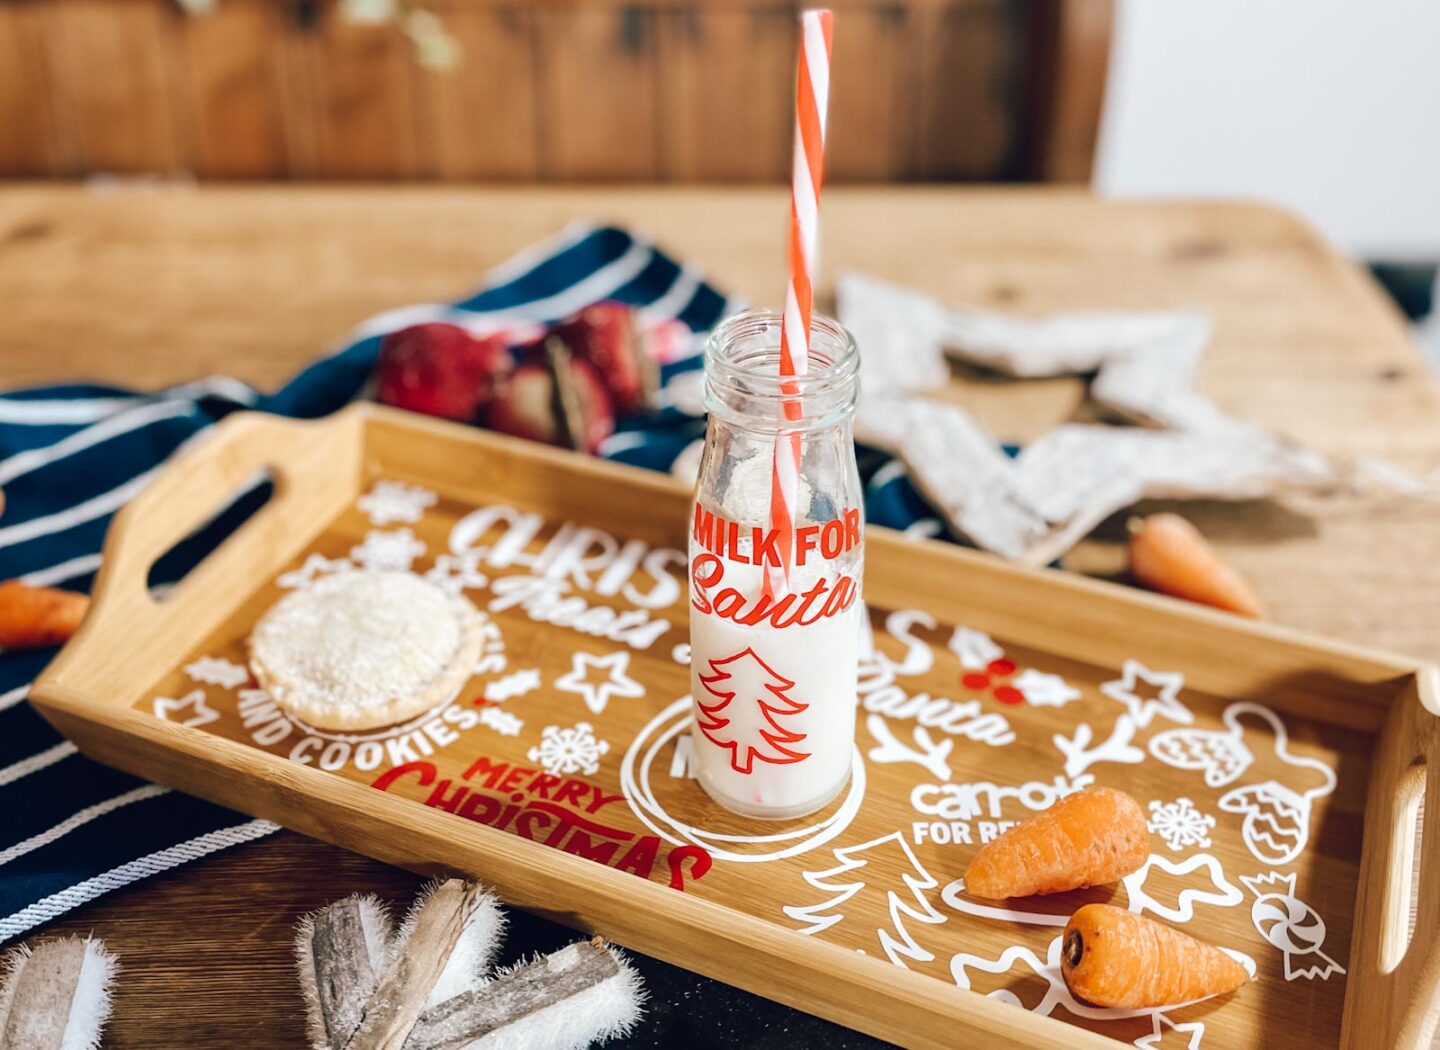
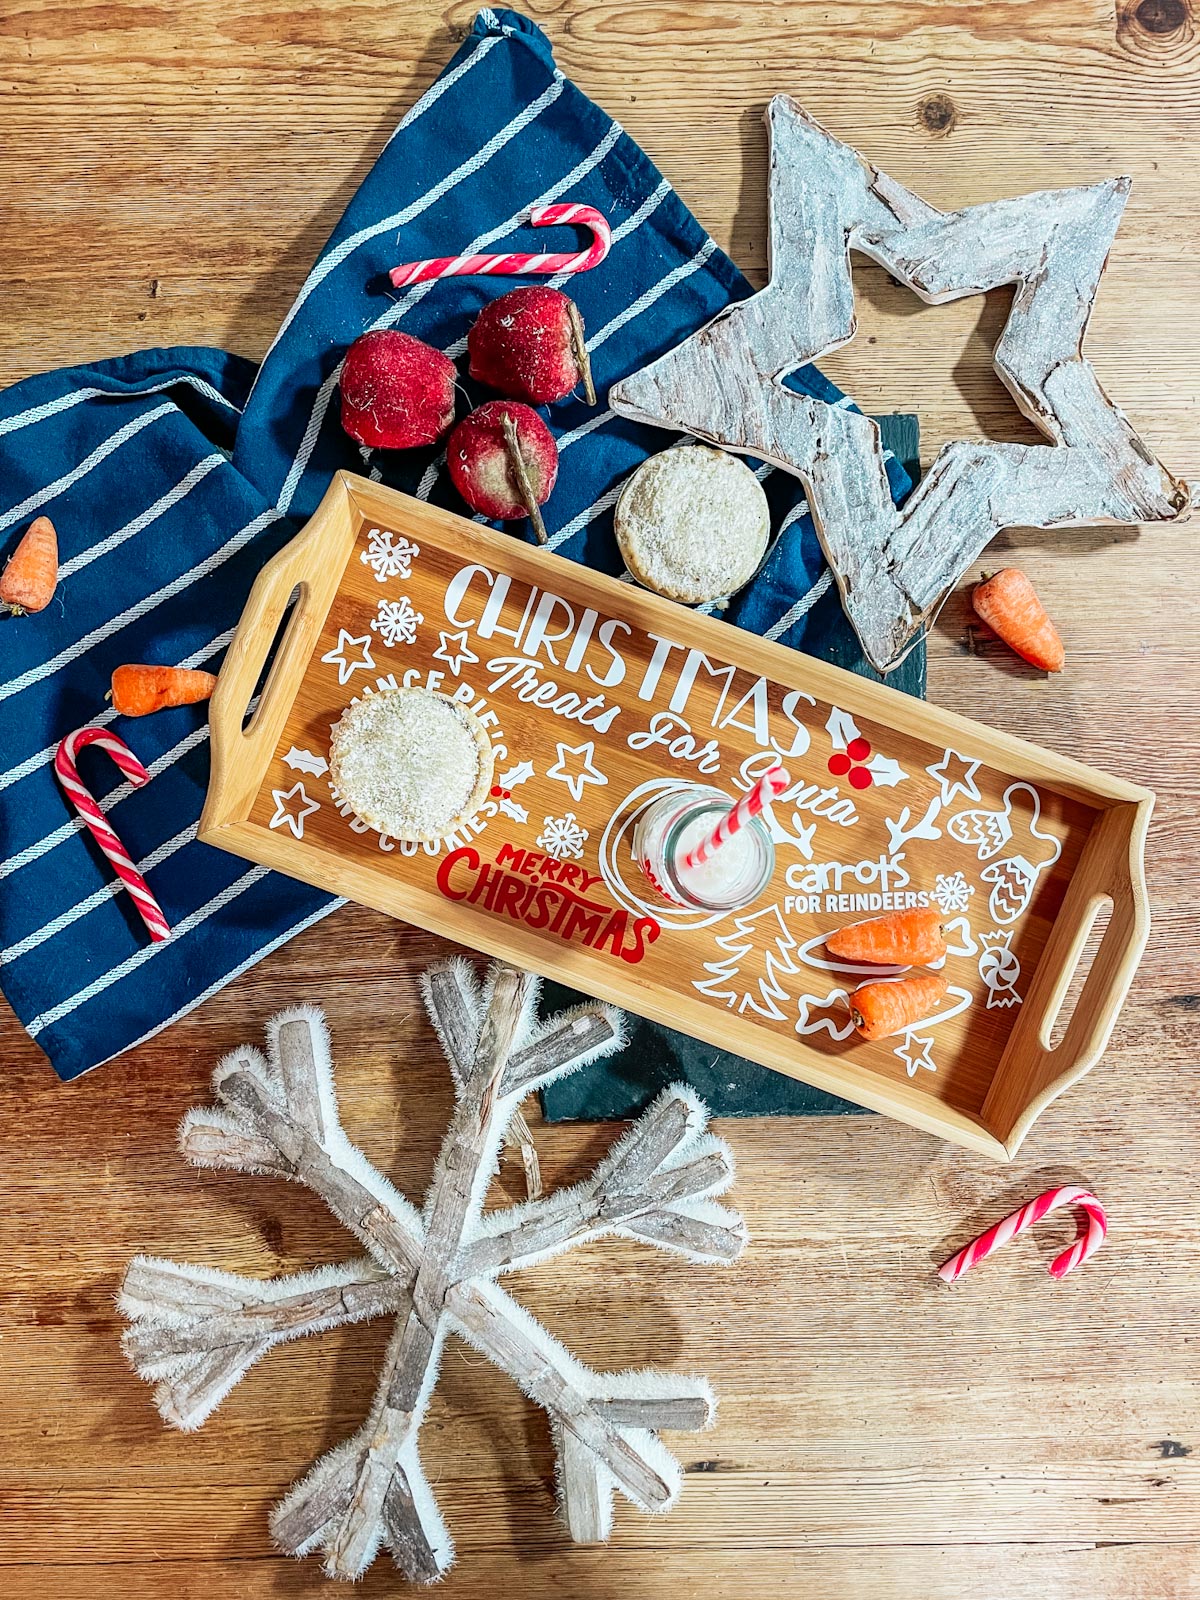
It’s nearly time for the big guy to visit and we need to be ready right? My Free Cookies For Santa SVG is perfect to make A Cute Santa Tray and bottle to leave out for Santa Clause on Christmas Eve.
This is a tradition we have followed ever since the boys were born, and one that even though the boys are older, and roll their eyes at me I still do!
You can’t let the Christmas Magic die can you? This mum isn’t going down without a fight, Christmas is ageless. Although I will let you into a little secret, we leave Bailey’s out for Santa! I figure by the time he gets to our house he will need it. Also check out my Magic Key post, to get your own Magic Santa key for Christmas Eve.

This post may contain affiliate links. Which means I may receive a small commission if you click a link and purchase something that I have recommended at no extra cost to yourself. Also as an amazon associate, I earn from qualifying purchases.
What You Will Find Here
How To Make A Santa Tray With My Free Cookies For Santa SVG
This post will take you through how to make the tray, with free Cookie For Santa SVG, PNG to make you very own festive treat tray for the Elves to leave on Christmas Eve. There is even space for some milk for Santa and carrots for the reindeers. This makes most the loveliest family Christmas tradition and one that brings so many memories.
If you are a fan of Elf on the Shelf culture then check out all of my Elf crafts, I have lots of ideas and free Elf printables including countdown stickers, money and Elf travel stamps.
To Make Your Santa Treat Tray You Will Need
- White Cricut Permanent Vinyl
- Tray (Mine is from B&M Bargains)
- Small Milk Bottle
- Red Permanent Cricut Vinyl
- Cricut Maker
- Cricut Brayer
- Scraper
- Transfer Tape
- Weeding Tool
Step By Step How To Make Your Santa Tray And Milk Bottle
Uploading To Cricut Design Space
Upload your Cookies For Santa SVG/PNG files to Cricut Design Space and size to fit your tray. You are better using the SVG file for this project as all the files come grouped together so can be moved. To ungroup simply select the file and click ungroup on the top on the right hand bar.
The file is all currently one colour, however if you ungroup your svg, you can move certain elements away to cut in red, I did this with the Merry Christmas and holly berries.
However before you send the project to cut YOU MUST WELD IT TOGETHER this will keep all the elements in the correct place rather than scrambling and separating them.
If your tray is a different shape you will need to ungroup your SVG and rearrange the elements to the correct shape. If you need a square, or circle, use a shape from the shape bar on the left hand side as a guide. You can discard this once you are happy. But do remember to weld together again before cutting.
When you are happy with the shape of your Cookies For Santa SVG elements weld together, size it so it fits on your tray and send to cut.
Cutting Your Santa Treat Tray SVG Design
When you send your project to cut use the permanent vinyl setting on more (I chose more as some of the cuts are intricate). If you are using a Cricut Mat use a brayer to ensure the vinyl is well adhered.
Weeding Your Cookies For Santa Tray SVG Design
Once cut, carefully weed your vinyl, this is the most time consuming part. You can either weed as one whole piece, or separate elements and build as a jigsaw on your tray.
I chose to weed as one piece, but make sure you weed out all the little bits. I find it useful to have a copy of the image closely so I can keep referring to it. Also light helps, I love my bright pad for this.
If you are using two colours keep these separate, but work on transferring the larger file first.
Once weeded cut a piece of Cricut transfer tape and carefully lay over your weeded elements, and using your scraper, transfer the images from the contact sheet to the transfer tape, ready to transfer to your tray.

Transferring Your Santa Tray SVG
Now ensure your tray surface and bottle are clean and free of dust and oil. I use a lint roller to make sure its clean. My tray was a bamboo tray which I found harder to adhere because its a bit oilier. However I did manage it, it just took a lot of patience.

Lay the transfer paper in place, now use your brayer and scraper to rub out all of the bubbles and adhere the vinyl cookies for Santa SVG to the tray. Lifting the transfer paper a bit at a time, I find it much easier to cut it off in sections as it lifts away to prevent it sticking back down.
Now you can add the red layer in the same way, once the tray is finished add the milk for Santa and star to your bottle and leave for 24 hours.

How To Get My Cookies For Santa SVG To Use With Cricut?
Click here or the image below to get your free downloadable Cookies For Santa SVG/PNG files and follow these instructions to add to Cricut Design Space. However, don’t forget to turn off any pop up blockers.

More Christmas Holiday Craft Ideas And Projects
- Elf Alphabet
- Santa Footprints Stencil
- Nativity Alphabet
- Mickey Christmas Crackers
- Printable Snowmen
- Winter Wonderland Alphabet
- Snowman Alphabet

Tips And Advice For Using Your Cookies For Santa SVG/PNG, Free Download.
- Cricut Design Space Guide
- How To Slice And Weld In Cricut Design Space
- How to upload to Cricut Design Space
- Using Iron On Vinyl
- Where Else To Get Free SVG Files
Also please do pop over to Instagram, and give me a follow and if you make a project tag me! I love seeing everyone else’s makes and chatting crafting. I could do that all day!


Cookies For Santa Tray Snd Free SVG
Free Cookies For Santa SVG To Create A Cute Santa Tray to leave cookies and mince pies and milk for Santa and carrots for the reindeers
Materials
- White Cricut Permanent Vinyl
- Tray (Mine is from B&M Bargains)
- Small Milk Bottle
- Red Permanent Cricut Vinyl
Tools
- Cricut Maker
- Cricut Brayer
- Scraper
- Transfer Tape
- Weeding Tool
Instructions
- Uploading To Cricut Design Space The file is all currently one colour, however if you ungroup your svg, you can move certain elements away to cut in red, I did this with the Merry Christmas and holly berries.
However before you send the project to cut YOU MUST WELD IT TOGETHER this will keep all the elements in the correct place rather than scrambling and separating them.
If your tray is a different shape you will need to ungroup your SVG and rearrange the elements to the correct shape. If you need a square, or circle, use a shape from the shape bar on the left hand side as a guide. You can discard this once you are happy. But do remember to weld together again before cutting.
When you are happy with the shape of your Cookies For Santa SVG elements weld together, size it so it fits on your tray and send to cut. - Cutting Your Santa Treat Tray SVG Design
When you send your project to cut use the permanent vinyl setting on more (I chose more as some of the cuts are intricate). If you are using a Cricut Mat use a brayer to ensure the vinyl is well adhered. - Weeding Your Cookies For Santa Tray SVG Design
Once cut, carefully weed your vinyl, this is the most time consuming part. You can either weed as one whole piece, or separate elements and build as a jigsaw on your tray.
I chose to weed as one piece, but make sure you weed out all the little bits. I find it useful to have a copy of the image closely so I can keep referring to it. Also light helps, I love my bright pad for this.
If you are using two colours keep these separate, but work on transferring the larger file first.
Once weeded cut a piece of Cricut transfer tape and carefully lay over your weeded elements, and using your scraper, transfer the images from the contact sheet to the transfer tape, ready to transfer to your tray.
- Transferring Your Santa Tray SVG
Now ensure your tray surface and bottle are clean and free of dust and oil. I use a lint roller to make sure its clean. My tray was a bamboo tray which I found harder to adhere because its a bit oilier. However I did manage it, it just took a lot of patience. Lay the transfer paper in place, now use your brayer and scraper to rub out all of the bubbles and adhere the vinyl cookies for Santa SVG to the tray. Lifting the transfer paper a bit at a time, I find it much easier to cut it off in sections as it lifts away to prevent it sticking back down.
Now you can add the red layer in the same way, once the tray is finished add the milk for Santa and star to your bottle and leave for 24 hours.