Do you ever need a last minute card and then just struggle for inspiration? I am going to show you a quick and easy tutorial, How To Make Cricut Cards In 6 Easy Steps with card stock, Cricut Design Space and slicing and welding. Honestly this is one of those, “wish I had thought of it years ago” moments.
I adore making cards, but sometimes overthink it, when in fact you just want something quick and easy, and I mean this is a super quick craft. In fact I challenge you to time yourself, I am guessing you can do this in under 5 minutes. (The design space bit) Lets give it a hashtag the #5minutecardchallenge and if you manage it share and tag me I would love to see your Quick Cricut Cards.
Now I can’t take all the credit for this one, I just made it my own. It all started when my good pal and business partner Donna from Like Love Do and Cruising For All made a similar card for Jack for his 21st, then I next time I needed a card I thought I would have a go.

This post may contain affiliate links. Which means I may receive a small commission if you click a link and purchase something that I have recommended at no extra cost to yourself. As an amazon, Cricut and Glowforge associate, I earn from qualifying purchases.
What You Will Find Here
How To Make Cricut Cards With Slice And Weld
This is a super easy process, you can use any image from Cricut Design Space, or any of my free files, alphabet and numbers which is a great way of making age or personalised cards in Cricut. And the choice is yours you can choose from loads of custom and personalised greeting card and make your own card designs.
What’s more you will not need a Cricut card mat, Cricut insert cards or cutaway cards. This is a quick and easy way to make your very own unique birthday cards, Christmas cards or any other theme of card you choose.
What Do You Need To Make Cards With Cricut?
- A Cricut Machine either a Cricut Maker or Cricut Explore Air or Cricut Joy
- A Fine Point Blade
- Weeding Tools
- Brayer
- Cricut Design Space
- Glitter Card Stock
- Greeting Card Blanks, I use these Craft Uk 8×8 Cards
- Glue Adhesive, I use Cosmic Shimmer Acrylic Glue or Card stock to make your own
- Cardstock or ready made cards and envelopes
- ?Glitter cardstock
- Scraper Tool
- Cricut Pens (If you want to add to your design)
- Cricut Foil Transfer Tool (If you want to add to your design)

Grab A Square From Cricut Shapes
Go to the left hand bar in Cricut Design Space, and click on the shapes box. You can select and shape you want. But for this project I am going to use a square with rounded corners. This will form the front of the card, and we are going to slice and weld into the square to create our Cricut cutaway card design.
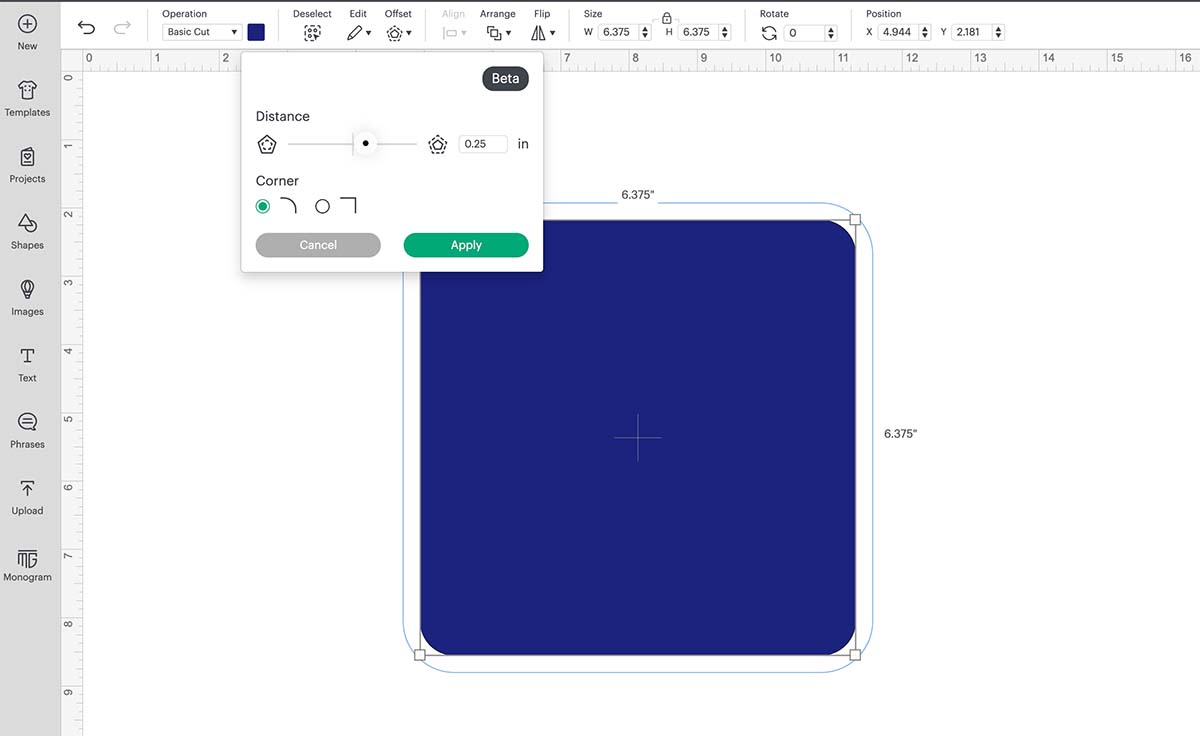
Create An Offset For Your Card Template
Now head to the top menu bar and click offset, I set my offset at 0.25 which is perfect for a card frame. This will create and offset that will form the frame of your card.
Slice The Inner Square From The Outer Square
Once you have your offset, slice the smaller square out of the larger square, this will give you your card frame. To slice select all and either click slice in the bottom right corner, or right click and press slice. You can now delete the rest and just keep your frame.

Choose And Image Or Phrase From Design Space Images Or Upload Your Own SVG Designs To Your Cricut Canvas
You have several options here, you can use your own image, use one of my free SVG files, just head to the Cricut menu at the top of this page.
Or if you have Design Space access choose and image or words or cut files from design space. I chose a happy birthday sunflower, but you can see how many options there are! You can use text, but if it’s a specific word you want try searching in images, there’s so much choice.

Weld And Cut Your Card Front
Position your image so its touching the square border and ensure the alignment is correct, this is very important if you want to your card in once piece. I also added a heart to finish the design.

When you are happy, select all and click weld. You can find weld in the bottom left hand corner. Now you can size your image, my cards are 8×8 so I wanted it to fit just inside. You can see in the image below it is touching the frame at the top and bottom.
Send to cut making sure you use your brayer to attach your card to your cutting mat.

Attach To Your Card
Once cut use Cosmic shimmer glue to attach your top layer card front image cut to your backer card and you have a great easy card made on Cricut in 6 steps.
If you want to back your own backer card, simply use A4 card and create a square slightly larger than the custom card front, deplete this, line up the two squares and weld together. Send to cut, creating a score line to create a fold with your scoring wheel or scoring stylus.
Also, try making personalised cards, to make a personalised card in Cricut type a name, choose a font and add the layer to your card.

More Cricut Tips For Beginners.
Tips And Advice For Using Your Download For Cricut
- Cricut Design Space Guide
- How To Slice And Weld In Cricut Design Space
- How to upload to Cricut Design Space
- Using Iron On Vinyl
- Where Else To Get Free SVG Files
Also please do pop over to Instagram, or Tik Tok and give me a follow and if you make a project tag me! I love seeing everyone else’s makes and chatting crafting. I could do that all day.