I am so excited to share this tutorial for a Magic Flip Wallet; they are the coolest things I used to make with my mum as a little girl. Every week when the milkman collected his money, I stood on the doorstep mesmerised by this magical wallet. I am from creative stock as my mum worked out how to make one, and we made our own Magic Flip Wallets.
Although we used to call them milkman’s wallets, flipping a note from side to side in the crossed ribbons compartment is so much fun. Magic wallets are great to make for magic tricks, spectators will be wowed by any magician flipping a paper bill from one side of the wallet to the other, and you will have them wondering how to make the magic wallet work.

What You Will Find Here
Step By Step How To Make A Magic Flip Wallet
Ok, this will not be good for the milkman to do his collection rounds with; it needs to be waterproof! Although you could make it with Faux Leather? However, you could use themed magic wallets for many things.
What Can A Magic Wallet Be Used For?
- Themed money envelopes, birthday, new baby, Christmas, Easter, Eid, Hanukah the list goes on.
- Mini folding scrapbooks, what a great way to store photos.
- Party invitations
- Wedding Invites
- Themed gift envelopes for travel and theatre tickets.
- Crafting with kids
- Just because they are so cute, who doesn’t want their own magic wallet?

See My Step-By-Step YouTube Video Tutorial

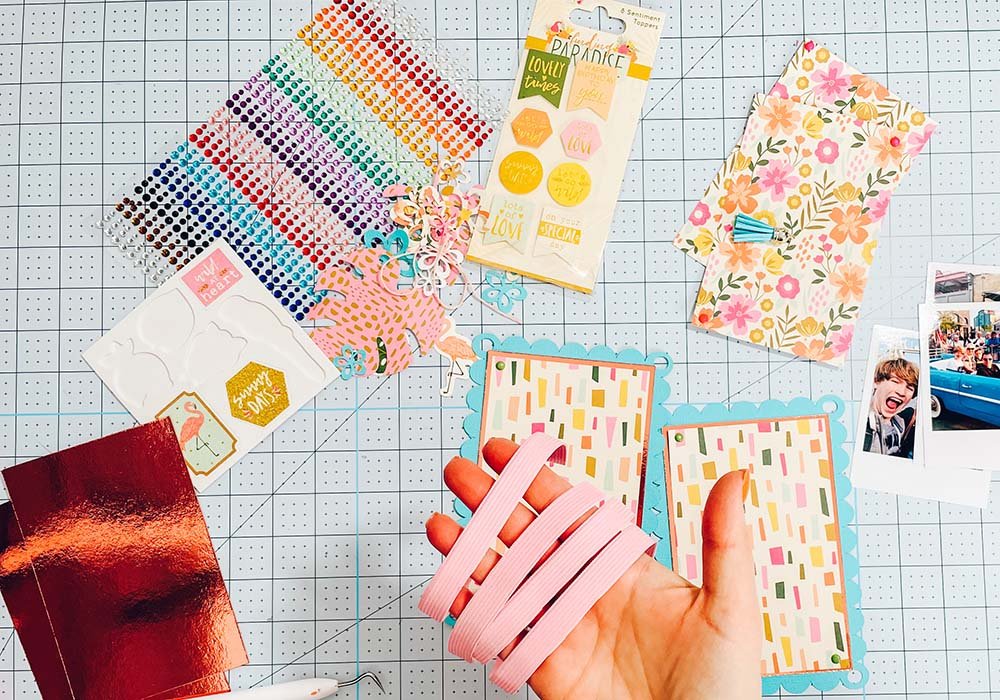
To Make This Magic Flip Wallet You Will Need
- Coloured card stock
- Poster Board (I used the Cricut Metallic Poster Board) or cardboard
- Patterned paper ( I used the Finding Paradise Collection from Craft Label)
- Embellishments (I used flowers from Cricut Design Space, coloured rhinestones, decals from the Finding Paradise collection)
- Key ring tassel and string
- Brads
- Tape Roller
- 24 inches of elastic ( I bought thick pink elastic and cut it to size) you can also use strips of paper or ribbon
- Double sided tape or sticky tape
- Glue gun
- Cricut
- Cutting Mat
- Cricut Design Space
If You Want To Use My Free Magic Wallet Template
You don’t need my template to create this flip wallet; you can use Oblongs. However, if you want my scalloped design, it’s free to download.
Click here or the image below to get your free downloadable Scallop design SVG/png files and follow these instructions to add to Cricut Design Space. Don’t forget to turn off any pop up blockers.
Start By Preparing Your Card
If you are cutting on your Cricut upload the template or choose your own in Cricut images. You can also cut your wallet out by hand.
You Will Need To Prepare
- 2. 7 x 5 inch scalloped oblongs on coloured card
- 2. identical rectangles 6 x 4-inch cut on the poster board
- 4. 5.9 x 3.9-inch oblongs in the patterned paper; these can be all the same or different.
- Cut the elastic or ribbon into four pieces; each must be 7 inches long.
Create the inside design first. Stick the poster board to the scalloped card and layer the pattered card on top using a tape roller.

Next Arrange The Elastic
(Check out my in-post video to see how I did this if you like to see rather than read.) To do this, lay your pieces of cardboard pattern side up (this will be the inside of your magic flip wallet). Now place two elastic strips on the left-hand card at the top and bottom, tucking the right-hand side edge under the bottom of the right-hand card and the left-hand edge underneath its card.
Next, cross two elastics or ribbons over on the right hand card; they must not come into contact with the top and bottom elastics. Tuck the left-hand edges under the right hand card. Flip the right hand elastics or ends of the ribbon under the card. It helps to use paper clips to keep in position and ensure your elastic is taut.

Now carefully flip your cards and glue the elastics or ends of the ribbons into place onto the side of the magic wallet; if you have used paperclips, you can remove them. You now have a magic reversible hinge joint. Each card should have 2 top and bottom elastics on one side and two cross elastics on the other.
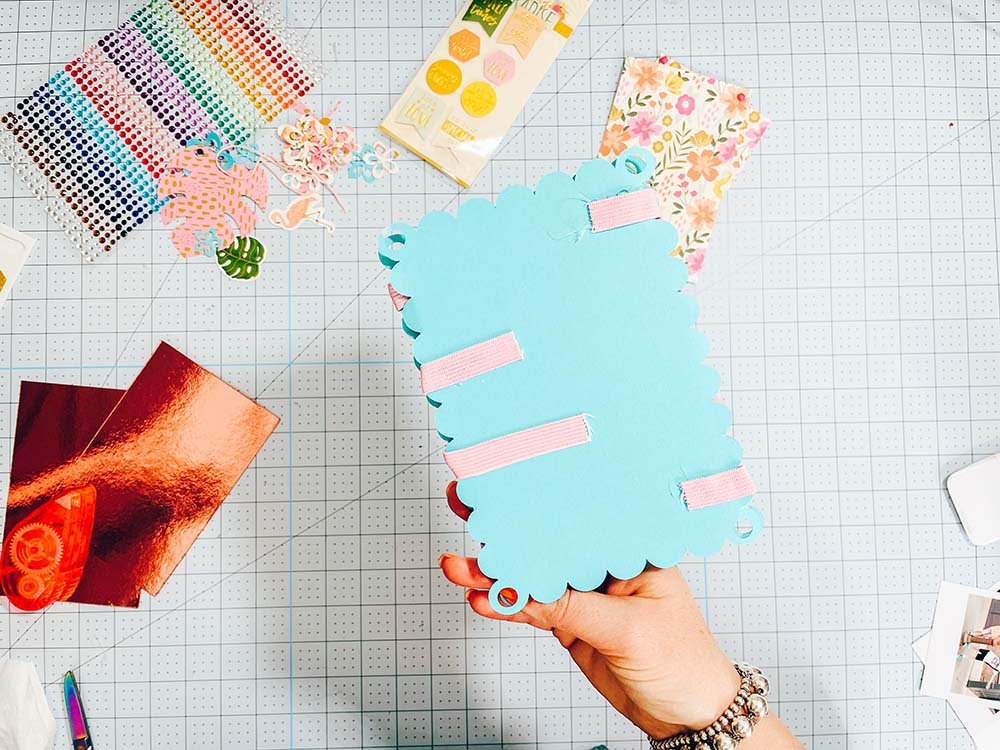
When you flip the cards, you can see you now have a working flip wallet; open it both ways to ensure it works before decorating the front.

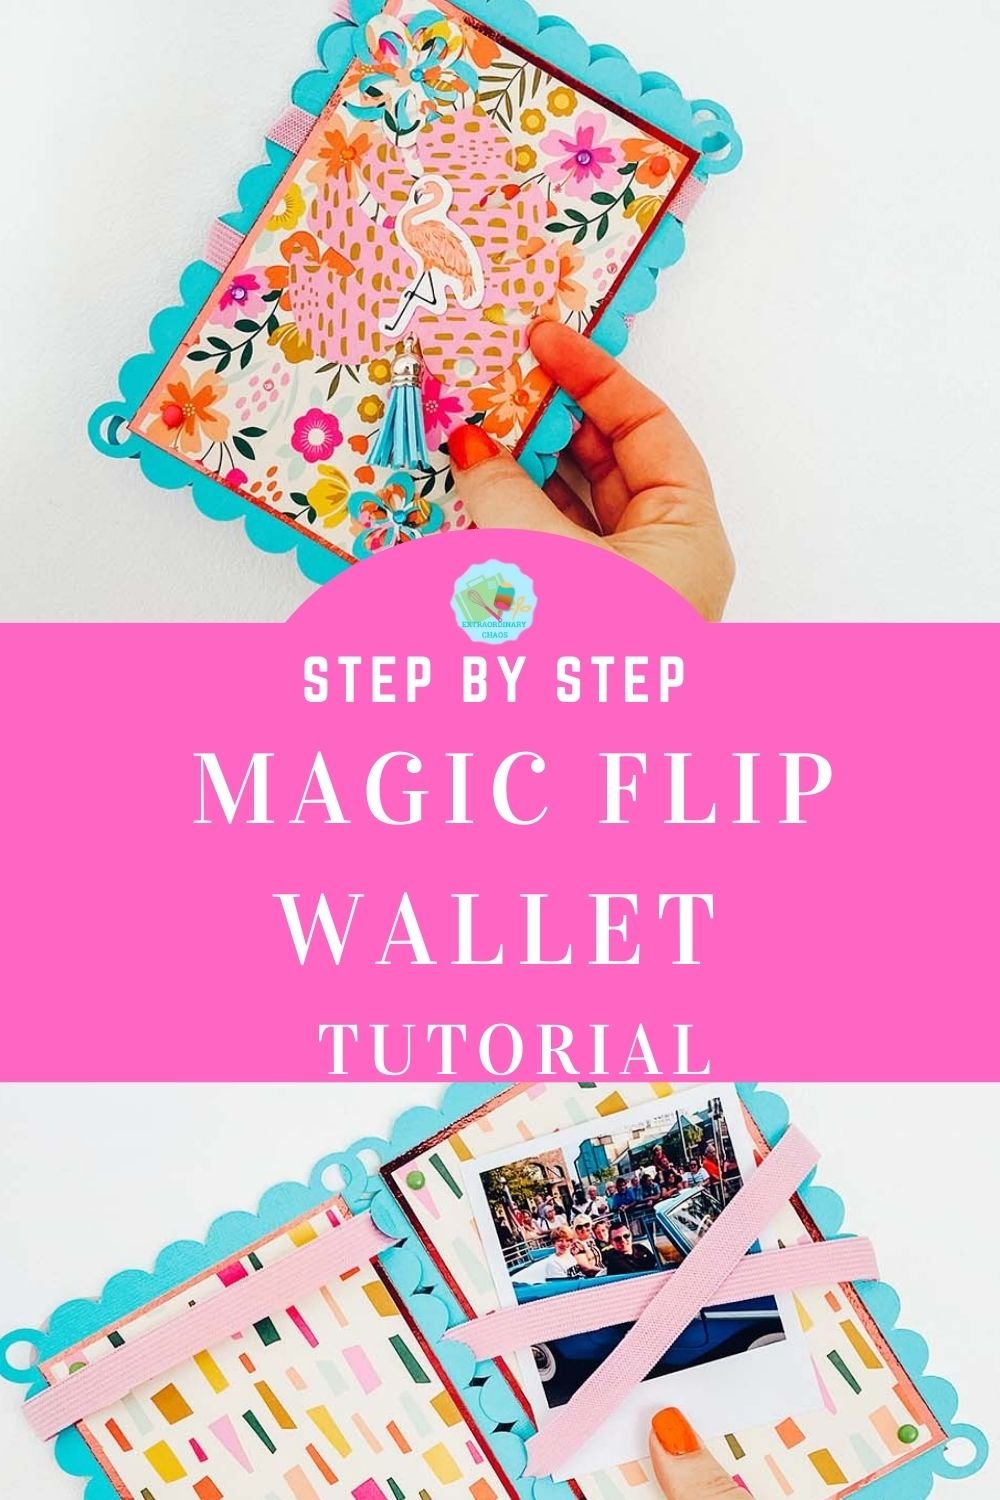
Decorating Your Magic Flip Wallet
This is down to you, your style and your creativity. If you are crafting with kids, this could be pretty simple, or you could work to a theme. Seriously I have so many ideas for seasonal and themed wallets.
I love adding crystals, tassels and embellishments at the moment and think it gives your finished look personality.

Now insert notes or fill them with photos, tickets or whatever you desire and watch the recipient squeal with delight as, honestly, what is not to love about having a magic flip wallet?


How To Make A Magic Wallet
How to make a magic flip wallet with step by step instructions to make with a Cricut or cut out by hand and decorate for themed magic wallets
Materials
- Coloured card stock
- Poster Board (I used the Cricut Metallic Poster Board)
- Patterned paper ( I used the Finding Paradise Collection from Craft Label)
- Embellishments (I used flowers from Cricut Design Space, coloured rhinestones, decals from the Finding Paradise collection)
- Key ring tassel and string
- Brads
- Tape Roller
- 24 inches of elastic ( I bought thick pink elastic and cut it to size)
- Double side tape
Tools
- Glue gun
- Cricut
- Cutting Mat
- Cricut Design Space
Instructions
- Start By Preparing Your Card
If you are cutting on your Cricut upload the template or choose your own in Cricut images. You can also cut your wallet out by hand. - You Will Need To Prepare
2. 7 x 5 inch scalloped oblongs on coloured card
2. 6 x 4 inch oblongs cut on the poster board
4. 5.9 x 3.9 inch oblongs in patterned paper, these can be all the same or different.
Cut the elastic in 4 pieces, each must be 7 inches long.
You will create the inside design first, to do this stick the poster board to the scalloped card and layer the pattered card on top using a tape roller. - Next Arrange The Elastic
(Check out my in post video to see how I did this if you like to see rather than read.) To do this lay your cards pattern side up (this will be the inside of your magic flip wallet) now place two elastic strips on the left hand card at the top and bottom, tucking the right hand side edge under the bottom of the right hand card and the left hand edge underneath its card.
Next cross two elastics over on the right hand card, they must not come into contact with the top and bottom elastics. Tuck the left hand edges under the right hand card. Flip the right hand elastics under the card. It helps to use paperclips to keep in position, and ensure your elastic is taut.
- Now carefully flip your cards and glue the elastics into place, if you have used paperclips you can remove them. Each card should have 2 top and bottom elastics on one side, and 2 cross elastics on the other.
 When you flip the cards you can see you now have a working flip wallet, open it both ways to ensure it works before decorating the front.
 - Decorating Your Magic Flip Wallet
This is totally down to you, your style and creativity. If you are crafting with kids this could be quite simple, or you could work to a theme. Seriously I have so many ideas for seasonal and themed wallets.
I am totally in love with adding crystals, tassels and embellishments the moment and think it gives your wallet personality.

Notes
What Can A Magic Wallet Be Used For?
Themed money envelopes, birthday, new baby, Christmas, Easter, Eid, Hanukah the list goes on.
Mini folding scrapbooks, what a great way to store photos.
Party invitations
Wedding Invites
Themed gift envelopes for travel and theatre tickets.
Crafting with kids
Just because they are so cute, who doesn’t want their own magic wallet?
Recommended Products
As an Amazon Associate and member of other affiliate programs, I earn from qualifying purchases.


Can you sent me the link for this project I could not get the video for it
Thank you
Hi Brenda here you go https://www.youtube.com/watch?v=5jsGdb-UGk0 thanks Sarah