
Today, I am sharing this gorgeous Free SVG Tropical Beach Alphabet and Number Set for Cricut and Silhouette. Summer brings with it a burst of colour and sunshine, and what better way to celebrate its arrival than this beautifully crafted beach alphabet? Creating beach style projects for cards, scrapbooking, and cake toppers.
Perfect for personalised greeting cards embellished with tropical vibes, scrapbook layouts infused with the essence of summer, or bespoke cake toppers that elevate any special occasion. The versatility of these tropical beach alphabets allows you to unleash your imagination and bring your artistic vision to life.
I made ombre letters with this alphabet. I have supplied the top letters and numbers. However, to make your own, scroll down for the step-by-step tutorial and video.

This post may contain affiliate links. Which means I may receive a small commission if you click a link and purchase something that I have recommended at no extra cost to yourself. As an amazon, Cricut and Glowforge associate, I earn from qualifying purchases.
What You Will Find Here
Craft Ideas For Our SVG Tropical Beach Alphabet Letters & Number Set For Cricut And Glowforge
- Tropical Cake Toppers, see my step by step tutorial to make your own cake topper.
- Framed Art
- Scrapbooking Layouts
- Cards
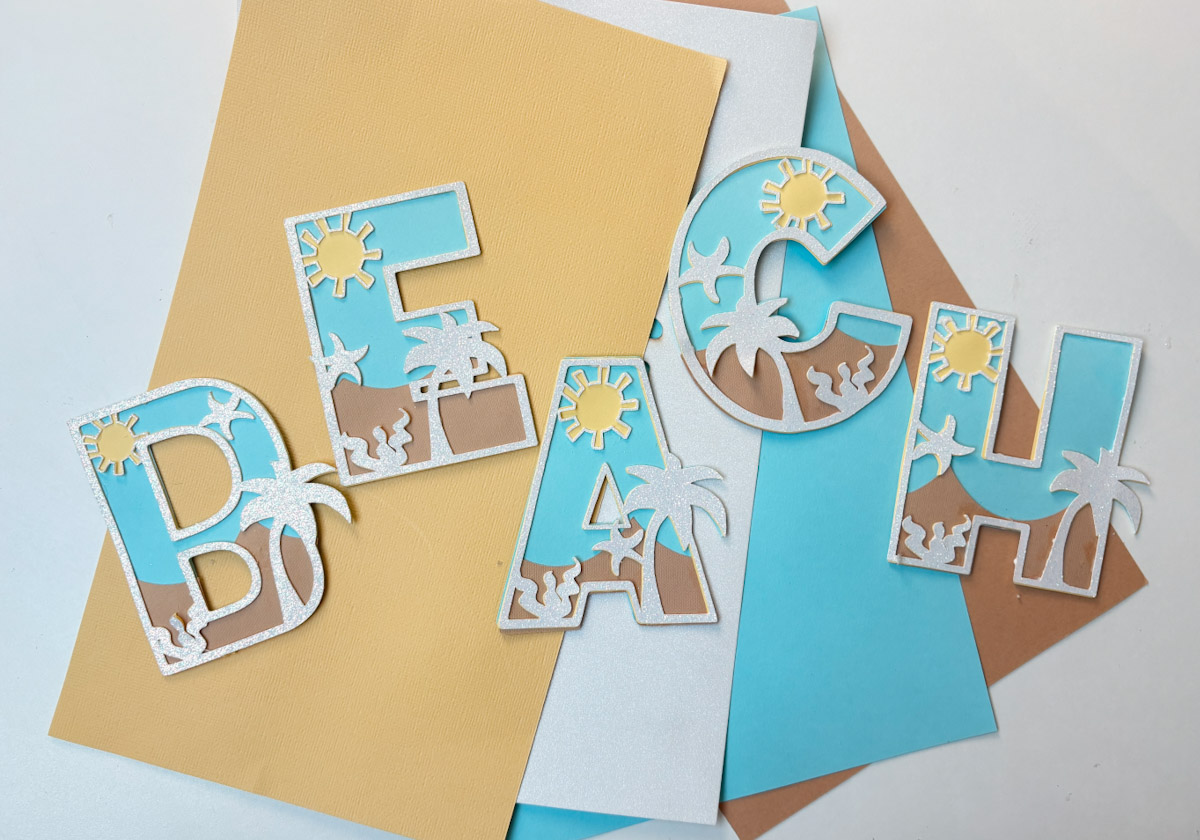
How to Make Beach Ombré Letters, Step-by-Step
What You’ll Need:
- Cricut Design Space
- Alphabet top layer
- A4 card in white, yellow, beige (sand), and blue
- Cutting mat (12×12)
- Glue (e.g., Cosmic Shimmer acrylic glue)
- Brayer
- Cricut
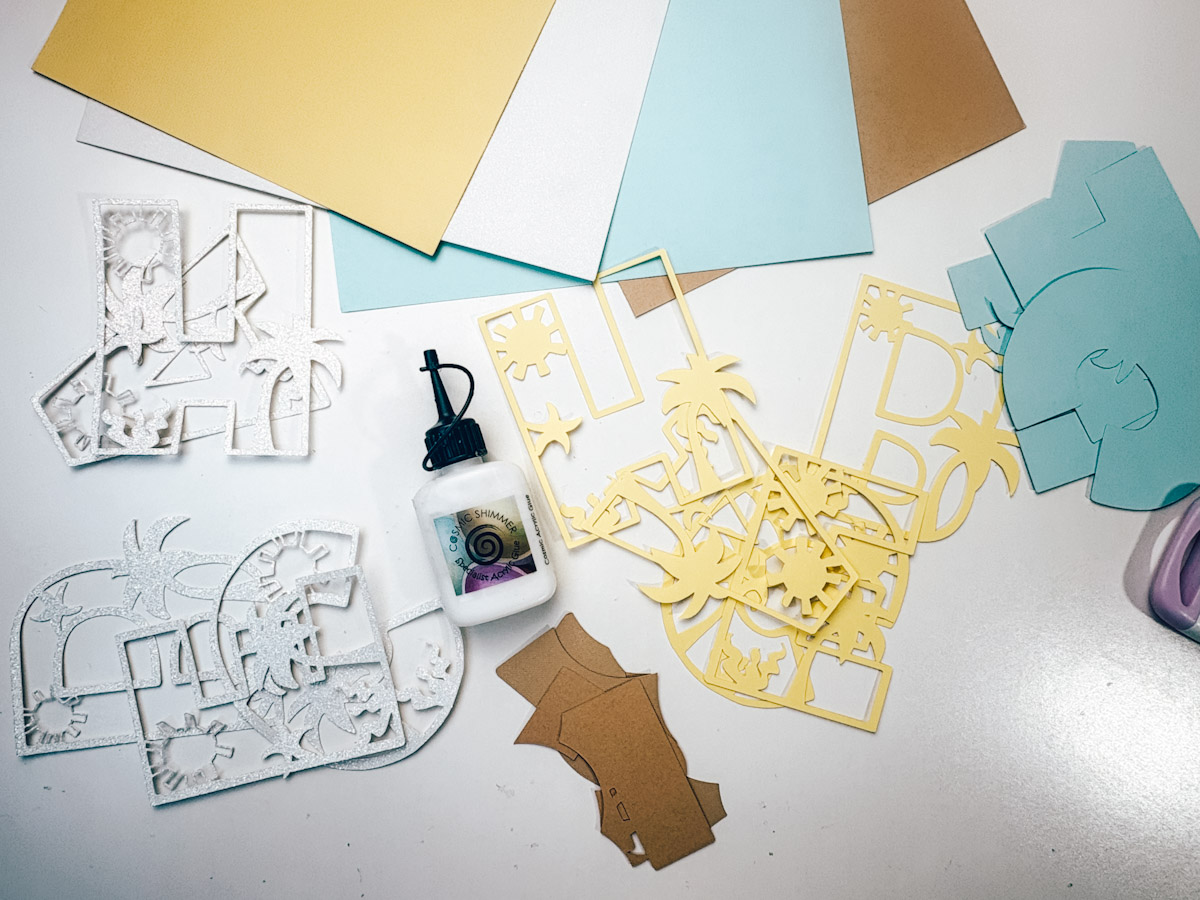
1. Upload and Duplicate the Letters
- Open Cricut Design Space.
- Upload all the letters you want to use (e.g., to spell “BEACH”).
- Highlight all the letters, right-click, and select Duplicate.
- These will be used for your first contoured layer.

2. Remove Contours for the Top Layer
- Click on each individual letter.
- In the bottom-right corner, click Contour.
- Remove one contour (such as the sun or detail layer) from each letter.
- Repeat this for every letter.
- Change the colour of this set of letters to white, this is your top layer.
3. Create the Yellow Sand Layer
- Duplicate the white layer.
- Move this new layer to the back (right-click > Send to Back).
- Change the colour of this layer to yellow.
4. Create the Blue Background Layer
- Duplicate the yellow layer again.
- Move this copy to the back.
- Change its colour to blue.
- For this layer, remove all contours so the letters are fully solid.
- But keep key letter details (e.g., inside of “E” and “I”)
5. Make the Ombre ‘Beach’ Edge
- Go to Shapes > Circle.
- Place a circle near the bottom of your letters.
- Duplicate the circle multiple times to form a bumpy, caterpillar-like row (to mimic shoreline).
- Once it’s long enough to cover the bottom of your letters, select all the circles.
- Use Attach > Weld to join them into a single shape.
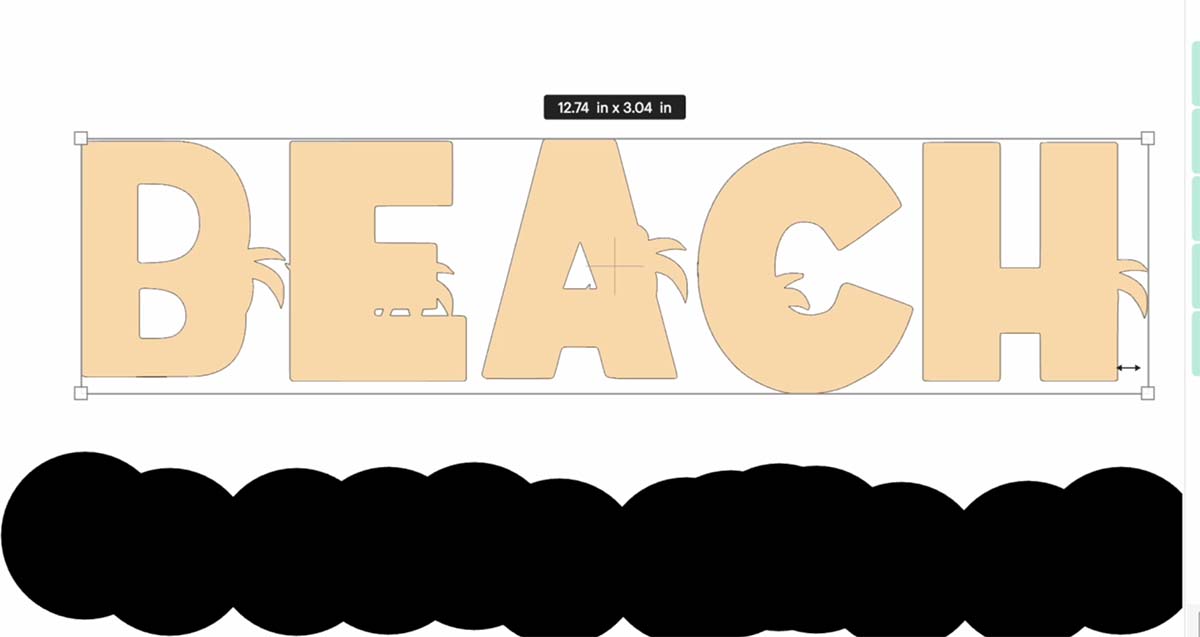
6. Weld and Slice the Sand Layer
- Weld your yellow sand letters together as one layer.
- This is essential because slice only works on single layers.
- Place the row of circles over the bottom of the sand layer.
- Unlock the circle shape and adjust size/position where you want the sand to start.
- Select both the sand letters and circle shape.
- Click Slice, this cuts the sandy effect into your letters.
- Delete the unwanted sliced-off bits.
7. Resize to Fit A4 (If Needed)
- Check your design fits within A4 size (about 11.5 x 8 inches).
- If not, slice some letters into two parts using a square shape.
- This ensures they fit on your 12×12 mat.

8. Cut the Layers
- Rearrange your letters to make the most efficient use of your A4 card on the mat.
- Cut each layer:
- Blue (base)
- Beige (sandy edge)
- Yellow (mid sun layer)
- White (top detail layer)
9. Assemble the Letters
- Start with the blue base layer.
- Next, glue on the sand (beige) layer.
- Add the yellow layer.
- Finally, stick on the white top layer.
- Use fine glue for edges (Cosmic Shimmer glue is great as it dries clear).
- Work from the back of the piece you’re gluing to avoid messy glue spots.
- You can also roughen the edge of the sand with scissors for added texture.

How To Get Your Tropical Beach Alphabet Letters And Numbers
Click here or the image below to get your free downloadable Tropical Beach SVG Alphabet from our shop and follow these instructions to add to Cricut Design Space if you are using a Cricut Machine. Note if you are using Glowforge you need SVG files to cut the image out of wood or acrylic. Or Png or SVG to engrave.
If You’re Having Problems?
Check out my trouble shooting page, hopefully it will answer any questions you may have.
Tips And Advice For Using Your Download For Cricut
This alphabet is also perfect to make cards and cake toppers with your Cricut, check out my guides below.
- How To Add Fonts To Cricut Design Space
- How To Remove Backgrounds On Illustrator
- Cricut Design Space Guide
- How To Slice And Weld In Cricut Design Space
- How to upload to Cricut Design Space
- Using Iron On Vinyl
- Where Else To Get Free SVG Files
Also please do pop over to TikTok or Instagram, and give me a follow and if you make a project tag me! I love seeing everyone else’s makes and chatting crafting. I could do that all day! This is also where I share videos of my makes.

