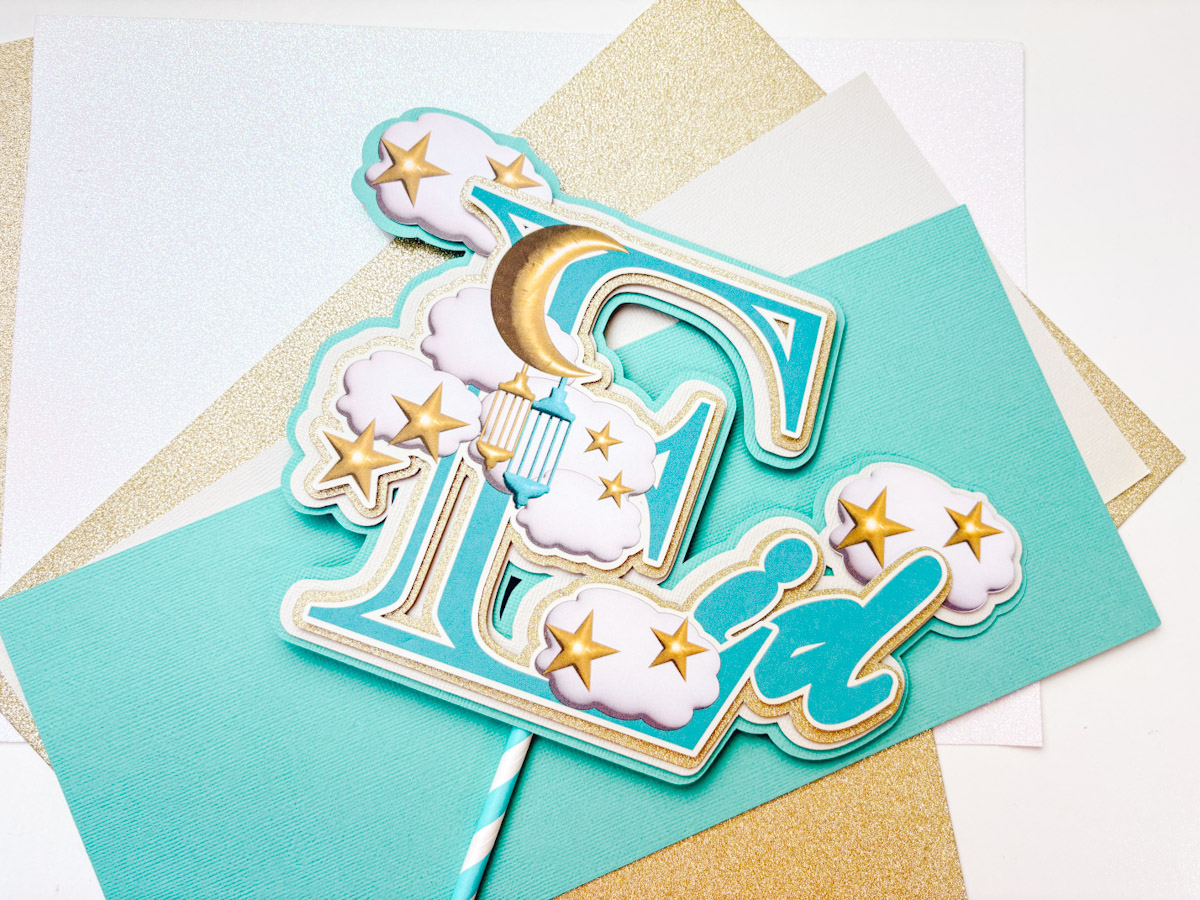
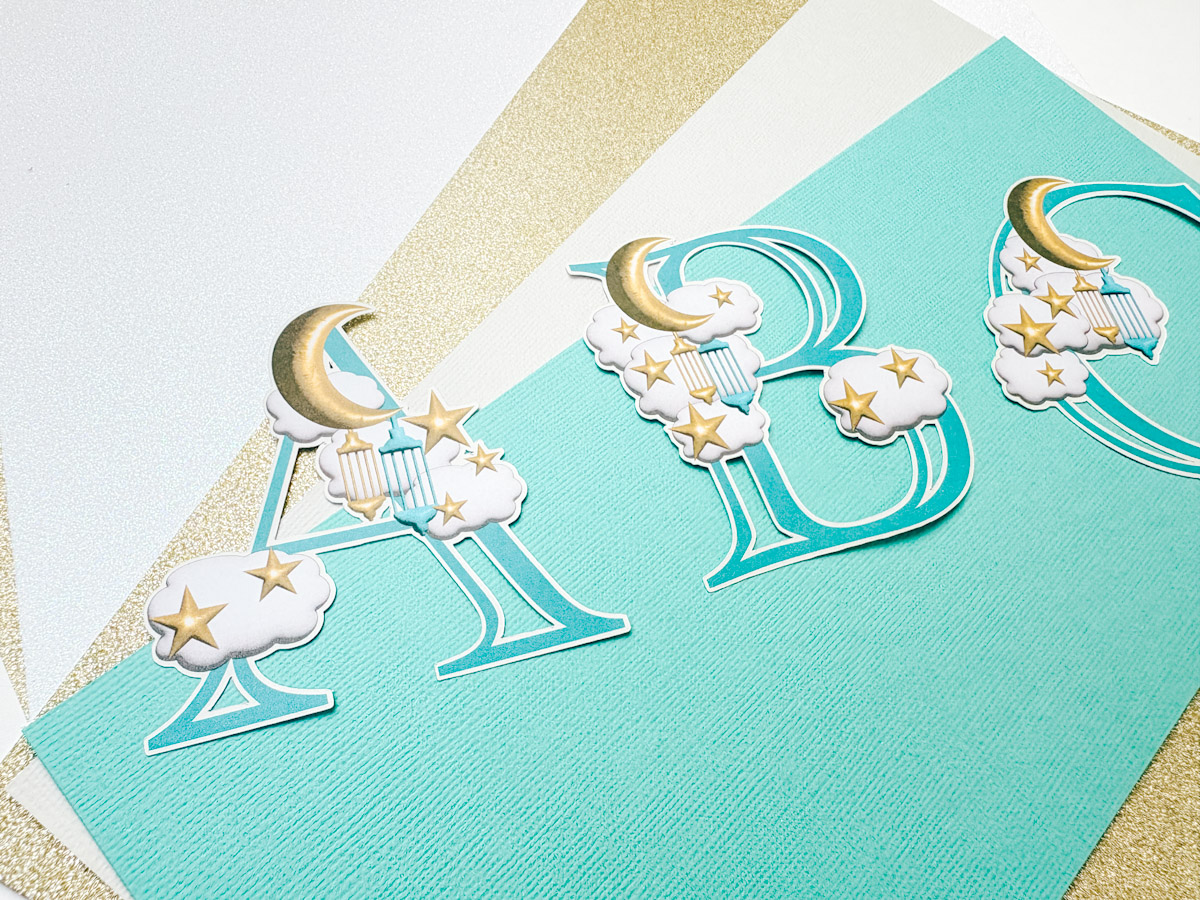
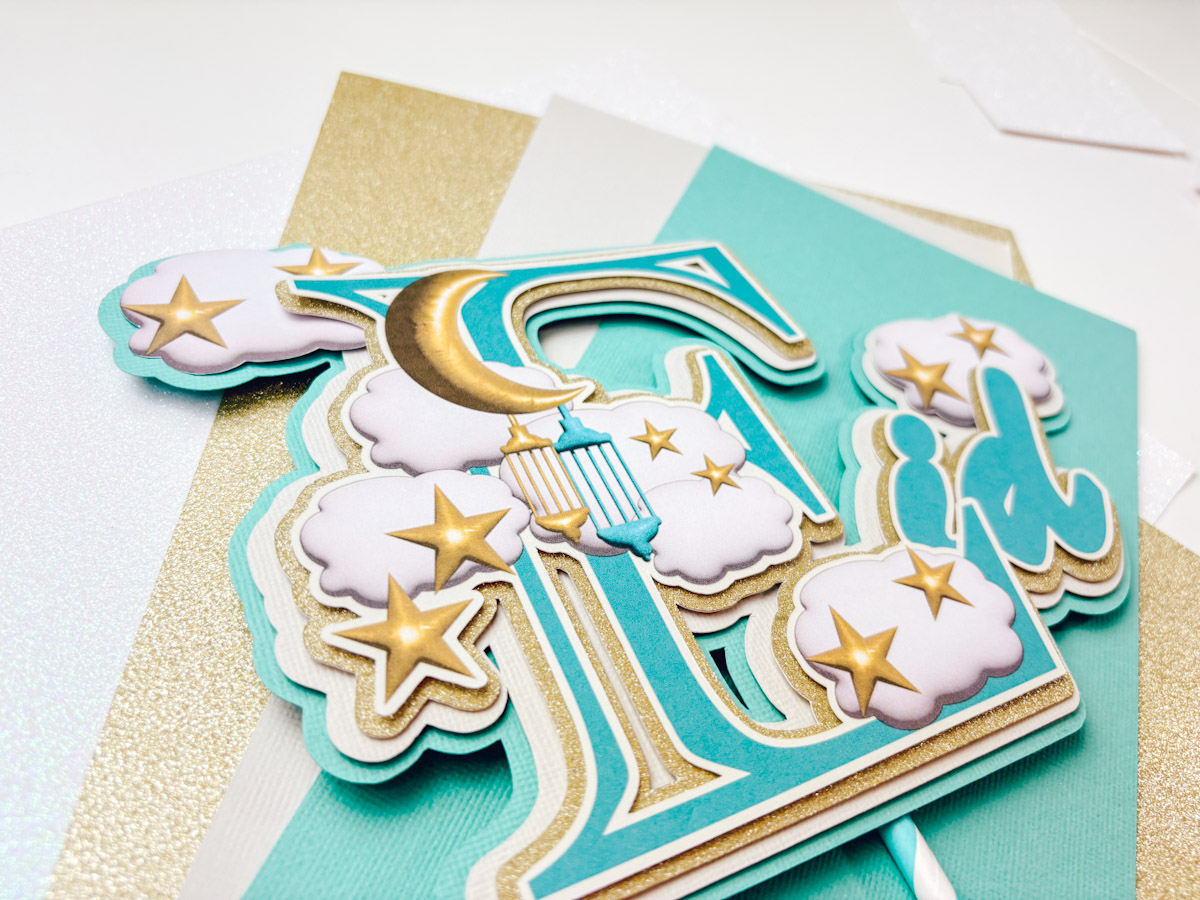
Today, we are sharing a cute Free Printable PNG 3D Eid Moon and Stars Alphabet and Number Set. Our 3D Eid Moon and Stars PNG Alphabet Letters and Numbers are ideal for use with LOKLiK, Cricut and Silhouette or to cut out by hand.
They are perfect for Eid-themed craft projects, from personalised cards to Eid scrapbooking layouts, party banners and decorations.

This post may contain affiliate links. Which means I may receive a small commission if you click a link and purchase something that I have recommended at no extra cost to yourself. As an amazon, Cricut and Glowforge associate, I earn from qualifying purchases.
What You Will Find Here
Project Ideas For Our Free PNG Printable 3D Puff Eid Moon and Stars Alphabet And Numbers
- Themed Eid Activities
- Planner Stickers
- Framed Art
- Sublimation Mugs
- Fridge Magnets
- Cake Toppers
- Eid Moon and Stars Banners
- 3D Eid Moon and Stars Scrapbooking Page Layouts
How To Upload and Print Your Printable 3D Eid Moon and Stars Clip Art Alphabet Letters And Numbers To Cricut Design Space.
Follow this step-by-step guide to upload images and SVG and PNG files to Cricut Design Space. Once uploaded, click Make it; if you need help with this, follow our step-by-step print and cut guide.
Watch The Video or Scroll Down For Step By Step Instructions
If You Don’t Have Cricut?
You can upload our 3D Eid Moon and Stars Clip Art PNG Alphabet to Canva, a great program for making posters and cards, or to Word or Pages. Just arrange your letters or numbers with spaces between them and cut them with a guillotine.
If You Want To Use These Free Printable 3D Eid Moon and Stars PNG Alphabet Letters And Numbers?
Click here or on the image below to get your free download of our Printable 3D Eid Moon and Stars PNG cut files. They are instant downloads from our shop.

If You’re Having Problems?
Check out my troubleshooting page, hopefully it will answer any questions you may have.
Tips And Advice For Using Cricut
- Cricut Design Space Guide
- How to upload to Cricut Design Space
- How To Make Print And Cut Stickers In Cricut Design Space
- Where Else To Get Free SVG Files
Also please do pop over to Instagram, or TikTok and give me a follow and if you make a project please do tag me! I love seeing everyone else’s makes and chatting crafting. I could do that all day! This is also where I share all my projects in progress.
Step-by-Step Guide: How to Make an Eid Cake Topper in Cricut Design Space
You Will Need
- Cricut Maker Or Silhouette
- Cricut Design Space
- Cutting Mat
- Plain and glitter card stock
- Brayer and weeding tools
- Double-sided sticky pads
- Cosmic Shimmer Glue
- Straw
- Upload the Design Elements
- Start by uploading the letter “E” and some clouds to Cricut Design Space.
- The cloud elements are available in the shop for £1.
- Resize the letter “E” and layer some clouds over it.
- Choose and Adjust the Font
- Select a font and type “id” to complete “Eid”.
- To make it chunkier, add an offset.
- Resize it to fit neatly next to your word.
- Match the Colours
- Click on the colour box and select “Advanced”.
- Drag the colour selector to match your letter.
- Adjust to a cooler grey tone if needed.
- Type the text in lowercase for a neater appearance.
- Create an Offset
- Add an offset to make the letters chunkier.
- Colour it using previously chosen colours.
- Position it correctly.
- Create a small offset in a creamy stone colour.
- Flatten the elements so they merge into one word.
- Make the Offsets for the Cake Topper
- Create a small offset for the base.
- Adjust the size using the offset tool in the top bar.
- Choose a muted colour.
- Ensure it is set to “cut” mode.
- Colour the offset appropriately.
- Prepare for Cutting
- Cut the elements on coloured cardstock.
- Only print and cut the top layer.
- Add a cloud and position it.
- Create an offset over the entire design to incorporate the cloud.
- Bring the offset to the front for better positioning.
- Refine the Design
- Create another offset and make it slightly larger.
- Ensure it is set to “cut”.
- Colour it green or another suitable shade.
- Duplicate the cloud and place another one.
- Create another offset over the entire design, adjusting the size.
- Print and Cut
- Resize the final design.
- Click “Make It” and send it for print and cut.
- Print a test copy first to ensure colour accuracy.
- Send the design to the printer.
- Remove the bleed and use the system dialogue for best print quality.
- Choose “Best” or “Final” quality settings in your printer’s system settings.
- Cut the Design
- Once printed, check it and send it to cut.
- Use heavy printable cardstock for durability.
- Use a green cutting mat for better adhesion.
- Lay all elements together to check alignment before cutting.
- Cut the entire project.
- Assemble the Cake Topper
- Start with the top layer.
- Use sticky pads for a raised effect.
- Add a muted gold and stone layer, using sticky pads sparingly.
- Position the clouds carefully, incorporating them into the offset.
- Add another layer with sticky pads.
- Ensure everything aligns neatly.
- Final Touches
- Flip the topper over.
- Attach a matching straw to the back using Cosmic Shimmer Glue.
- Let it dry for a couple of minutes.
- Your cake topper is now complete!
