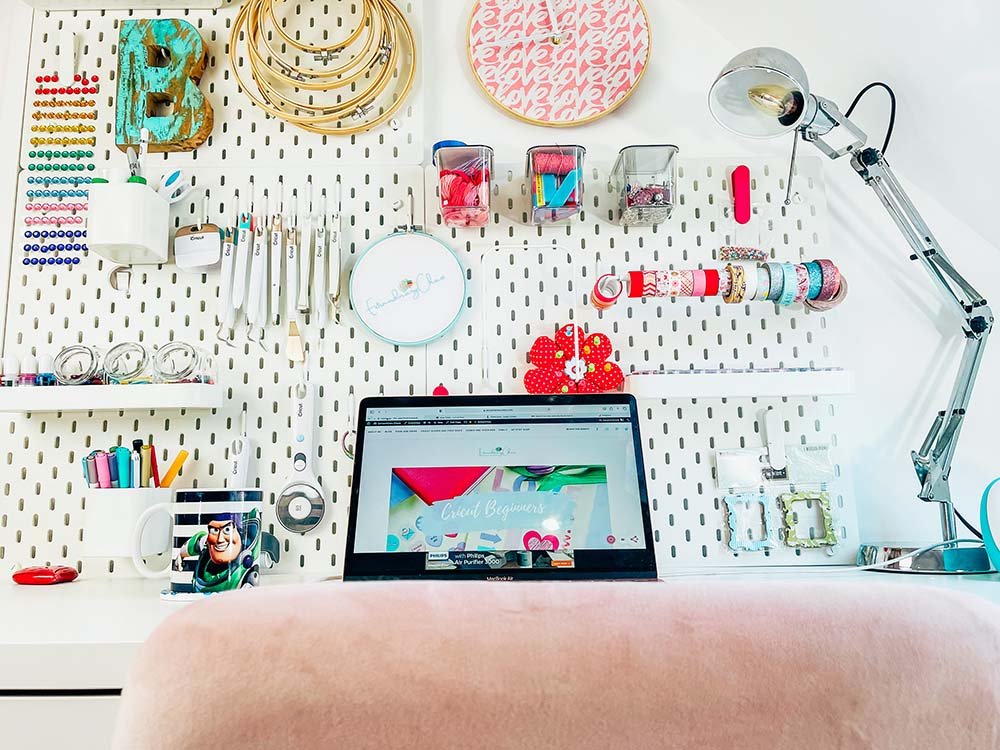
My new DIY Clock was a total accident, it had never occurred to me to make a clock, but then I had this space of my craft room wall.
It was crying out for something, I pondered over a pretty cut file, but felt such a functional wall needed something functional but also beautiful. So this Easy DIY Clock Made With Embroidery Hoops seemed perfect. Pretty, functional and filled that space that had a lot to live up too.
But now my whole new peg board wall is beautiful, functional and makes life so much easier. My craft room has been a long time in the making, not finished yet, I still need the perfect crafting work area and more storage. However we are getting there.

What You Will Find Here
How To Make A DIY Clock Made With Embroidery Hoops
You Will Need
- Fabric, I used the Cricut Love Story sampler
- 1 piece of 12×12 poster board or extra thick card
- 10 Inch Embroidery Hoop
- Clock Workings check they fit your hoop
- Double sided sticky tape
- Scissors or rotary cutter
- Tape measure
- Cricut Maker and cutting mat (not essential)

Other DIY Clock Ideas?
- Add numbers with iron on vinyl
- Create a learning to tell the time clock
- Use characters, such as Mickey Mouse for a themed character clock.
- Make the clock personalised by using a large iron on letter on a hessian canvas.
- Create a pattern such a spots with iron on vinyl
- Use a map covered with clear vinyl for a travel theme
- Embroider the numbers on
- Personalise for your business with print and cut stickers
- Make wedding clocks for table decorations for the big day
- Use felt and felt on the numbers
- Send as a gift with a message on.
Method
Preparing Your DIY Clock
Start by cutting the poster board to fit just inside the smallest of the hoops. If you have a Cricut its easy to size using your mat as a guide.
Using a silent setter of scissors make a hole though the centre of the card ensuring it is in the middle. I did this by using a tape measure and marking out the centre.
You will need to cut the fabric to overlap so you have a good inch and a half all the round.
Iron the fabric to remove any creases.

Now put lines of double sided tape onto the back side of the poster board or card and gently smooth the fabric over the card so there are no creases.
Once attached, make a hole in the fabric in the same place as the hole in the card.

Building Your DIY Clock
You can now attach the hoops to the start of face of your DIY clock. Position the smaller hoop at the back and the larger over the top of the fabric.
Push the hoops together ensuing the screw is at the top, this will be your hanger. Now pull the fabric taut all the way around so there are no creases, before tightening the screw at the top of the hoop.

Adding The Hands To Your DIY Embroidery Hoop Clock
The pack came with full instructions, however it’s super easy to do.
Start by adding a washer to the back workings and putting in place. To do this push the screw through the hole you created on your clock and adding a washer to secure it,
Now add the hour hand, pushing a little to click into place, next the minutes followed by the seconds. The hands are very thin and bend easily so at this point add a battery and check the second and minute hands are working freely. If not gently bend into position.

Neatening The Back Or Your Hoop Clock
To neaten your hoop flip it over and place a line of double sided tape to the back inside hoop. If you have already put the hands on your clock prop one side up so you don’t squash them.

Lastly press and tuck the fabric to neaten it off and prevent fraying, I used a Cricut tool to gently tuck the fabric in.

Your clock is now ready to hang, I find a hook worked back for this!
If You Want Your Clock Smaller
As the arms of the clock are thin they will be easy to cut shorter, however be careful not to bend them.
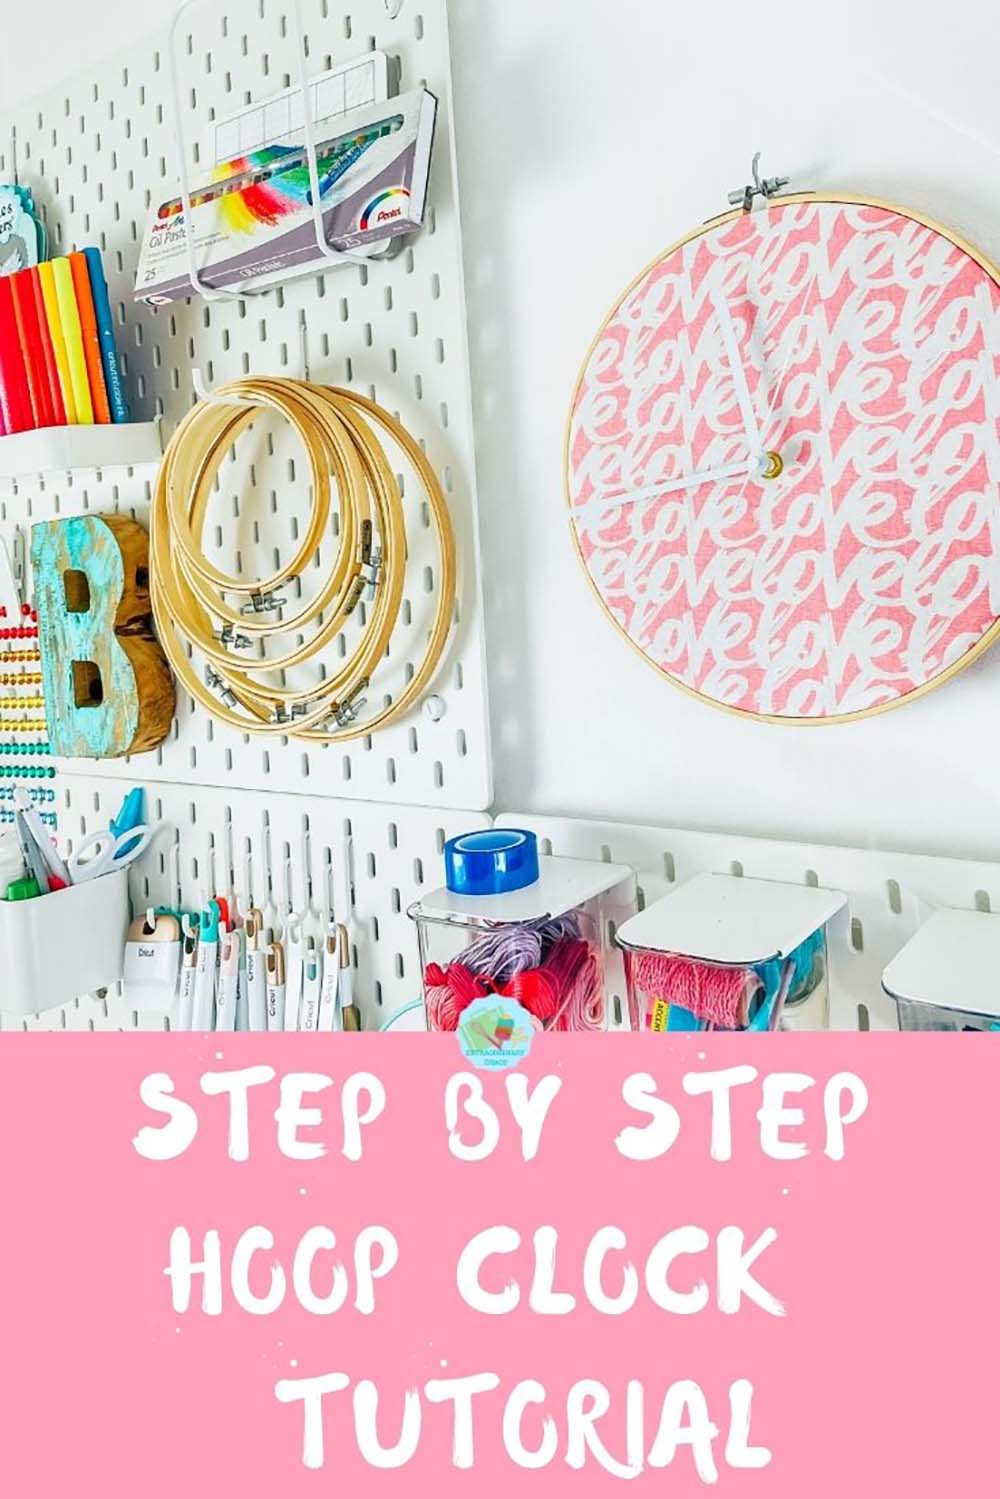

How To Make A DIY Clock With Embroidery Hoops
How to make an Easy DIY Clock With Embroidery Hoops and fabric, an easy step by step tutorial to make a wall clock to match your interior.
Materials
- Fabric, I used the Cricut Love Story sampler
- 1 piece of 12×12 poster board or extra thick card
- 10 Inch Embroidery Hoop
- Clock Workings check they fit your hoop
- Double sided sticky tape
Tools
- Scissors or rotary cutter
- Tape measure
- Cricut Maker and Cutting Matt ( Not essential)
Instructions
- Preparing Your DIY Clock
Start by cutting the poster board to fit just inside the smallest of the hoops. If you have a Cricut its easy to size using your mat as a guide. Using a silent setter of scissors make a hole though the centre of the card ensuring it is in the middle. I did this by using a tape measure and marking out the centre.
You will need to cut the fabric to overlap so you have a good inch and a half all the round.
Iron the fabric to remove any creases. Now put lines of double sided tape onto the back side of the poster board or card and gently smooth the fabric over the card so there are no creases.
Once attached, make a hole in the fabric in the same place as the hole in the card.
- Building Your DIY Clock
You can now attach the hoops to the start of face of your DIY clock. Position the smaller hoop at the back and the larger over the top of the fabric.
Push the hoops together ensuing the screw is at the top, this will be your hanger. Now pull the fabric taut all the way around so there are no creases, before tightening the screw at the top of the hoop.
- Adding The Hands To Your DIY Embroidery Hoop Clock
The pack came with full instructions, however it’s super easy to do. Start by adding a washer to the back workings and putting in place. To do this push the screw through the hole you created on your clock and adding a washer to secure it,
Now add the hour hand, pushing a little to click into place, next the minutes followed by the seconds. The hands are very thin and bend easily so at this point add a battery and check the second and minute hands are working freely. If not gently bend into position.
- Neatening The Back Or Your Hoop Clock
To neaten your hoop flip it over and place a line of double sided tape to the back inside hoop. If you have already put the hands on your clock prop one side up so you don’t squash them. Lastly press and tuck the fabric to neaten it off and prevent fraying, I used a Cricut tool to gently tuck the fabric in.
  Your clock is now ready to hang, I find a hook worked back for this!
Notes
Other DIY Clock Ideas?
Create a learning to tell the time clock
Use characters, such as Mickey Mouse for a themed character clock.
Make the clock personalised by using a large iron on letter on a hessian canvas.
Create a pattern such a spots with iron on vinyl
Use a map covered with clear vinyl for a travel theme
Embroider the numbers on
Personalise for your business with print and cut stickers
Make wedding clocks for table decorations for the big day
Use felt and felt on the numbers
Send as a gift with a message on
If You Want Your Clock Smaller
As the arms of the clock are thin they will be easy to cut shorter, however be careful not to bend them.
Recommended Products
As an Amazon Associate and member of other affiliate programs, I earn from qualifying purchases.
