Today, I’m sharing this out-of-this-world free SVG Space Rocket Alphabet and Number Set for Cricut and Silhouette. (Sorry, couldnt help it) Space brings with it sparkles and stars, and what better way to celebrate than this beautifully crafted space alphabet and number set? Creating stunning projects for cards, scrapbooking, and cake toppers has never been prettier.
I created a layered letter and number with a twinkling star background, which is perfect for cake toppers. Check out our step-by-step instructions and video tutorial below.
Imagine the possibilities: personalised greeting cards embellished with vibrant stars, scrapbook layouts infused with the essence of space, or bespoke cake toppers that elevate any special occasion. The versatility of this alphabet allows you to unleash your imagination and bring your artistic space vision to life.

This post may contain affiliate links. Which means I may receive a small commission if you click a link and purchase something that I have recommended at no extra cost to yourself. As an amazon, Cricut and Glowforge associate, I earn from qualifying purchases.
What You Will Find Here
Craft Ideas For Our SVG Space Rocket Alphabet Letters & Number Set For Cricut And Glowforge
- Space Cake Toppers, see my step by step tutorial to make your own cake topper.
- Framed Art For Kiddies Bedrooms
- Scrapbooking Layouts
- Cards
- Birthday Invitations and Party Decor

How to Make Layered Spaceship Letters in Cricut Design Space (Perfect for Cake Toppers & Cards)
Supplies You’ll Need:
- Cricut Design Space
- Cricut cutting machine
- Cardstock in various colours:
- Sparkly dark blue (top layer)
- Red and orange (spaceship body and flames)
- Gold glitter card (back star layer)
- Free top-layer alphabet and number SVG (provided in video)
- Cosmic Shimmer Acrylic Glue or similar craft glue
- Light grip cutting mat
- Weeding tools (optional for small pieces)
Step 1: Upload Your Design to Cricut Design Space
Begin by uploading the top layer of the alphabet and number set into Cricut Design Space. For this tutorial, we’ll be using the number 8 as an example.
- Upload the file.
- Select the number or letter you want to work on.
- Remove any other letters from your canvas to keep it tidy.
Step 2: Add an Offset
These letters are quite fine in detail. Consider adding a small offset to make them chunkier and easier to handle:
- Select your number.
- Click Offset and adjust the size to your preference.
- Apply the offset and duplicate it for layering.
This step is optional, depending on whether you prefer a finer or chunkier letter style.

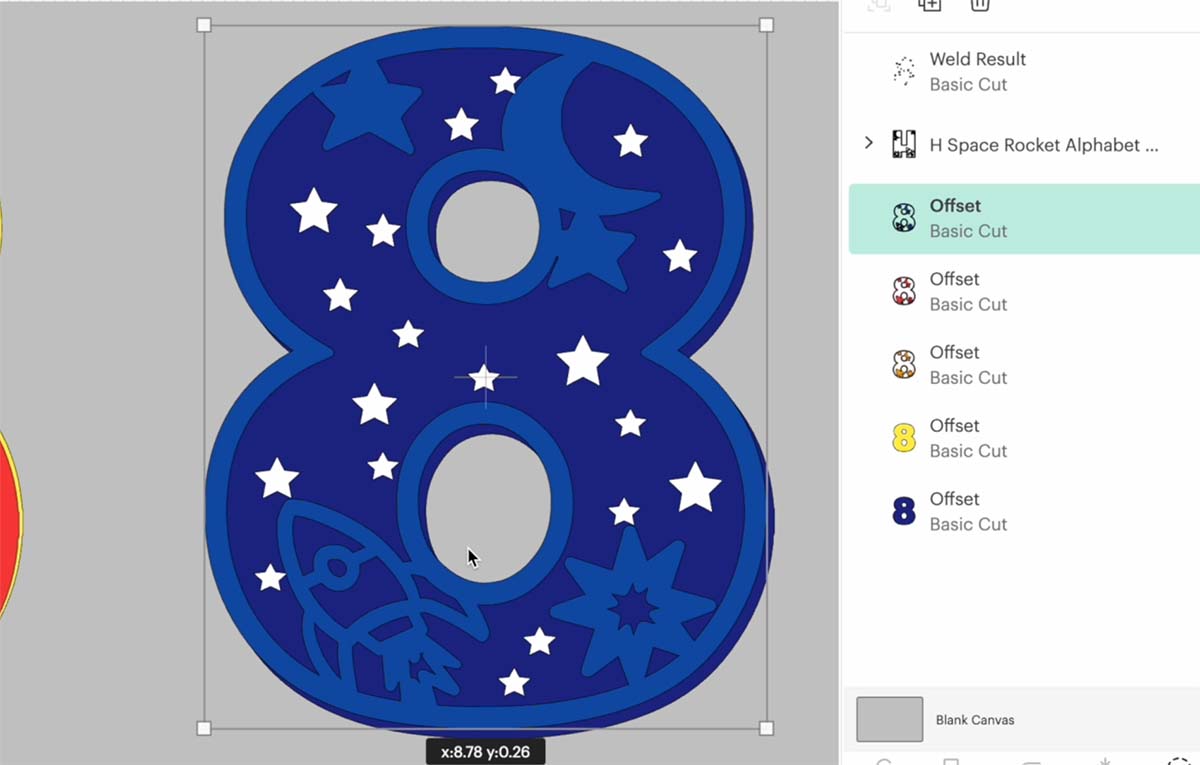
Step 3: Create Layered Colours for the Spaceship
You’ll now start duplicating and editing each layer using the Contour tool to build up the spaceship look.
- Duplicate the base layer.
- Use Contour to remove parts:
- First, remove everything except the main shape.
- Change this layer’s colour (e.g. red).
- Duplicate again:
- Use Contour to remove everything except the flames and centre of the star.
- Change this layer to orange.
- Duplicate once more to create a full background layer.
Step 4: Prepare the Star Background Layer
To create the star cut-outs that shine through:
- Duplicate your background layer again.
- Use Contour to remove all details, leaving only the full outline.
- Duplicate this to make two versions:
- One will become the star cut-out layer.
- The second will be the back-most glitter layer.
- Set the back layer colour to yellow (or gold glitter card).
Step 5: Add Star Cut-Outs
Now let’s design the stars that will appear in the background.
- Open the Shapes tool and select Star.
- Adjust star sizes to create variety and duplicate as needed.
- Move the top (blue) layer above your star layer to check visibility.
- Arrange the stars so they’re visible but don’t interfere with the top layer design.
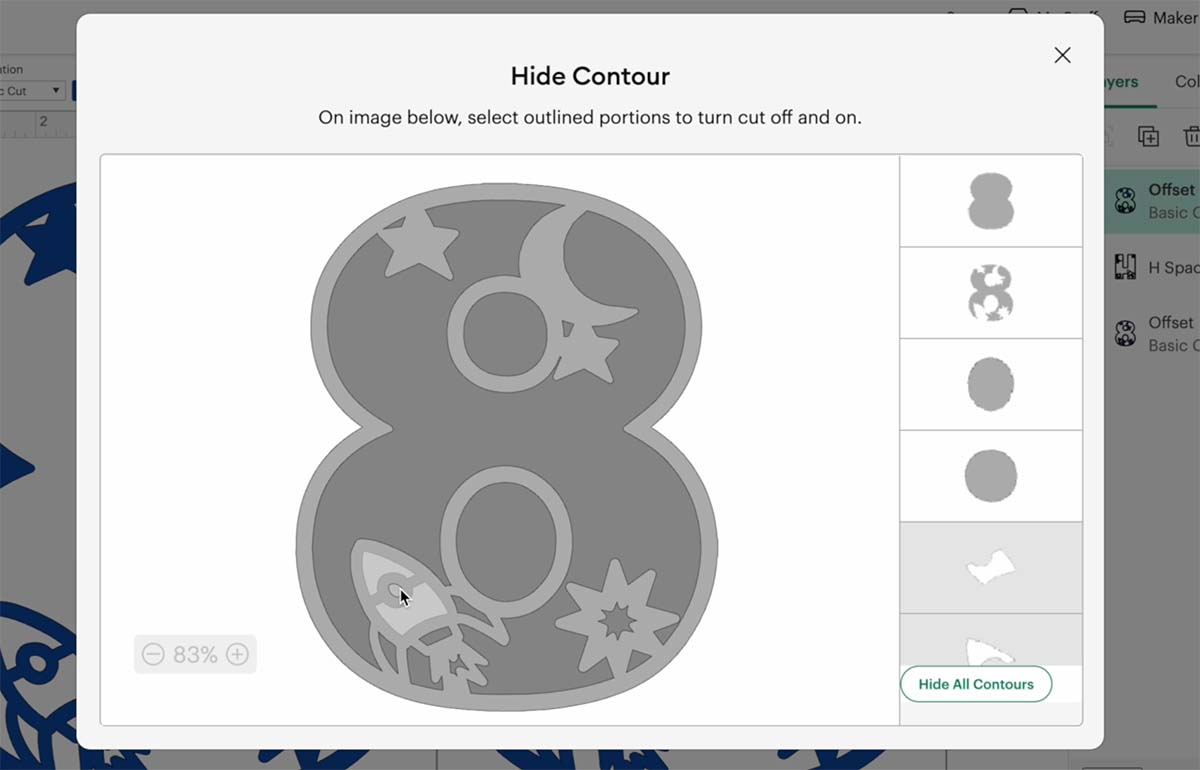
Step 6: Weld and Slice the Star Layer
To create your actual star cut-outs:
- Hide or move the top and back layers temporarily.
- Select all stars and the layer they sit on.
- Click Weld to combine them.
- Now select the welded layer and slice the stars out of the back layer.
- Delete the leftover pieces.
You now have a layer with star-shaped holes, ready to sit over the gold glitter card.
Step 7: Arrange and Check Your Layers
- Reorder your layers using the right-hand panel in Cricut Design Space.
- Ensure your yellow glitter layer is at the back.
- Check the visual to make sure all elements are aligned and stars are visible.
Step 8: Resize and Send to Cut
- Resize your design on the mat if needed.
- Make sure all layers fit your project (e.g. cake topper or card size).
- Send the layers to cut.
Tip: If you’re using delicate card, use a light grip mat and reverse peel to avoid curling.
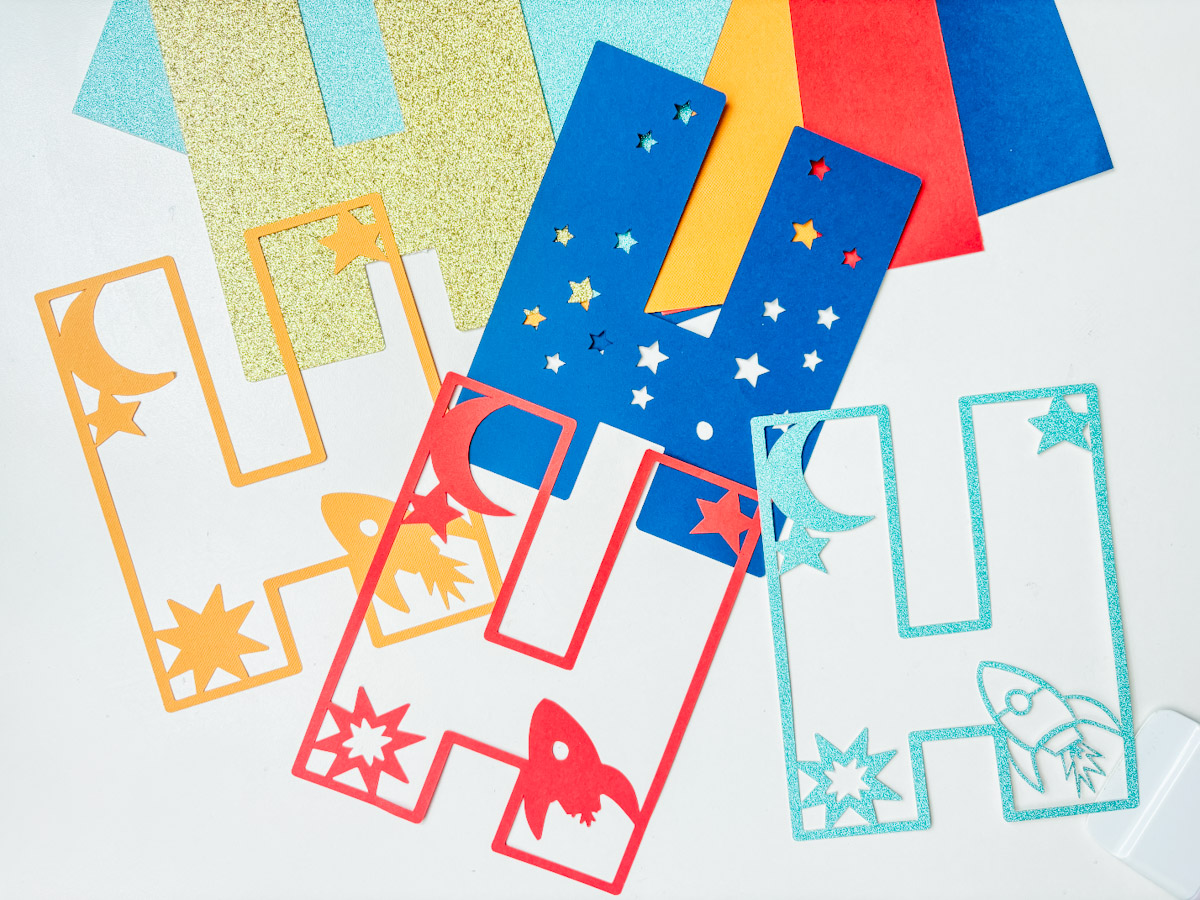
Step 9: Assemble Your Layered Letter
Once your pieces are cut:
- Start gluing from the back layer forward.
- Use Cosmic Shimmer Acrylic Glue, it dries clear and can be wiped clean.
- Carefully align each layer, pressing gently as you go.
Note: You can pause this process at any time to check placement or clean up any excess glue.
Final Tips and Notes
- The offset layer adds a chunkier finish; whether to use it is down to personal preference.
- These letters are brilliant for space-themed birthdays, party decor, or custom scrapbooking pages.
- Don’t forget to tag me on social media if you create your own, I’d love to see your colour choices and variations.

How To Get Your Space Rocket Alphabet Letters And Numbers
Click here or the image below to get your free downloadable Space Rocket SVG Alphabet from our shop and follow these instructions to add to Cricut Design Space if you are using a Cricut Machine. Note if you are using Glowforge you need SVG files to cut the image out of wood or acrylic. Or Png or SVG to engrave.

If You’re Having Problems?
Check out my trouble shooting page, hopefully it will answer any questions you may have.
Tips And Advice For Using Your Download For Cricut
This alphabet is also perfect to make cards and cake toppers with your Cricut, check out my guides below.
- How To Add Fonts To Cricut Design Space
- How To Remove Backgrounds On Illustrator
- Cricut Design Space Guide
- How To Slice And Weld In Cricut Design Space
- How to upload to Cricut Design Space
- Using Iron On Vinyl
- Where Else To Get Free SVG Files
Also please do pop over to TikTok or Instagram, and give me a follow and if you make a project tag me! I love seeing everyone else’s makes and chatting crafting. I could do that all day! This is also where I share videos of my makes.
