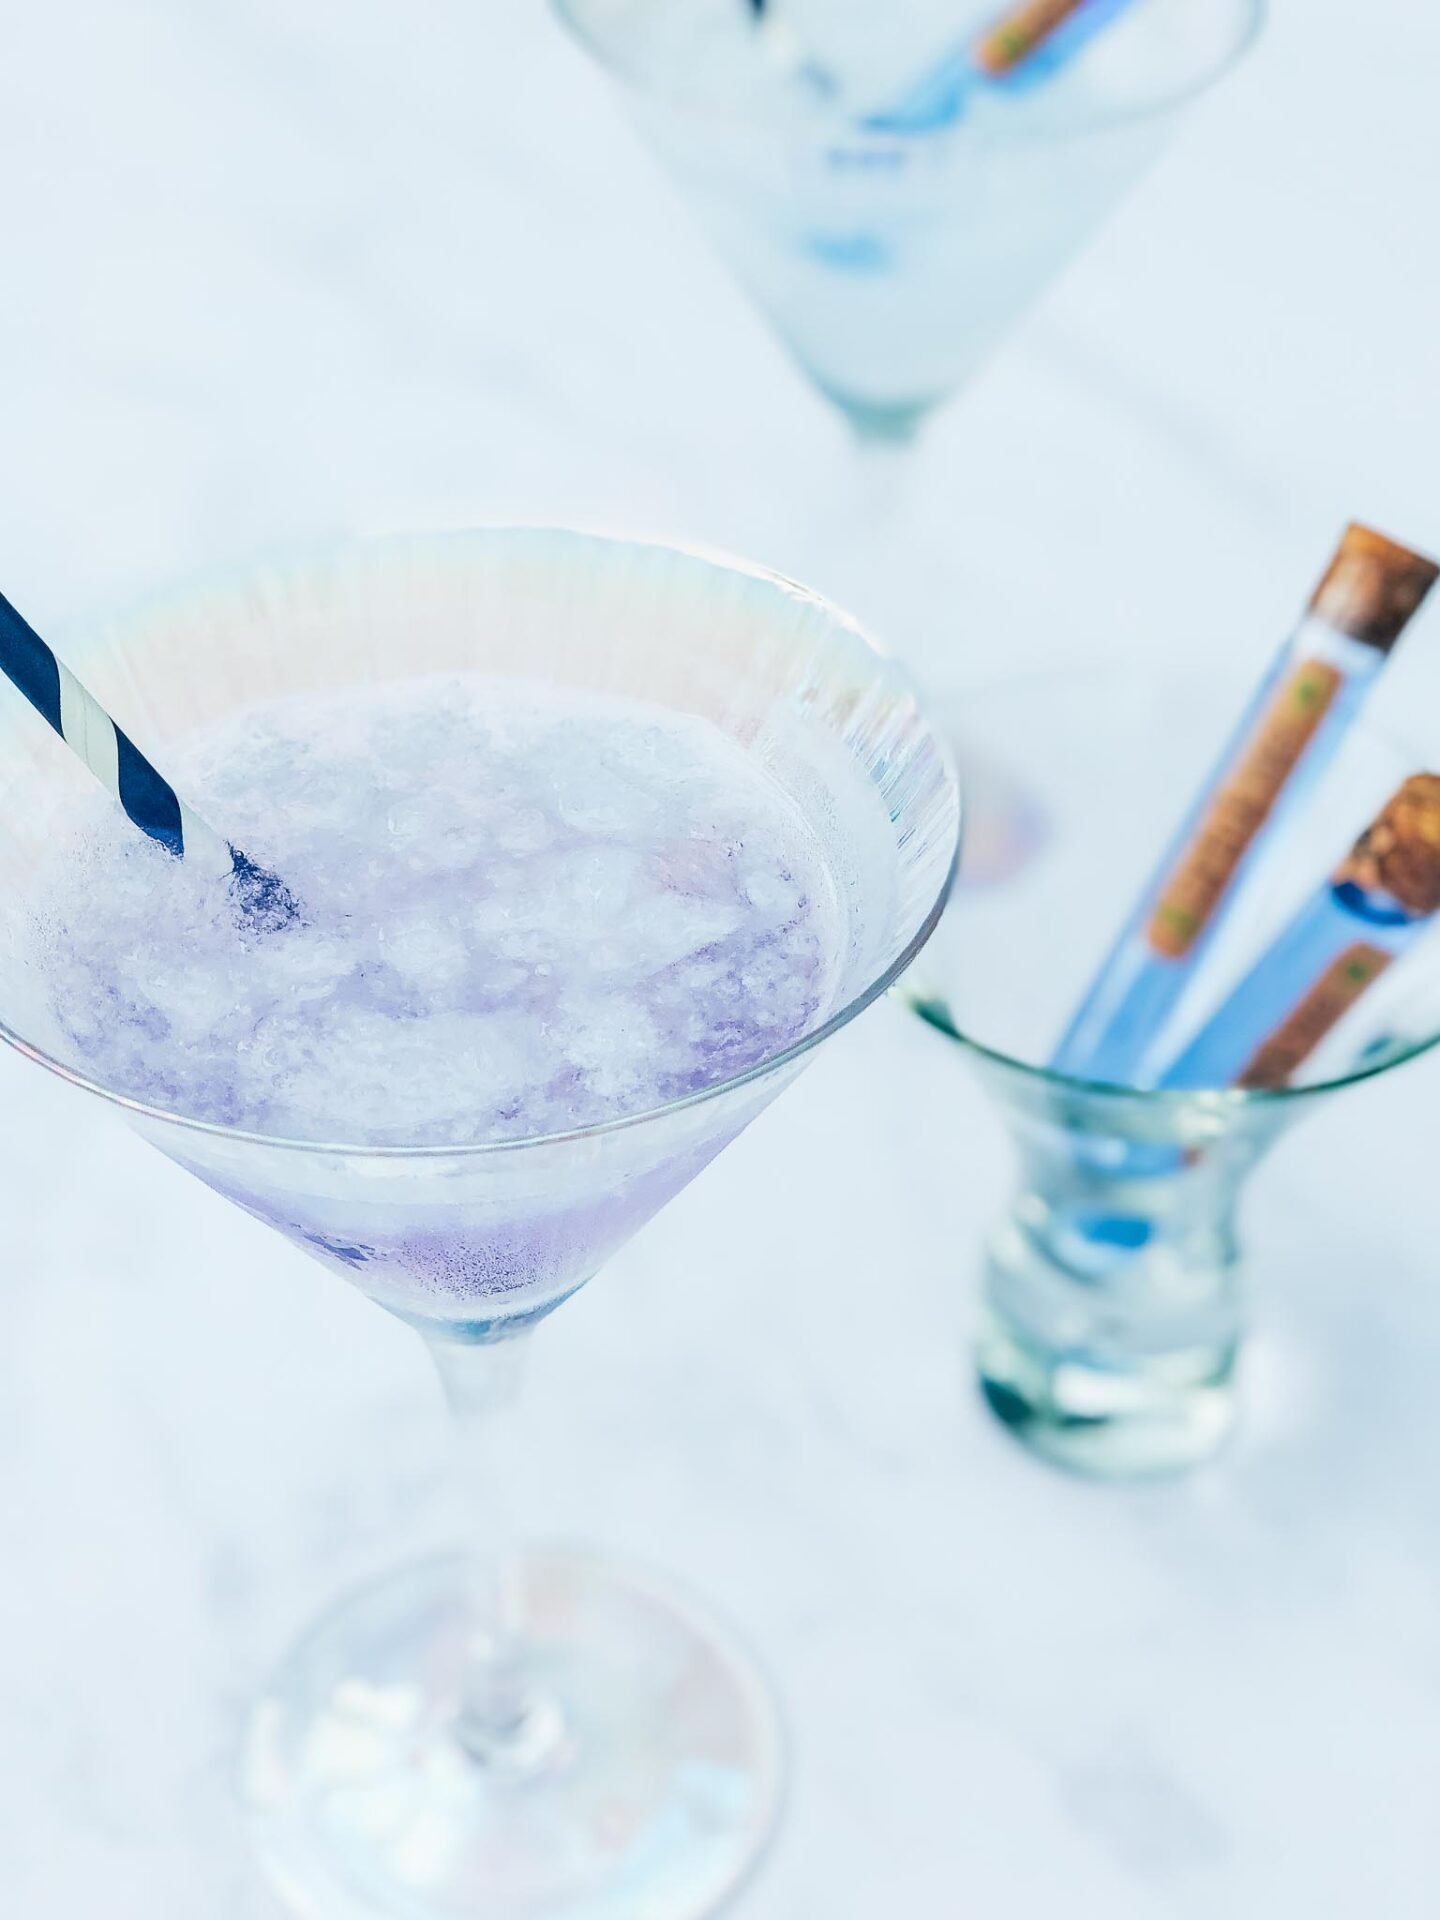
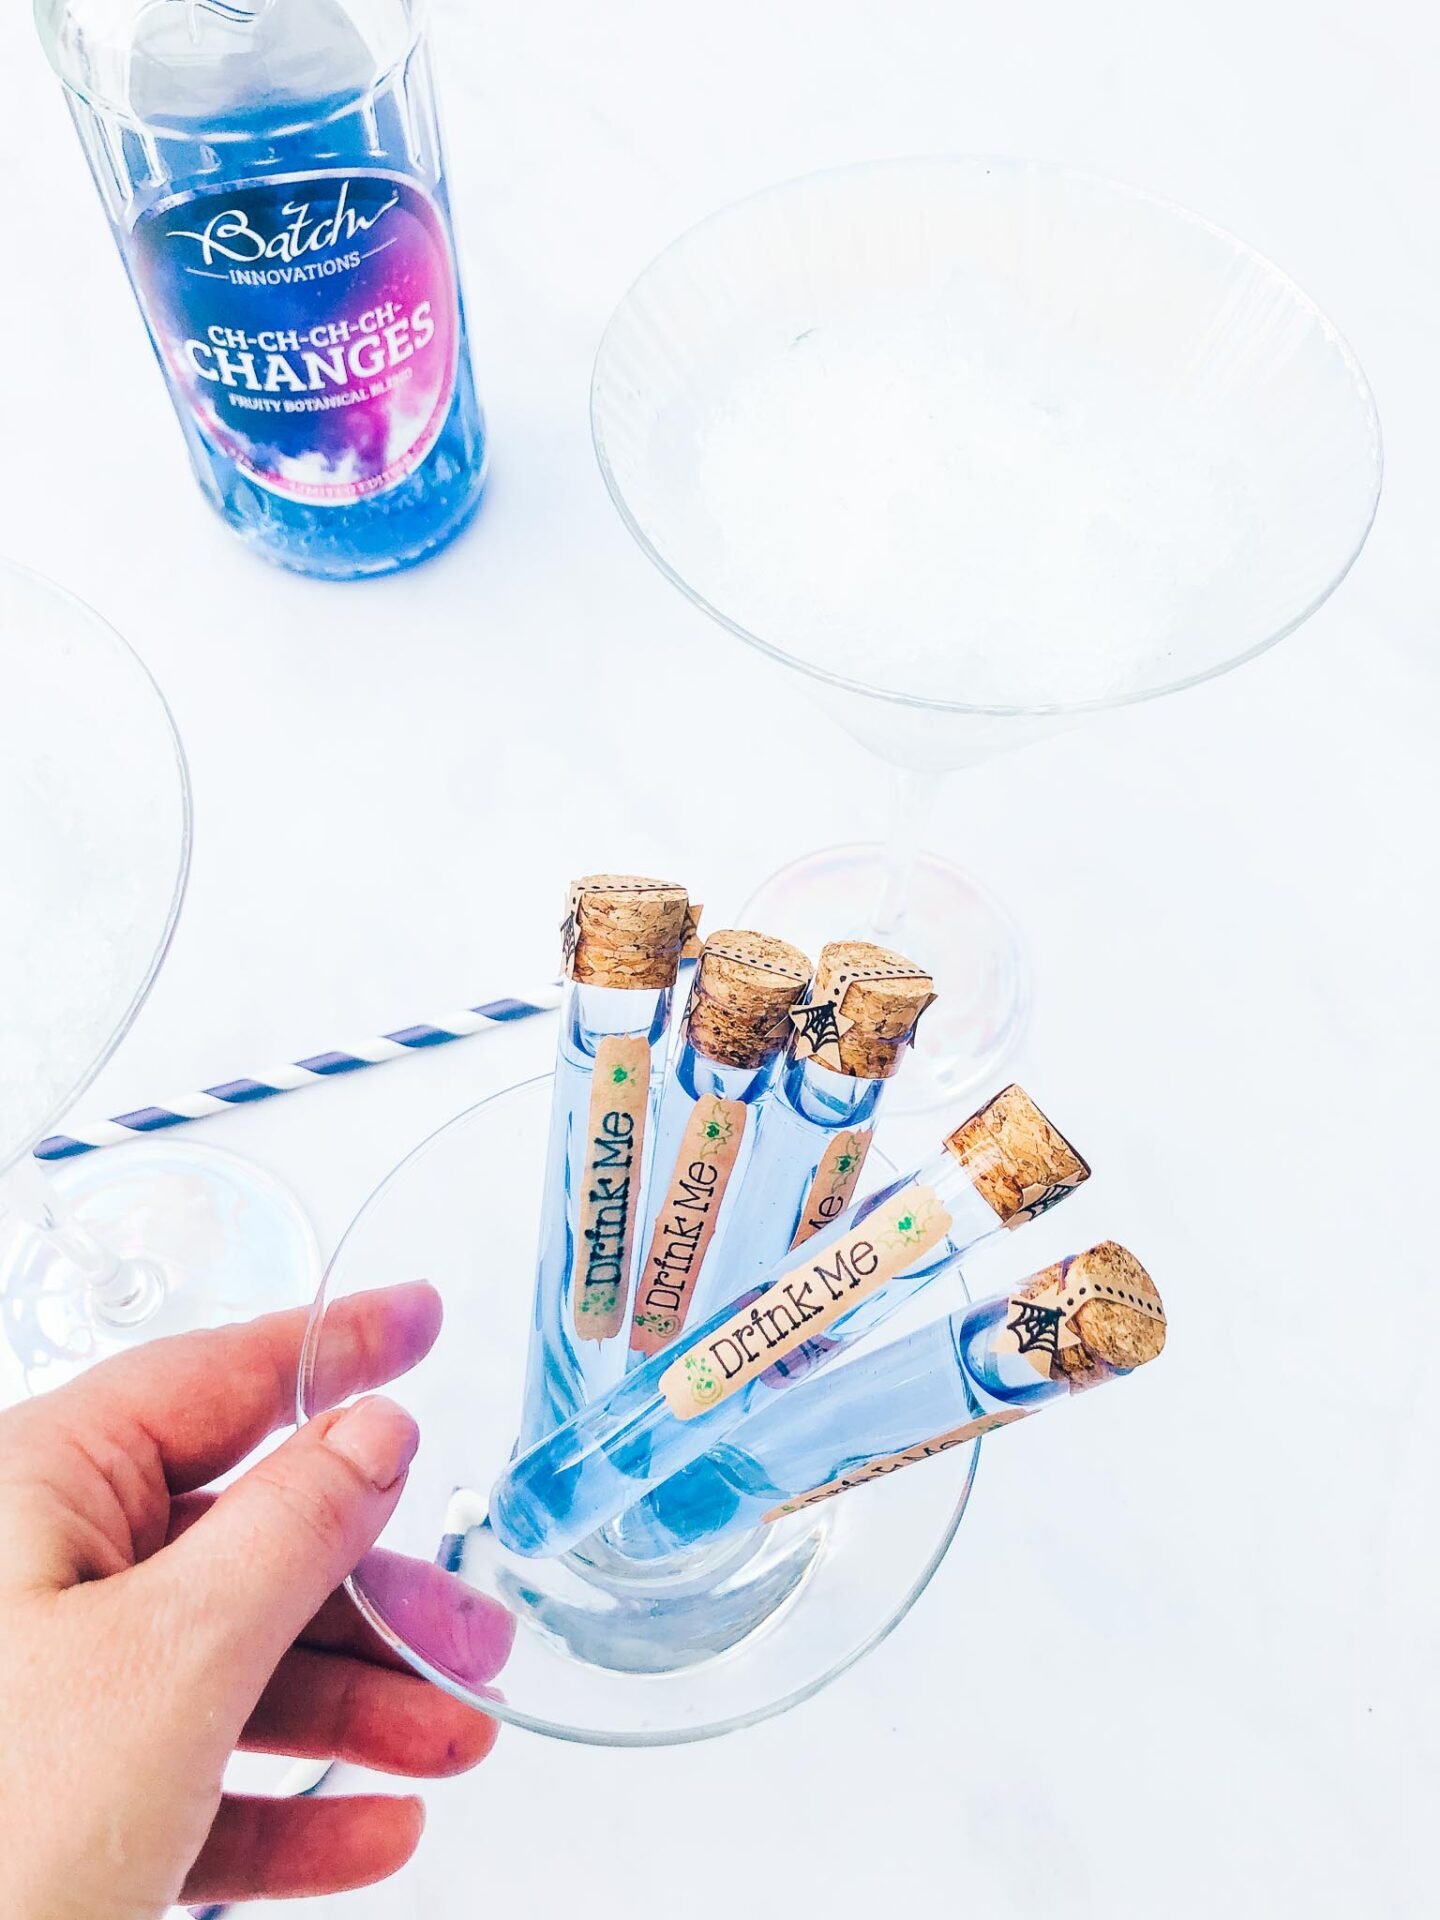
These cute labels for Halloween Gin Potion Bottles, made with my Cricut Joy are perfect for Halloween parties. Now these bottle are filled with colour changing gin and strictly for adult parties. However you could also create a non alcoholic version for children’s parties. Because as wonderful as this gin version is, the intrigue and magic is all in those little bottles, they scream drink me. Thus making them perfect for Halloween parties or themed afternoon teas.
Making these Halloween Potion Bottles is so easy on the Cricut Joy, however you don’t need a Cricut Joy to make them, there’s a PDF link and also print and cut link further down the page. Or if you have design space access you can cut and draw them on your Cricut Machine.
If you want to see me create my projects, follow me on Tik Tok and Instagram.

How To Make Cricut Halloween Potion Bottles
You Will Need
- Cricut Joy/ Maker/ Explore
- Cricut Design Space
- Weeding Tool
- Plastic test tubes with cork stopper’s
- Cricut Joy Writable Smart Label Paper ( This can also be used on a cutting mat with the Cricut Explore Air Or Maker)
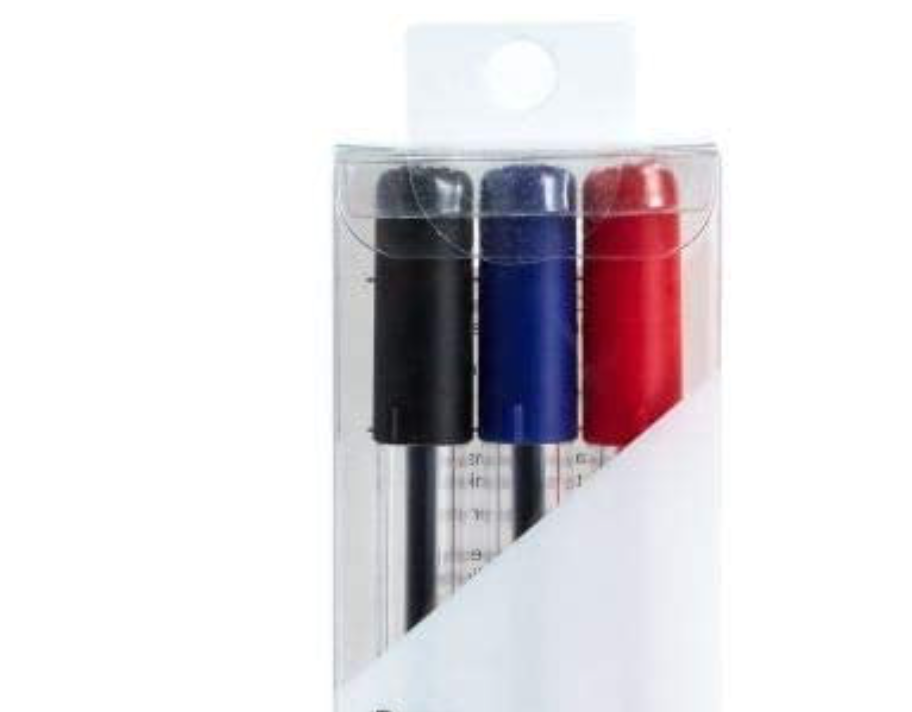
- Black And Green Cricut Joy Pens.
- Colour Changing Gin ( See below for a list of suggestions)
Where Will I Get Colour Changing Gin?
I used Batch Colour Changing Gin, which is delicious, however that was a special edition which is no longer available. You can also make your own, or try out some of theses gins I found on Amazon.
- Todleys 22 Carat Gold Colour Changing Marshmallow Gin Liqueur
- Sharish Blue Magic Gin
- McQueen Colour Changing Gin
- Make your Own Colour Changing Gin
How Do I Make Non Alcoholic Colour Changing Cocktails
Use Butterfly Pea Flower , whilst I have never used this before you would be be able to mix with water and add to your test tubes. The secret is to pour your potion into an acidic drink such as lemonade with slices of lemon in, thats when the magic happens.
To Use My Halloween Potion Bottles Template
If you have paid Cricut Design Space then the project is ready to use here. Alternatively click here or below for the PNG files which can be uploaded to design space as a print and cut project. Or PDF which can be printed and cut out by hand.
Making The Gin Halloween Potion Bottles With Your Cricut Joy
Create A Label
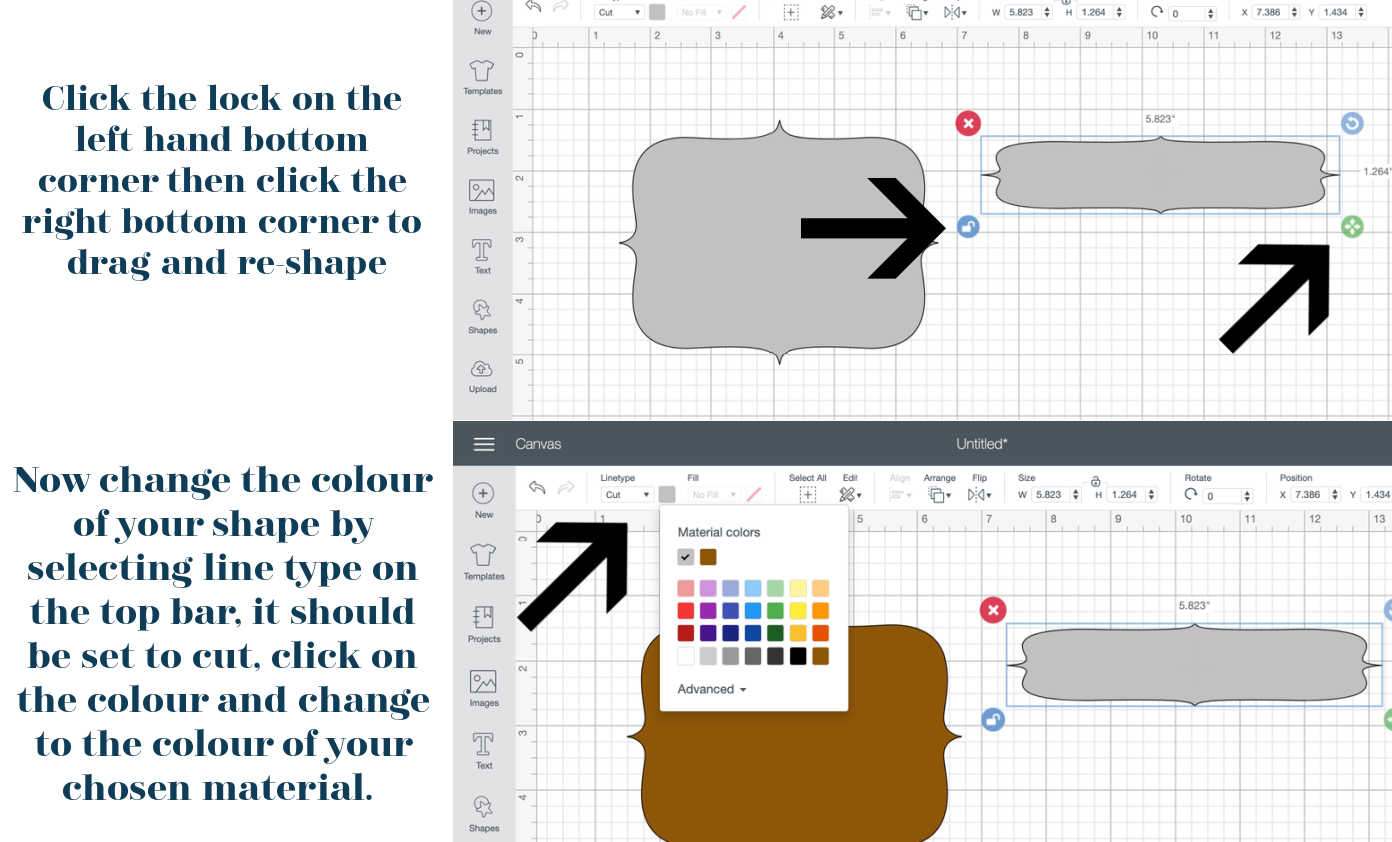
In Cricut Design Space choose images and search for a label or tag, scroll until you find a tag you like the shape of and select.
Now unlock your image, you can do this by clicking on the label and selecting the lock on the left hand bottom corner then click the right bottom corner to drag and re-shape into a longer label shape.
Next change the colour of your shape by selecting line type on the top bar, it should be set to cut. Click on the colour and change to the colour of your chosen material.
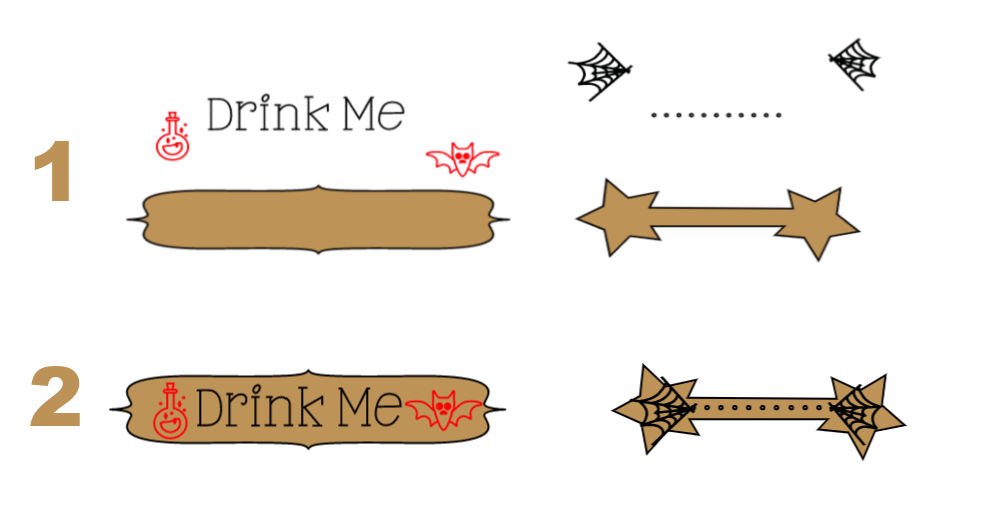
Once you have your chosen shape and colour for the label you can decorate it. Click add text and click font and filter, now select writing.
When you’ve typed your text search for an image, ensuring you click filter in the left hand bar and choose draw.
Colour your text by selecting the line-type box on the top left, it should be on draw. Now choose the colour for your text and image and position on your tag.
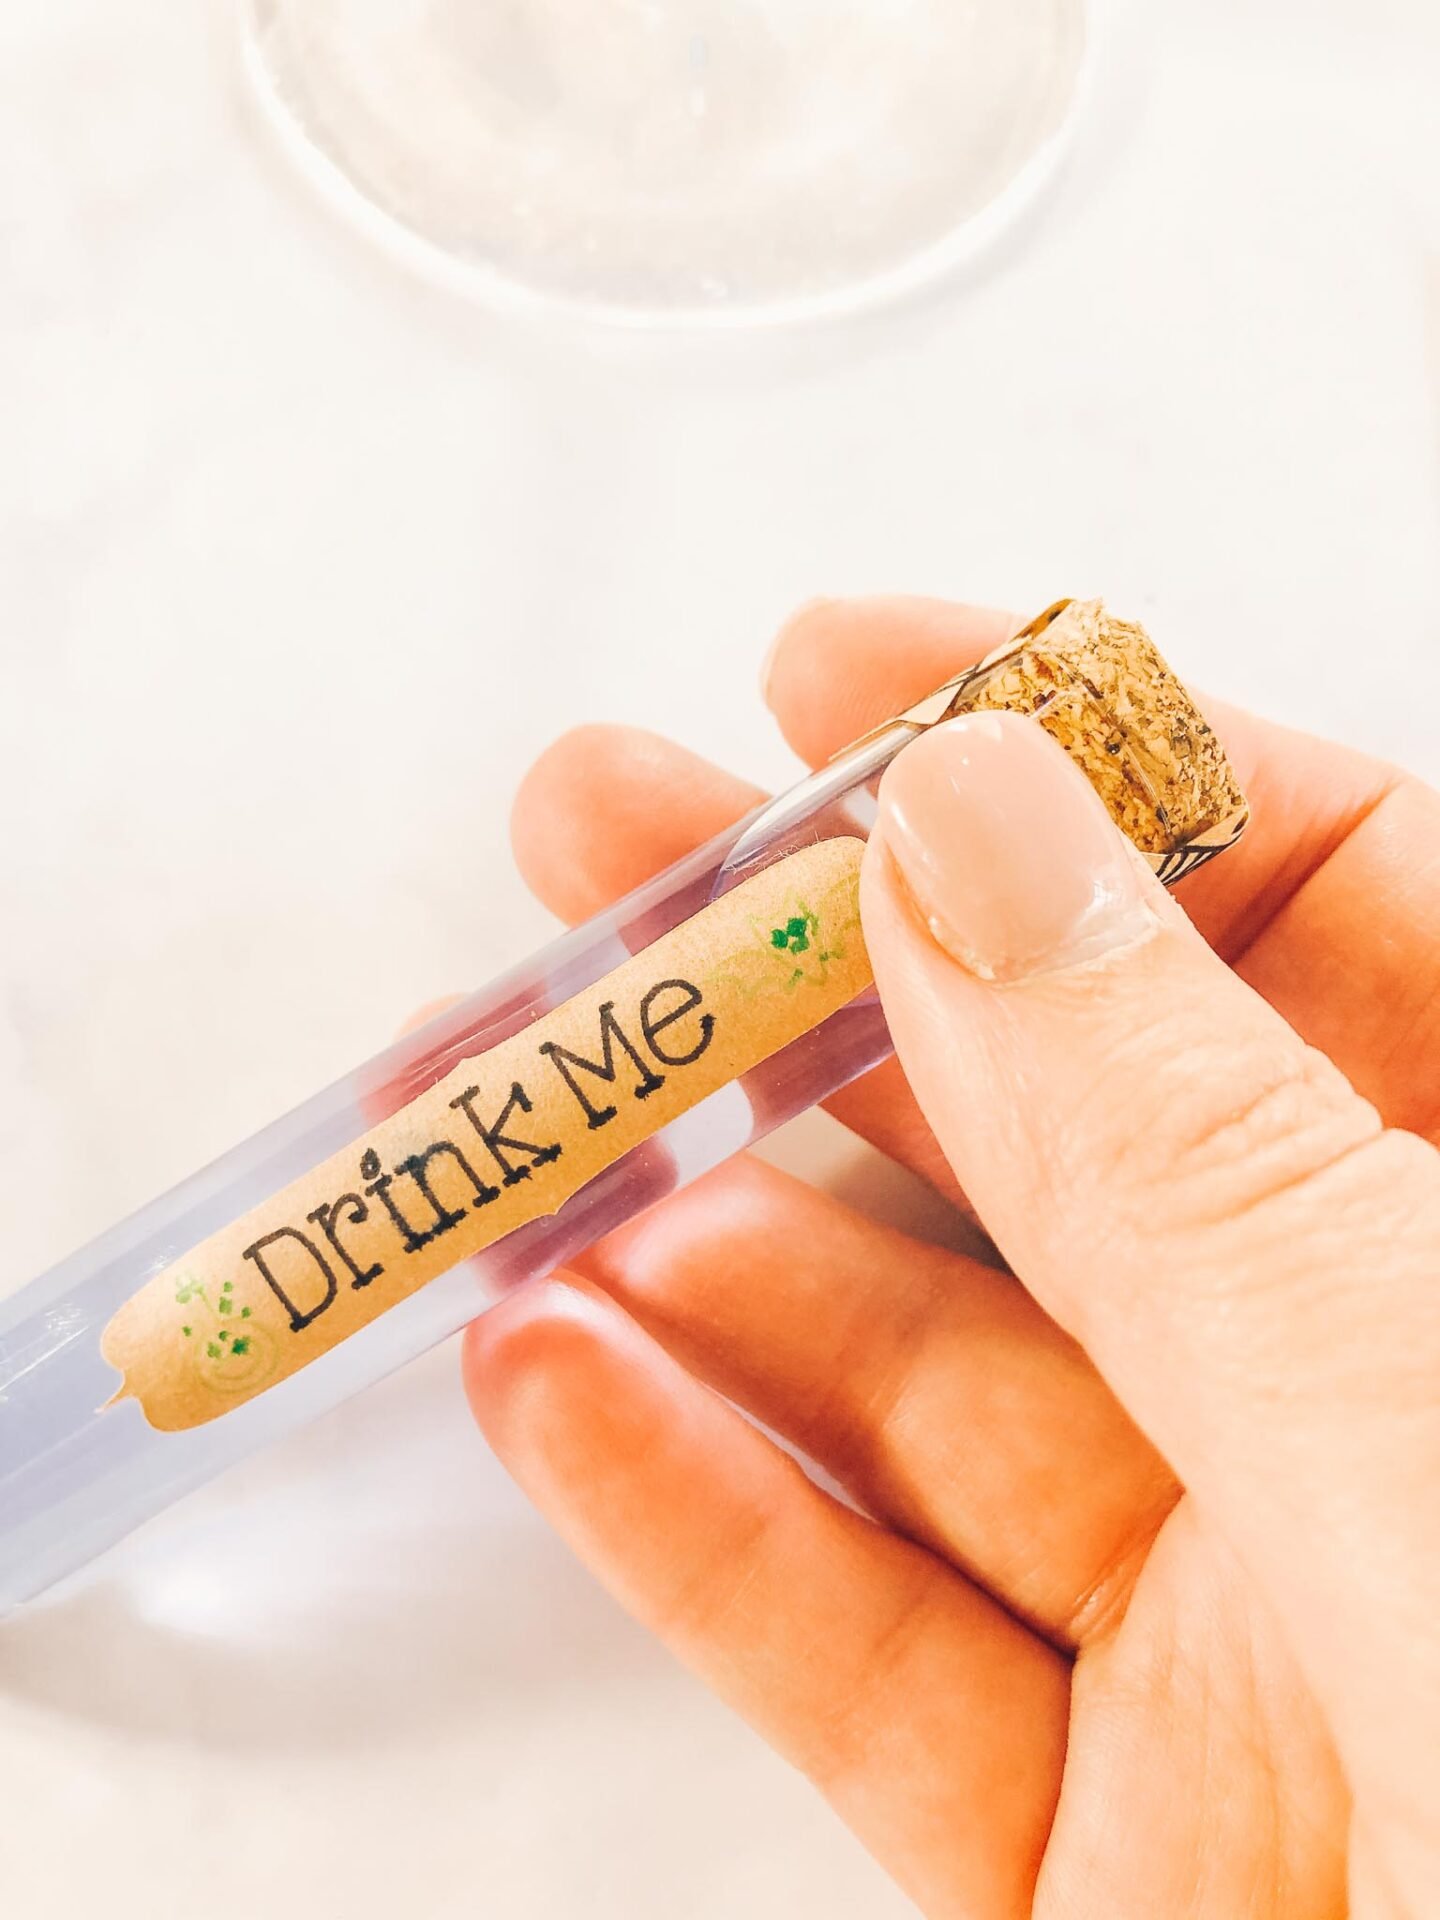
Next right click select all and attach the images to the label. Now when you send you project to cut it will keep the project together. Size your label (mine are just over 2 inches long) and duplicate as many times as you need.
Making The Seal’s For The Bottles’.
To make the seals choose a rectangle and drag into a narrow line, just like you did in the steps above.
Now choose 2 stars and position on each end of your line before selecting all and choosing weld in the bottom right hand corner, then colour your seal.
To add personalisation look for a simple image, I chose a black spiders webs and selected a simple line of dots in images decorate the top.
Once you are happy, position, right click and click attach in the bottom right corner. Now size and also duplicate until you have the right amount before sending your labels to the Cricut Joy.

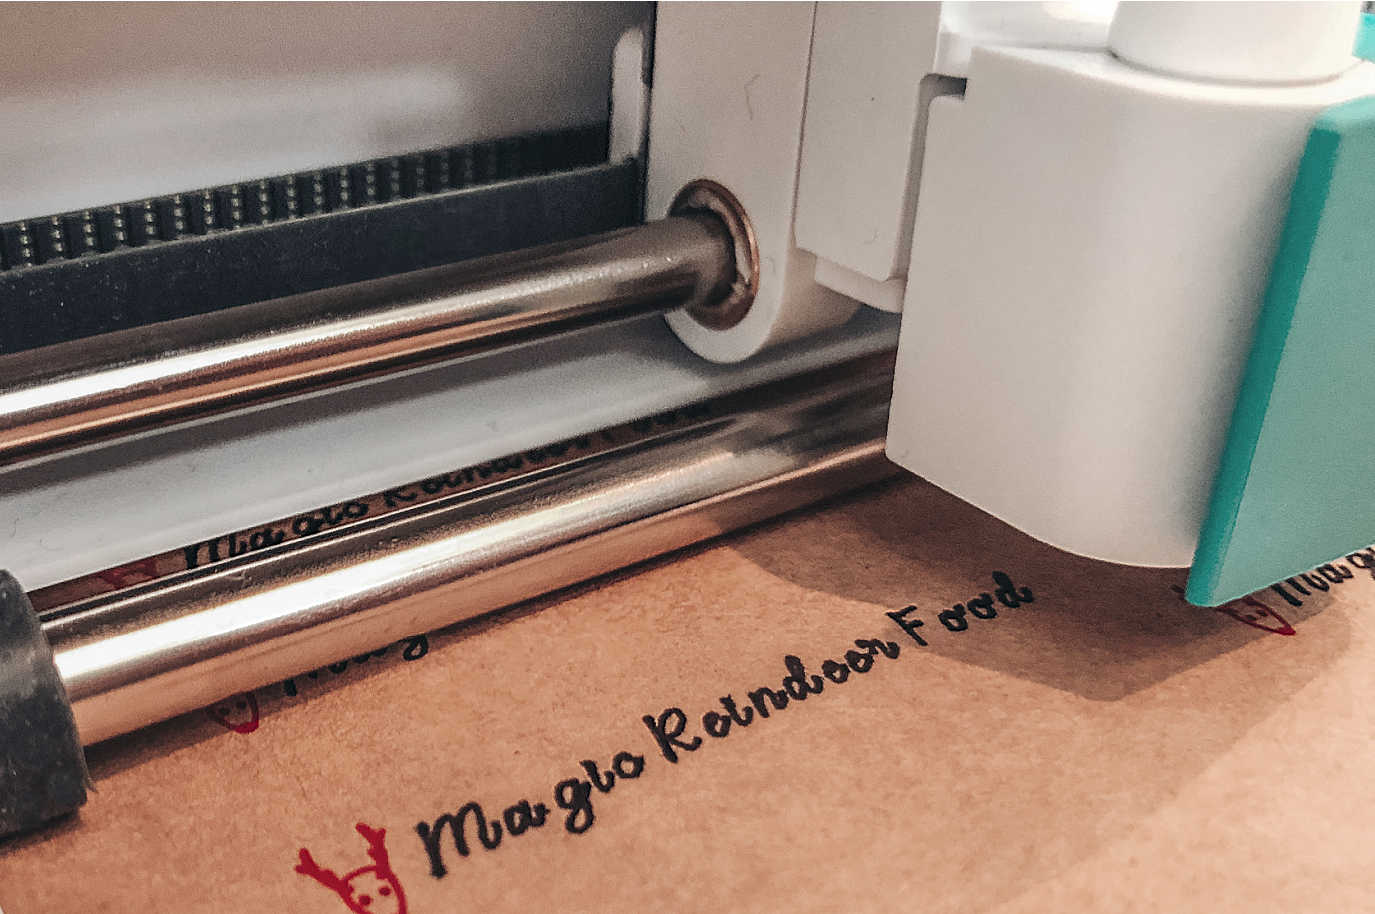
Cutting The Halloween Gin Potion Bottles Labels On Your Cricut.
When you send your labels to your Cricut Joy to cut select the material and the Joy will prompt you to add a pen. It will draw first, then prompt you to add the blade and cut.
Making The Halloween Potion Bottles
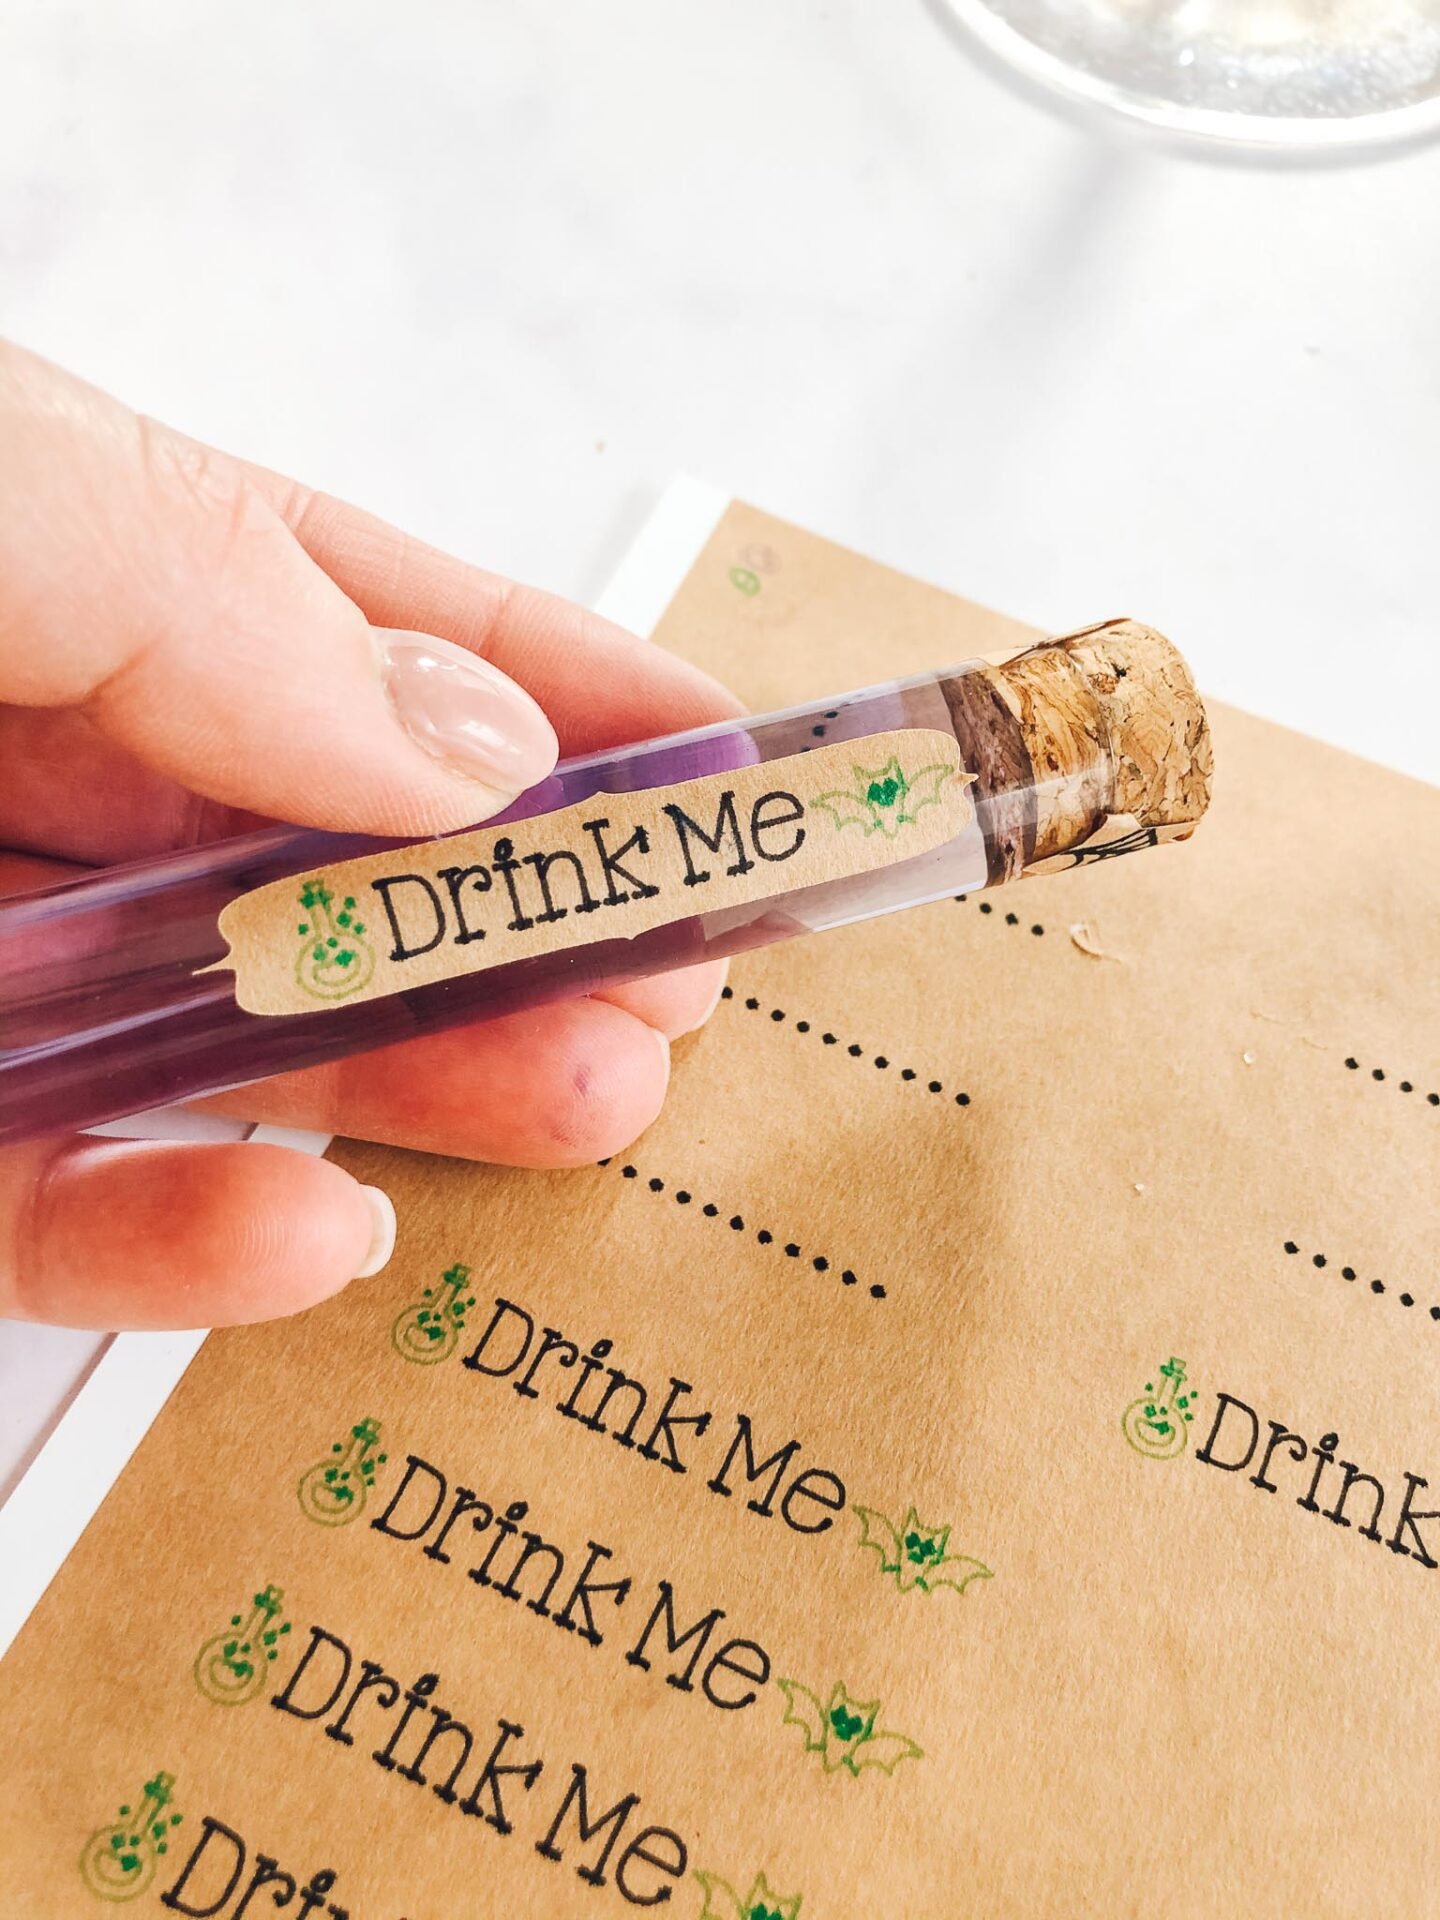
Once the labels are cut carefully attach to each test tube. Additionally, fill the tube with your colour changing drink and attach the bottle seal over the cork to secure the bottle.
Serve all your magic potion bottles together in a glass alongside a tray of glasses full of ice and tonic. However the labels are not waterproof and the ink will smear so do not submerged them.
More Halloween Crafts

How To Make Halloween Potion Bottles
How To Make Halloween Potion Bottles With Cricut Joy Including a free print and cut template and prf printable to create lables for Halloween Gin Test Tubes
Materials
- Plastic test tubes with cork stopper’s
- Cricut Joy Writable Smart Label Paper ( This can also be used on a cutting mat with the Cricut Explore Air Or Maker)
- Black And Green Cricut Joy Pens.
- Colour Changing Gin
Tools
- Cricut Joy/ Maker/ Explore
- Cricut Design Space
- Weeding Tool
Instructions
Create A Label
In Cricut Design Space choose images and search for a label or tag, scroll until you find a tag you like the shape of and select.
Now unlock your image, you can do this by clicking on the label and selecting the lock on the left hand bottom corner then click the right bottom corner to drag and re-shape into a longer label shape.
Next change the colour of your shape by selecting line type on the top bar, it should be set to cut. Click on the colour and change to the colour of your chosen material.
Decorate Your Label
Once you have your chosen shape and colour for the label you can decorate it. Click add text and click font and filter, now select writing.
When you’ve typed your text search for an image, ensuring you click filter in the left hand bar and choose draw.
Colour your text by selecting the line-type box on the top left, it should be on draw. Now choose the colour for your text and image and position on your tag.
Next right click select all and attach the images to the label. Now when you send you project to cut it will keep the project together. Size your label (mine are just over 2 inches long) and duplicate as many times as you need.
Making The Seal’s For The Bottles'
To make the seals choose a rectangle and drag into a narrow line, just like you did in the steps above.
Now choose 2 stars and position on each end of your line before selecting all and choosing weld in the bottom right hand corner, then colour your seal.
To add personalisation look for a simple image, I chose a black spiders webs and selected a simple line of dots in images decorate the top.
Once you are happy, position, right click and click attach in the bottom right corner. Now size and also duplicate until you have the right amount before sending your project to the Cricut Joy.

Cutting The Halloween Gin Potion Bottles On Your Cricut.
When you send the project to your Cricut Joy to cut select the material and the Joy will prompt you to add a pen. It will draw first, then prompt you to add the blade and cut.
Making The Halloween Potion Bottles
Once the labels are cut carefully attach to each test tube. Additionally, fill the tube with your colour changing drink and attach the bottle seal over the cork to secure the bottle.
Serve all your magic potion bottles together in a glass alongside a tray of glasses full of ice and tonic. However the labels are not waterproof and the ink will smear so do not submerged them.
Notes
How Do I Make Non Alcoholic Colour Changing Cocktails
Use Butterfly Pea Flower , whilst I have never used this before you would be be able to mix with water and add to your test tubes. The secret is to pour your potion into an acidic drink such as lemonade with slices of lemon in, thats when the magic happens.
Recommended Products
As an Amazon Associate and member of other affiliate programs, I earn from qualifying purchases.