Sometimes it’s so hard to choose a gift for a special occasion or a personalised print for you home. This is why I have found my discovery of the Cricut Maker and paper cutting revolutionary. Check out my Cricut Guides Page for more projects and tips or if you want to find out all about Cricut’s newest cutting machine the Cricut Joy CLICK HERE.
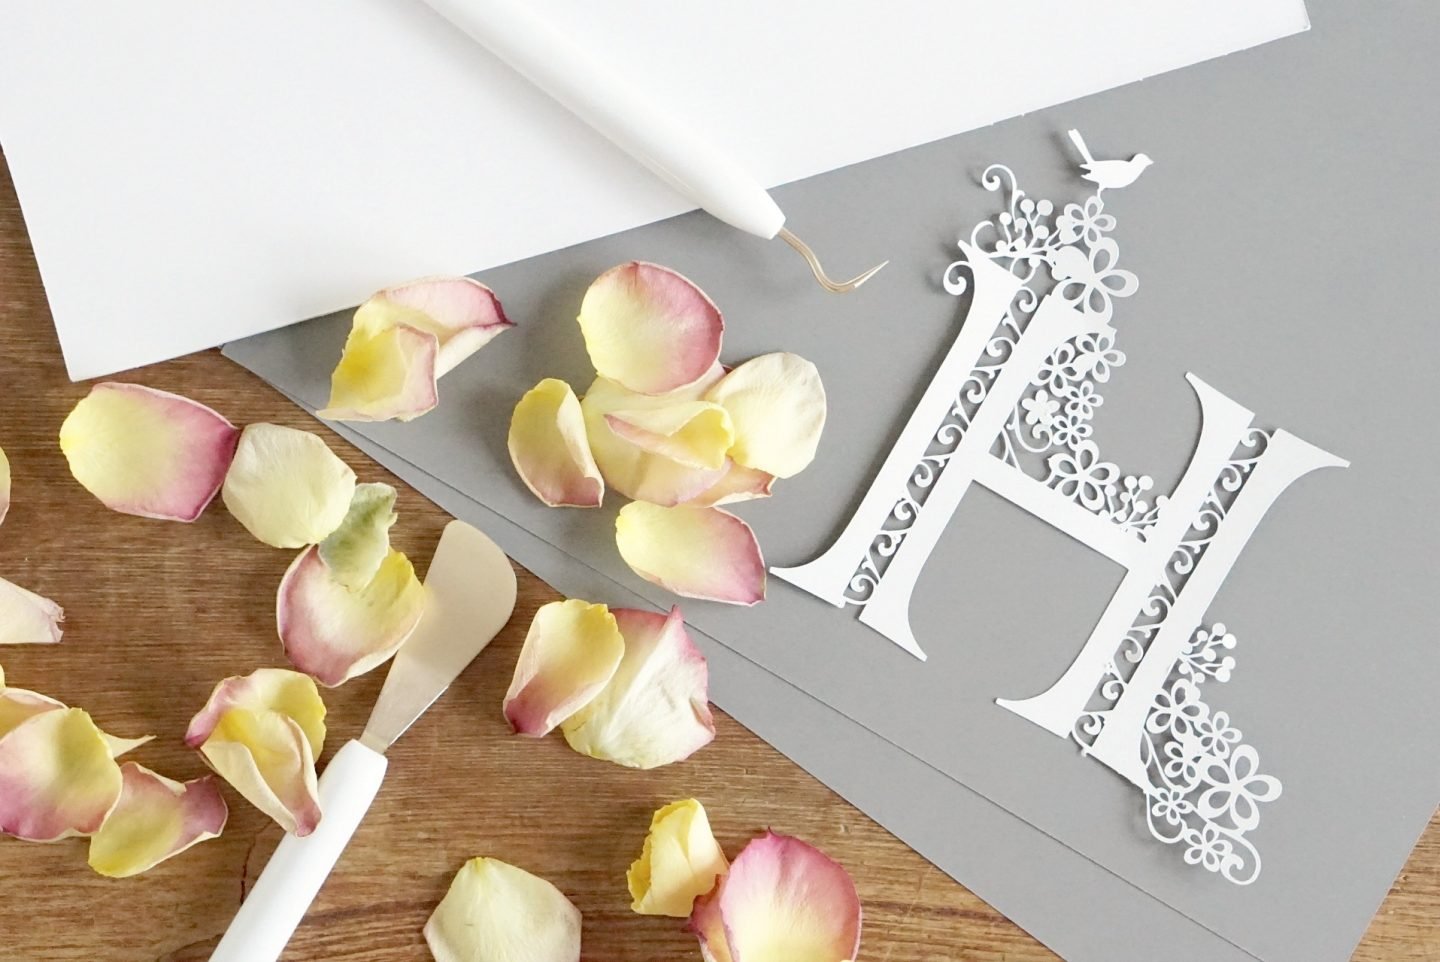
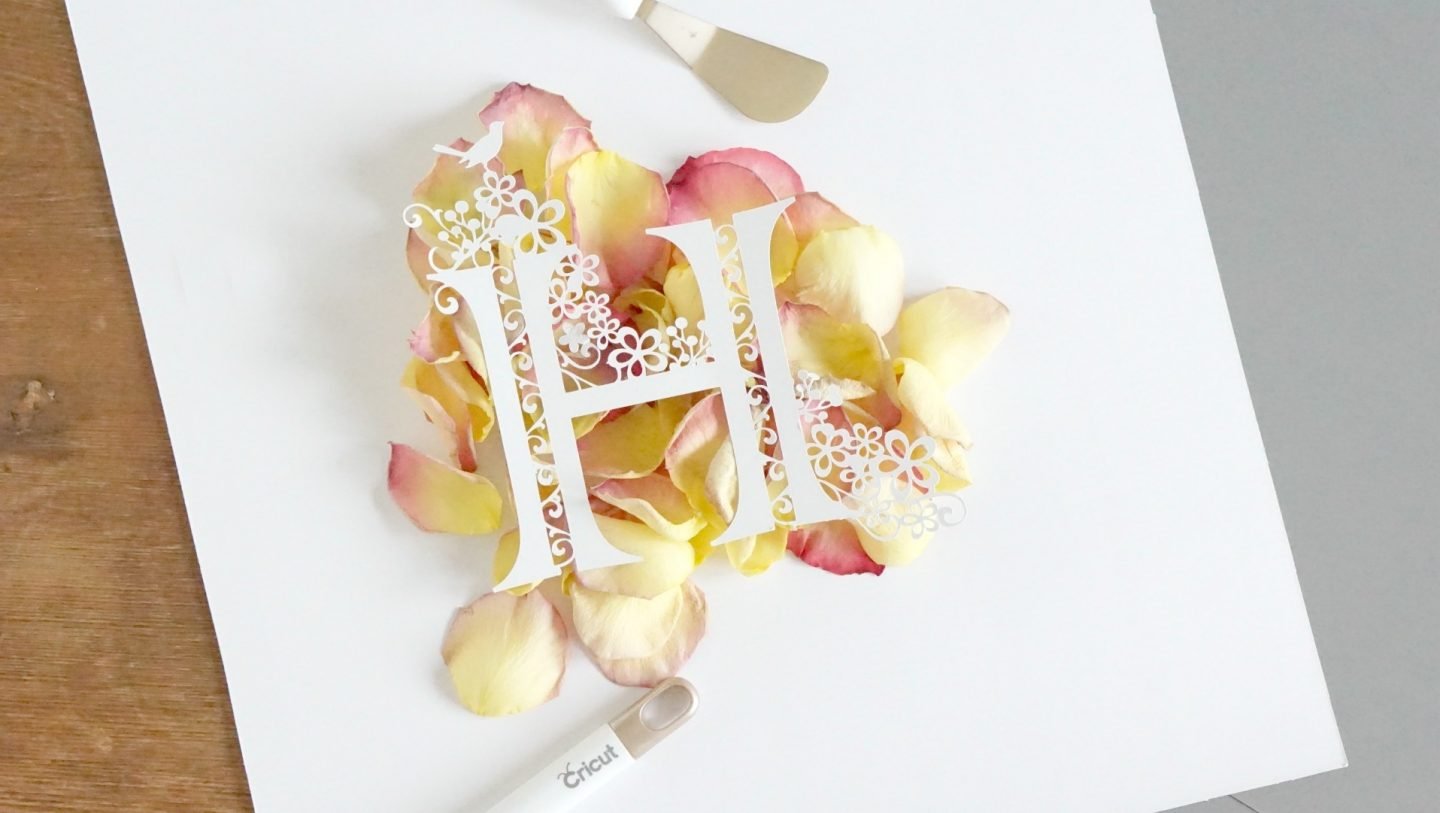
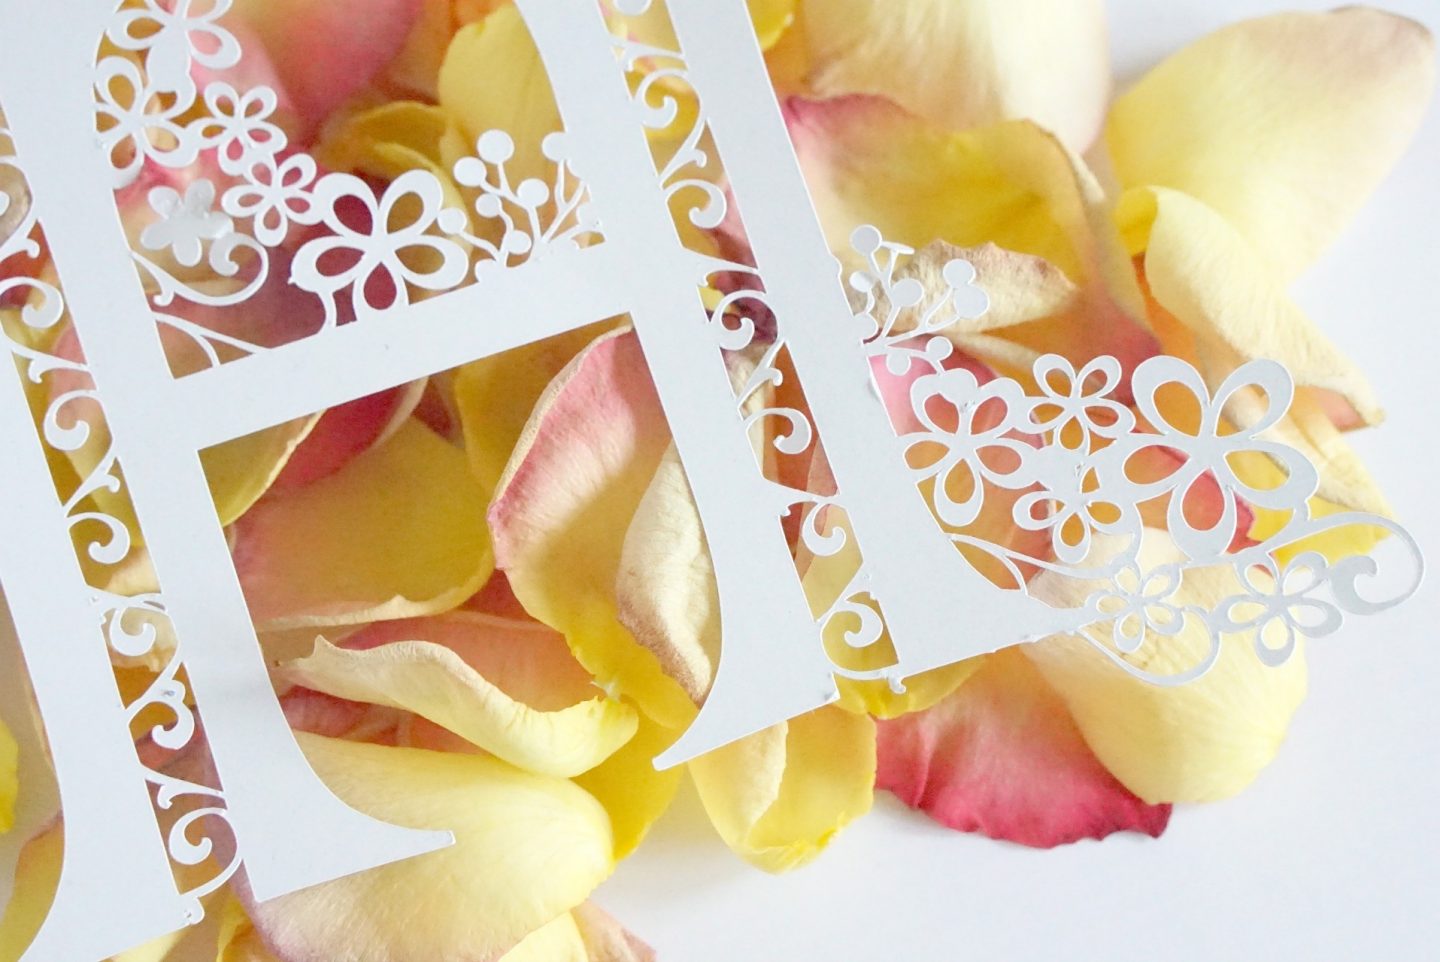
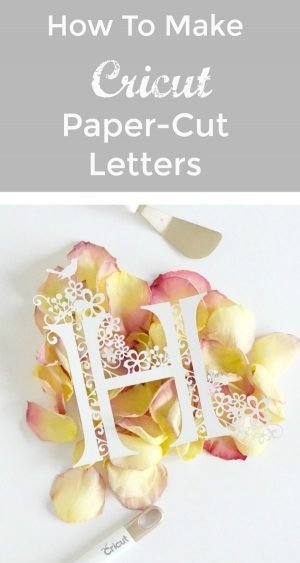
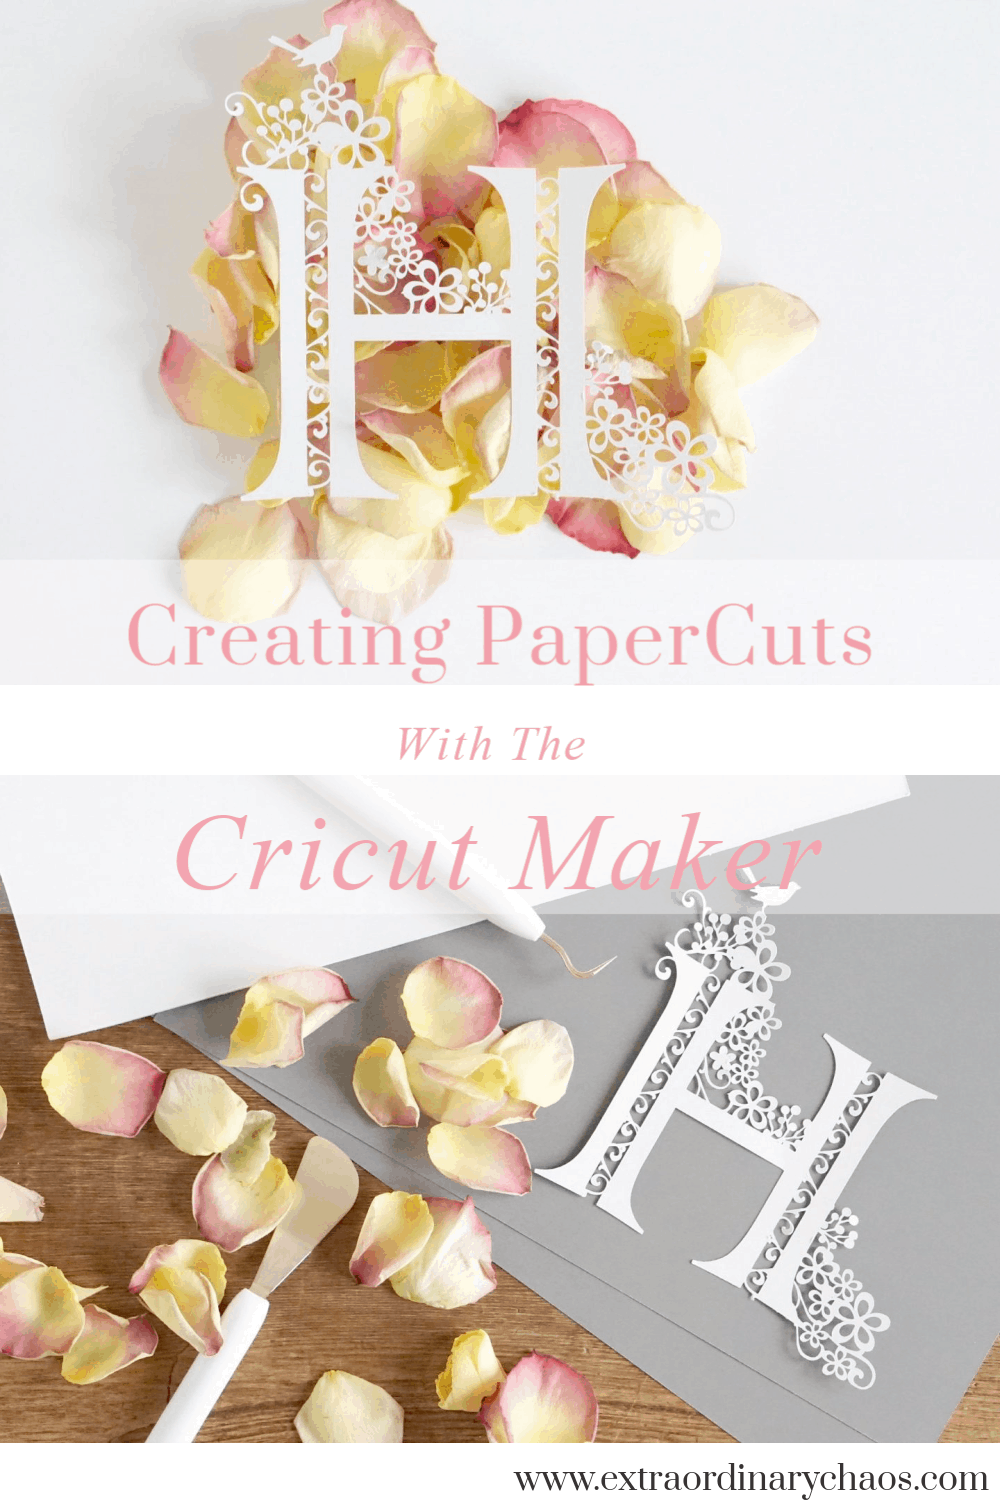
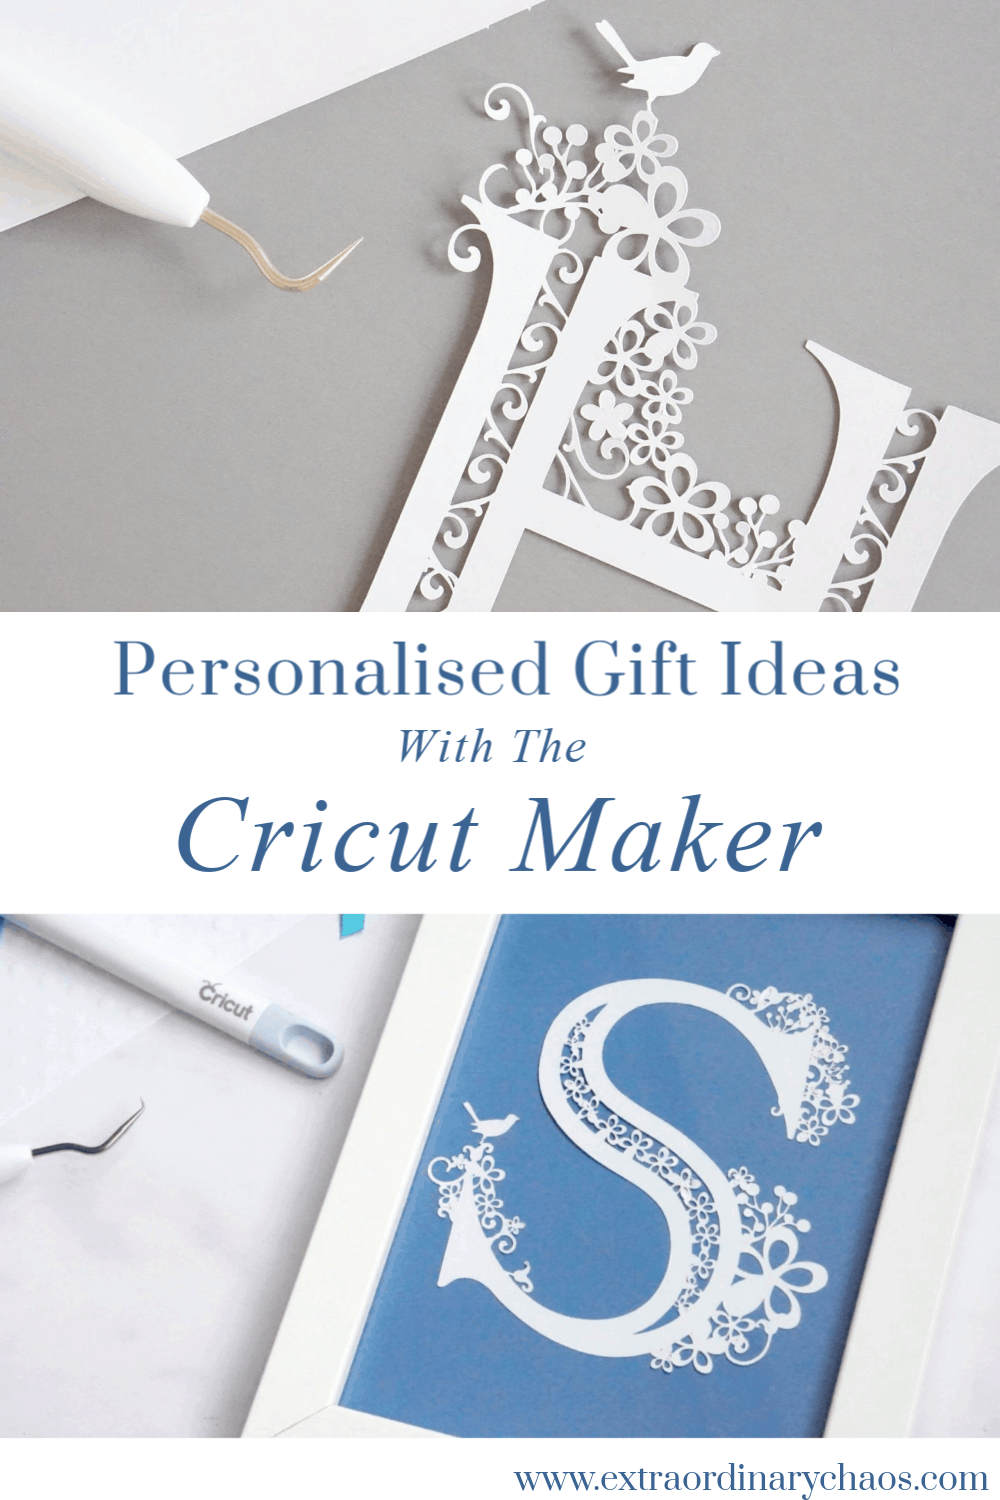
It’s amazing what you can do with a Cricut. With this in mind today’s tutorial shows how to make a beautiful paper cutting monogram letter. Which is perfect for paper cut greetings cards or framed in a collection for an interiors project, or gift, with the Cricut Maker. However if you dont want to make your own check out my free set of Alphabet Letters Here
If you want to see me create my projects, follow me on Tik Tok and Instagram.

Also if you love paper cutting with Cricut check out my tutorial to create a Unicorn Paper Cut here.

What Will You Need For This Project.
Cricut Maker or Explore Air or Joy
Or Cricut Card Stock (I have just discovered this cuts much better and produces a cleaner cut)
Cricut Design Space.
Follow These Simple Paper Cutting Design Steps, How to Make Cricut Paper-Cuts With The Cricut Maker.
- In your design space click new project.
- Choose your letter and font, I chose Colonna as I like the option of adding detail inside the letters as well as around them.
- Decide on a rough size. This can be amended once the project is finished, before cutting.
- Go into images and choose the embellishments you would like to use to decorate your paper cut.
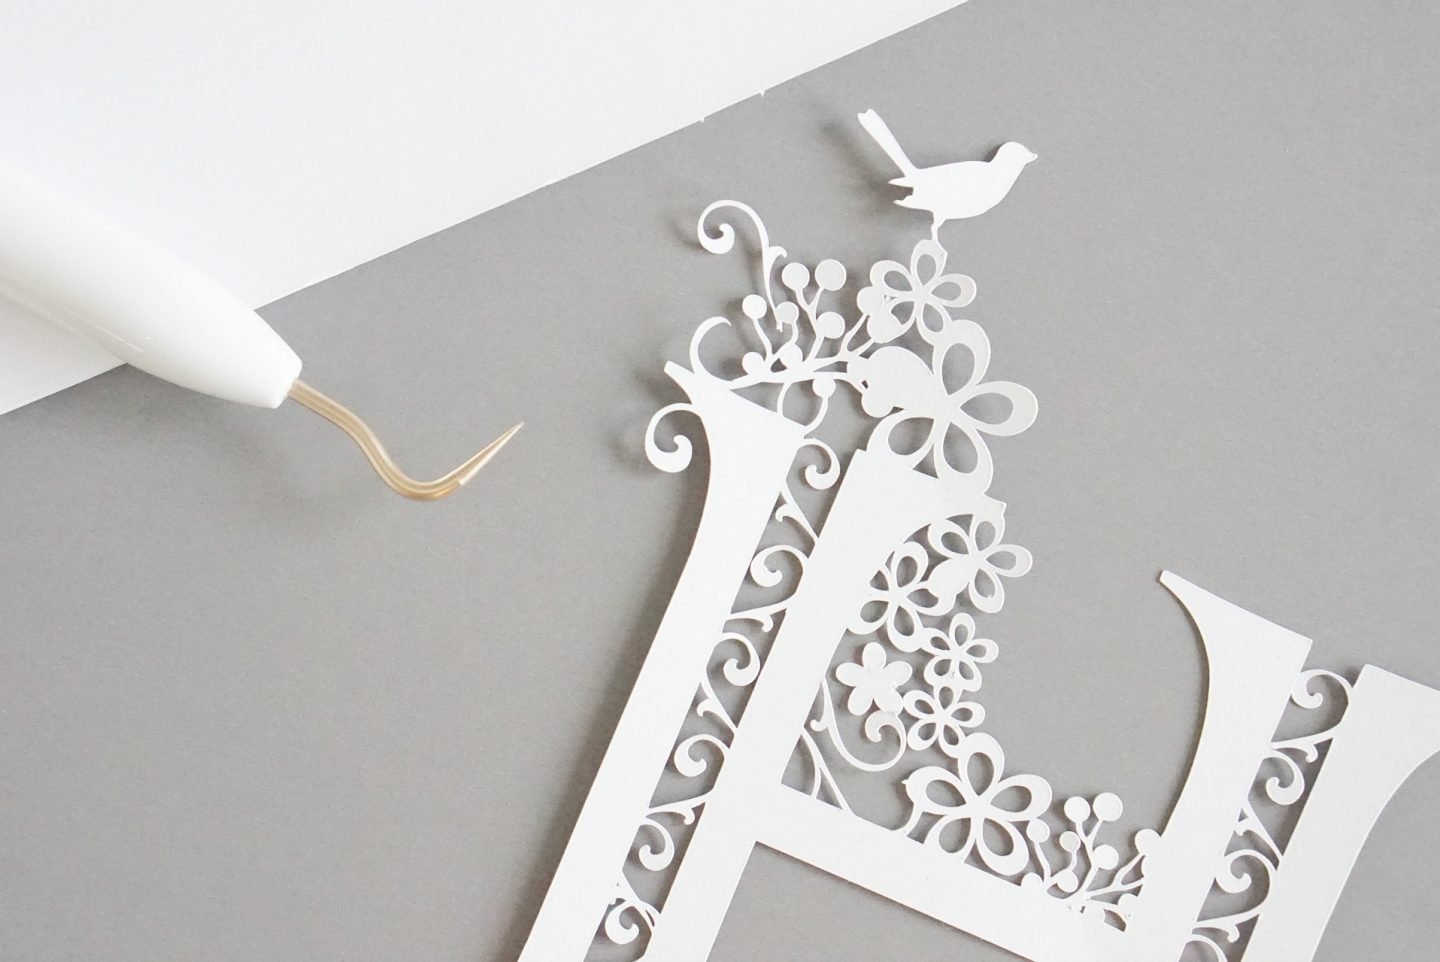
- Set the whole project to one colour, I use black to create a silhouette paper cut effect, this makes it easier to visualise and also enables you to group the project.
- Start dragging the embellishments to size and position onto the project. To duplicate, right-click and click duplicate or copy and paste. You can also flip embellishments to create mirror images.
- Once you are happy right-click and highlight the project, then click group, please note this will not make the project cut ready, just make it easier to size and continue adding to without affecting the rest of the design.
- One you are happy with your letter, right-click highlight the project and click weld. This will bond all the components ready to cut.
- Click make it, prepare and load matt, choose card selection on the design space and press go.

Hints and Tips paper cutting with the Cricut Maker
When choosing the size of your crafting project, use your Cricut cutting matt for guidance. If using a photo frame I generally place it on top of the matt to ensure my sizing is 100% accurate. You can then change accordingly on the design space where you can access many free Cricut images to add to your design.
Keep the whole project in one colour to ensure you are able to group and weld it together.
Save it as a project before grouping so you can edit and change for future projects.
Also before grouping check for over lap of embellishments/images as this will create blank spots on the cut.
Avoid using any tiny detail as it can make the cut a little messy, the Cricut is able to cut fine detail as you can see from my finished letter. But too many tiny thin lines can be problematic.
Ensure the while project is connected in some way to create a connected finished project.
If you are struggling with multiple embellishments/images moving about during design, group the project to make it whole. I find this so much easier. You can then continue to add to the project.
Before pressing cut ensure you have welded the project.
Save the finished welded project for future use.
Check out my vlog below, I have also included the links to my finished projects and the unlinked paper cutting project.
The latter being useful should you want to open and edit the project, change the letter and rearrange thus saving time collecting and sizing images.
Good luck. But honestly, it’s not a difficult project, yet is very rewarding once finished. And if you create a beautiful letter from this tutorial please share it and tag me on @sarahjchristie
Check out my instagram stories for Cricut Tips
Click here for more Cricut Projects
Other Paper Cut Projects Can Be Found On This Page
This post contains affiliate links
Pin For Later
This is so beautiful Sarah i’d Love to have a go on this cricut machine it looks so professional! I’ve put one on my mothers days gift list haha fingers crossed. The tutorial is brill you make it look so easy ? Mandy xxxx
WE will have to have a crafting day Mandy, that would be fab x
This is SO brill Sarah!! It’s so similar to the larger ones I’m making for my NOTHS shop. I’m really keen to know if it will cut artwork that is deigned outside of the software — and whether I could upload my own designs! I have so many ideas that this would be brilliant for — it’s a shame you can test them out in store! Our local Hobbycraft sells them, I think. I might ask them if I can test one out 🙂 Lovely to see you putting it to good use!! xx
I do know that Hobby Craft have crafting events with the Cricut so keep your eyes peeled, I love mine it is fab and I am confident with would cut most thicknesses as it has a thick blade. You can also import designs too x
Wow Sarah, you have really made the most of your Cricut – I love seeing these creations. I had no idea of how much you could do!
Thanks Helen I blooming love it its such an incredible machine you can do so much with it x
Such an elegant little embellishment! Thanks so much for sharing your creativity with the Cricut!
Ah thank you thats so kind x
I love this tutorial! where did you find that font?
Hi Taylor thanks so much, it was on the Cricut Dashboard one of the Cricut access fonts x
WOW, what a stunning project! I love the tutorial too. You are very kind to share, I’m slowly trying to get one made with the letters P & N for a bridal shower!!!
Thanks so much Marilyn, jut remember to keep welding your project and it will work out, and copying and pasting the embellishments saves time too x
Do you take custom orders for these?
Ah sorry I dont, do you have a cricut machine?
Beautiful! I am going to try and one. Great tutorial.
Thank you x
Beautiful I love it! I have had a lot of difficulty with card stock ripping or tearing on my maker even if I use a brand new blade. No problem with simple cuts just the fine detailed. Also No problem with vinyl etc. What type or brand of card stock do you find works best for these detailed cuts?
Thanks Lisa I use the Cricut Cardstock I have never tried another brand and I always set my blade one heavier on finer cuts x
I would love to know what design elements you used in your letter H. Thank you.
Hi Lynne all the elements are on this link if you click on images and fonts used in project, hope that helps. I am a huge fan of swirls and flowers and like to add the odd bird in. If the link does not work let me know and I will send you the element codes xx https://design.cricut.com/#/design/84297488/projects/user-project/84297488?category=My%20Projects
When I click the link it tells me I can buy this for $4.99 but when I click to customize I can’t do anything but size it?
How do I find the embellishment you used?
Hi Kacey if you click on the link a few lines above where it says the unlinked project you can edit that one, but make sure you weld it before you cut x
BEAUTIFUL!
Beautiful!! Ive had my cricut for almost a year and I am in love!! I had always wanted one! But I was intimidated by it the first month I had it. Finally I take it out of the box lol and start searching “Im scared of my cricut” and now 10 months later and I have over 200 projects in my cricut design space!! I LOVE MY CRICUT!
Your design is beautiful Sarah!! I cant wait to try this!! Another reason I love my cricut, I still learn something new everyday! The possibilities are endless!!
Thank you for sharing!!
Your cricut soul sister,
Kristi….
I felt like that at first Kristi but now I love it! Thank you so much and I love that Soul Sister xx
I love this papercut. Just one question, where do you get all your images from? The swirl, flowers etc? I have the explore air. I want to try and make something for my parents 60th anniversary. So far all the projects i have done have been bought ones.
Thank you
Hi Julie I just searched flowers in design space and welded them all together, if you copy and paste multiple times it makes it quicker, also there are tips on the youtube video on the post, but its actually pretty simple once you get started x
Thank you Thank you Thank you I have been going crazy trying to figure out how to do this . I found you on pinterest I couldn’t believe my luck you also explain everything step by step which is a great a help . I have a silhouette which is not so different I can’t wait to try this out tomorrow just one question though the images you used what are they e.g. svg , png
They are images within Cricut Design space although you can add a any type of image into design space for use on projects x
OK. Is the alphabet available somewhere? Got it to pull up the pic of the letters somewhere yesterday. Everytime I try today all the links say the projects say they are private of exclusive content.
I am quite sure that I can not reproduce your amount of creativity.
Any help/hope for me?
Thanks!
Hi Elizabeth this post was a tutorial so I never created the whole alphabet, however there are quite a few Alphabets here that are free to download, some you have to save in the post up-load to design space and remove the back, some I have already done that and are in png files ready to download, hope that helps. x https://extraordinarychaos.com/free-downloadable-cricut-alphabets-and-numbers
A couple of months after receiving my Cricut Maker as a Christmas gift I began looking for something I could make as a wedding gift for my son. I had no previous experience with cutting machines or paper crafting. I found some pictures of your letters but I did not find your website. I used your photo to create a Monogram of the letter ‘B’. When I shared it on a cricut group on facebook I was asked where I got it. When I said I created it myself I was asked if I would share it. I explained that it was my first project and I had no idea how to share. I must have done a pretty good job on my creation because another member said that they had seen it somewhere and would find it and share it.
I am so glad that I have found your website two and a half years later. If I had found it back then it certainly would have saved me much frustration. Thank you for your creations as well as your generosity in sharing your knowledge and designs.
Hi Phyllis thank you so much you have made my day and lovely comments like this make it all worth while, Sarah xx