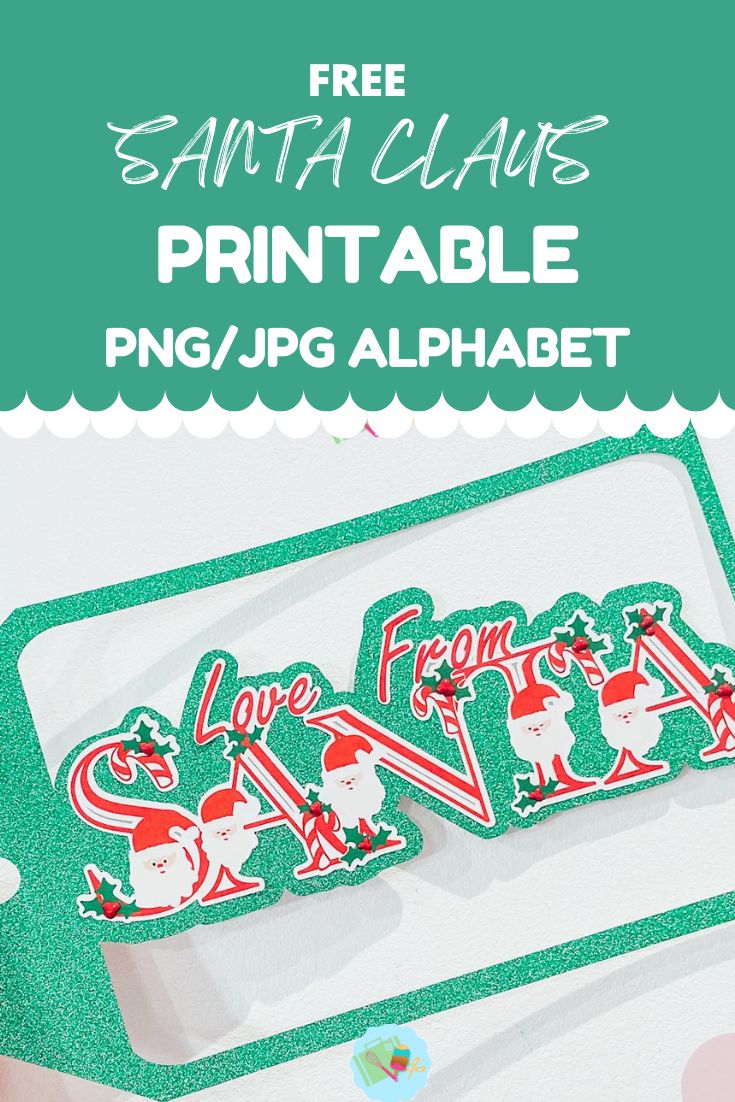
I am so excited to share our free Santa Printable Monogram Letters And Numbers, this set is the perfect way to decorate festive card, gifts or scrapbooking layouts.
Santa has the be one of the main men of the year right? Especially to little ones who spend their whole year building up to either Christmas or their birthday, its one celebration rolling into another. Or was that just our kiddies?
If you want to see me create my projects, follow me on Tik Tok and Instagram.
This cute monogram Santa Printable Monogram Letters And Numbers is perfect for the Christmas build up and Christmas printable crafts. Thus perfect for making personalised cards, gift tags and even use the numbers for a sleeps to Christmas build up or diy calendar. Today I am going to make a gift tag, but this alphabet has soooo many uses.
This post may contain affiliate links. Which means I may receive a small commission if you click a link and purchase something that I have recommended at no extra cost to yourself. As an amazon, Cricut and Glowforge associate, I earn from qualifying purchases.
To Make Our Santa Gift Tags You Will Need
- Printer, (Make sure you calibrate your printer to your Cricut before using for the first time, you will find the calibration button by clicking on the 3 lines next to CANVAS in the top left corner of Design Space)
- Glossy sticker printer paper
- Green glitter card
- Cricut Maker
- Cutting Mat
- Cricut Tool Kit

How To Upload Your Printable Santa PNG Alphabet Letters And Numbers To Cricut Design Space.
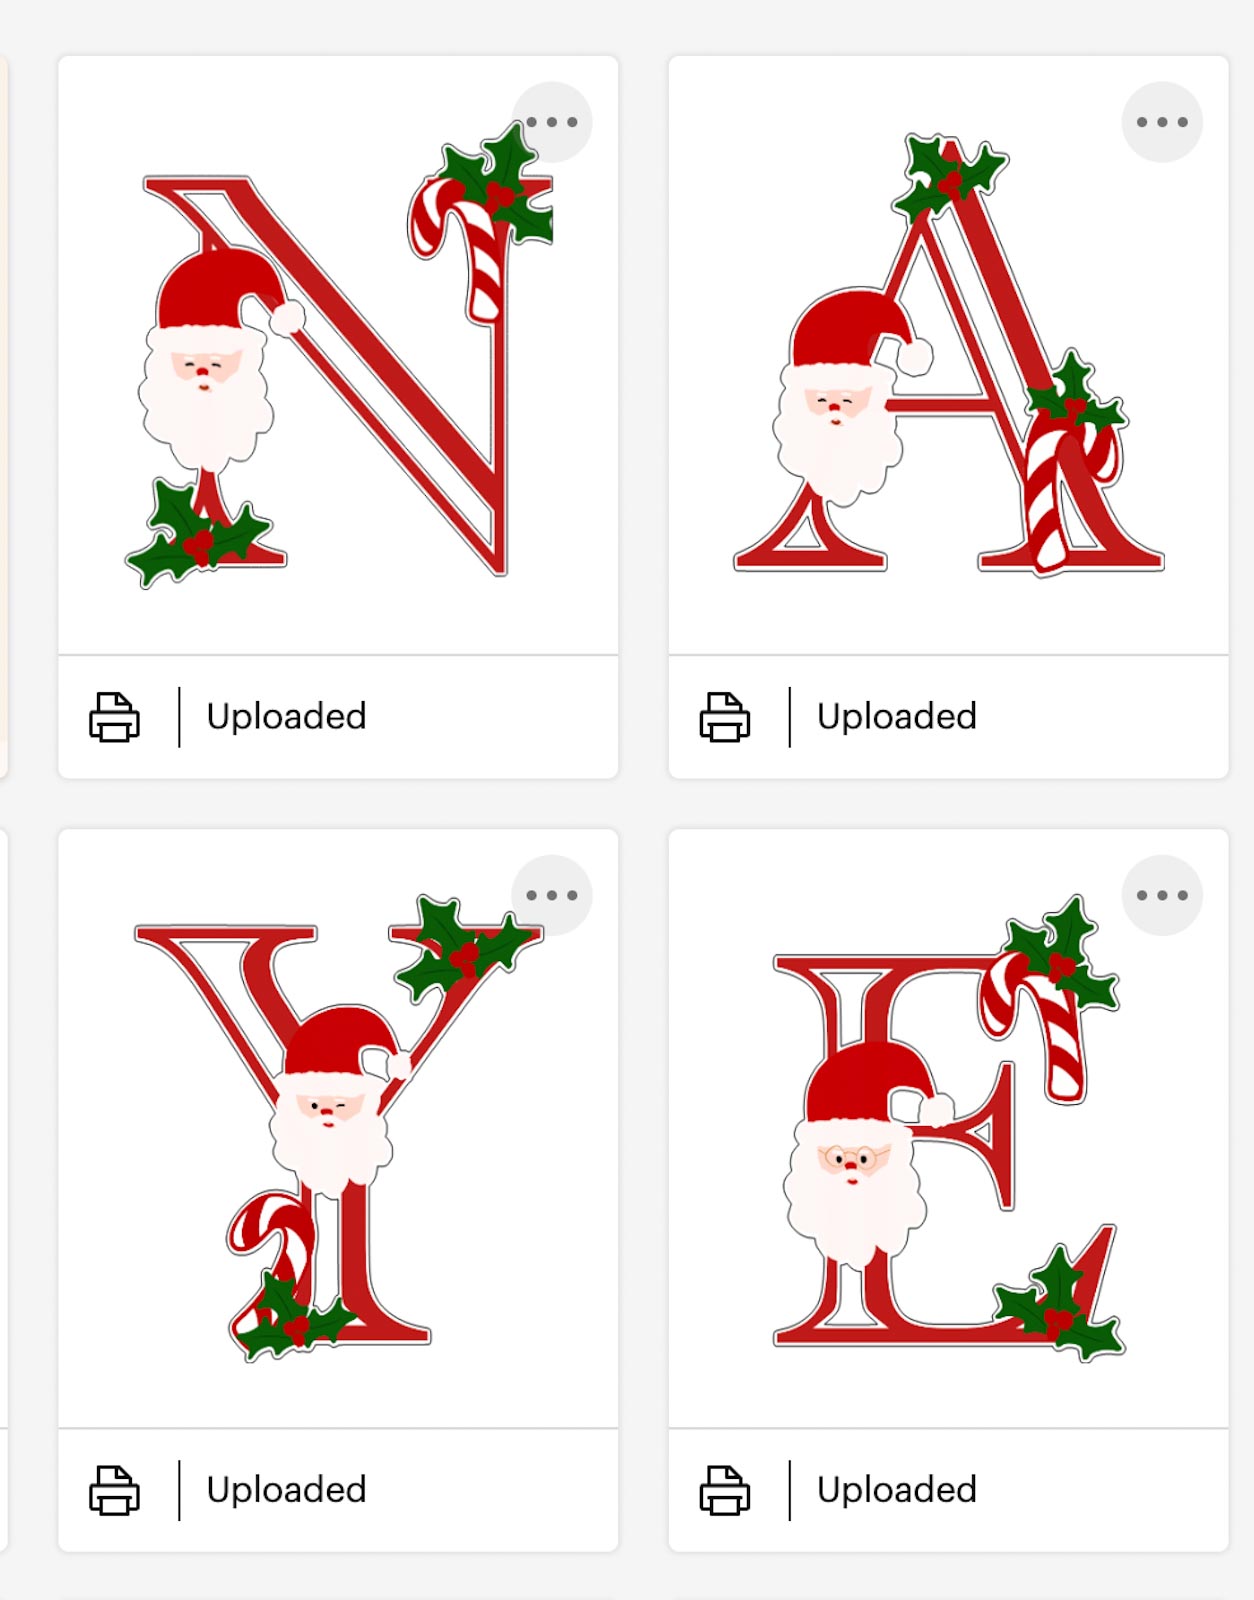
Start by clicking upload in the bottom left hand corner of Cricut Design Space, a box will appear where you can select browse. Now find you download file and choose the PNG folder, these are the files you will need for design space. For help bulk downloading my files from google drive check out this video.
Select the printable Santa PNG Alphabet letters and numbers you require one at a time. When you choose a letter you will see the box below. Select complex and click continue in the Bottom right corner. Note the JPG images will load with a background you want the PNG.
Next you’ll be taken to a screen where you can remove the back of the file, however I have done this for you, click continue in the bottom left corner. Now you will get the choice to save your printable alphabet as a cut file or a print then cut file. You must save as print then cut.
You can now bulk select the letters and numbers for your Santa project to pull into Cricut Design Space.
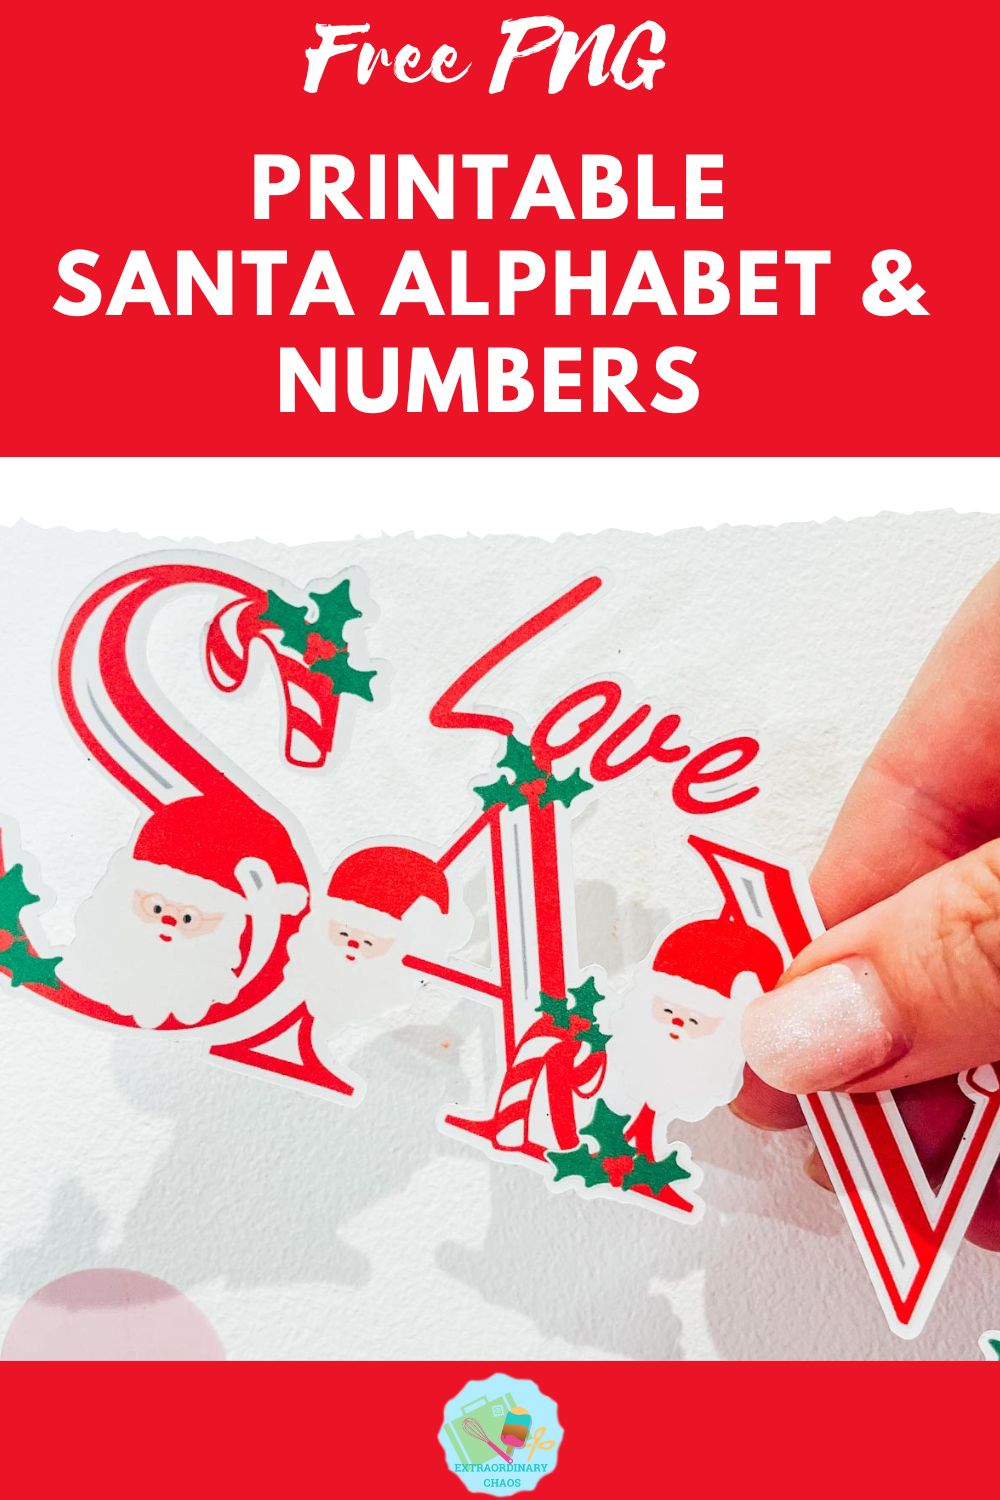
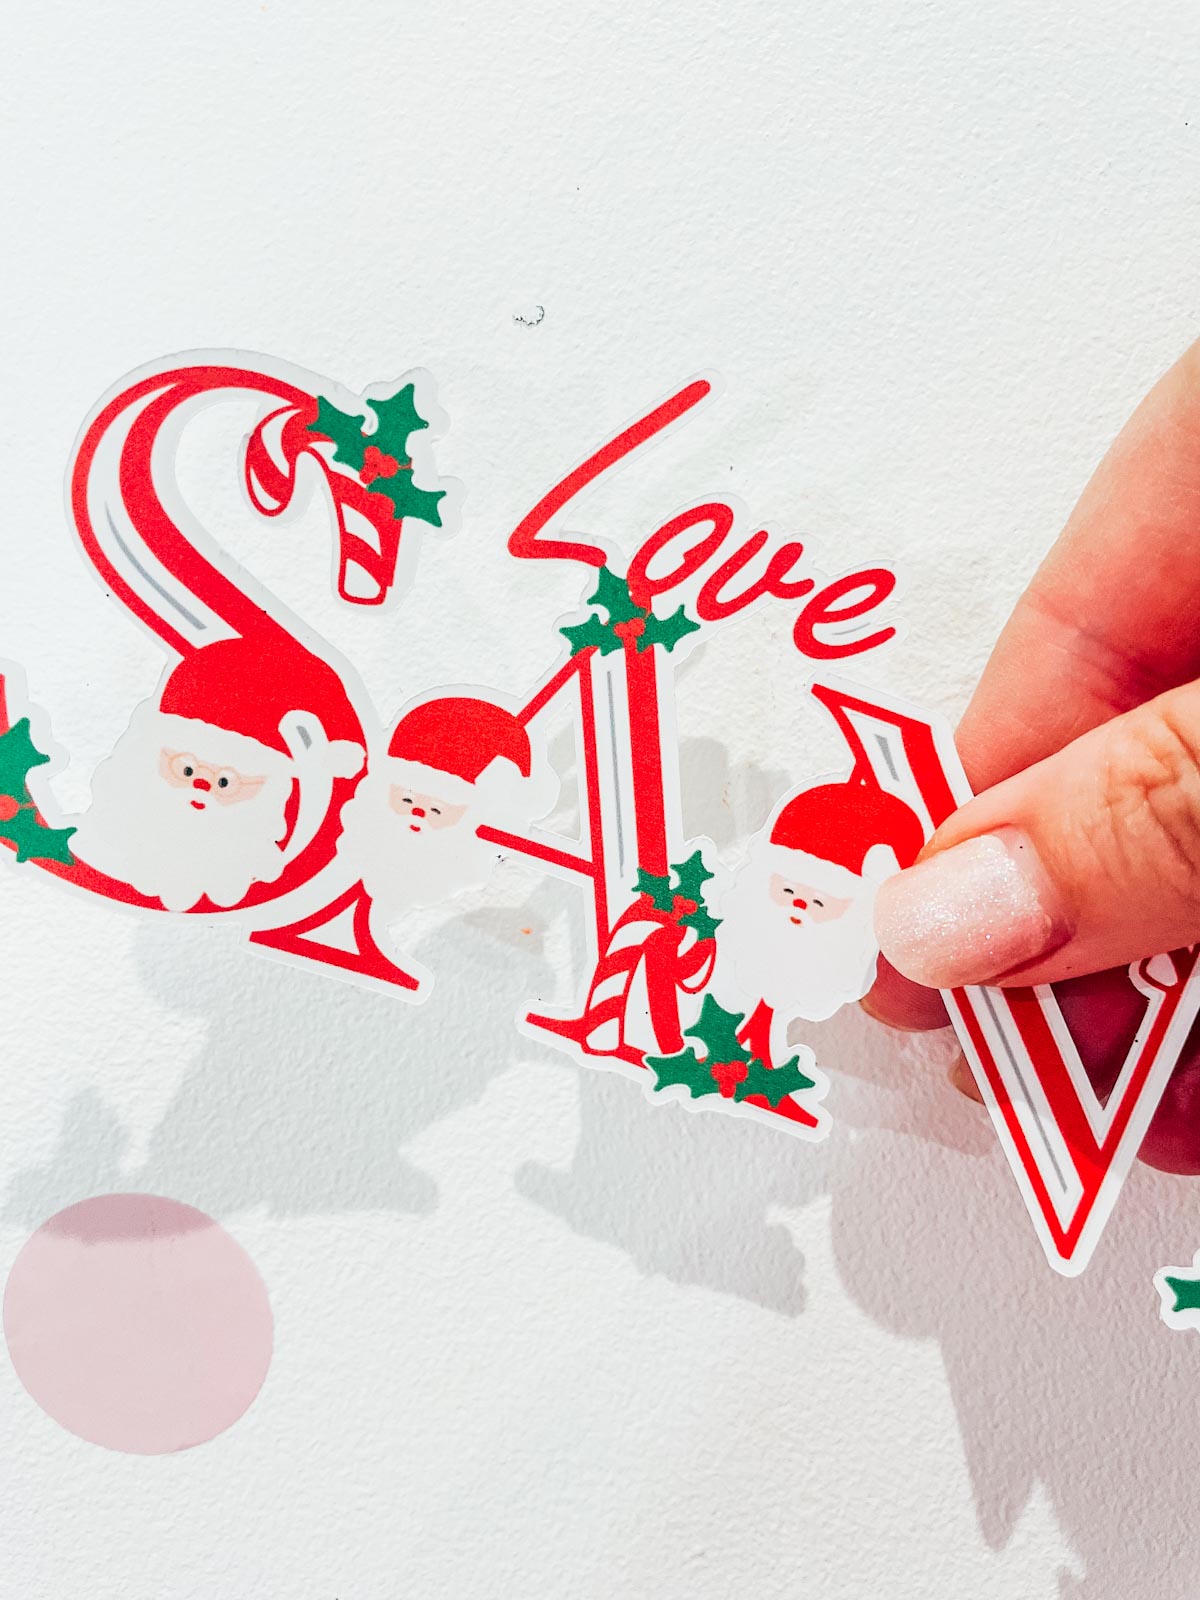
I then arranged my letters and added love from from Cricut Text and flattened the letters together to make one word. I chose Love From Santa, however it could be a name to make it more personalised.
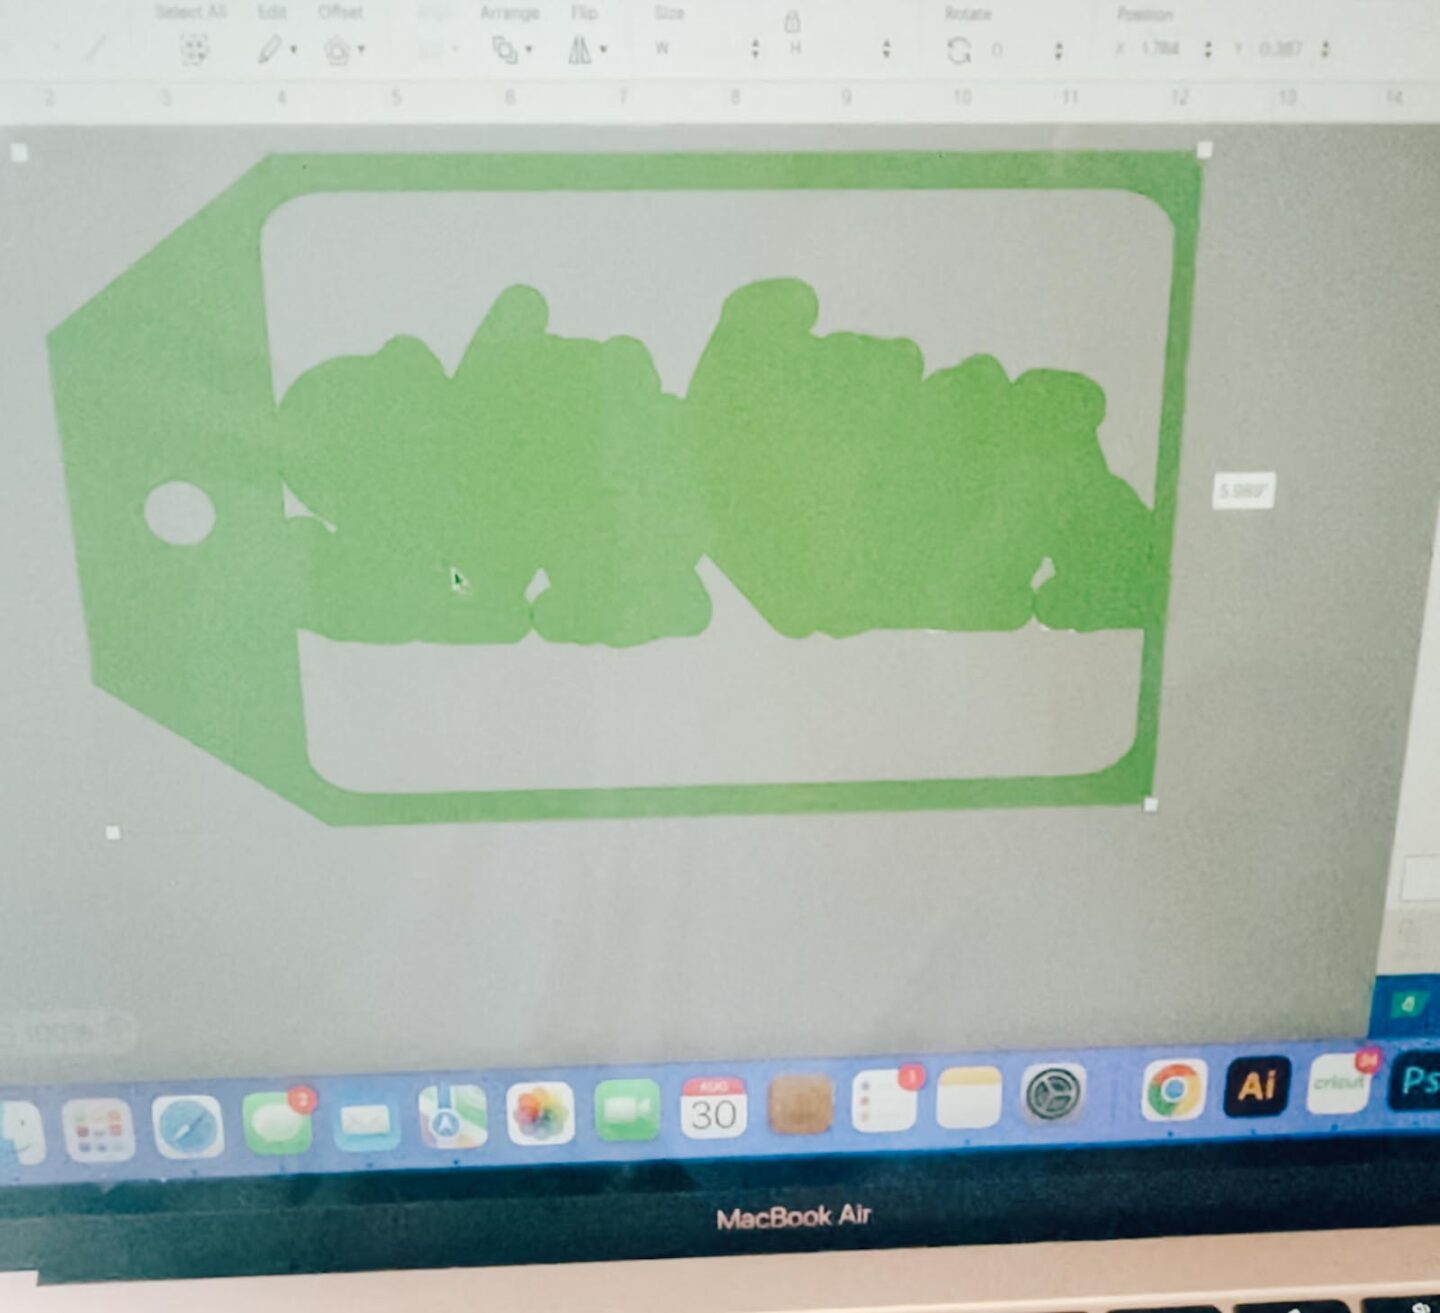
Once I hade done that I created an offset around the word, removed all contours and changed the contour to a cut file. Then grab a gift tag from design space, slice out the centre with an oblong from shapes and them weld the offset into the void. See how to do this in this TIKTOK video, this is a card tutorial but the principle is the same.
How To Print Your Santa PNG Alphabet Stickers And Cut Your Tag With Cricut
Once you are happy with your choice and sizes, click on the corner and drag the attached images until they are the correct size to print and cut. They need to be 6.75.x 9.25 or less to use the print and cut feature. You must also ensure the word fits perfectly on your tag so line it all ab before sending to make.
Now click make it, this will take you to the print preview page, ensure you feed your sticker paper is the correct way into the printer and press print. When you unload your printer avoid touching the black guide line around the edge of the printed stickers as I find this smudges easily.
Once printed, gently put the sticker sheet on your cutting mat, I don’t roll it with a brayer as I usually would, simply gently press around the edge. But always ensure I use a sticky mat and ensure the edges are well stuck down.
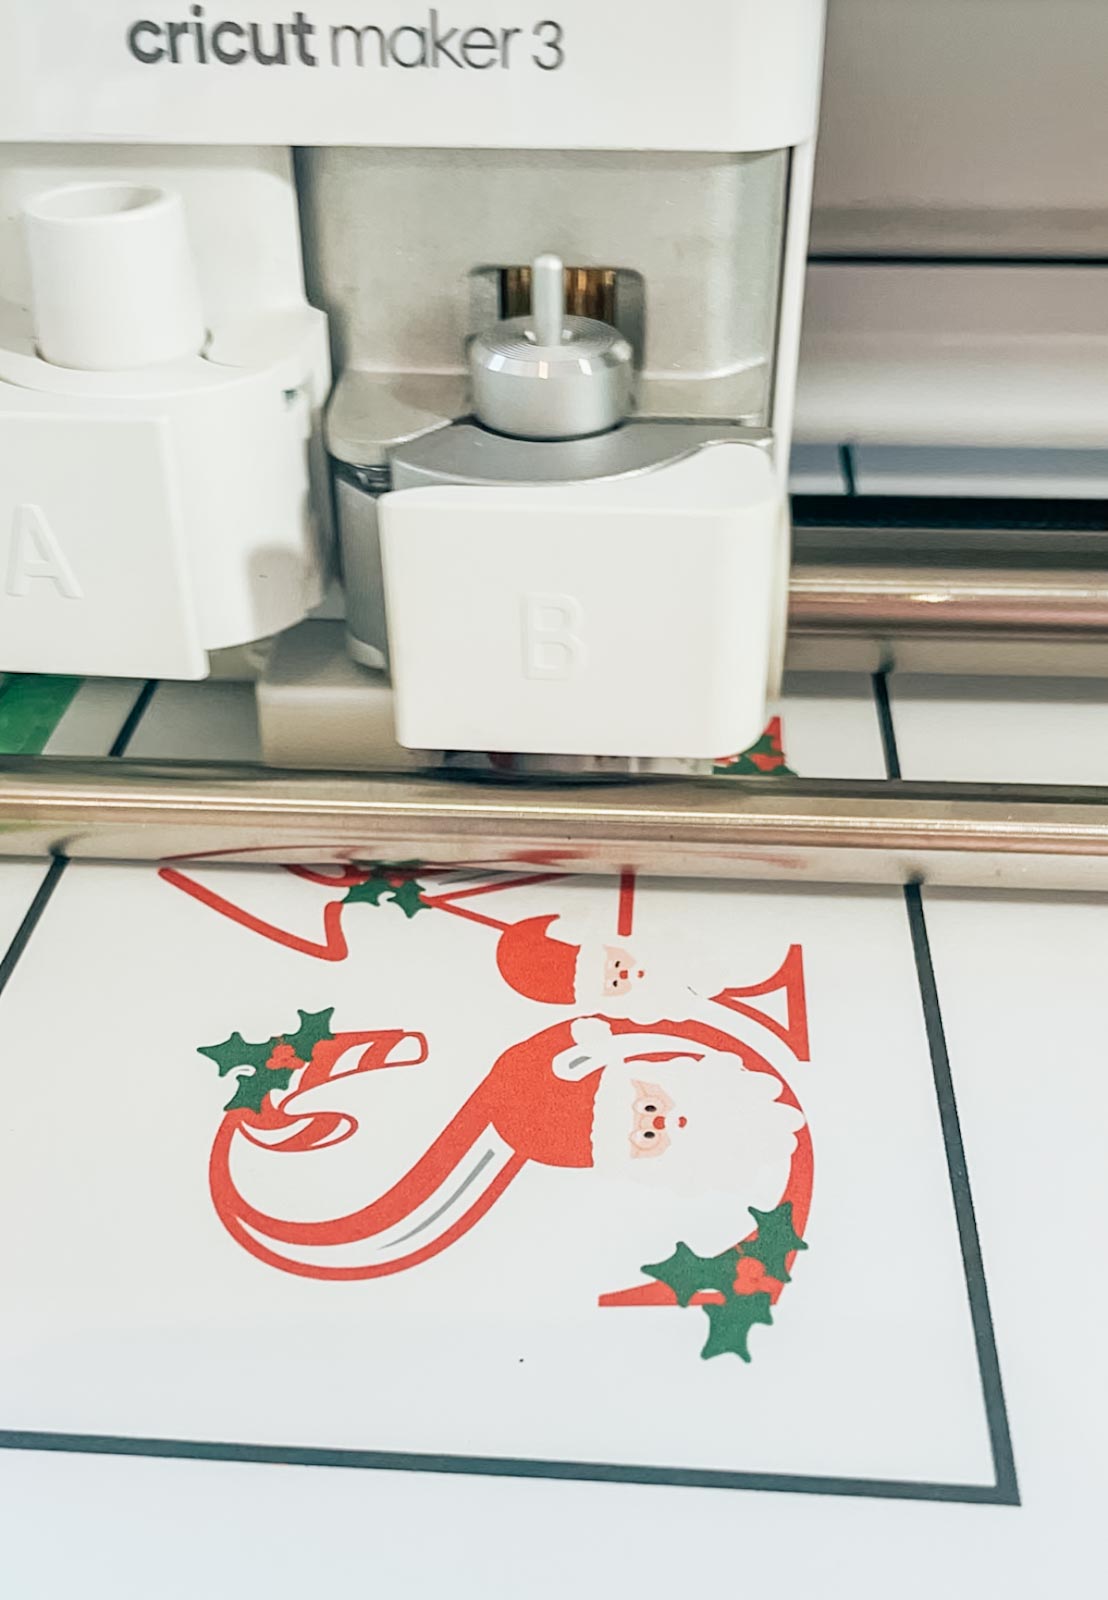
You will now be taken to the cut screen, here you can choose your material. I always use the printable vinyl or washi setting, this successfully cuts the top sticker layer only with the default pressure setting. And press go on your Cricut. Although I made this project on printable magnetic paper, there is a setting in design space for this.
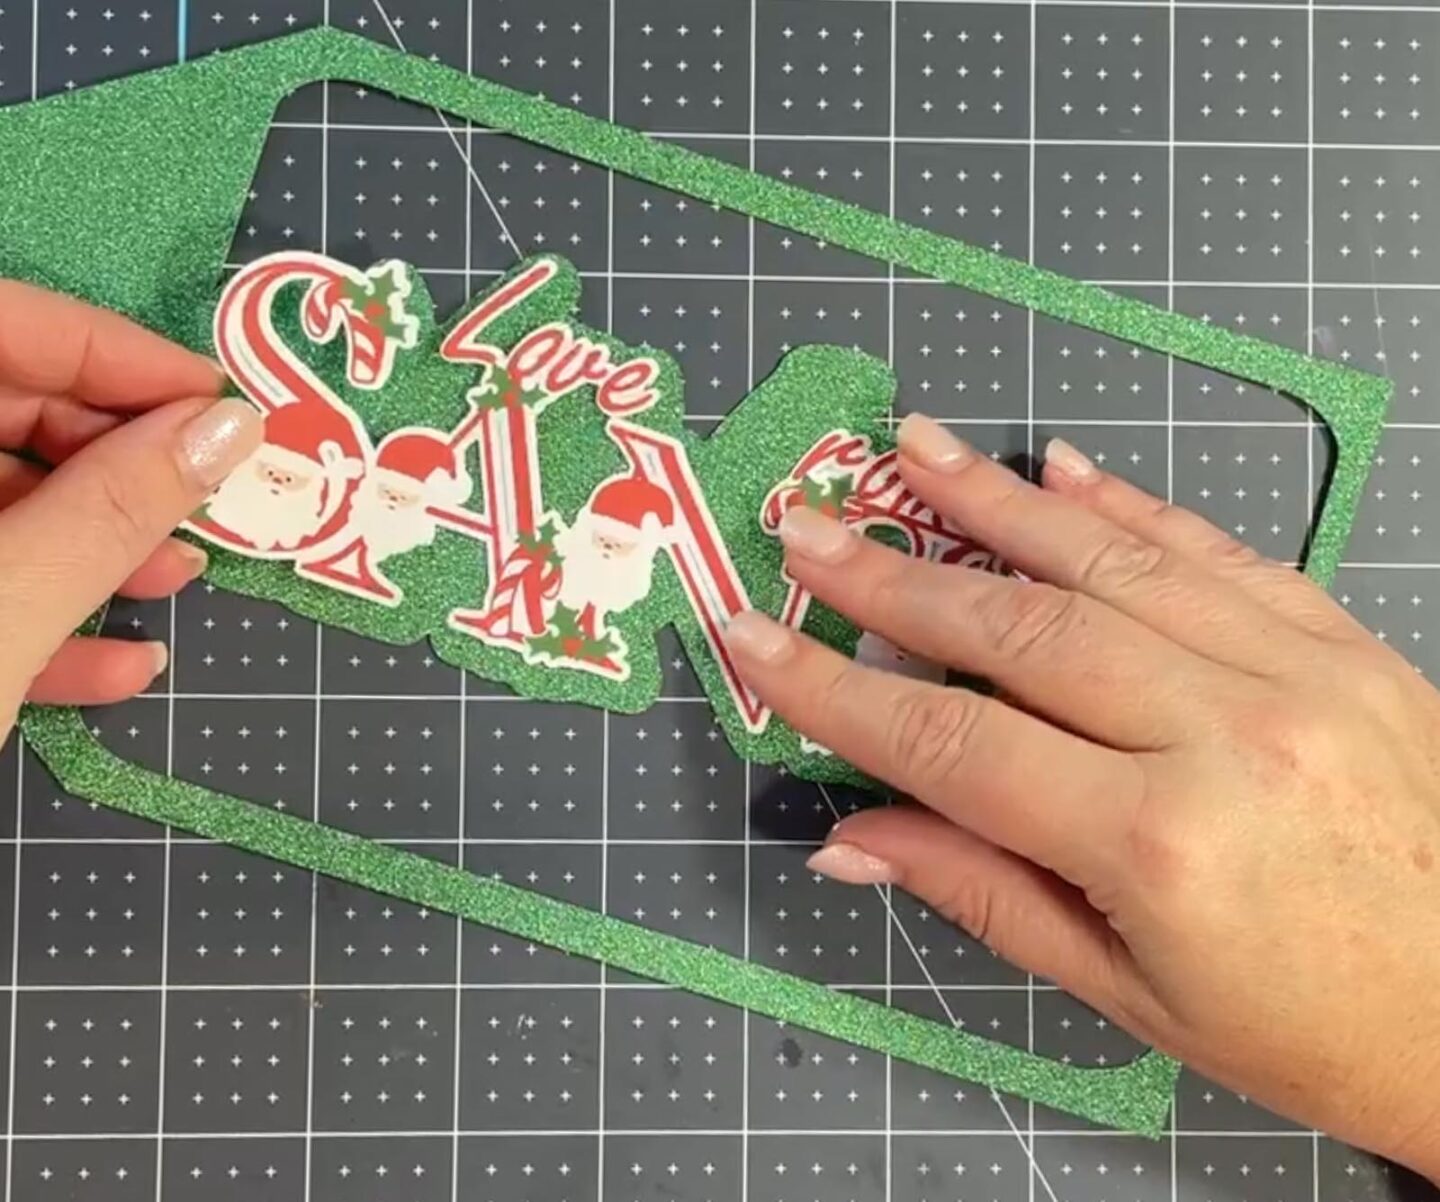
Cut your tag background on green glitter card and then the tag is ready to build. Simply peel the sticker and position onto the tag and it’s all ready to go.
If You Don’t Have Cricut ?
You can upload my Santa PNG Alphabet to Canva, this is a great programme for making posters and cards, or indeed Word or Pages. I have provided a set on Jpg files for use in these programs if you would prefer your Printable Santa Alphabet to have the white background on.
If You Want To Use These Free Cricut Printable Santa PNG Alphabet Letters And Numbers?
Simply click here or on the image below to get my free Cricut Printable Santa PNG cut file downloads and I will pop them across to you. Here’s how you upload the files to Cricut Design Space.

If You’re Having Problems?
Check out my trouble shooting page, hopefully it will answer any questions you may have.
Also, See These Amazing Printables From Some Incredible Designers
- Christmas Color by Numbers by Artsy-Fartsy Mama
- Christmas Wall Art by Simple Made Pretty
- Kindness Advent Calendar by Mum in the Mad House
- Printable Letter to Santa by The Listed Home
- Roll the Dice Gift Swap by The Denver Housewife
- Christmas Activity Sheets by The Quiet Grove
- Christmas Watercolour Printables by Little Miss Eden Rose
- Pink Christmas Printable by Like Love Do
Tips And Advice For Using Cricut
- Cricut Design Space Guide
- How to upload to Cricut Design Space
- How To Make Print And Cut Stickers In Cricut Design Space
- Where Else To Get Free SVG Files
Also please do pop over to Instagram, or TikTok and give me a follow and if you make a project please do tag me! I love seeing everyone else’s makes and chatting crafting. I could do that all day! This is also where I share all my projects in progress.