I am here to today to tell you about the HTVRont Auto Heat Press as I have been reviewing and putting it through its paces along with the HTVRont Glitter HTV for a couple of weeks now. Now I am not a heavy duty user of HTV, but that’s more about convenience and time.
However I do love to create my own custom hoodies, plus I am a huge fan of using HTV on cards, yes that right, try it? HTV looks fabulous on cards and tags, especially glitter! Anyhow I digress, what I really want to do today it share this marvellous heat press with you in my HTVRONT Auto Heat Press Review.
This post may contain affiliate links. Which means I may receive a small commission if you click a link and purchase something that I have recommended at no extra cost to yourself. As an Amazon, Cricut and Glowforge associate, I earn from qualifying purchases.
What You Will Find Here
Guide To The HTVRont Auto Heat Press
This nifty heat press is perfect for automatic pressing from HTVRont is a wonderful addition to your craft space, especially if using HTV is your thing? If it’s not, it might just make you use HTV more! This is also perfect for any crafter you uses sublimation or infusible ink and making projects in batches.
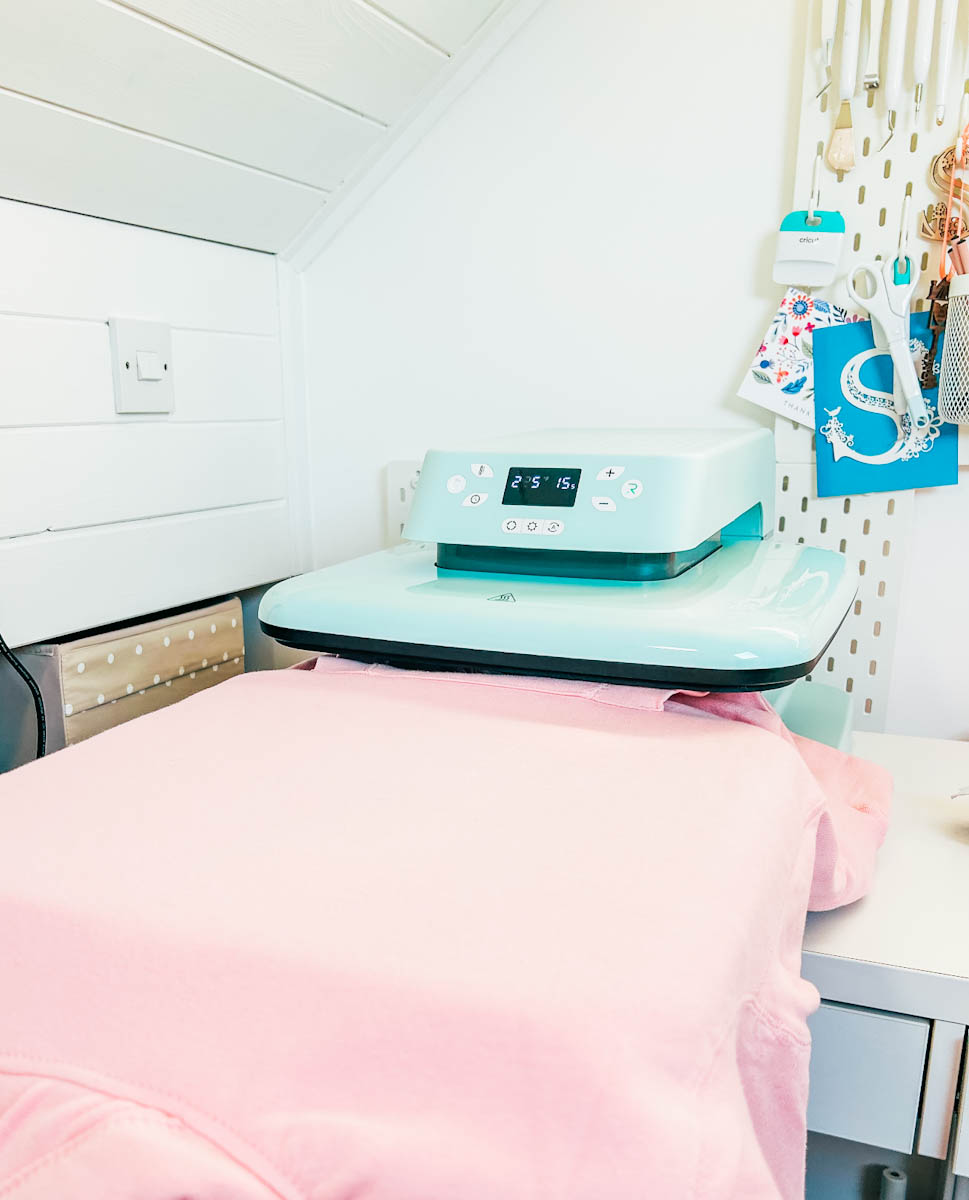
The large heating plate is 15×15 thus allowing you to make larger projects, and the overall dimensions of the machine are 20x20x16, this is something you need to consider when purchasing. But it does fit nicely at the end of my desk so is perfect for desktops if your desk is wide enough. The pullout drawer design also allows easy access for projects.

How Does The HTVRont Auto Heat Press Work?
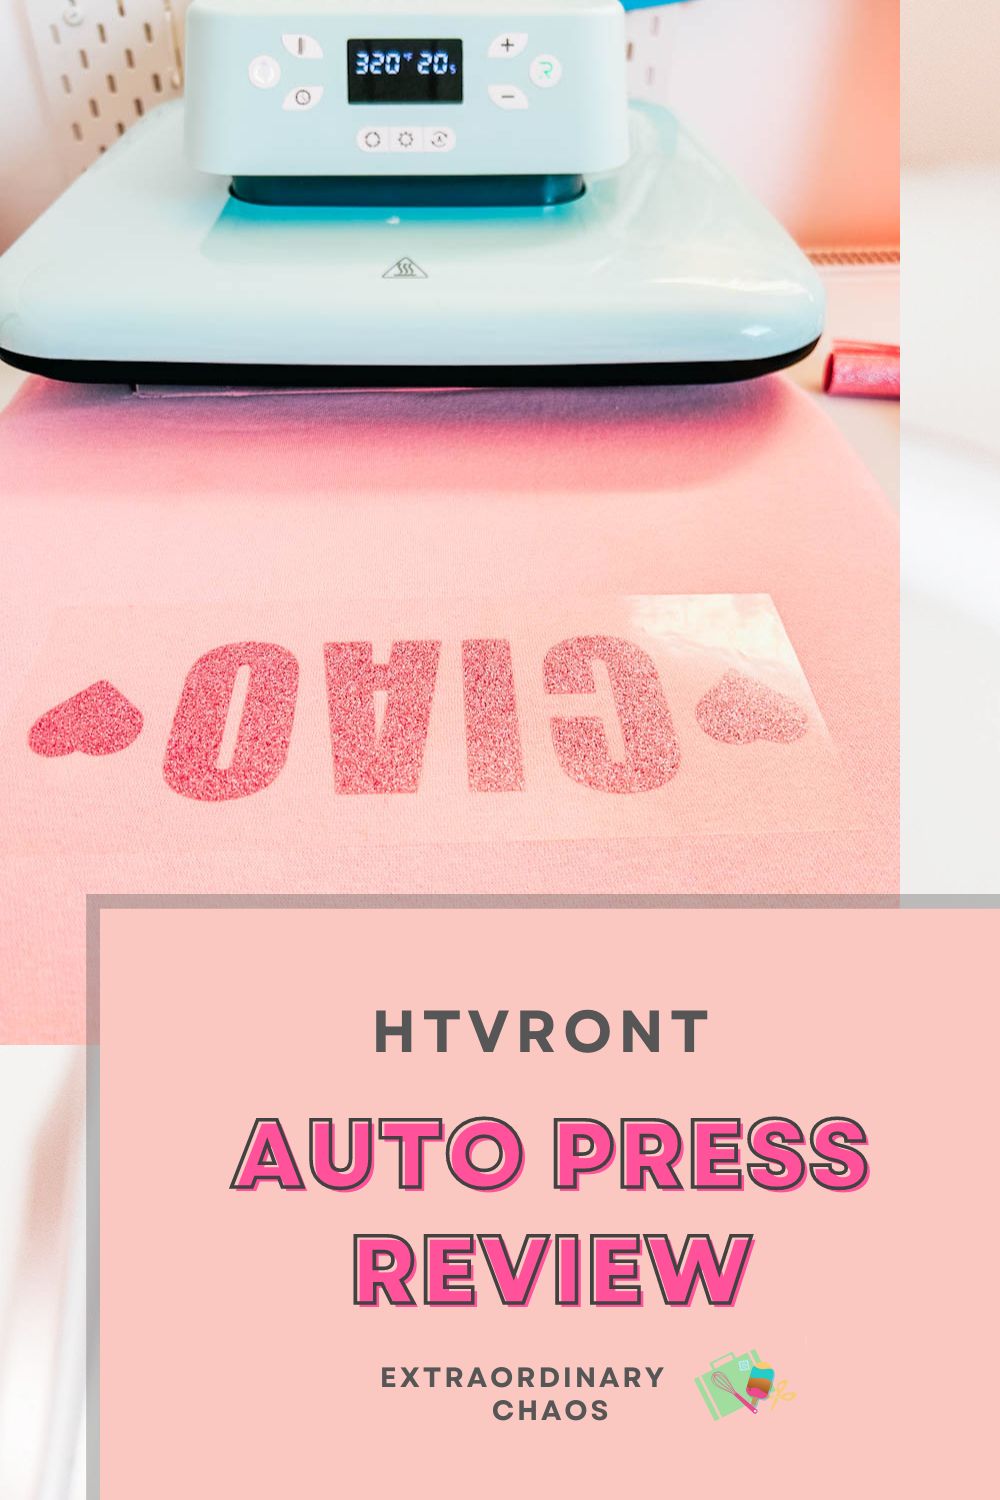
The Auto Heat Press has has a sleek design and looks super stylish. With a pull out tray which also has an integrated removable heat mat, which makes it easy to load blank projects via the drawer. It has a maximum temperature of 210°c/410°f and takes less than 4 minutes to heat up to 160°C.
The machine works with automatic pressure, thus you only have to choose your mode, heat and time and the automatic setting do the rest. Thus you are good to go, with uniform heat for even pressure. And when its done the advanced lifting system lifts away from the project
Load your project onto the pad, slide the tray in and ensure it clicks and press go, its that easy.

The Screen Of The HTVRont Auto Press
The touch screen is easy to use with simple on and off button, temperature and timer button. You can adjust the time and temperature with the customization mode via the + and – buttons on the right hand side.
Underneath the screen you will find 3 buttons the first is the preset, this allows you to quickly use one of the 4 presets.
The 4 Pre Set Modes Are….
- 300 and 15 seconds
- 320 and 15 seconds
- 330 and 20 seconds
- 390 and 40 seconds
The second button allows you to set your own presets. If you have a certain material you use a lot this is a real time saver. The third is the Auto Mode button, if you have this turned on when you close the tray it will automatically close and press. Alternatively you can press the R button on right to press, I prefer this method as I can make any adjustments at the last minute. Saying that, pressing the R button will also stop pressing if you do need to make alterations.
What Can You Make With The HVRont Heat Press Machine?
- Tote Bags
- T-Shirts and hoodies
- Make Up Bags
- Banners and flags
Guide To Setting Up Presets On Your Auto Press
Click on the button on the bottom middle row that looks like a cog or sunshine, it will flash a or b these are your 2 preset options. Click a or b then set your time and heat using the temperature and clock button and the arrows. Now press and hold the button and it will set.

What Supplies Do I Need For The Heat Press Machine?
- A cutting machine such as a Cricut, xTool or Silhouette machine
- HTVRont Heat Transfer Vinyl
- Cutting matt
- SVG Design
- Weeding tools
- Brayer
Step By Step Guide How To Use The HTVRont Auto Heat Press With HTV Vinyl
Cut Out Your SVG, HTV Image Or Word
Start by designing and cutting out your vinyl, for this project I used HTVRont pale pink glitter and cut it on my xTool M1, if you are using your Cricut check out this tutorial. Make sure you mirror your project before cutting as you cut into the back of the vinyl and then flip it to press. When you load your vinyl to cut, place it sparkly or shiny side down. The plastic protective sheet should be on the top of the project so you can apply the teflon sheeting on top.

Weed And Heat Press Your Project
Once cut, weed your image and turn on your auto heat press. If you are using HTVRont vinyl the timings are all on or in the packaging. As I was using glitter HTV I set the auto-press at 300°C for 20 seconds.
However do make sure you pre heat your material first for around 5 seconds, this ensures the fabric and HTV bond correctly.

However do make sure you pre heat your material first for around 5 seconds, this ensures the fabric and HTV bond correctly.
Once pre heated, apply your image taking care to position correctly and cover with a teflon sheet. Now set the time and temperature before sliding the tray in. You need the tray to click before pressing the R button. If you have the auto button activated this will happen automatically as soon as the tray clicks.
Which Side Of The Iron-On Vinyl Goes Down?
Once pre heated, apply your image taking care to position correctly with the protective backing no top. You should be able to see your image colour and design, then cover the plastic topping with a teflon sheet.
Now set the time and temperature before sliding the tray in. You need the tray to click before pressing the R button. If you have the auto button activated this will happen automatically as soon as the tray clicks.

Can You Press Directly On To HTV?
It is recommended you cover the whole area with a teflon sheet or grease proof paper and I have found this is always better to get the best results.
Allow Your HTV To Cool
HTVRont vinyl is cold peel so allow to cool before peeling to reveal your finished creation.
Does HTV Vinyl Last On Clothing?
Yes as long as you follow the washing instructions the HTV will remain in tact and not fade.

Can You Do Sublimation With The HTVRont Auto Heat Press?
Yes, the machine heats up to 410° F so its perfect to use with sublimation projects.
Can You Change The Pressure Of The Auto Heat Press?
No you can’t change the pressure on the machine, which isn’t ideal are some vinyls do need more pressure. However I haven’t had a bad result as yet, but did have to press one project twice.
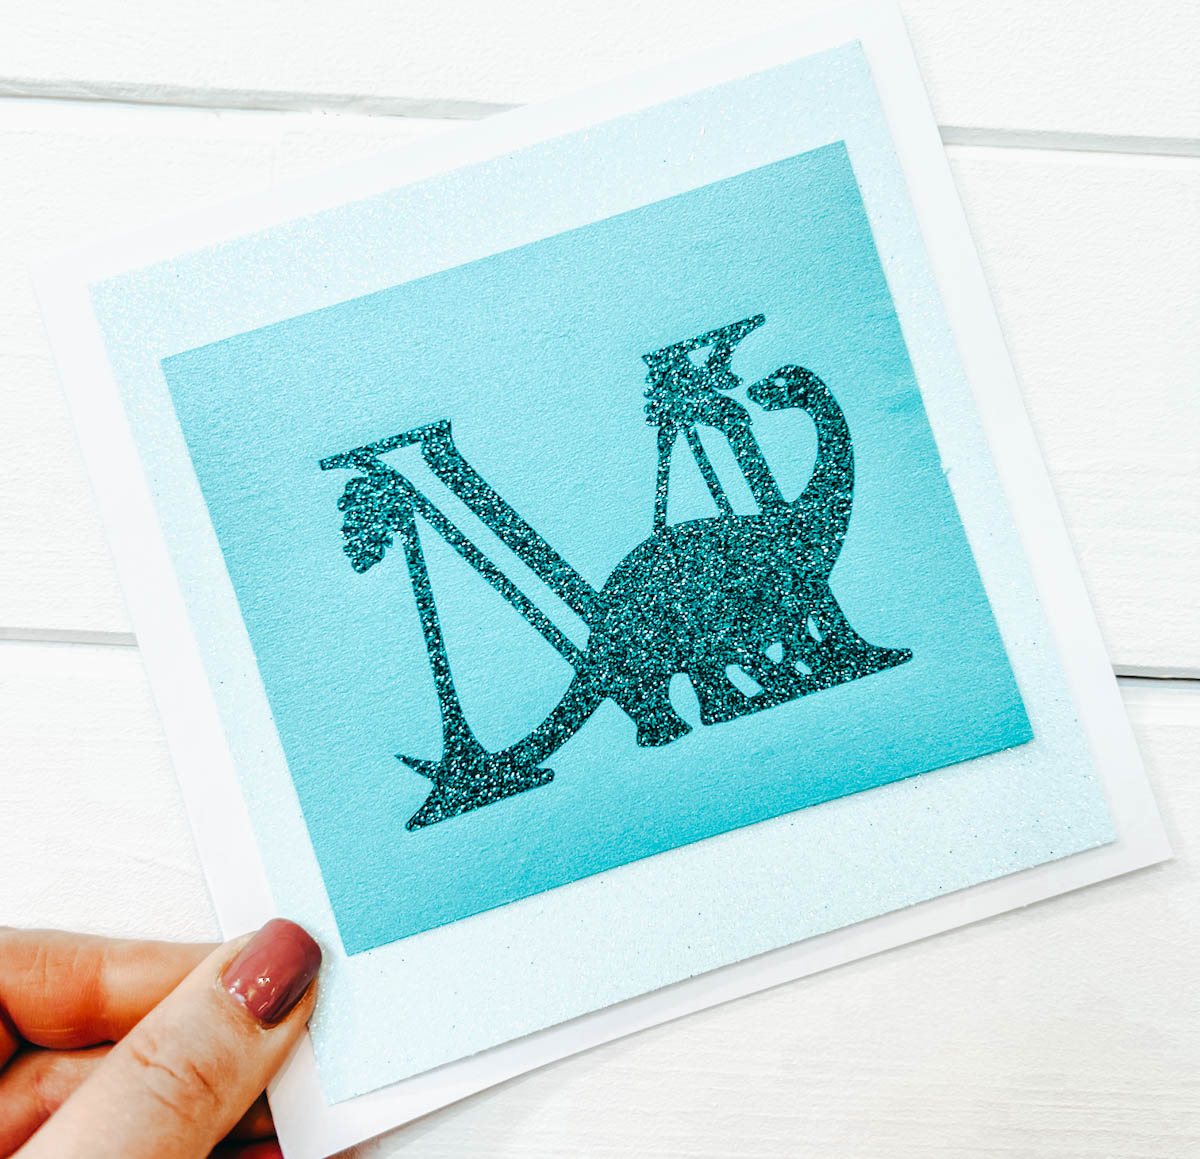
You Can Also Make Cards With Heat Transfer Vinyl
If like me you love making cards using HTV? Check out this cute dinosaur birthday card I created with the auto heat press, using my dinosaur alphabet set.

However the opportunities are endless with my SVG alphabets covering all occasions. And the great thing is you can make up to 4 cards at a time on the 12×12 plate.
How Much Is The HTVRont Auto Heat Press?
The Auto Heat Press costs $295 which is great price for the quality of the machine, and what it does. It does cost more in the UK as its currently on sale at £319.99.
Review Of The HTVRont Auto Heat Press
The HTVRont Auto Heat Press is a fabulous piece of kit, super easy to use. Also the result I have had so far on these projects, and on test pieces before were all great. The HTV was well bonded and washed well on my test hoodie I tried before Christmas. I particularly love how easy it is to use, and how great it looks on my desk. Plus the fact that is is all set up and ready means I will use it more.
Please note I was gifted the auto heat press but all opinions are my own and I love this press!
Thankyou for the honest review! Love your vlogs xx
I am on the look out for a decent Heatpress & looked at this as it has a good size platform that glides out plus its auto BUT living in the UK a heafty price tag unfortunately. A big mark up for us UK residents xx
I know I did question that and its shipping and import tax cost which is such a shame. We need a UK craft store the stock them although I have just found it on Amazon for £303 with no shipping https://amzn.to/3XLfysP
I decided to buy a heat press so I could do more with vinyl and sublimation. I had checked into many different ones and finally decided on this heat press. I have had it for several months now and am just as happy with it now as I was the first time I used it.
Easy to use, looks good, and doesn’t take up as much space to use as so many others.
Hi
Thanks for your review.
I too had been looking into the different presses and checking out prices too. I had an Easy press but was finding it heavy to lift.
Now I have my HTVRONT and I it.
Thee big plate area makes it a dream to lay out T Shirts and it’s so easy to use and does a perfect job.
I totally agree its so easy to use, almost effortless
Has anyone had an issue when you do your first project, it comes out perfectly. But when you go to do your second project, the heat press just beeps over and over again and when you press the R to lower the heat plate, the heat plate does not lower and it still continues just to beat over and over again.
When I first got the heat press, it did not do this. I’ve only used it a handful of times and it just started doing it last weekend. I ended up having to unplug the machine and let it cool down and then I was able to press another shirt.
Today it did the same thing again. I don’t understand what the problem is, it’s supposed to make things easier to where you can press multiple items back to back. Am I taking too much time between projects and it’s causing the press to overheat?
Please let me know if anyone else has had this issue and what they have done to resolve it
Thank you in advance for your time
Hi Andrea sorry no not had any problems at all have you tried contacting customer care to see if they can help? Silly question but theres no HTV stuck to the plate is there?
This happened to me when there was too much on the press and the drawer hadn’t fully closed or clicked into place when I was using it
Hi yes, this has happened to me. I have been using the HTC for a while now. Today I’m in the middle of printing 300 shirts and my HTV heat presser isn’t closing at all. I took it off the auto press to see if I could get it to close manually no luck. I don’t want to purchase a new one I just need to know what to do to fix the one I have. I love it. This machine has encouraged me. Someone please let me know what to do about this.
Loretta