
Today, I am sharing this gorgeous Free SVG Ladybird Alphabet and Number Set for Cricut and Silhouette. Spring brings with it a burst of colour and freshness, and what better way to celebrate its arrival than this beautifully crafted Ladybird alphabet? Creating stunning projects for cards, scrapbooking, and cake toppers has never been prettier.
If you’re looking for a fun and creative Cricut project, this layered ladybug alphabet tutorial is perfect, whether you’re a beginner or a seasoned crafter. In this easy step-by-step guide, I’ll walk you through how to upload your files, slice out a grass layer, and create a beautiful 4-layer letter or number ready for scrapbooking, card-making, or party decorations.
This ladybird-inspired alphabet looks so effective once it’s cut and layered, and it’s easier than it looks!

This post may contain affiliate links. Which means I may receive a small commission if you click a link and purchase something that I have recommended at no extra cost to yourself. As an amazon, Cricut and Glowforge associate, I earn from qualifying purchases.
What You Will Find Here
Craft Ideas For Our SVG Ladybird Alphabet Letters & Number Set For Cricut And Glowforge
- Ladybird Cake Toppers
- Framed Art
- Scrapbooking Layouts
- Cards
- Childrens Bedroom Decals
- Iron on Vinyl Projects

How To Get Your Ladybird Alphabet Letters And Numbers
Click here or the image below to get your free downloadable Ladybird SVG Alphabet from our shop and follow these instructions to add to Cricut Design Space if you are using a Cricut Machine. Note if you are using Glowforge you need SVG files to cut the image out of wood or acrylic. Or Png or SVG to engrave.

If You’re Having Problems?
Check out my trouble shooting page, hopefully it will answer any questions you may have.
Ladybug Alphabet Cricut Tutorial: Step-by-Step Guide
What You’ll Need
- Cricut Design Space
- Ladybug Alphabet SVG or PNG files
- Coloured cardstock (red, white, green, blue, etc.)
- Glue (preferably with a fine-tip applicator)
- Cricut machine
- Cutting Mat
- Brayer

Step 1: Upload Your Files
- Open Cricut Design Space.
- Upload your Ladybug Alphabet files, both SVG and PNG work.
- Choose the letter or number you’d like to work on.
Step 2: Weld Your SVG Layers
- Click on your SVG letter or number.
- If it appears in lots of separate pieces, click “Weld” to combine them.
- This only needs to be done for some letters where the parts aren’t grouped.
Tip: You can also use PNGs if you prefer. They cut the same way.
Step 3: Create the Top Layers
- Duplicate your letter or number twice.
- Use the Contour tool (bottom-right corner) to remove the inner spots or layer 2.
- Click “Hide All Contours”
- Then click to add back only the shapes you want (like the main letter or number form).
- Colour each layer differently (e.g. red for the top layer, white for spots) to help visualise.
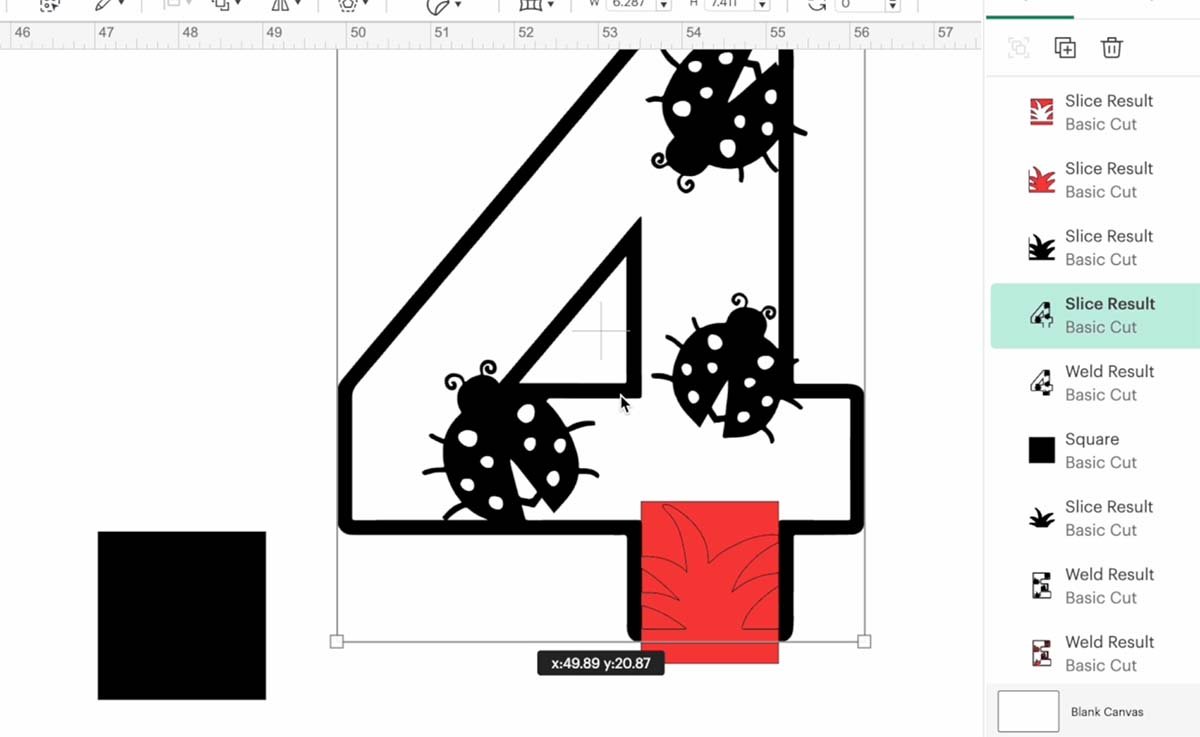
Step 4: Slice Out the Grass
- Duplicate your letter twice, once for the grass, and one for the back sky layer.
- Add a rectangle (or oblong) shape over the grass on one of the layers and slice it out.
- Resize and position the rectangle across the bottom of the grass strip and slice any extra lines. (See video)
- Delete the unwanted parts, this gives you a clean bottom edge.
Step 5: Create The Grass Layer
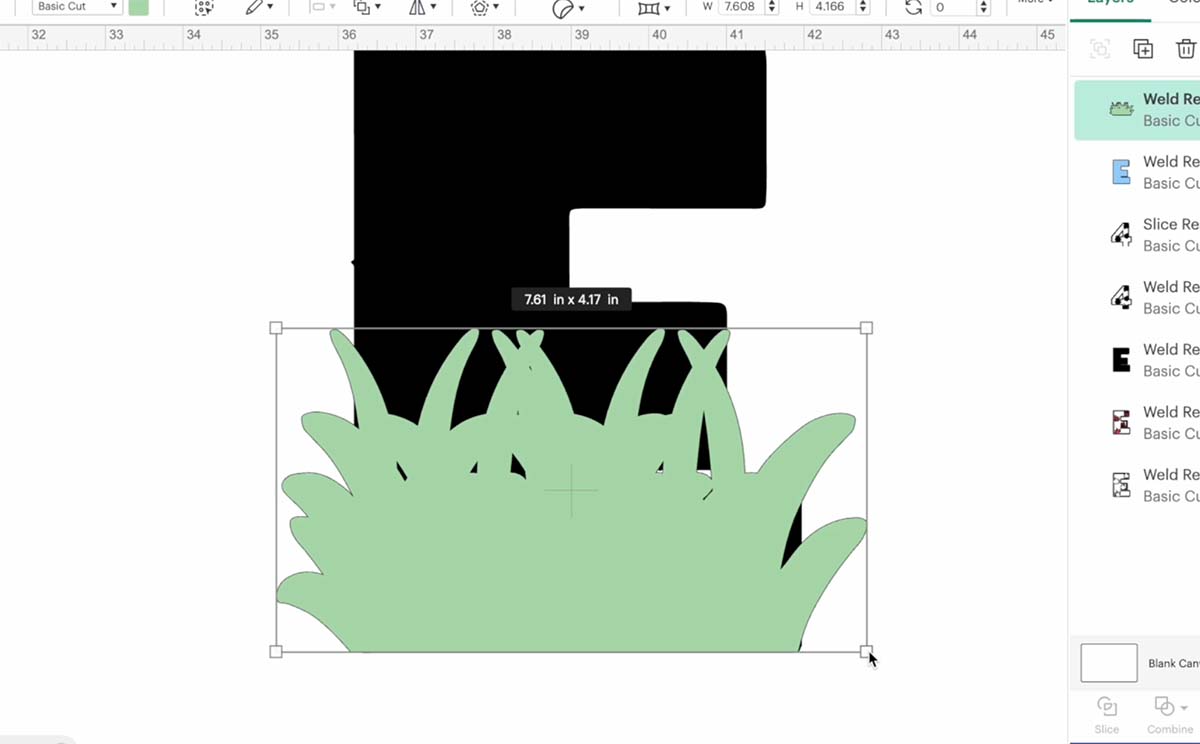
- Open Contour again and remove any leftover bits you don’t need.
- Use another rectangle to slice off messy areas if needed.
- Duplicate your grass shape multiple times.
- Resize and flip some of them to create a more natural look.
- Use “Align Bottom” to level them evenly.
- Once happy with the arrangement, select all and weld to create one grass piece.
Step 6: Create a Sky Background
- Colour the black layer blue or your chosen sky colour.
- Now you should have at least 4 layers:
- Top layer (red with white spots)
- Mid layer (cut contours)
- Grass layer (green)
- Sky background (blue)
Step 7: Layer and Assemble
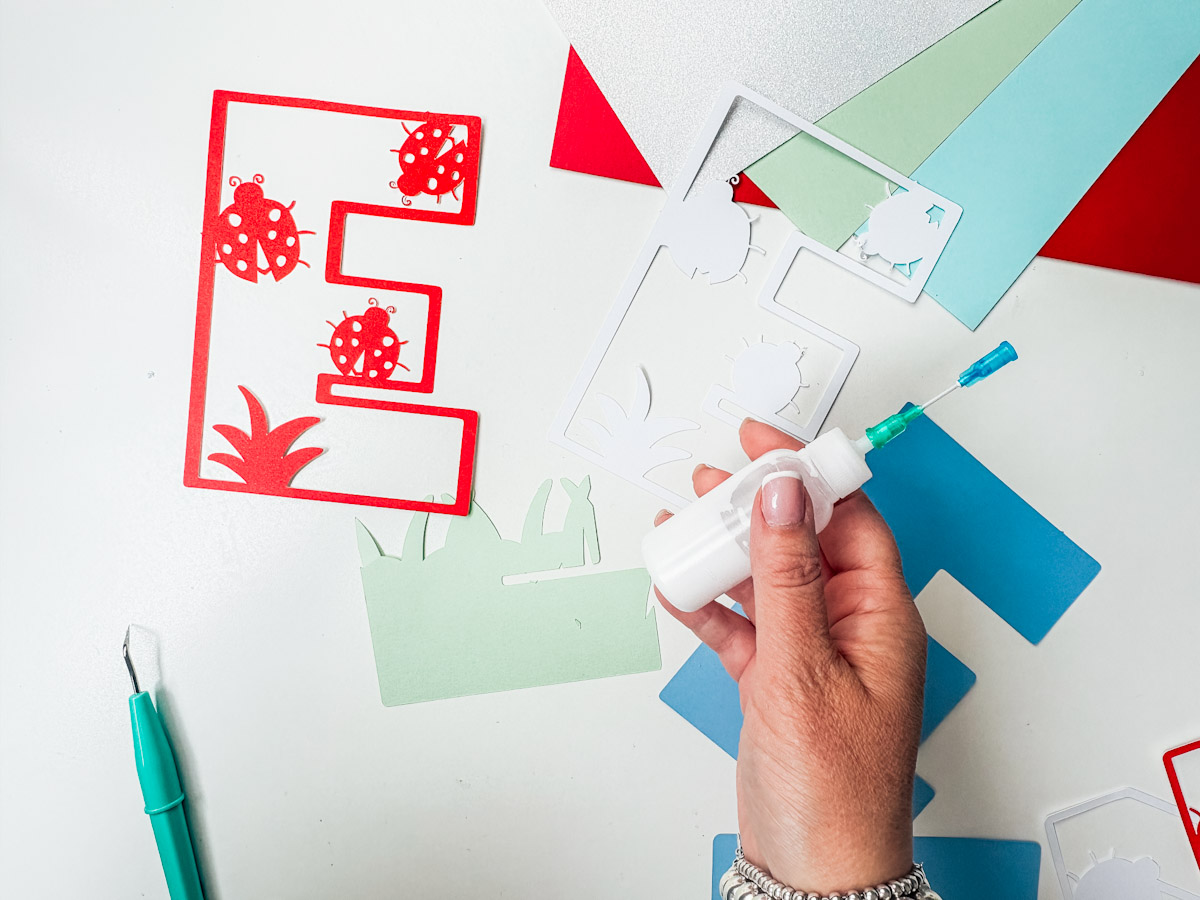
- Arrange your layers in order:
- Bottom: Sky
- Next: Grass
- Then: Base letter layer
- Top: Red letter with white ladybug spots
- Use glue (a fine-tip glue bottle is helpful) or sticky pads if framing.
Step 8: Final Touches
- Remove tiny contours that might be too fiddly to cut cleanly.
- Adjust colours and positions as needed.
- Once everything’s cut, glue it all together, starting from the back layer and working forward.
Bonus Tips
- Use the same grass layer across different letters to save time.
- Experiment with colours and shapes – the grass doesn’t have to be green.
- If you’re new to Cricut, check out the beginner step-by-step video series on the Extraordinary Chaos YouTube channel.

Tips And Advice For Using Your Download For Cricut
This alphabet is also perfect to make cards and cake toppers with your Cricut, check out my guides below.
- How To Add Fonts To Cricut Design Space
- How To Remove Backgrounds On Illustrator
- Cricut Design Space Guide
- How To Slice And Weld In Cricut Design Space
- How to upload to Cricut Design Space
- Using Iron On Vinyl
- Where Else To Get Free SVG Files
Also please do pop over to TikTok or Instagram, and give me a follow and if you make a project tag me! I love seeing everyone else’s makes and chatting crafting. I could do that all day! This is also where I share videos of my makes.
