
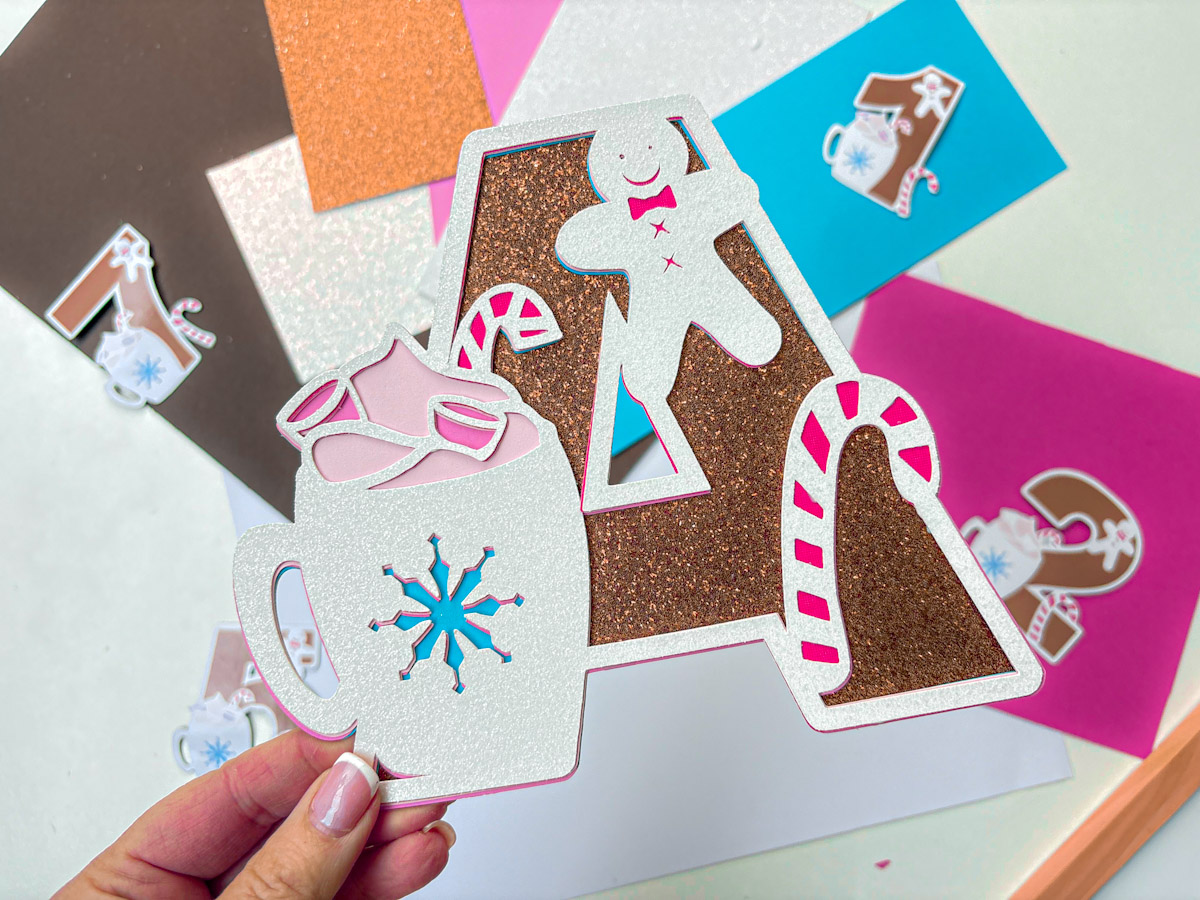
Today, I am sharing this stunning Free SVG Gingerbread Alphabet and Number Set for Cricut and Silhouette. Creating stunning projects for cards, scrapbooking, and cake toppers has never been more festive.
This alphabet is perfect for creating so many Christmas projects. Check out my video tutorials for creating a printable Christmas countdown magnetic numbers. Perfect for the Elves to leave on the fridge or the kiddies to countdown how many sleeps there are till Christmas.
Plus, check out my layering tutorial to see how I made a layered SVG file from a single layer in Procreate, then uploaded the layers to Cricut to cut. This is great for framed art, Christmas cards and cake toppers.
This post may contain affiliate links. Which means I may receive a small commission if you click a link and purchase something that I have recommended at no extra cost to yourself. As an amazon, Cricut and Glowforge associate, I earn from qualifying purchases.
What You Will Find Here
Craft Ideas For Our SVG Gingerbread Alphabet Letters & Number Set For Cricut And Glowforge
- Gingerbread Man Cake Toppers
- Framed Art
- Scrapbooking Layouts
- Christmas Cards
- Psrty Invitations
- Childrens Gingerbread Themed Bedroom Decals
- Iron on Vinyl Projects

Step-by-Step Instructions: How to Make a Gingerbread-Themed Layered Letter Using Pro Create And Cricut
You will need….
- Cricut machine (Joy, Explore, or Maker)
- Procreate
- iPad if you are using Procreate
- iPad Pencil (optional) Make sure it is compatible with your model of iPad, not all are
- Cricut Design Space (free software)
- Standard Gripmat (green)
- Weeding tool (for removing small bits)
- Brayer (optional, to smooth cardstock on mat)
- Foam pads or glue
- Card Stock

Step 1: Open Your PNG in Procreate
Open the Procreate app on your iPad. Tap the “+” icon to create a new canvas. Tap the spanner (Actions) icon, then go to Add, Insert a file or Insert a photo. Choose the PNG you want to work with; it will appear in your new Procreate canvas.
Tip: PNGs work best for this method because they already have a transparent background.
Step 2: Duplicate Your Image
Just like working with the Cricut Contour Tool, each new layer you want to create needs its own copy of the original design.
Tap Gallery in the top left corner. Tap Select, then tap your design. Tap Duplicate.
You’ll now have two identical copies of your PNG. The top one will become your first (top) layer, and you’ll edit the others to create the layers underneath.
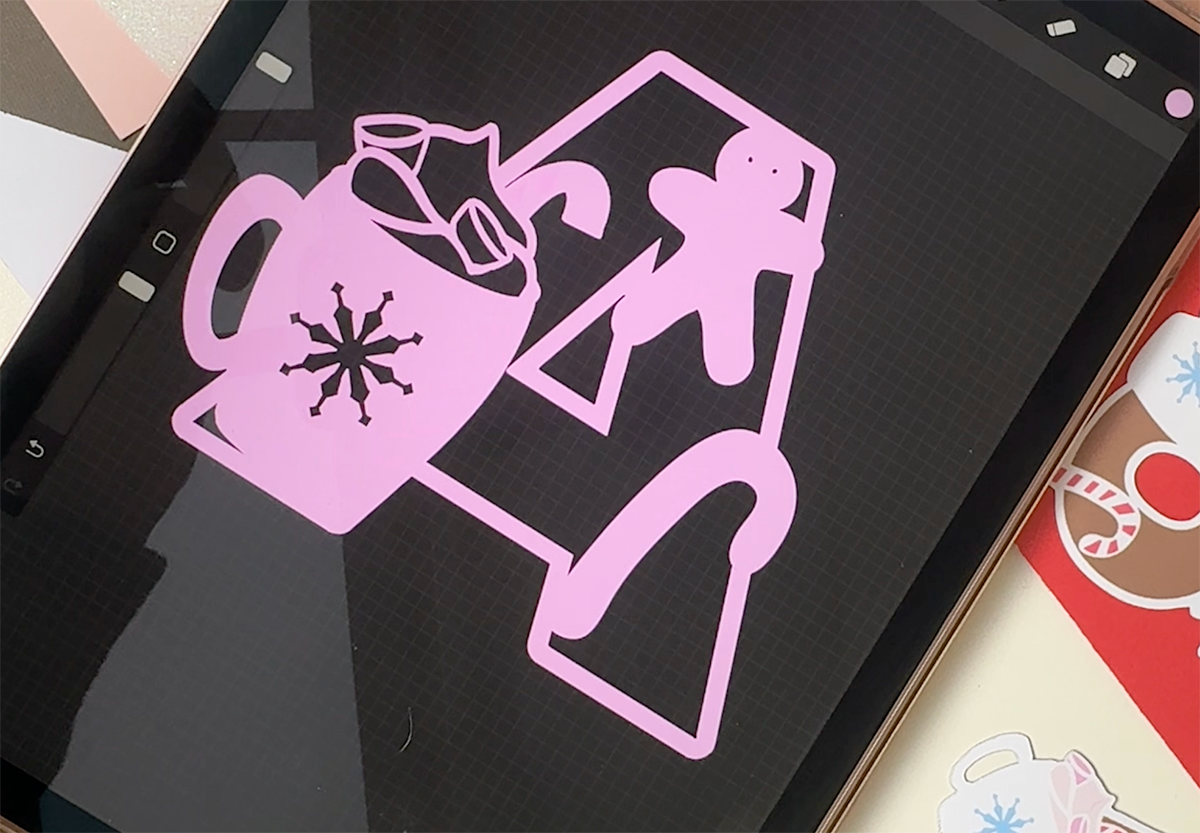
Step 3: Create Your First Layer
Open your duplicated file. Make sure your PNG is black; this ensures Cricut Design Space reads it correctly when you export it later. Use the pen to remove or fill areas, depending on which parts you want visible. (See Video)
For example, if you’re layering a gingerbread design, you might keep the top white icing layer visible for your first file.
Step 4: Make Your Second Layer
Go back to the Gallery and duplicate the first edited version again. Open it and remove or fill more areas of the design, like buttons, bows, or inner details. This creates your next colour layer (for example, the red layer underneath the white icing).
You can change the layer colour temporarily in Procreate (just tap the colour circle) to help you see the difference between layers, but remember to change everything back to black before exporting.
Step 5: Continue Duplicating for Each Layer
Repeat the process for each layer in your design. Duplicate the previous version, open it, and block out or colour over more sections to reveal only what you want for that layer. Each layer builds upon the last, just like stacking cardstock in a Cricut layered file.
You’ll end up with several Procreate files, one for each layer, for example white icing, red base, pink highlights, and so on.
Step 6: Export Each Layer as a PNG
Once you’ve created all your layers, open your first layer file. Tap the spanner (Actions) icon, Share, PNG. Choose where to save it, you can AirDrop it to your Mac, save to Files, or upload directly to Cricut if you’re working on iPad.
Repeat this for all your layers until they’re all saved as separate PNGs. Or stack the layers to export in bulk.

Step 7: Upload to Cricut Design Space
Open Cricut Design Space. Click Upload, Upload Image, Browse and select one of your PNGs. Choose “Cut Image” instead of Print Then Cut, then click Upload. Repeat for each layer file until all your PNGs are in Cricut.
Once uploaded, you can resize, recolour, and layer them in Design Space ready to cut from cardstock or vinyl.
Step 8: Cut and Assemble Your Layers
Now the fun part. Cut each layer from different coloured cardstock or vinyl. Stack and glue your layers together using foam pads or glue to create beautiful dimension. Stand back and admire your finished design, all built from a single PNG using Procreate.
Why This Method Works So Well
You can control every tiny detail of your design. It’s a great backup if the Cricut Contour Tool is glitchy. You can design anywhere, even on the sofa while watching TV. Procreate gives you more creative flexibility than Design Space alone.

How To Get Your Gingerbread Alphabet Letters And Numbers
Click here or the image below to get your free downloadable Gingerbread SVG Alphabet from our shop and follow these instructions to add to Cricut Design Space if you are using a Cricut Machine. Note if you are using Glowforge you need SVG files to cut the image out of wood or acrylic. Or Png or SVG to engrave.
If You’re Having Problems?
Check out my trouble shooting page, hopefully it will answer any questions you may have.
Tips And Advice For Using Your Download For Cricut
This alphabet is also perfect to make cards and cake toppers with your Cricut, check out my guides below.
- How To Add Fonts To Cricut Design Space
- How To Remove Backgrounds On Illustrator
- Cricut Design Space Guide
- How To Slice And Weld In Cricut Design Space
- How to upload to Cricut Design Space
- Where Else To Get Free SVG Files
Also please do pop over to Instagram, and give me a follow and if you make a project tag me! I love seeing everyone else’s makes and chatting crafting. I could do that all day! This is also where I share videos of my makes.

