
Today, I am sharing this gorgeous Free SVG Car Alphabet and Number Set for Cricut and Silhouette. Creating stunning projects for cards, scrapbooking, and cake toppers has never been cuter.
If you’re looking for a fun and creative Cricut project, this layered car alphabet tutorial is perfect, whether you’re a beginner or a seasoned crafter. In this easy step-by-step guide, I’ll walk you through how to upload your files, create a road, hillside and apple tree, and create a super cool layered letter or number ready for scrapbooking, card-making, or party decorations.

This post may contain affiliate links. Which means I may receive a small commission if you click a link and purchase something that I have recommended at no extra cost to yourself. As an amazon, Cricut and Glowforge associate, I earn from qualifying purchases.
What You Will Find Here
Craft Ideas For Our SVG Car Alphabet Letters & Number Set For Cricut And Glowforge
- Car Cake Toppers
- Framed Art
- Scrapbooking Layouts
- Cards
- Childrens Bedroom Decals
- Iron on Vinyl Projects

Step-by-Step Instructions: How to Make a Car-Themed Layered Letter Using Cricut
You will need….
- Cricut machine (Joy, Explore, or Maker)
- Cricut Design Space (free software)
- Standard Gripmat (green)
- Weeding tool (for removing small bits)
- Brayer (optional, to smooth cardstock on mat)
- Foam pads or glue
- Pintasa Acrylic Paint Pens
- Card Stock, Red, Blue, White, Yellow, Green and Black

1. Download and Prepare the Alphabet Set
- Upload the top-layer letter (PNG or SVG) into Cricut Design Space. Both file types work the same.
2. Add and Slice the Number into the Flag
- Select the number you want (e.g., 7) and rotate it using the top bar until it fits within the flag shape.
- Select both the number and the letter, then use Slice to cut the number into the flag for personalisation.
3. Create the Layered Letter Design
- Duplicate the top layer and colour the first copy.
- Select the second copy and use the Contour tool to remove the cloud shape. This will be the white cloud layer.
- Duplicate again for the third layer. Remove the number via Contour and colour this layer yellow (flag layer).
- Duplicate a final time, remove all contours, and colour this layer blue for the sky background.
4. Make the Road Layer
- Duplicate the blue background.
- Use unlocked circle shapes to form a wavy road shape across the bottom of the letter.
- Weld the circles together to form one shape.
- Slice this shape out of the background layer to create the road cut-out.
- Move it into position behind the car using the right-hand side layer bar.
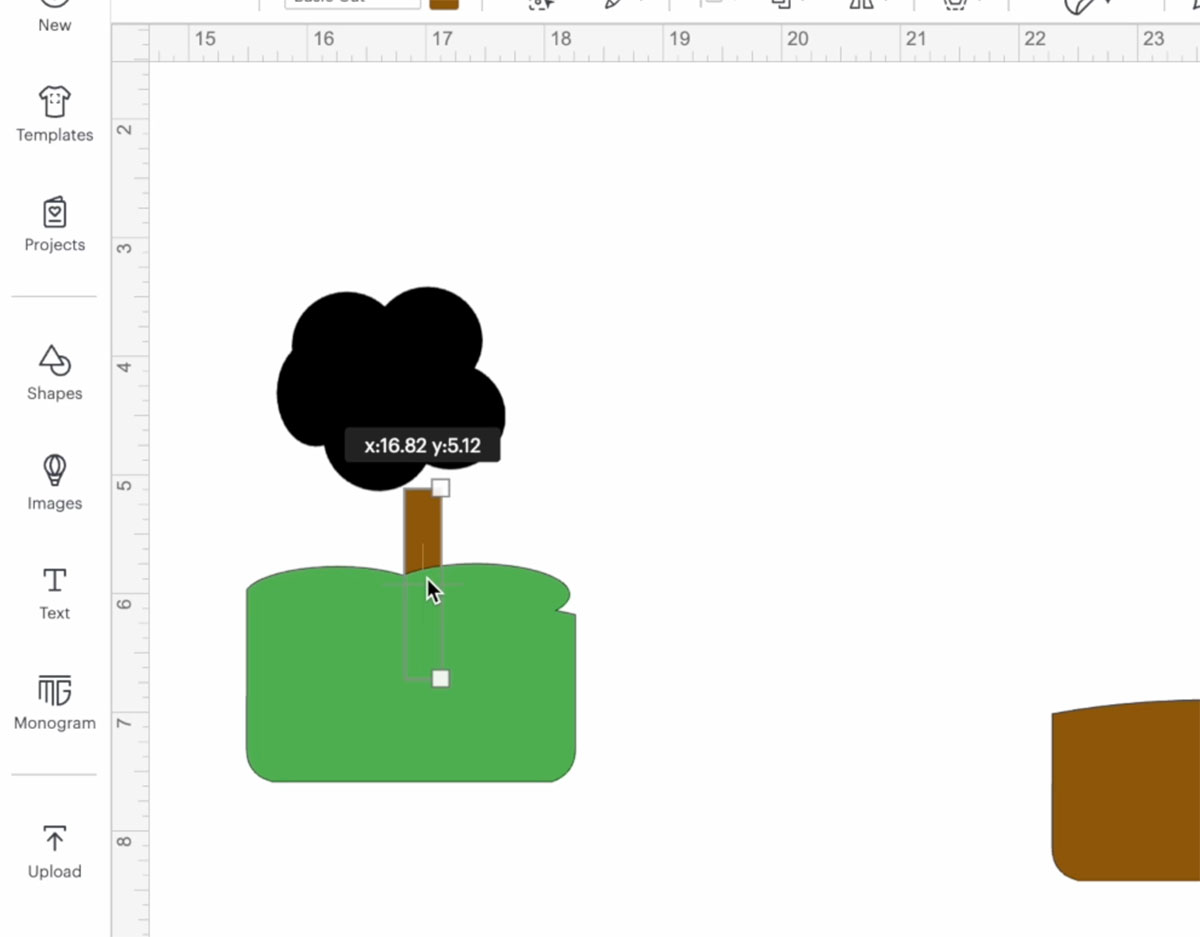
5. Create the Grass Verge and Tree
- Duplicate the background layer again.
- Use multiple circles to form a rough tree top shape. Select all and weld.
- Remove any inner gaps using the contour tool.
- Duplicate the tree, squash and drag it over the road base to create a grassy verge.
- Slice the tree shape out of the background layer.
- Create a tree trunk by squashing a square shape and attaching it to the tree top. Weld together.
6. Build the Hill on the Other Side
- Duplicate the tree and place an oval shape over the top of it. Slice it out to remove part of the tree.
- Use another oval to create a hilly grassy shape. Position it just above the road line.
- Weld the shapes together to create a single hilly bank. Position behind the car in the layer panel.
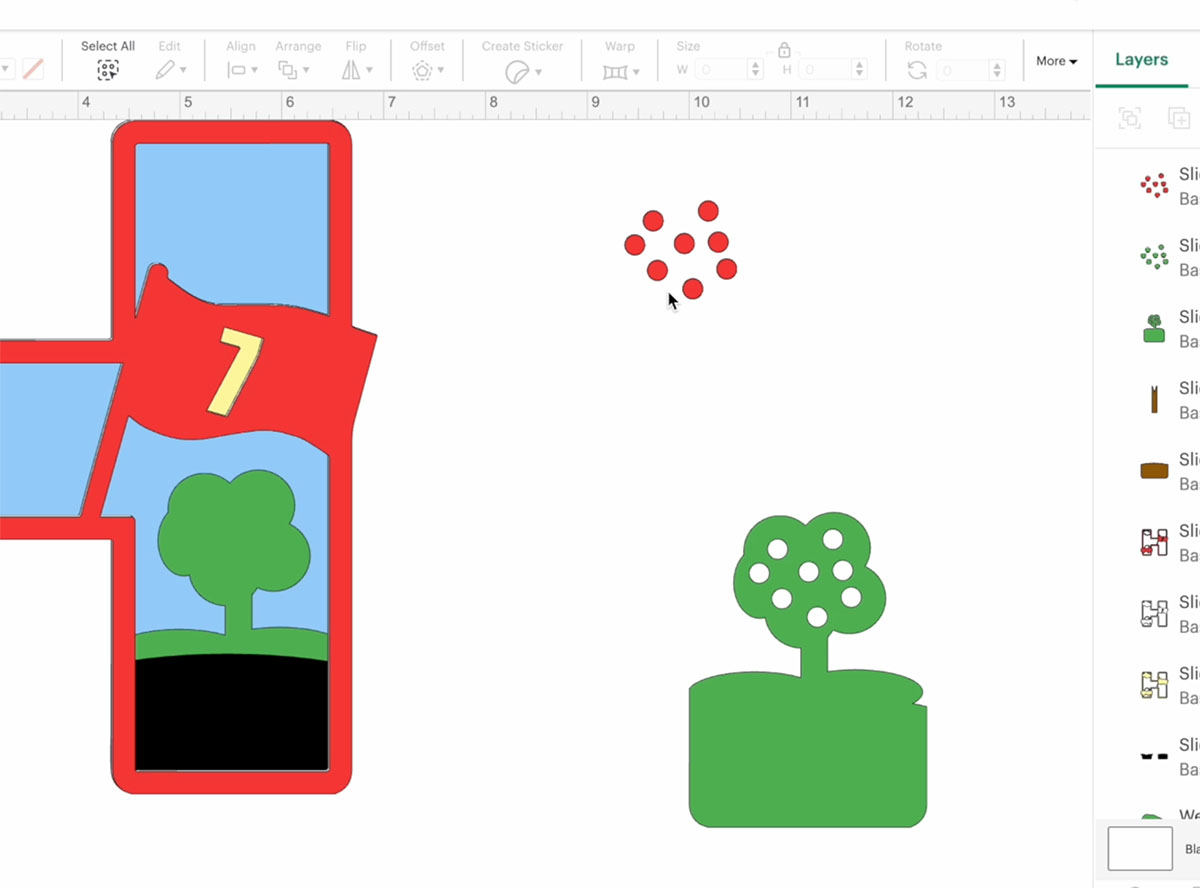
7. Add Apples to the Tree
- Duplicate the tree again to create an apple tree.
- Make small circle shapes for apples and position them over the tree.
- Move the tree out of the way and weld the apples together.
- Slice the welded apples out of the top layer of the tree.
- Colour the bottom tree layer red and place the sliced top layer back over it to reveal red apples.
8. Prepare Materials and Cut
You will need:
- Cardstock in red, green, blue, yellow, black glitter, white, and backing colour.
- Cricut cutting mats (green or blue).
- Brayer to secure card to mat.
- Sticky foam pads in various sizes.
- Scissors.
- Acrylic paint pens or markers for the road and tree trunk.
Cut each layer according to the colour and weight of cardstock. Use a heavier setting for glitter or thick card.
9. Remove from Mat
- Ensure no card is stuck underneath before peeling.
- Flip the Cricut mat over and peel the mat away from the card to avoid curling.
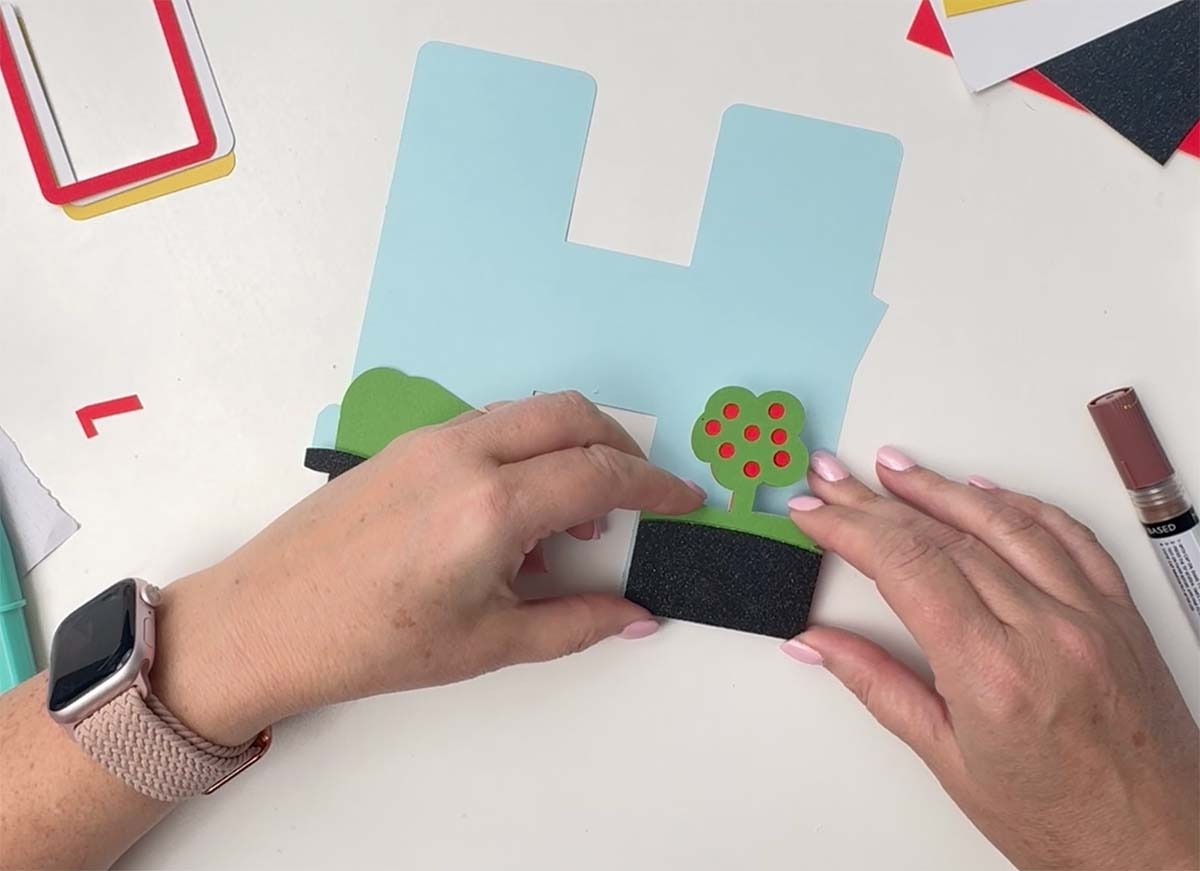
10. Assemble the Layers
- Start from the back layer (blue) and build forward.
- Use foam pads to give the piece dimension. Where needed, apply double foam pads to compensate for depth differences.
- Add the white cloud layer, yellow flag layer, and then top red letter.
- Use small or halved foam pads where space is tight.
11. Add Final Details
- Use acrylic paint pens to colour in the tree trunk and add road markings.
- Test markers on scrap paper first.
- These are designed to look fun and cartoonish, so precision is not essential.

How To Get Your Car Alphabet Letters And Numbers
Click here or the image below to get your free downloadable Car SVG Alphabet from our shop and follow these instructions to add to Cricut Design Space if you are using a Cricut Machine. Note if you are using Glowforge you need SVG files to cut the image out of wood or acrylic. Or Png or SVG to engrave.

If You’re Having Problems?
Check out my trouble shooting page, hopefully it will answer any questions you may have.
Tips And Advice For Using Your Download For Cricut
This alphabet is also perfect to make cards and cake toppers with your Cricut, check out my guides below.
- How To Add Fonts To Cricut Design Space
- How To Remove Backgrounds On Illustrator
- Cricut Design Space Guide
- How To Slice And Weld In Cricut Design Space
- How to upload to Cricut Design Space
- Using Iron On Vinyl
- Where Else To Get Free SVG Files
Also please do pop over to TikTok or Instagram, and give me a follow and if you make a project tag me! I love seeing everyone else’s makes and chatting crafting. I could do that all day! This is also where I share videos of my makes.

