
Are you ready to add a touch of summer adventure to your crafting projects? Our free layered camping alphabet is perfect for Cricut users, scrapbookers, and card makers looking to create fun, personalised designs with ease.
Whether you’re crafting holiday scrapbooks, making camping-themed cards, or adding a playful twist to your papercrafts, I am going to teach you how to make these files into multi-layered files with a day and night theme. Let’s dive in and get crafting!

This post may contain affiliate links. Which means I may receive a small commission if you click a link and purchase something that I have recommended at no extra cost to yourself. As an amazon, Cricut and Glowforge associate, I earn from qualifying purchases.
What You Will Find Here
Craft Ideas For Our SVG Camping Alphabet Letters & Number Set For Cricut And Glowforge
- Camping Cake Toppers
- Framed Art
- Scrapbooking Layouts
- Cards
- Childrens Bedroom Decals
- Iron on Vinyl Projects
Step-by-Step Instructions: How to Make a Camping-Themed Day and Night Layered Letter Using Cricut
You will need….
- Cricut machine (Joy, Explore, or Maker)
- Cricut Design Space (free software)
- Standard Gripmat (green)
- Weeding tool (for removing small bits)
- Brayer (optional, to smooth cardstock on mat)
- Foam pads or glue
- Card Stock

1: Upload Your Alphabet and Elements
- Upload your camping alphabet letters into Design Space.
- Upload your sun, moon and stars into the same project.
2: Adding the Moon for the Night Version
- Select the moon, apply an offset to make it chunkier.
- Delete the thinner moon, duplicate your new moon and position it over your chosen letter.
- Use slice to cut the moon shape out of the letter, then position the moon back in place.
- Create a small offset to fill gaps if needed and weld together.
- Position and weld your stars into the design.
3: Create the Mini Campfire
- Logs:
- Insert a square, squash it into a rectangle.
- Duplicate and criss-cross them, weld together.
- Duplicate again, stagger for layered logs, weld together.
- Flames:
- Insert a circle, squash it down.
- Duplicate and resize one smaller.
- Slice one out of the other to create a flame shape.
- Duplicate and flip for layered flame effects.
- Weld layers together to complete your fire.
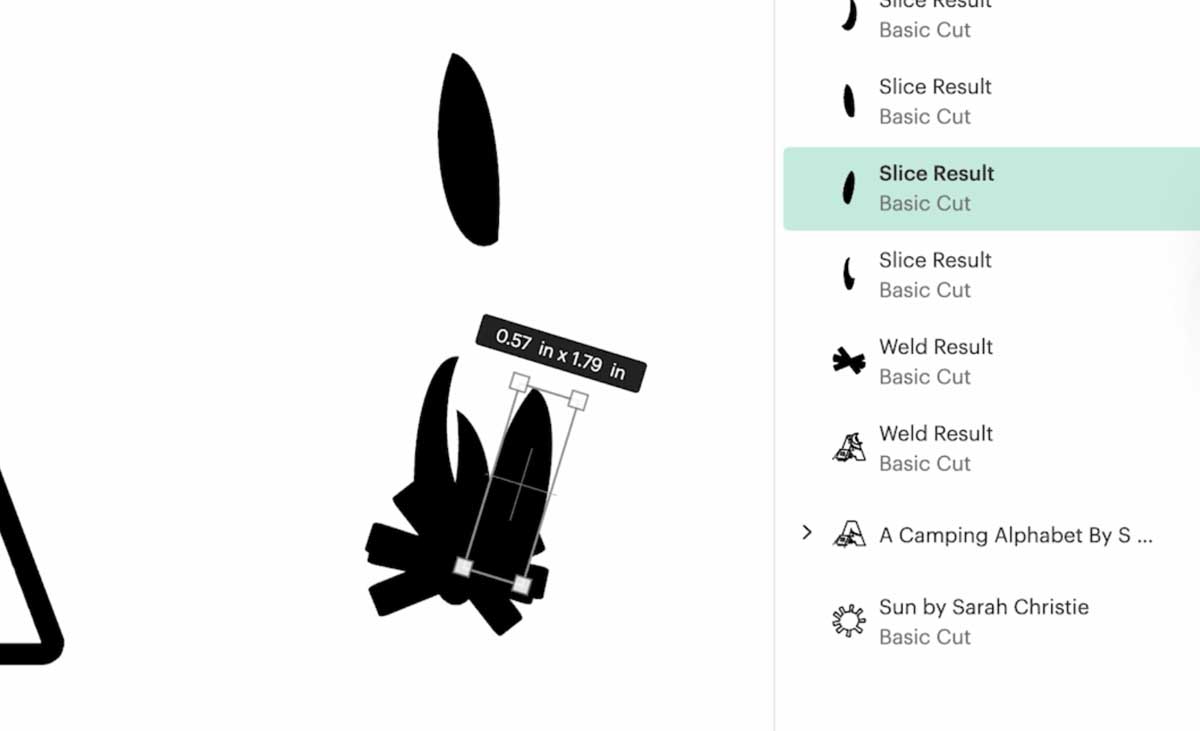
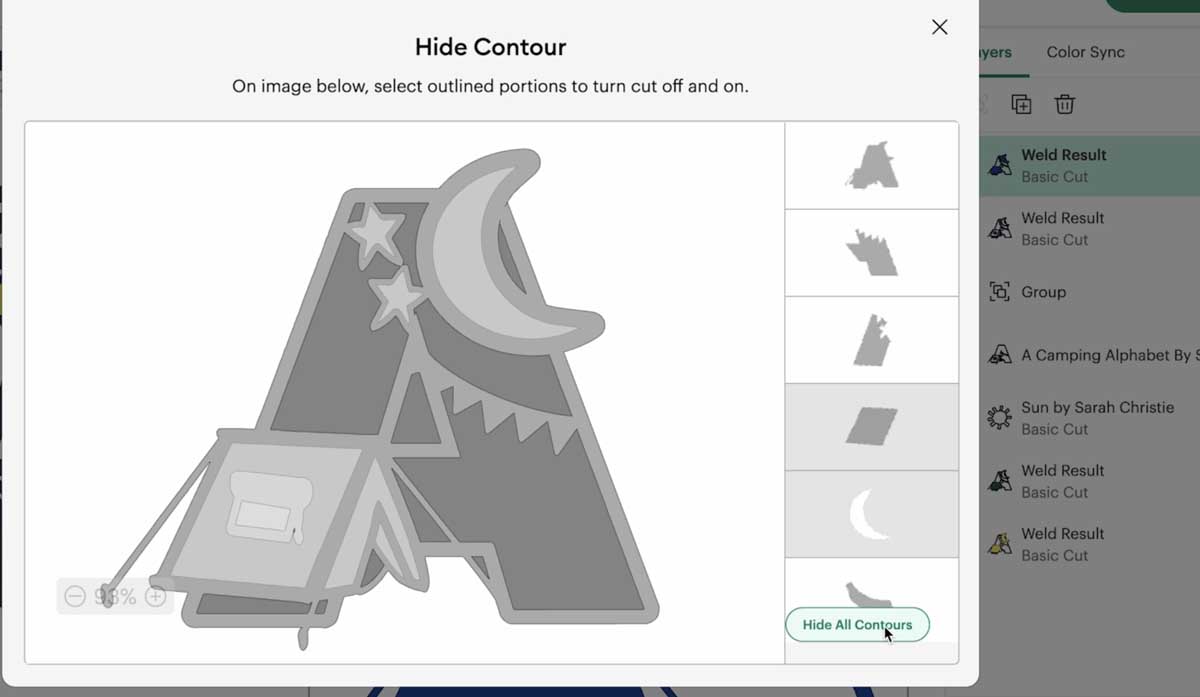
4: Contouring Layers for Depth
- Duplicate your letter for layering.
- Remove contours for the tent layer (keep the window cutout if desired).
- Duplicate again, remove contours for the moon and stars layer.
- Duplicate one more time, remove all contours for your back layer.
- Line up your layers and colour:
- Front: blue
- Tent: green or pink
- Stars layer: yellow or gold
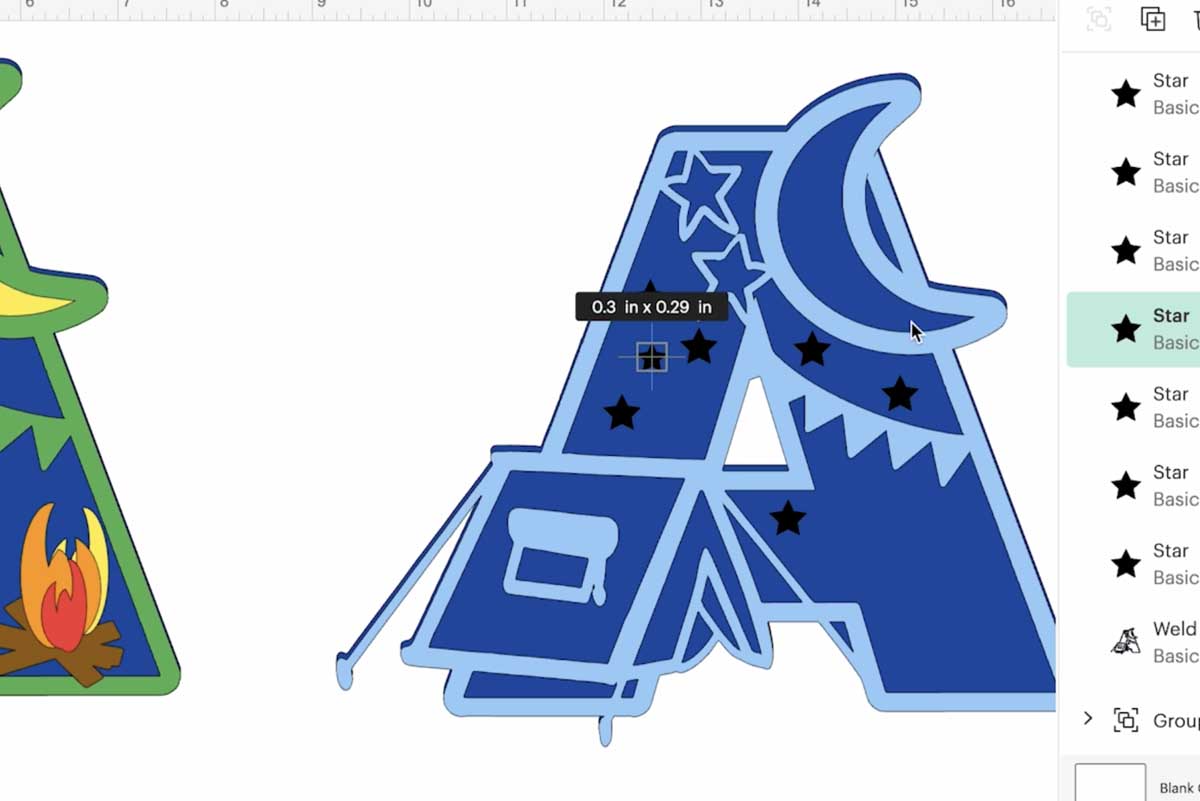
5: Creating the Starry Sky
- Duplicate the back layer.
- Position stars around the top layer for guidance.
- Weld the stars together, then slice them out of the back layer.
- This creates your starry sky layer.
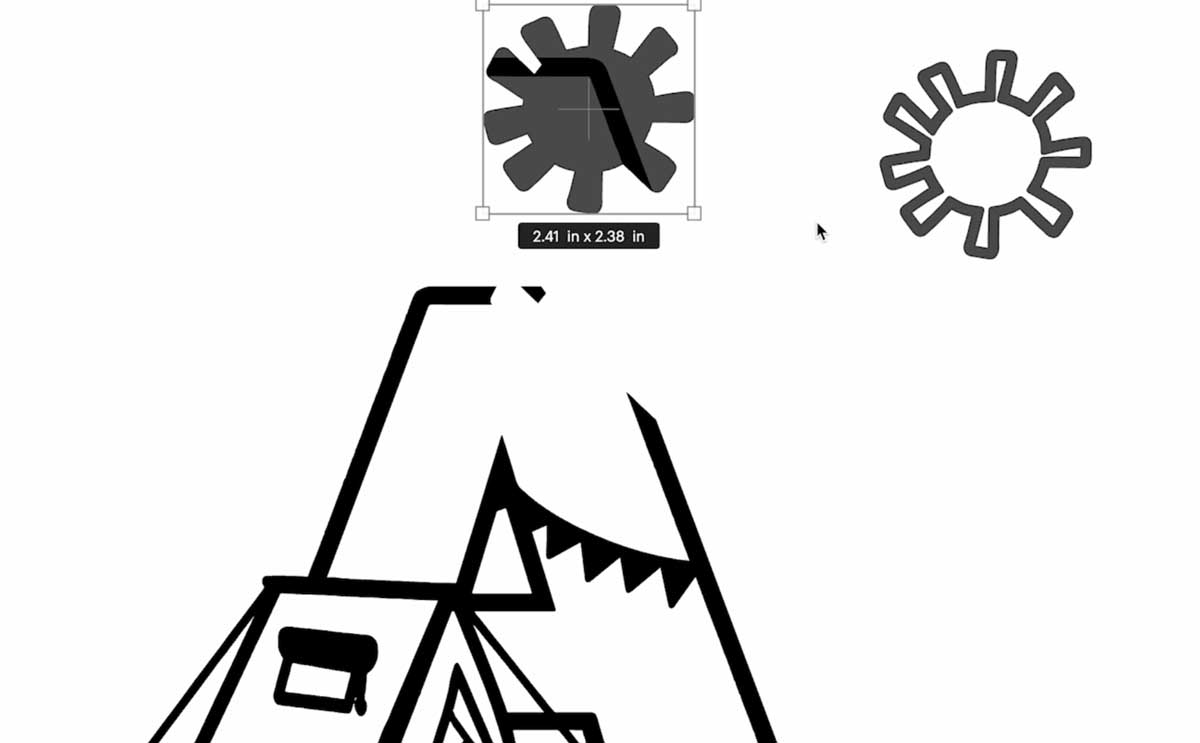
6: Creating the Day Version with the Sun
- Use the sun, create an offset, and duplicate it.
- Slice the sun out of the corner of your chosen letter.
- Replace with the duplicate sun, adjust offset if too thick, and weld together.
- Duplicate and remove contours for the tent (colour pink if desired).
- Duplicate again, remove contours for the sun and window (colour yellow).
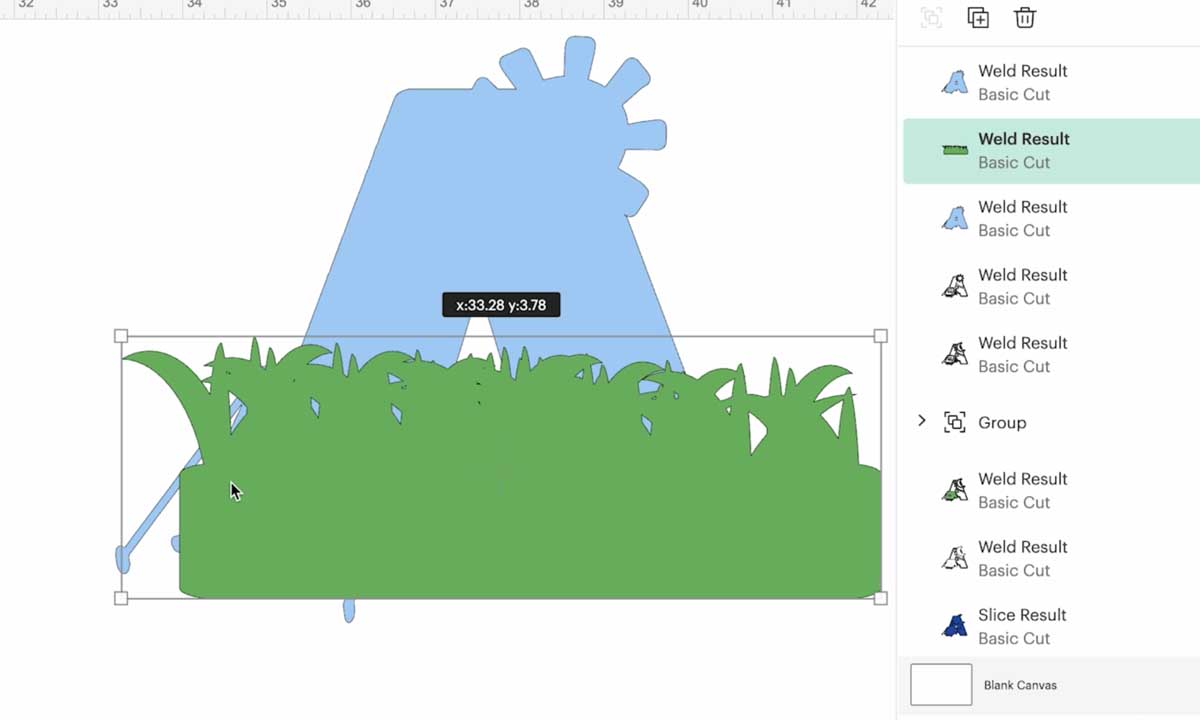
7: Creating Grass Layers
- Insert a circle, squash it down, duplicate, and slice one from the other to create a grass shape.
- Duplicate multiple times, adjusting sizes and angles for layered grass, then weld together.
- Create a base by slicing the bottom of your grass and welding it into a strip.
- Duplicate your back letter layer, slice the grass layer from it to create a grass cut-out layer.
- Remove tiny unwanted bits using the contour tool.
8: Preparing to Cut
- Group your day and night letters, adjust sizes to fit onto A4 glitter cardstock for minimal waste.
- Place your mini campfire in a corner to use scrap card for cutting.
- Flip mirrored designs if needed to maximise paper space on your mat.
- Use a combination of glitter cardstock and plain cardstock as preferred.
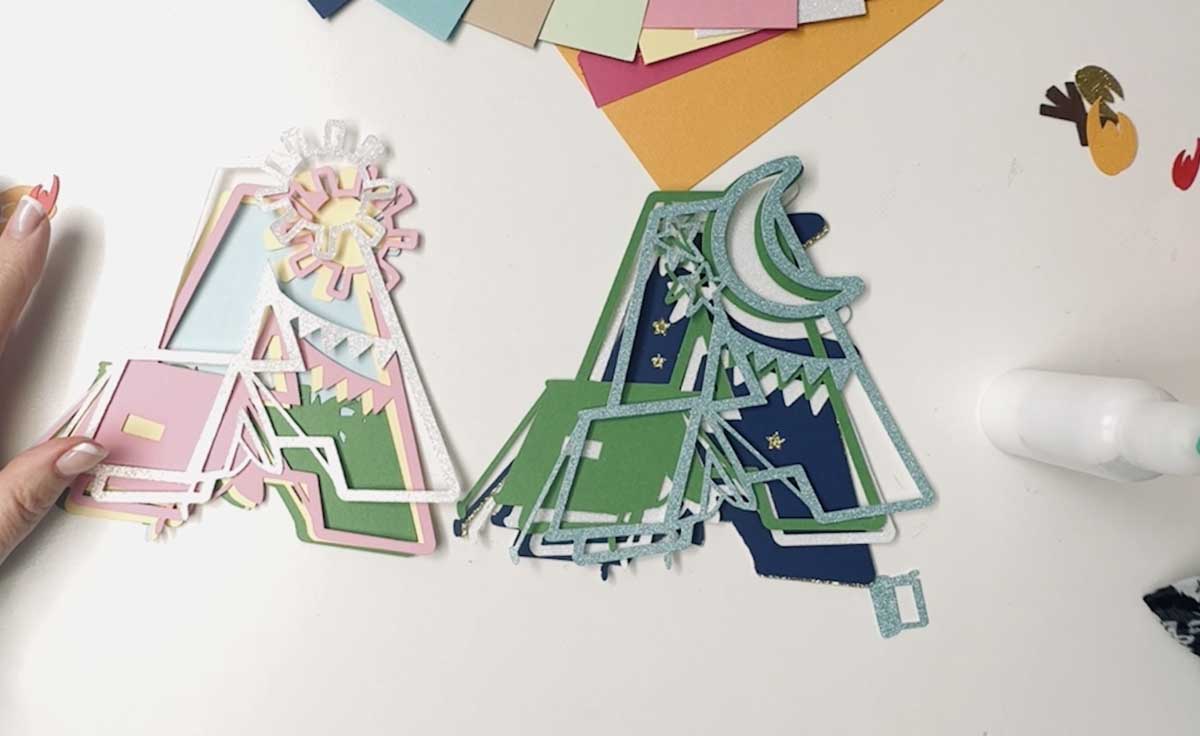
9: Building Your Layered Alphabet
- Start from the back layer forward when gluing your design.
- Assemble your campfire first so you don’t lose small pieces.
- Continue layering each section:
- Starry sky (night) / Sky layer (day)
- Grass
- Tent
- Front letter with welded sun/moon and stars
- Press gently between layers to secure with glue.
Tips:
- If the offset is too thick, simply undo and create a smaller offset.
- Weld whenever you need elements to cut as one piece.
- Use scrap card for your campfire to reduce waste.
- Layer colours to visualise before cutting to avoid mistakes.
How To Get Your Camping Alphabet Letters And Numbers
Click here or the image below to get your free downloadable Camping SVG Alphabet with day and night options from our shop and follow these instructions to add to Cricut Design Space if you are using a Cricut Machine. Note if you are using Glowforge you need SVG files to cut the image out of wood or acrylic. Or Png or SVG to engrave.
If You’re Having Problems?
Check out my trouble shooting page, hopefully it will answer any questions you may have.
Tips And Advice For Using Your Download For Cricut
This alphabet is also perfect to make cards and cake toppers with your Cricut, check out my guides below.
- How To Add Fonts To Cricut Design Space
- How To Remove Backgrounds On Illustrator
- Cricut Design Space Guide
- How To Slice And Weld In Cricut Design Space
- How to upload to Cricut Design Space
- Using Iron On Vinyl
- Where Else To Get Free SVG Files
Also please do pop over to TikTok or Instagram, and give me a follow and if you make a project tag me! I love seeing everyone else’s makes and chatting crafting. I could do that all day! This is also where I share videos of my makes.

