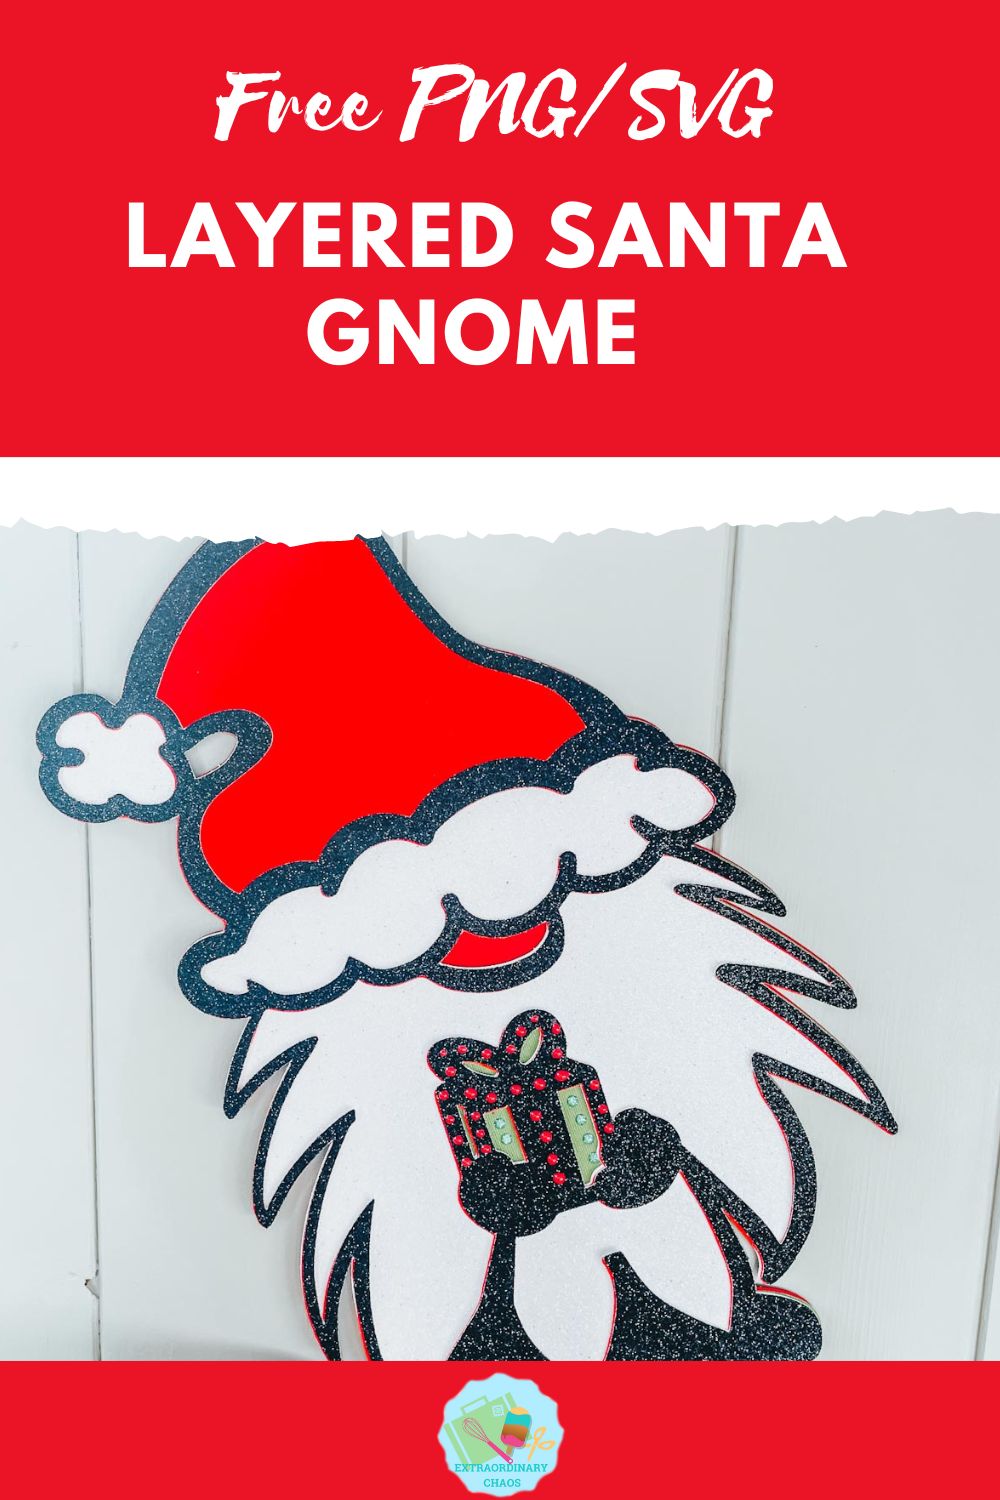
It’s time to jump into Christmas crafts, which means another new season of gnomes. I do love a gnome, as you know if you are a regular reader. However today we are sharing our Free Layered Santa, Christmas Gnome SVG, he’s a cute one and what’s not to love about Santa?
If you are a gnome fan check out the rest of the gnome gang.
However this little gnome is perfect for Christmas Holiday projects with Cricut, Glowforge and Silhouette. And will make great diy decorations, cards and scrapbooking layouts.
This post may contain affiliate links. Which means I may receive a small commission if you click a link and purchase something that I have recommended at no extra cost to yourself. As an amazon, Cricut and Glowforge associate, I earn from qualifying purchases.
What You Will Find Here
What You Will Need For My Free Christmas Gnome SVG
- Cricut Maker,
- Weeding Tools
- Brayer
- Card Stock, red, black , and white glitter, plus forrest green and dark red.
- Glue, I use Cosmic Shimmer Acrylic Glue
- Nuvo Drops in Red and White Blizzard

Making Your Christmas Gnome SVG/PNG On Cricut
Upload your Christmas Gnome SVG files to Cricut Design Space, follow these instructions if you need help doing this. Firstly you will need to ensure all layers line up correctly, they should, however if they don’t, select your layer and click on the padlock on the top bar to adjust. Also use this video guide to get help downloading my files from Google Drive in bulk.

Once you are happy, colour all the layers of your Christmas Gnome using the pictures on this page as a guide. The Colours I used are….
- 1. Black glitter
- 2. Red glitter
- 3. White glitter
- 4. Green
- 5. Dark red

Cutting Your Christmas Gnome SVG On Cricut
When you send your Christmas Gnome SVG/PNG files to your Cricut to cut, ensure you use your brayer to roll the paper, vinyl or card to adhere to the mat. Note that movement will affect the cut.
How To Build Your Christmas Gnome SVG Layered File
Firstly start by making sure they all line up and every layer is the correct way round, then flip all of the layers over.
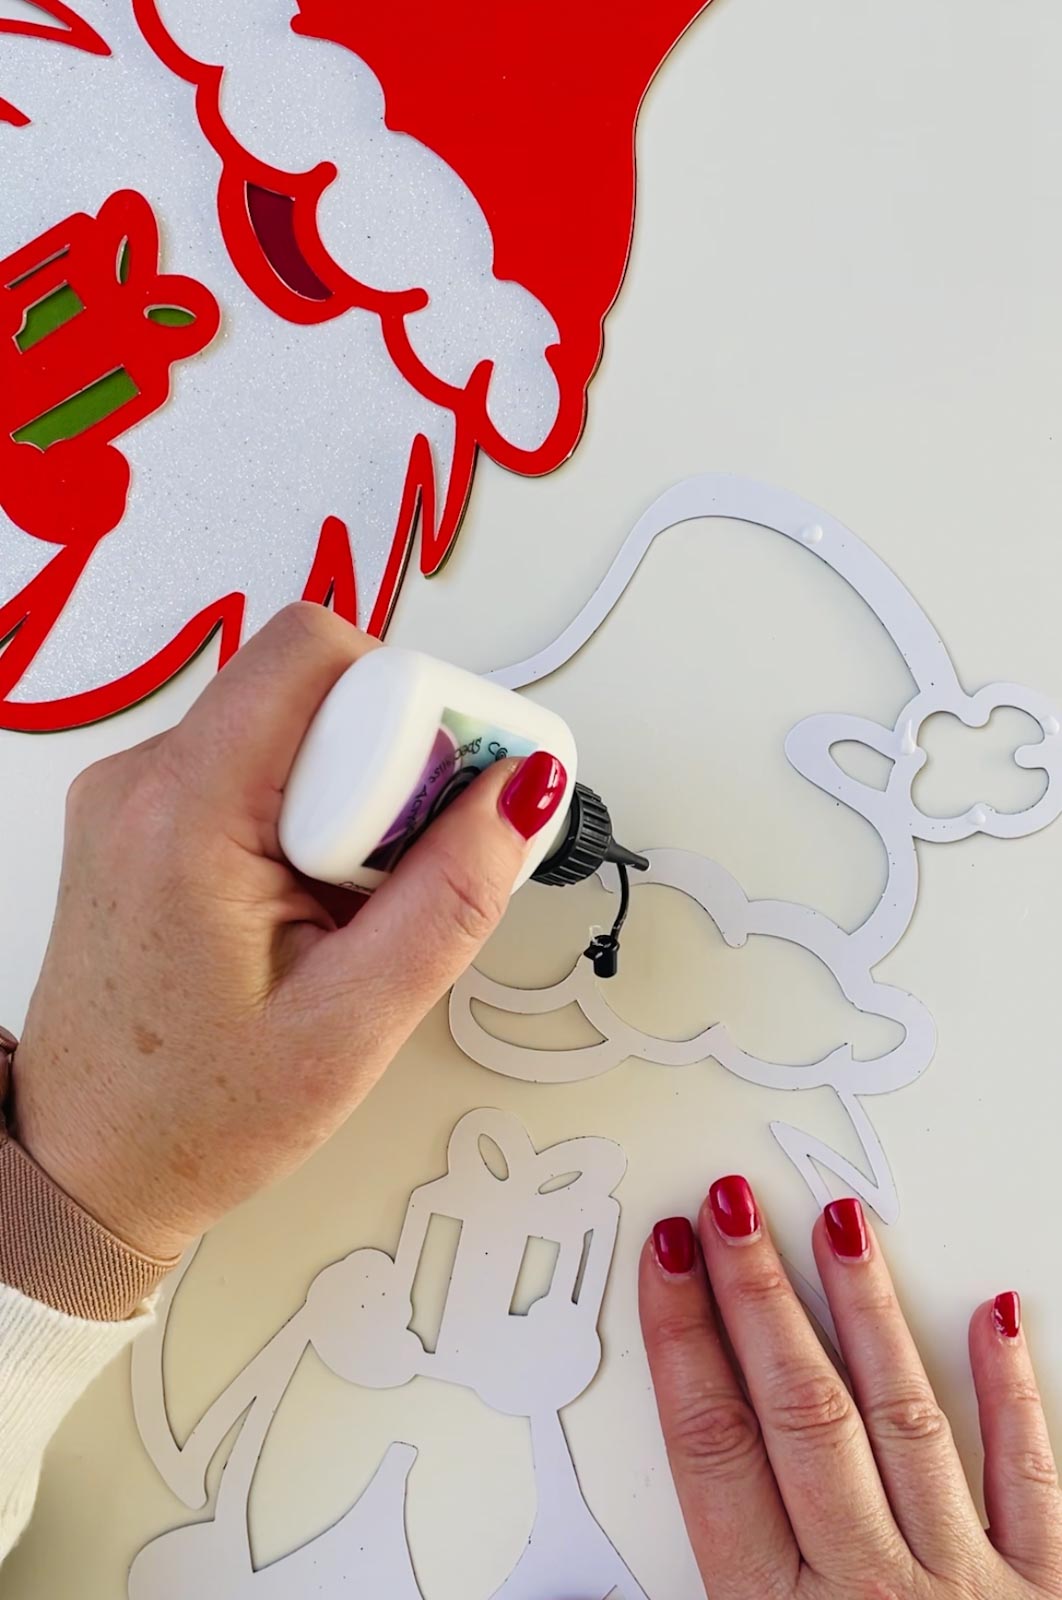
Next, turn the back red layer over, then apply glue to the back of the green layer and flip and attach to the red layer. Repeat this with the white, red and black layer until your gnome is built.
Lastly use the Nuvo glitter drops to decorate your present, of course this is optional but does look cute.
How To Get Your Free Christmas Gnome SVG/PNG Files
Click here of the the image below to get your free downloadable Christmas Gnome SVG/png files from our members shop and follow these instructions to add to Cricut Design Space. Note if you are using Glowforge you need SVG files to cut the image out of wood or acrylic. Or Png or SVG to engrave.

If You’re Having Problems?
Check out my trouble shooting page, hopefully it will answer any questions you may have.
Tips And Advice For Using Your Download For Cricut
- Cricut Design Space Guide
- How To Slice And Weld In Cricut Design Space
- How to upload to Cricut Design Space
- Using Iron On Vinyl
- Where Else To Get Free SVG Files
Also please do pop over to Instagram, or Tik Tok and give me a follow and if you make a project tag me! I love seeing everyone else’s makes and chatting crafting. I could do that all day.
