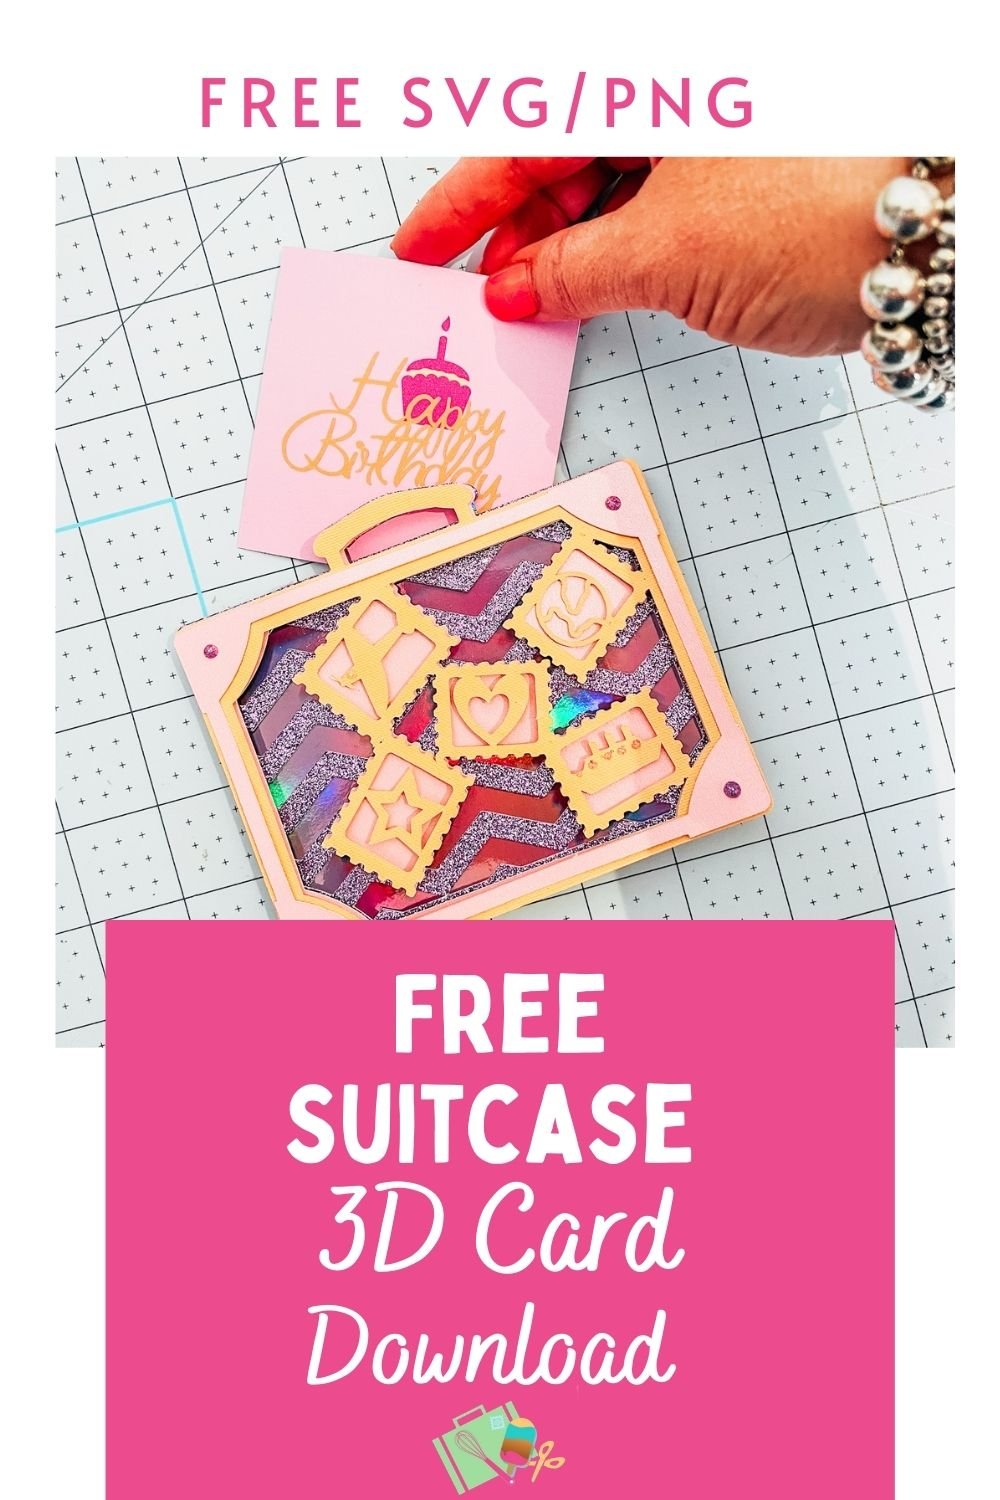
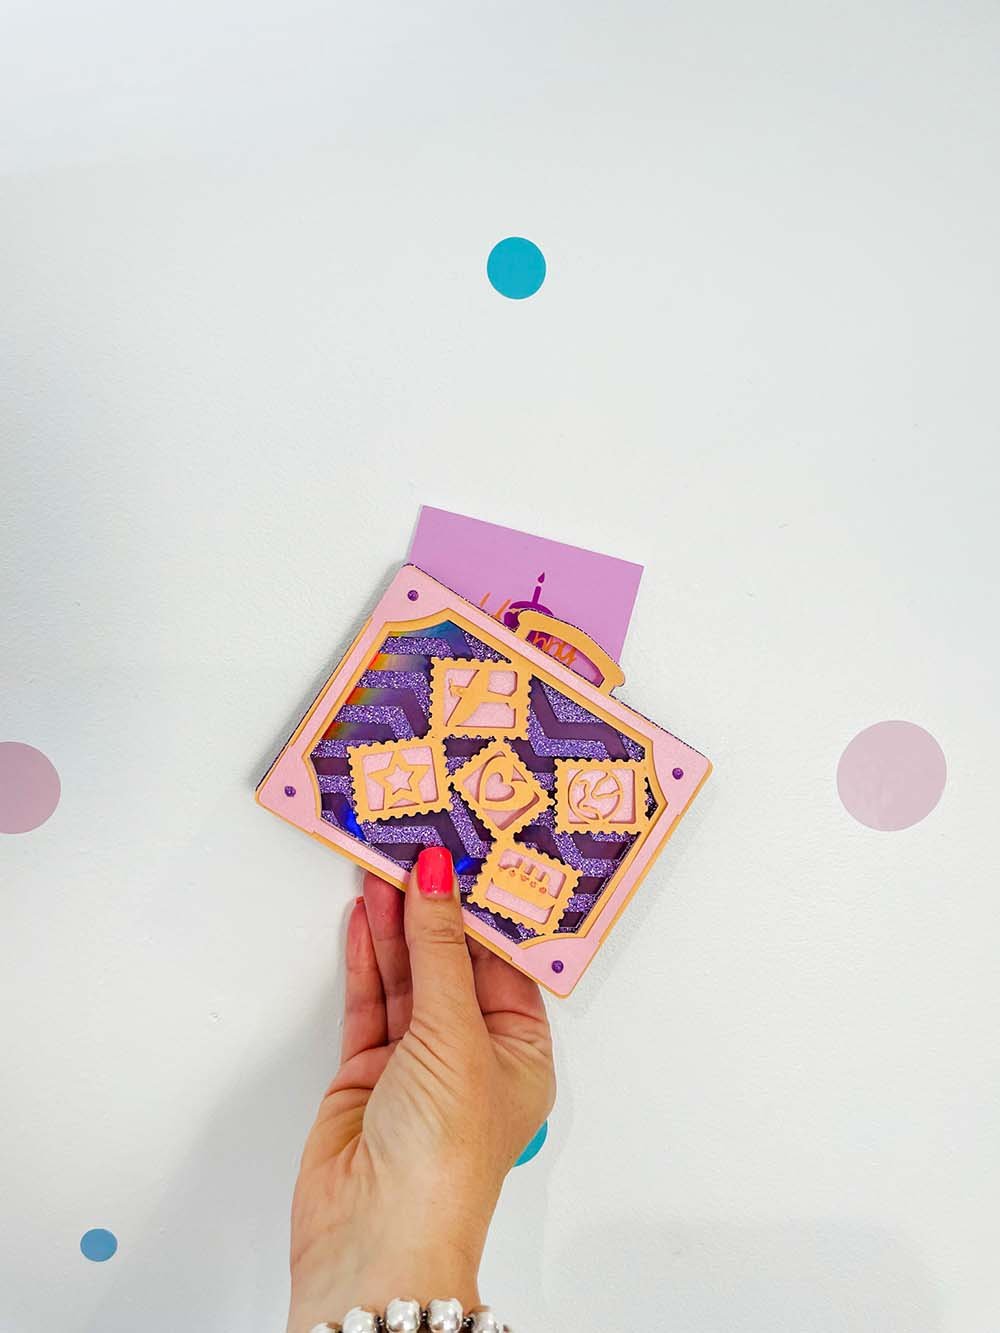
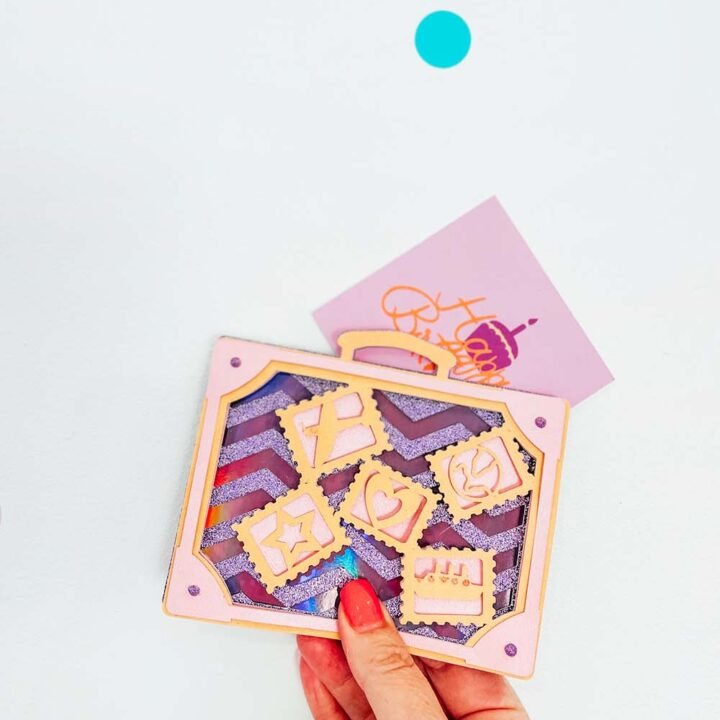
Do you love travel? It’s always been a huge motivation for me, I am always looking for the next family adventure. Another chance to make memories. So yes, I have missed travel for the last 18 months, however am thankful for my family and home too. Saying that, I can’t wait to get back to travel? These Free 3D Suitcase SVG For Cards And Scrapbook Layouts are perfect to cut on Cricut, Silhouette or Brother.
And any travel lover would love a travel themed card, or indeed and pocket suitcase for a mini book or scrapbooking layout.
If you want to see me create my projects, follow me on Tik Tok and Instagram.
Although this suitcase has been designed as a 3d layered project, any of the layers can also be used for individual projects such as vinyl for travel themed t shirts, cups, banners and coasters, yet you also have the option of creating 3d suitcase cards, banners and framed artwork. I have also included a card template or single back file for the suitcase SVG to give you project options.
Project Ideas For Using My 3D Suitcase SVG
- Layered Suitcase Cake Toppers
- Travel Themed Cards
- Scrapbooks
- Travel T Shirts
- Framing As 3D Wall Art
- Decorating Travel Themed Parties
- Suitcase Decals On Back Packs
- Cricut Mugs
- Cushion Covers
- Infusible Ink Coasters
To Make A Layered 3D Suitcase Card
You Will Need
- Cricut Maker
- Cricut Design Space
- Cutting Mat
- 12x 12 plain and glitter card stock
- Tonic Studio Neuvo Dots (Optional)
- Brayer and weeding tools
- Double sided sticky pads
- Hot glue gun
If You Want To Use This Cut File For 3D Suitcase SVG Projects?
Simply click here or on the image below to get my free 3D Suitcase SVG cut file download and I will pop them across to you in PNG and SVG form. You will find 4 layers plus 2 back files, one for a 3d card and one back file.
However, make sure your pop-up blocker is turned off. Here’s how you upload the files to Cricut Design Space

If You’re Having Problems?
Check out my trouble shooting page, hopefully it will answer any questions you may have.
How To Build Your 3D Suitcase In Cricut Design Space
Once your files are in design space click select and add all of your 5 chosen layers.
Change the colour of each file so they will all cut different colours on separate mats when you send to cut.
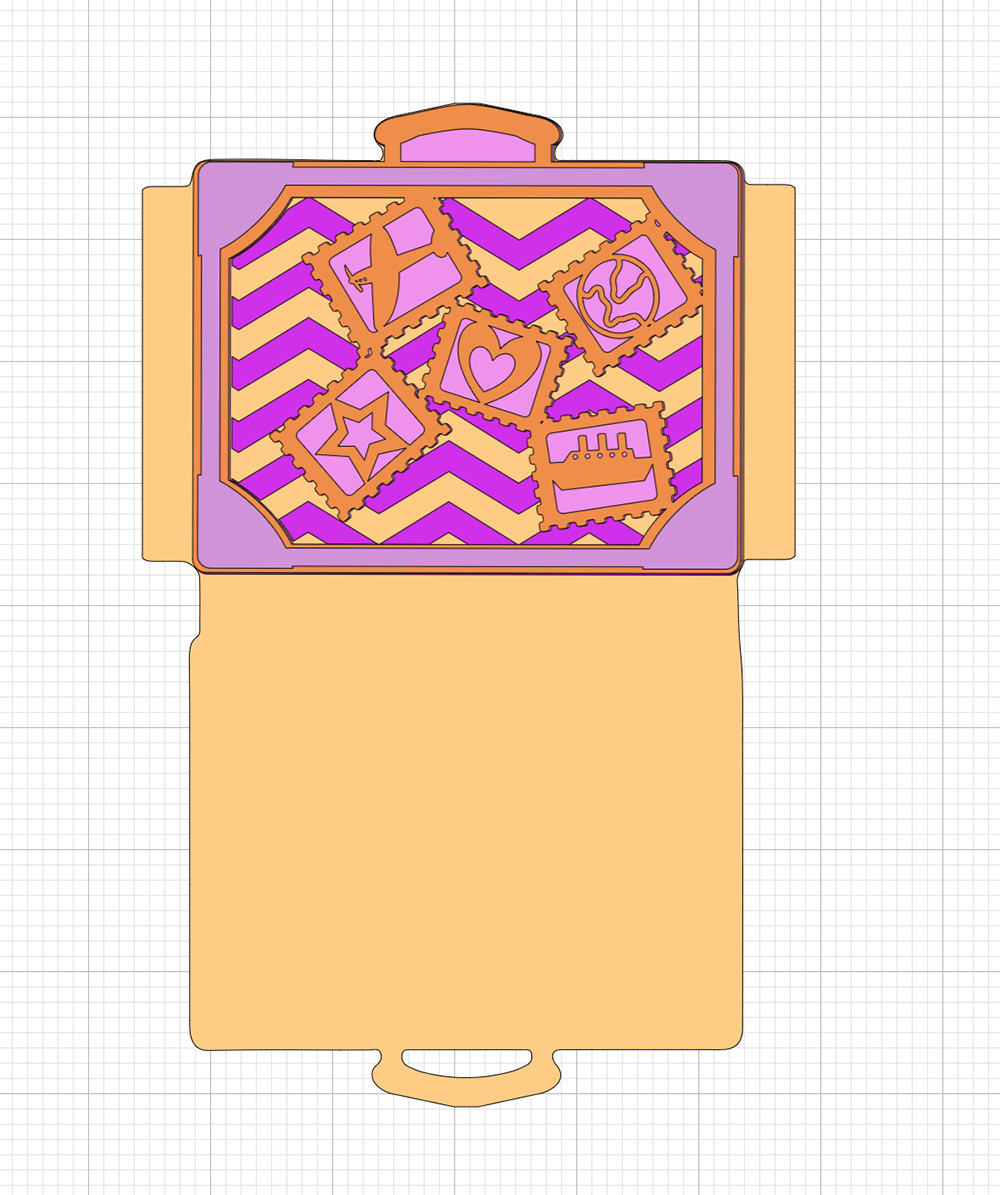
Ensure if you are using the 3d card template that you line it up like the image below, the suitcase must line up with the centre oblong. The flaps at the side are to fold and create your card.
Before cutting line up all the files, if any are slightly misshapen unlock the 3D Suitcase SVG by selecting the image and clicking the padlock on the bottom left corner. You can now drag the files to fit.
Cutting Your Suitcase SVG/PNG Cut Files
When you send your 3D Suitcase SVG/PNG files to your Cricut to cut, ensure you use your brayer to roll the paper, vinyl or card to adhere to the mat. Movement will affect the cut.
Remember you are using 5 colours so have the card stock ready to hand and really think about the colours. I chose glitter card and foil craft board for the back layers to add depth and feel I achieved that. I also used the same shade of pink twice to add a feature layer to the front that matched a back layer.
If your cutting mat looses its stickiness this will affect the quality of cut. Also make sure your mat is in good condition, this is vital for cutting intricate cuts.
Additionally, make sure you set the material and cut pressure correctly to match whatever materials you’re cutting to get a clean cut. If you have any problems cutting check the mat, pressure and material settings as generally this is where the problem will lie.
Assembling Your 3D Suitcase
Start by laying out all 5 layers to ensure they line up.
I have suggested an order on the files which makes sense and the layers are numbered accordingly.
If you are making a 3d suitcase card with your SVG start by scoring the lines, see the image below. Score the lines on the front and back of the card using a scoring tool and ruler. If you don’t have a scoring tool try a ballpoint pen lid.
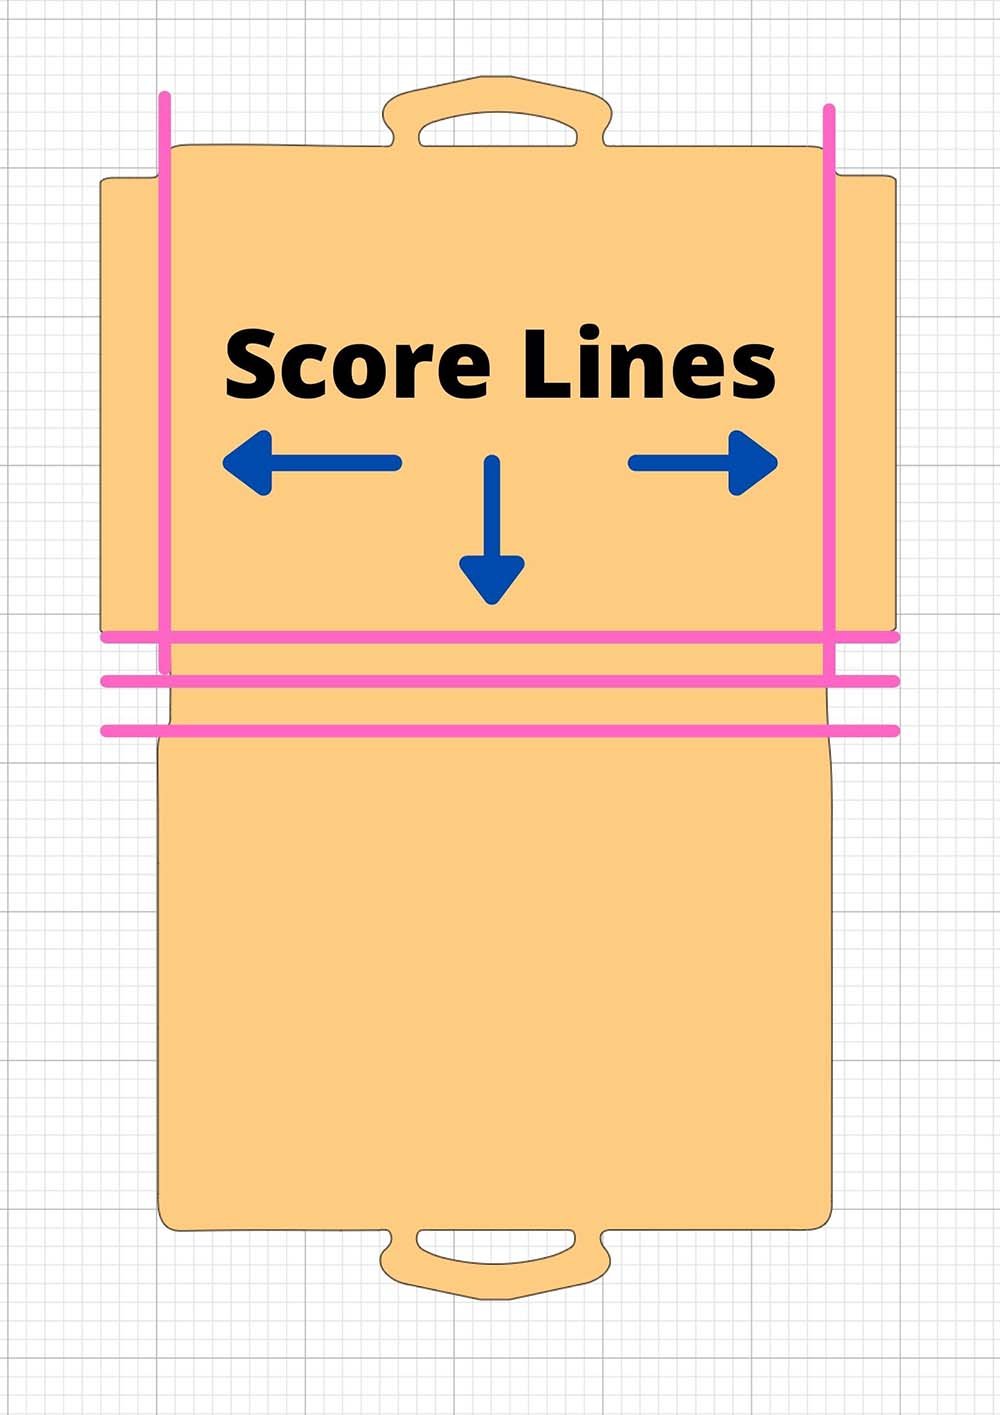
Note that the bottom of the case has 3 lines, the centre line should be folded inwards to create an indentation.
Now fold the case upwards so your cut file is back to back, fold the side flaps and glue to create your suitcase.
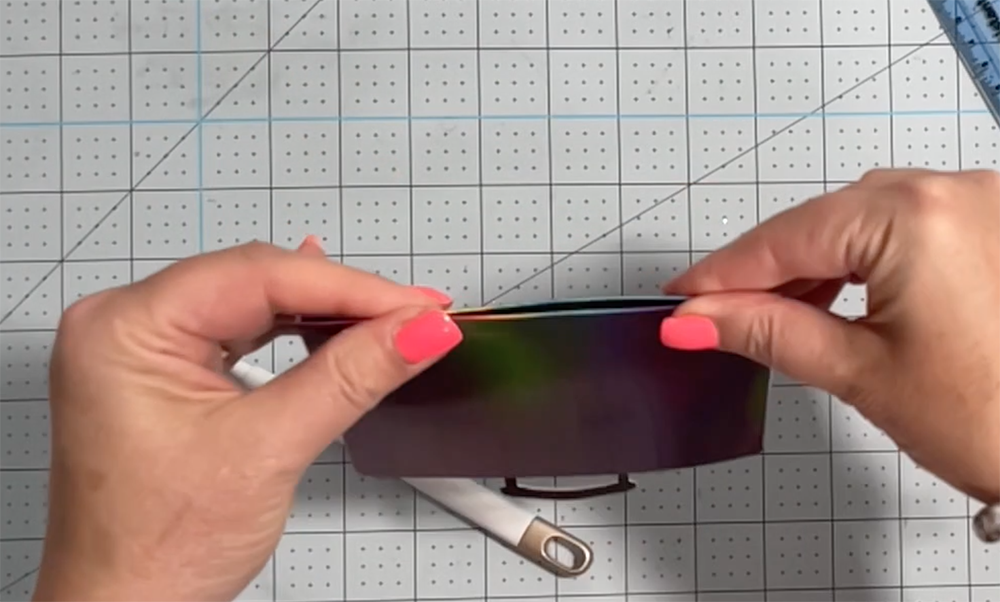
Next placing the back layer face up, and sticking foam pads to the corners of the back of your layer 2. Flip the layer over and position onto the back layer, making sure it lines up.
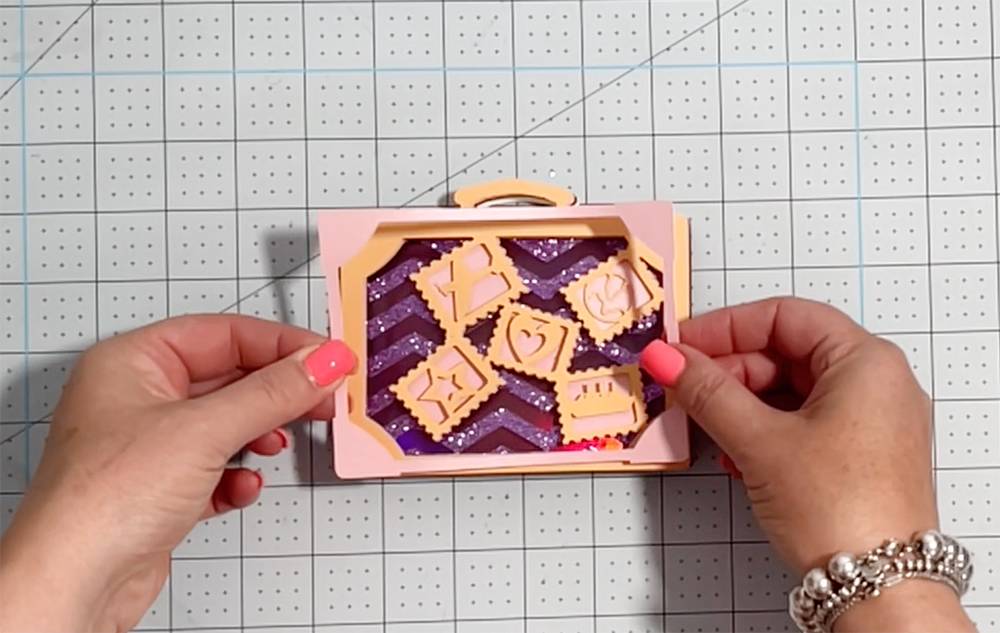
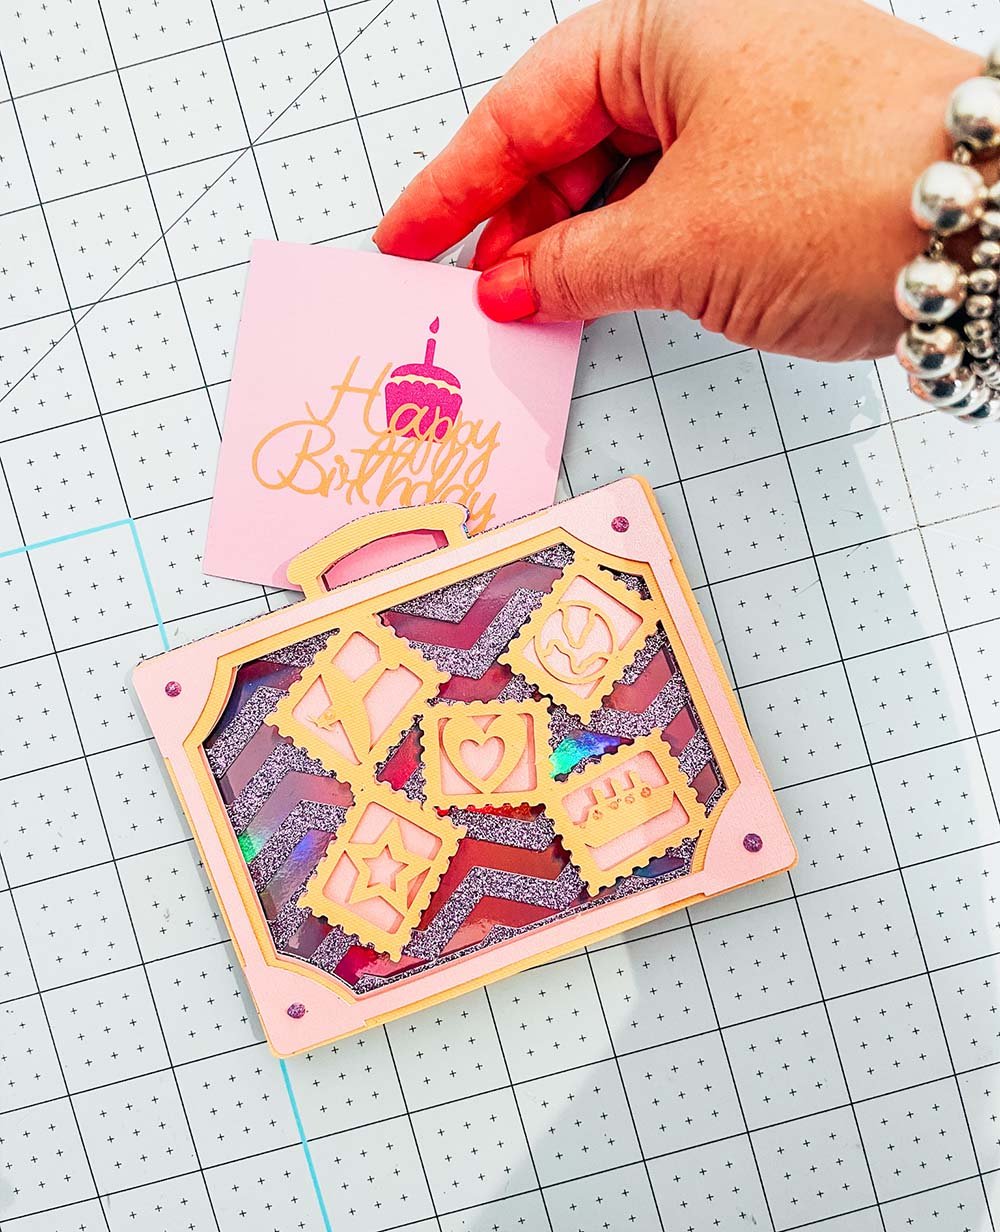
Keep going layer by layer with your 3D Suitcase SVG until you’ve finished. Check out my little in post video to see how I built mine.
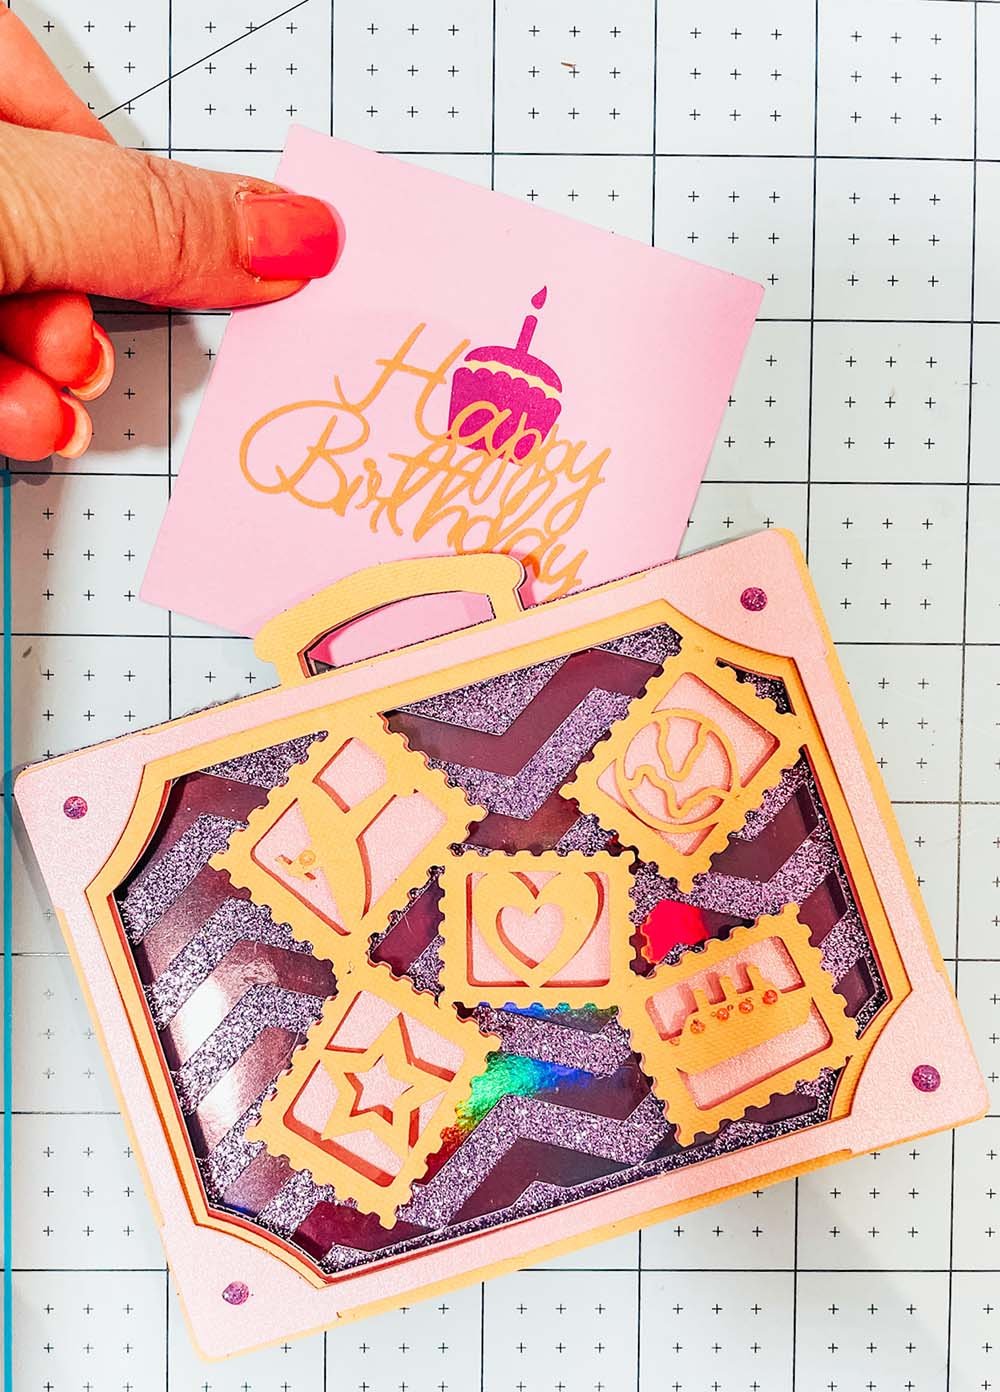
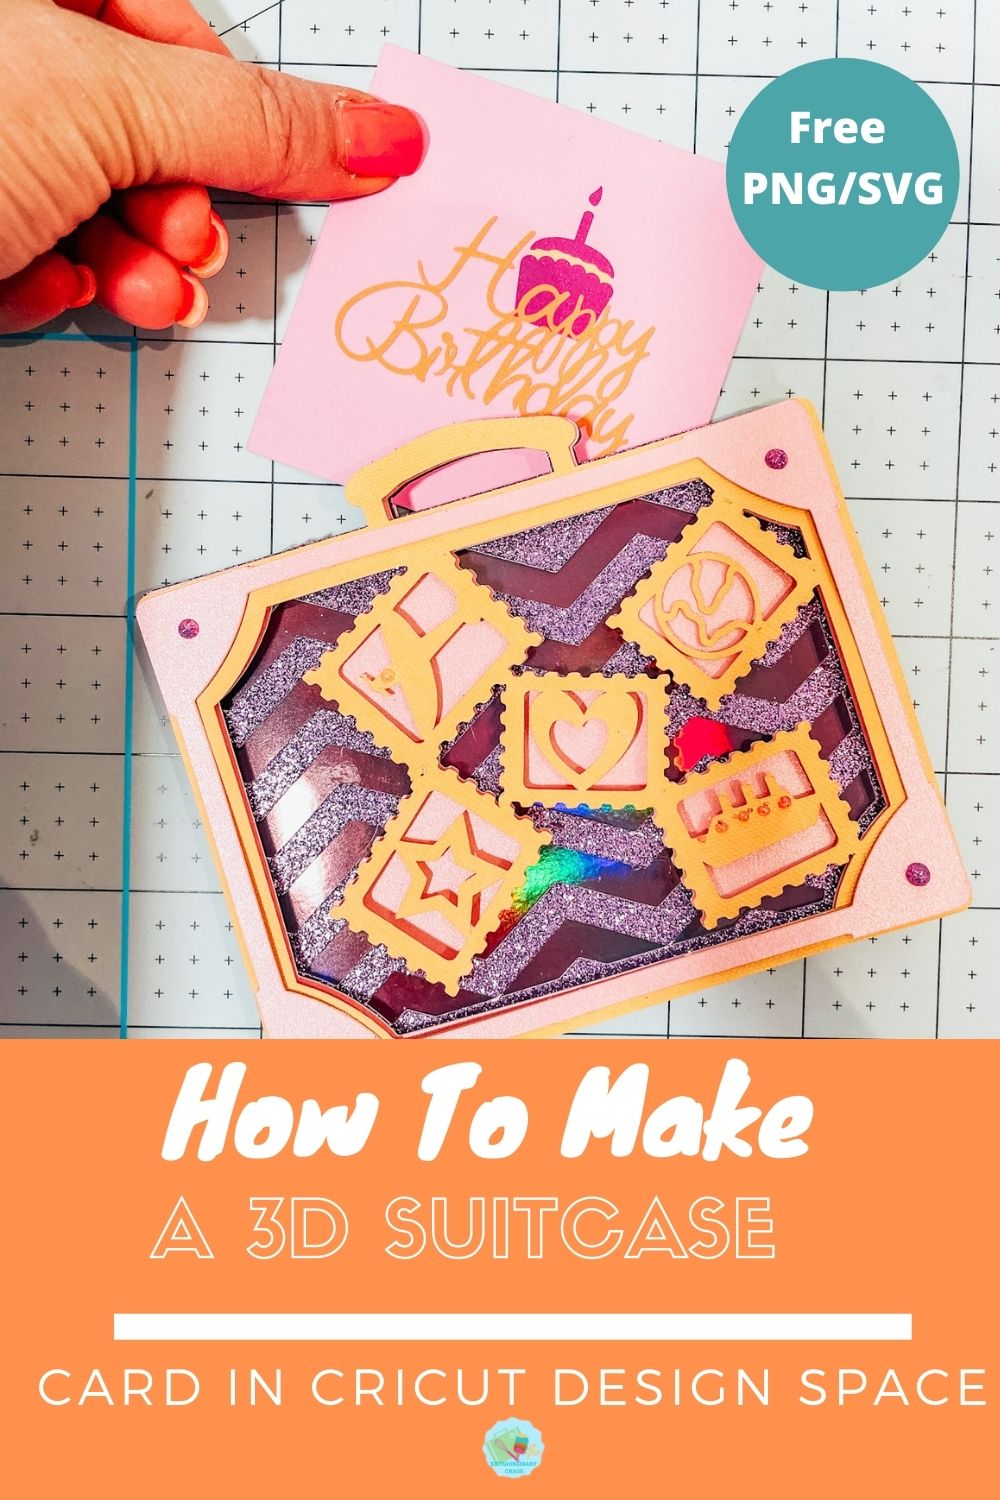
Once finished, to add the dots simple dot any areas you want to add dots to with Neuvo Crystal Drops, I used them on the corners to add a feature. Have a practice on paper beforehand and one you have a good flow simply dot the drop without touching the nozzle on the card, keeping even spaces and allow to dry. Lastly add a message or gift tickets inside.
Please do pop over to Instagram, and give me a follow and if you make a project please do tag me! I love seeing everyone else’s makes and chatting crafting. I could do that all day!
3d Suitcase Layered Card
Free 3D Suitcase SVG For Cards And Scrapbook Layouts to cut out and make 3d cards on Cricut, Silhouette and Brother cutting machines.
Materials
- Plain and glitter card stock
- Tonic Studio Neuvo Dots (Optional)
- Double sided sticky pads
Tools
- Cricut Design Space
- Cutting Mat
- Brayer and weeding tools
- Hot glue gun
Instructions
- How To Build Your 3D Suitcase In Cricut Design Space
Once your files are in design space click select and add all of your 5 chosen layers.
Change the colour of each file so they will all cut different colours on separate mats when you send to cut. Ensure if you are using the 3d card template that you line it up like the image below, the suitcase must line up with the centre oblong. The flaps at the side are to fold and create your card. Before cutting line up all the files, if any are slightly misshapen unlock the 3D Suitcase SVG by selecting the image and clicking the padlock on the bottom left corner. You can now drag the files to fit.
 - Cutting Your Suitcase SVG/PNG Cut Files
When you send your 3D Suitcase SVG/PNG files to your Cricut to cut, ensure you use your brayer to roll the paper, vinyl or card to adhere to the mat. Movement will affect the cut.
Remember you are using 5 colours so have the card stock ready to hand and really think about the colours. I chose glitter card and foil craft board for the back layers to add depth and feel I achieved that. I also used the same shade of pink twice to add a feature layer to the front that matched a back layer.
If your cutting mat looses its stickiness this will affect the quality of cut. Also make sure your mat is in good condition, this is vital for cutting intricate cuts.
Additionally, make sure you set the material and cut pressure correctly to match whatever materials you’re cutting to get a clean cut. If you have any problems cutting check the mat, pressure and material settings as generally this is where the problem will lie. - Assembling Your 3D Suitcase
Start by laying out all 5 layers to ensure they line up.
I have suggested an order on the files which makes sense and the layers are numbered accordingly.
If you are making a 3d suitcase card with your SVG start by scoring the lines, see the image below. Score the lines on the front and back of the card using a scoring tool and ruler. If you don’t have a scoring tool try a ballpoint pen lid. Note that the bottom of the case has 3 lines, the centre line should be folded inwards to create an indentation. Now fold the case upwards so your cut file is back to back, fold the side flaps and glue to create your suitcase.
  Next placing the back layer face up, and sticking foam pads to the corners of the back of your layer 2. Flip the layer over and position onto the back layer, making sure it lines up.
Keep going layer by layer with your 3D Suitcase SVG until you’ve finished. Check out my little in post video to see how I built mine.
Once finished, to add the dots simple dot any areas you want to add dots to with Neuvo Crystal Drops, I used them on the corners to add a feature. Have a practice on paper beforehand and one you have a good flow simply dot the drop without touching the nozzle on the card, keeping even spaces and allow to dry. Lastly add a message or gift tickets inside.
Notes
Project Ideas For Using My 3D Suitcase SVG
Layered Suitcase Cake Toppers
Travel Themed Cards
Scrapbooks
Travel T Shirts
Framing As 3D Wall Art
Decorating Travel Themed Parties
Suitcase Decals On Back Packs
Cricut Mugs
Cushion Covers
Infusible Ink Coasters
Recommended Products
As an Amazon Associate and member of other affiliate programs, I earn from qualifying purchases.