There is nothing prettier than a shadow box, they are so rewarding to make, they also look great quality. Additionally, if you get it right they make wonderful gifts. My free Woodland Christmas Shadow Box SVG is perfect for Christmas decor and hand made gift ideas. Also scroll down for my tutorial, which will take you through how to size and measure your shadow box, to get it exactly right.
What You Will Find Here
Free Woodland Christmas Shadow Box SVG And Tutorial

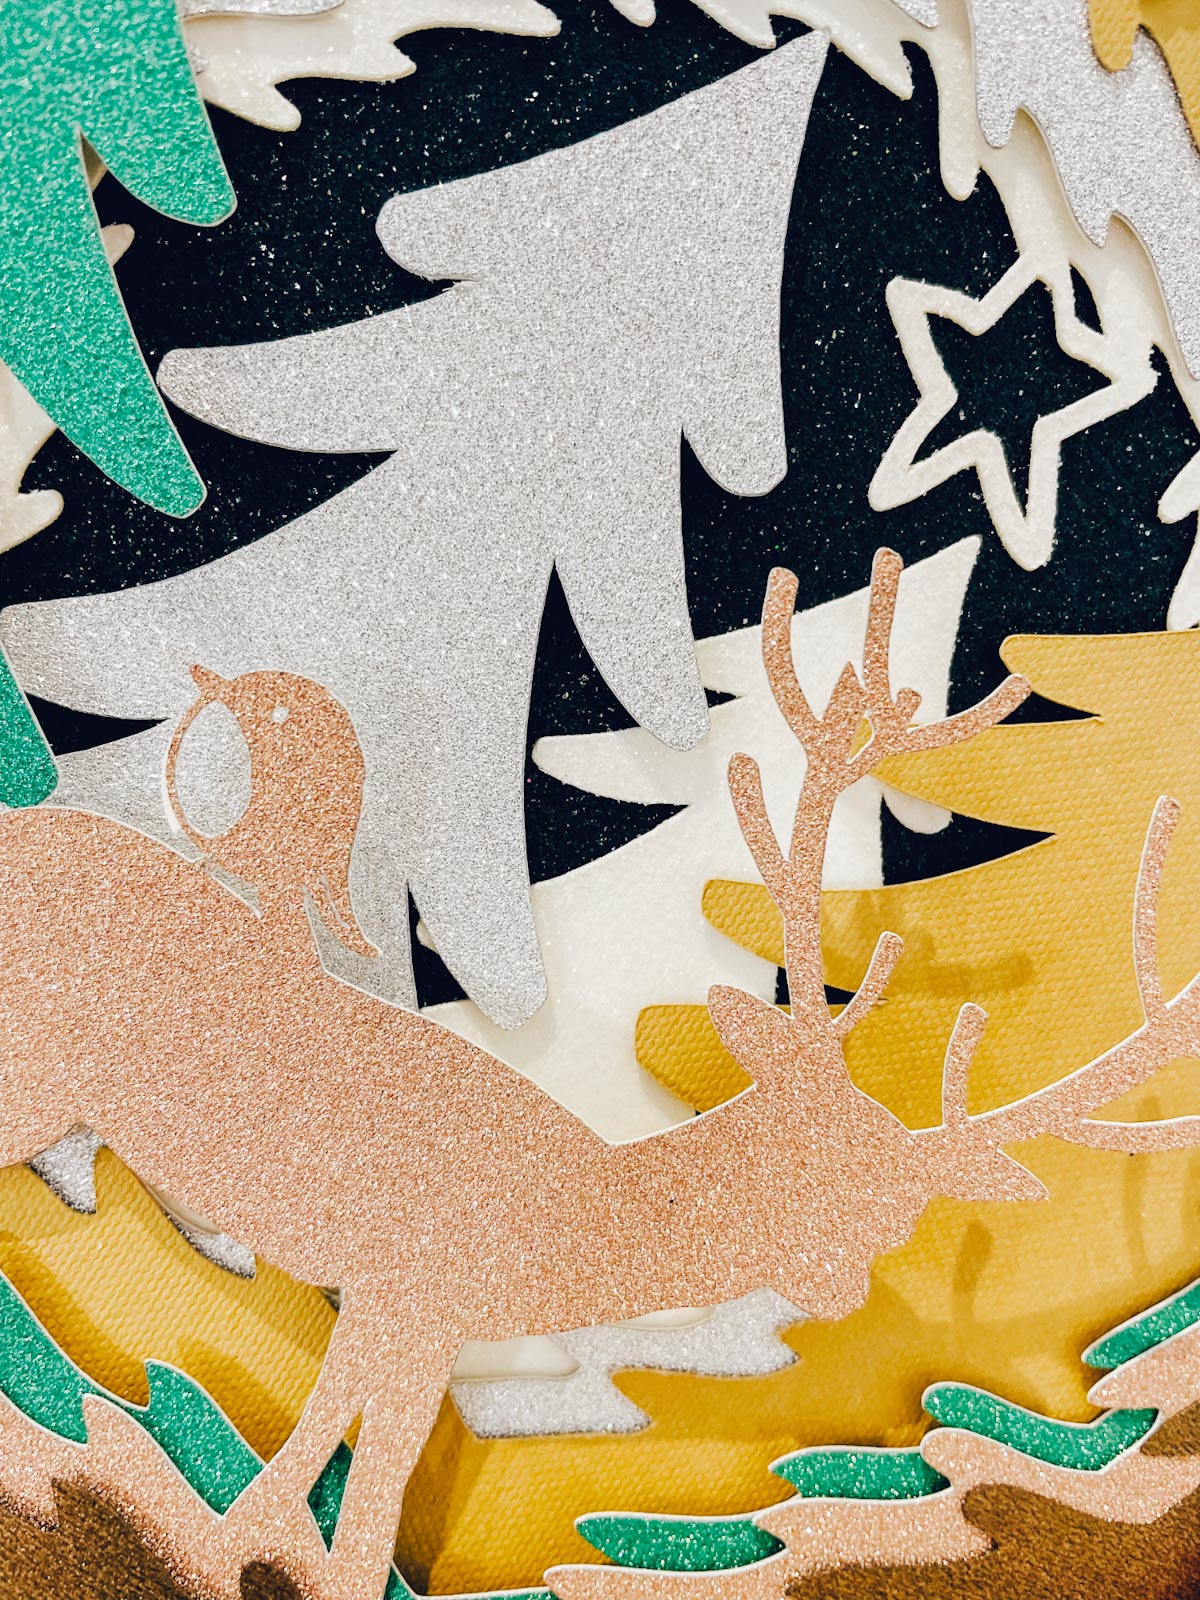
I chose a woodland theme as there is something beautiful about being out in nature in the snow, it just feels festive? Thus this shadow box is designed to represent the snow on the hills in the background, with the sky full of stars and the woodland animals in their natural environment. It’s also very easy to make.
This post may contain affiliate links. Which means I may receive a small commission if you click a link and purchase something that I have recommended at no extra cost to yourself. Also as an amazon associate, I earn from qualifying purchases.
Free Woodland Christmas Shadow Box SVG And Tutorial

You will need
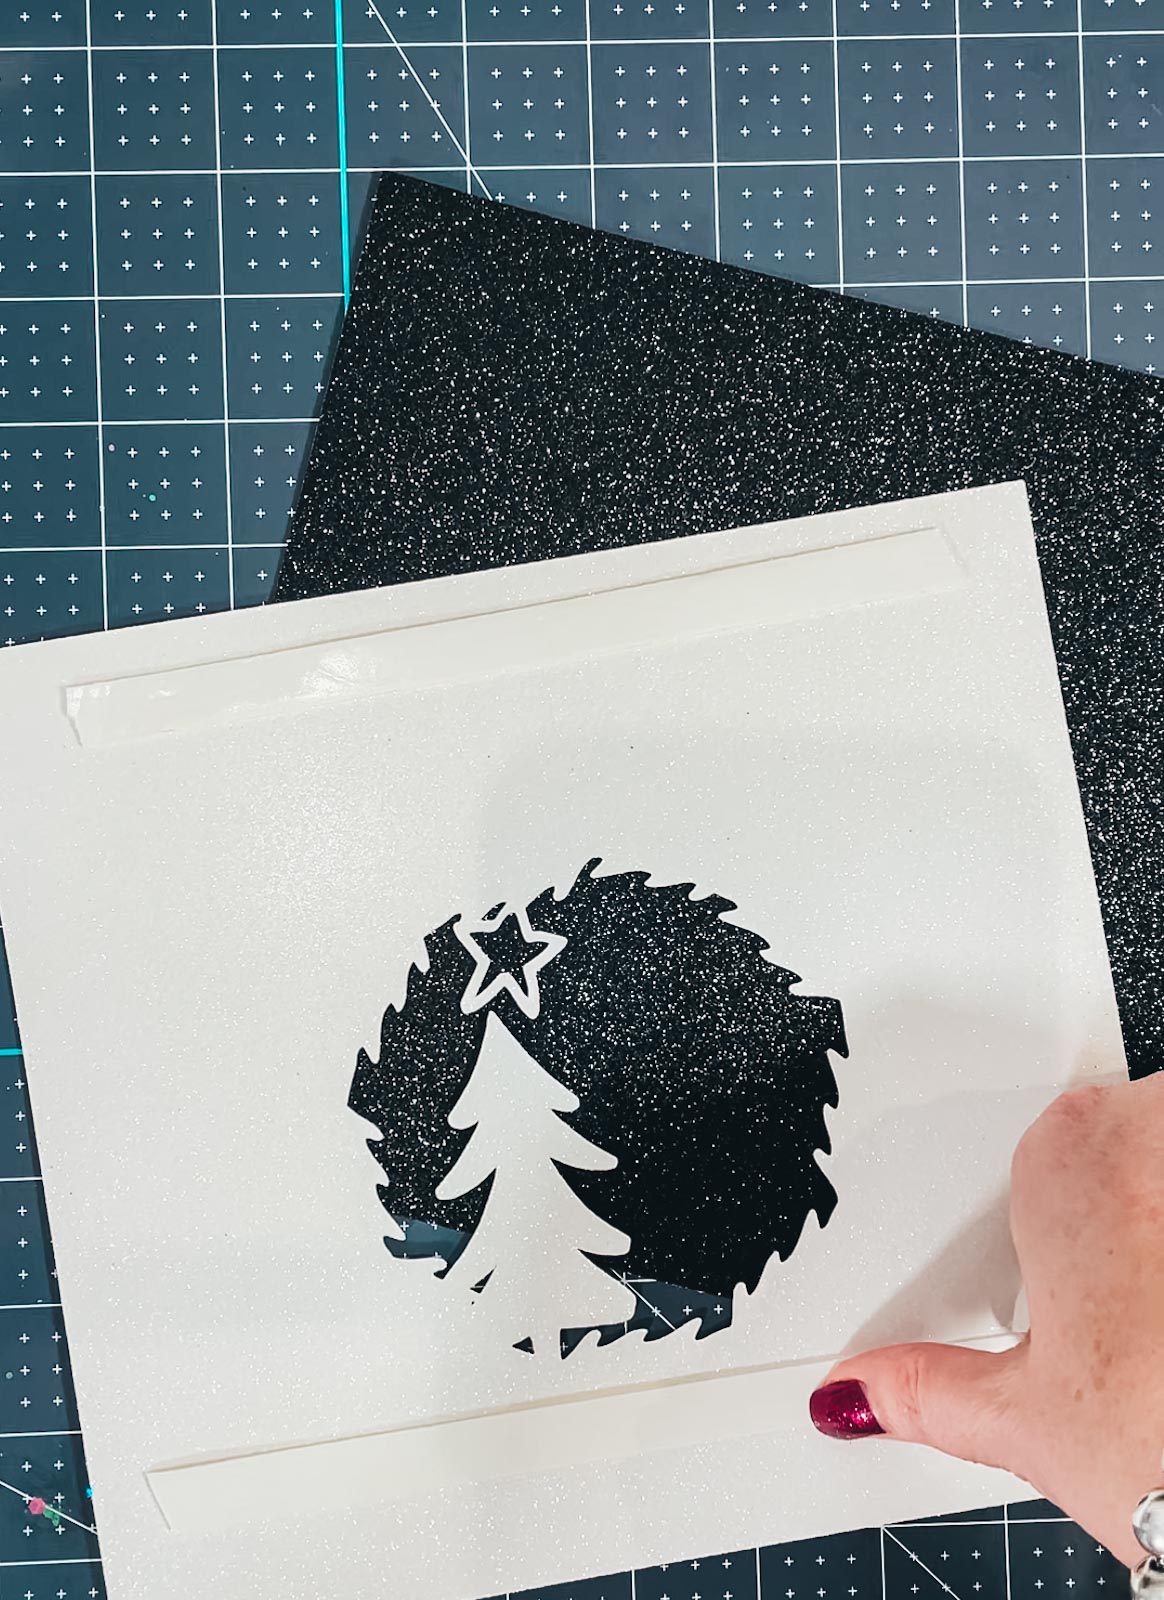
- 7 layers of card stock, I used both plain card stock and glitter card stock to create a dimensional effect.
- Box Frame, I used a 10×10, you can pick this up cheaply at Ikea or Amazon
- Double side sticky foam tape
- Cricut Maker
- Cricut Mats
- Brayer ( This is my favourite tool ever, essential for cutting card)
- Weeding Tool
How To Make This Christmas Shadow Box
- Start by uploading all of your Christmas Woodland SVG files to Cricut Design Space.
- Next measure the internal area of you shadow box frame. I aways use my Cricut cutting mat to do this, as I find it translates to design space easily.
Size All Your Layers In Design Space

- Now size all of your woodland layers to ensure they all line up together. Once they do, select all, right click and group them together. Once grouped together you can move and size the project as a whole to the size you require.
- When you are ready to send your Christmas Shadow Box SVG files too cut, arrange your colours. I find it helps me pick out my card stock and colour my layers in design space accordingly. Now send to cut.
Tips For Cutting Your Files With A Cricut Maker

Use a brayer to adhere the card-stock to your cutting mat. If you are using double sided glitter I find it helps to also secure it with strong masking tape.
If your cutting mat looses its stickiness this will affect the quality of cut. Also make sure your mat is in good condition, this is vital for cutting intricate cuts.
Additionally, set the material and cut pressure correctly to match whatever materials you’re cutting to guarantee a clean cut. If you have any problems cutting check the mat, pressure and material settings as generally this is where the problem will lie.
How To Build You Christmas Shadow Box

Start by lining up all the layers, group them together and place face downwards on the craft table.
Starting At The Back Turn The Back Layer Over
Now apply double-sided tape to the back of layer 2; flip this over and attach it to the back layer. Keep working though the layers until you have built up the whole Woodland Christmas shadow box.
Attach To The Back Of The Frame

Now stick some sticky pads to the back of the box frame and position you woodland scene.
How To Get My Christmas Shadow Box SVG To Use With Cricut, Glowforge Or Silhouette?
Click here or on the image below to get your free downloadable Woodland Christmas Shadow Box SVG/PNG files from our shop and follow these instructions to add to Cricut Design Space.
More Christmas Holiday Craft Ideas And Projects

- Elf Alphabet
- Nativity Alphabet
- Mickey Christmas Crackers
- Printable Snowmen
- Winter Wonderland Alphabet
- Snowman Alphabet
Tips And Advice For Using Your Woodland Alphabet SVG/PNG, Free Download

- Cricut Design Space Guide
- How To Slice And Weld In Cricut Design Space
- How to upload to Cricut Design Space
- Using Iron On Vinyl
- Where Else To Get Free SVG Files
Also please do pop over to Instagram, and give me a follow and if you make a project tag me! I love seeing everyone else’s makes and chatting crafting. I could do that all day!
