
Today, we are sharing a cute free Printable PNG 3D Pink Moon and Stars Baby Alphabet and Number Set. Our 3D Pink Moon and Stars PNG Alphabet Letters and Numbers are ideal for use with LOKLiK, Cricut and Silhouette or to cut out by hand. They are perfect for Baby-themed and toddler diy parties and craft projects, from personalised cards to Pink Baby scrapbooking layouts, party banners, wall decals and decorations.

This post may contain affiliate links. Which means I may receive a small commission if you click a link and purchase something that I have recommended at no extra cost to yourself. As an amazon, Cricut and Glowforge associate, I earn from qualifying purchases.
What You Will Find Here
Project Ideas For Our Free Printable 3D Pink Moon and Stars Baby Clip Art PNG Alphabet And Numbers
- Themed Pink Baby Activities
- Planner Stickers
- Framed Art
- Sublimation Mugs
- ABC and Numver Fridge Magnets
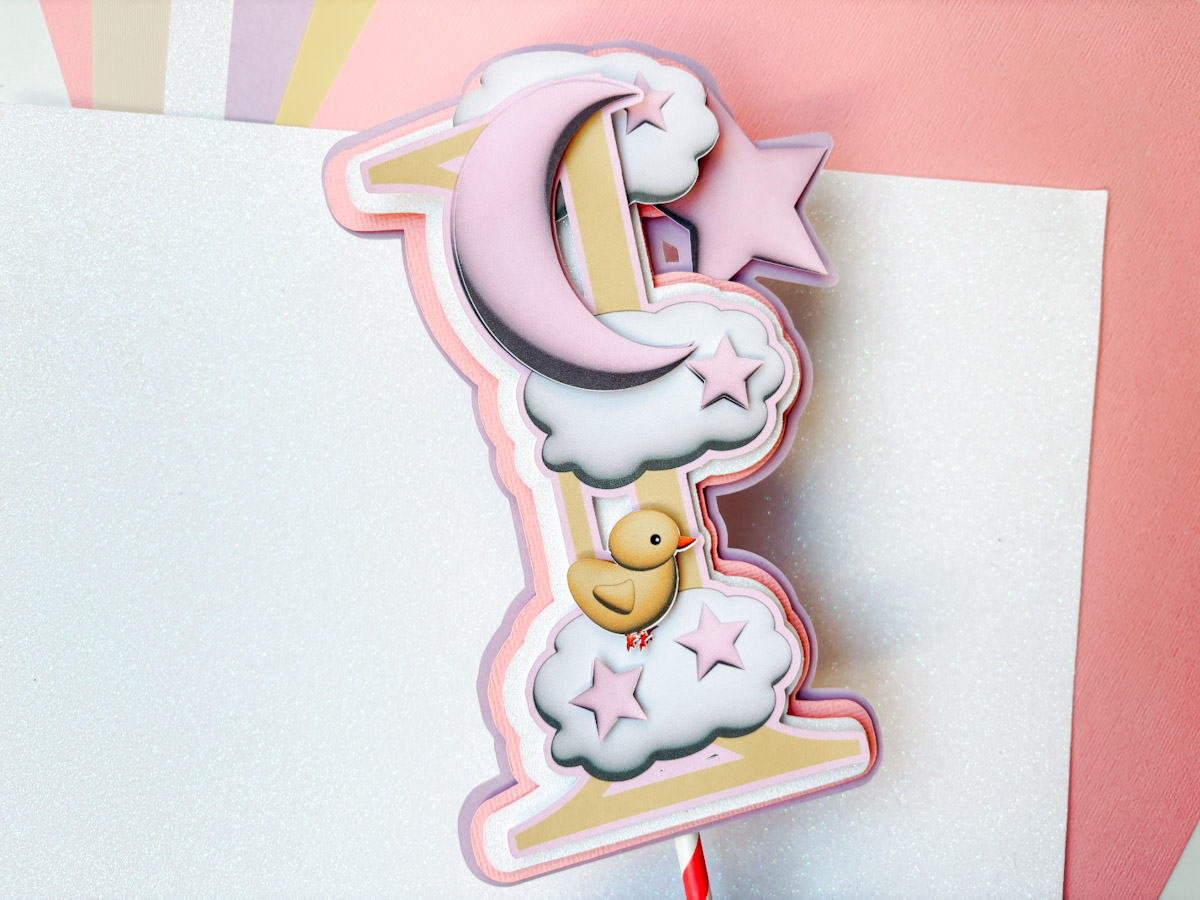
- Pink Moon and Stars Cake Toppers For Birthdays, Baby Showers and Christenings
- Baby, Nursery and Christening Scrapbooking Page Layouts

How To Upload and Print Your Printable 3D Pink Moon and Stars Baby Clip Art Alphabet Letters And Numbers To Cricut Design Space.
Follow this step-by-step guide to upload images and SVG and PNG files to Cricut Design Space. Once uploaded, click Make it; if you need help with this, follow our step-by-step print and cut guide.
Also Scroll Down For Our Step By Step Text Guide
If You Don’t Have Cricut ?
You can upload our Pink Moon and Stars Baby Clip Art PNG Alphabet to Canva, a great program for making posters and cards, or to Word or Pages. Just arrange your letters or numbers with spaces between them and cut them with a guillotine.
If You Want To Use These Free Printable 3D Pink Moon and Stars Baby PNG Alphabet Letters And Numbers Template?
Click here or on the image below to get your free download of our Printable Pink Moon and Stars PNG cut files. They are instant downloads from our shop. And get the 3d Elements from the shop for a pound. And get the blue version here.
If You’re Having Problems?
Check out my troubleshooting page, hopefully it will answer any questions you may have.
How to Make a First Birthday Cake Topper: Step-by-Step Tutorial
Materials Needed:
- Pink Moon and Stars alphabet file (see above)
- Additional elements: pink star, moon, fluffy cloud, chick. Optional
- Cutting machine (e.g., Cricut or Silhouette)
- Coloured cardstock and white glitter cardstock
- Sticky pads or foam adhesive
- Brayer
- Green cutting mat
- Printer
- Straw
- Cosmic Shimmer Glue

Step 1: Upload and Prepare Files
- Upload the Pink Moon and Stars alphabet file to your cutting machine software.
- If you want a layered design, upload additional elements like the moon, stars, cloud, and chick.
- A blue version will be available soon if you prefer a different colour scheme.
Step 2: Create the Base Layer
- Select the number one from the alphabet set or any number or letter you require.
- Click on the top bar and choose Offset.
- Adjust the size of the offset layer and set it to white.
- Change the background to pale grey (this helps when working with white layers).
Step 3: Add Extra Elements
- Upload the cloud file and position it over the number one.
- Adjust its placement so that it doesn’t overpower the number.
- Select all elements and create another offset layer.
- Before flattening, add stars to the cloud:
- Place two small stars over the cloud.
- Select all and flatten them to make a single layer.
Step 4: Layering the Moon
- Drag the moon over the cloud to create a layered effect.
- Create another offset layer.
- Adjust placement for a visually balanced design.
Step 5: Check Cut and Print Settings
- Ensure all layers are set to cut instead of print.
- If any layers are mistakenly set to print and cut, change them back to cut.
- Create another offset layer to add depth.
Step 6: Add Final Elements
- Position the chick or duck on the topper.
- Ensure it is not flattened, so it remains a separate cut layer.
- Place additional stars in various positions.
- Rotate and resize stars as needed for a natural arrangement.
Step 7: Print and Cut
- Set printer to fine settings for best print quality.
- Use a green mat for cutting and a brayer to secure paper if using an older mat.
- Send all elements to be printed and cut.
Step 8: Assemble the Cake Topper
- Start layering from top to bottom.
- Use sticky pads to create a dimensional effect.
- Attach the first layer, then the second, ensuring proper alignment.
- Add the cloud, making sure it is correctly oriented.
- Secure all elements with sticky pads.
- Adjust and reposition as necessary to achieve the desired look.
Tips And Advice For Using Cricut
- Cricut Design Space Guide
- How to upload to Cricut Design Space
- How To Make Print And Cut Stickers In Cricut Design Space
- Where Else To Get Free SVG Files
Also please do pop over to Instagram, or TikTok and give me a follow and if you make a project please do tag me! I love seeing everyone else’s makes and chatting crafting. I could do that all day! This is also where I share all my projects in progress.

