If you are thinking of purchasing or have recently purchased an xTool M1 laser hybrid machine, then you need to try out its print and cut capabilities. Today we are going to share a super easy step by step tutorial on How To Make Stickers With The xTool M1 (US Readers Click Here). If you want to get these stickers click here for our free stickers in the shop.

This post may contain affiliate links. Which means I may receive a small commission if you click a link and purchase something that I have recommended at no extra cost to yourself. As an amazon and XTool associate, I earn from qualifying purchases.
What You Will Find Here
How To Make Stickers With xTool M1
Upload Your Printable PNG Files
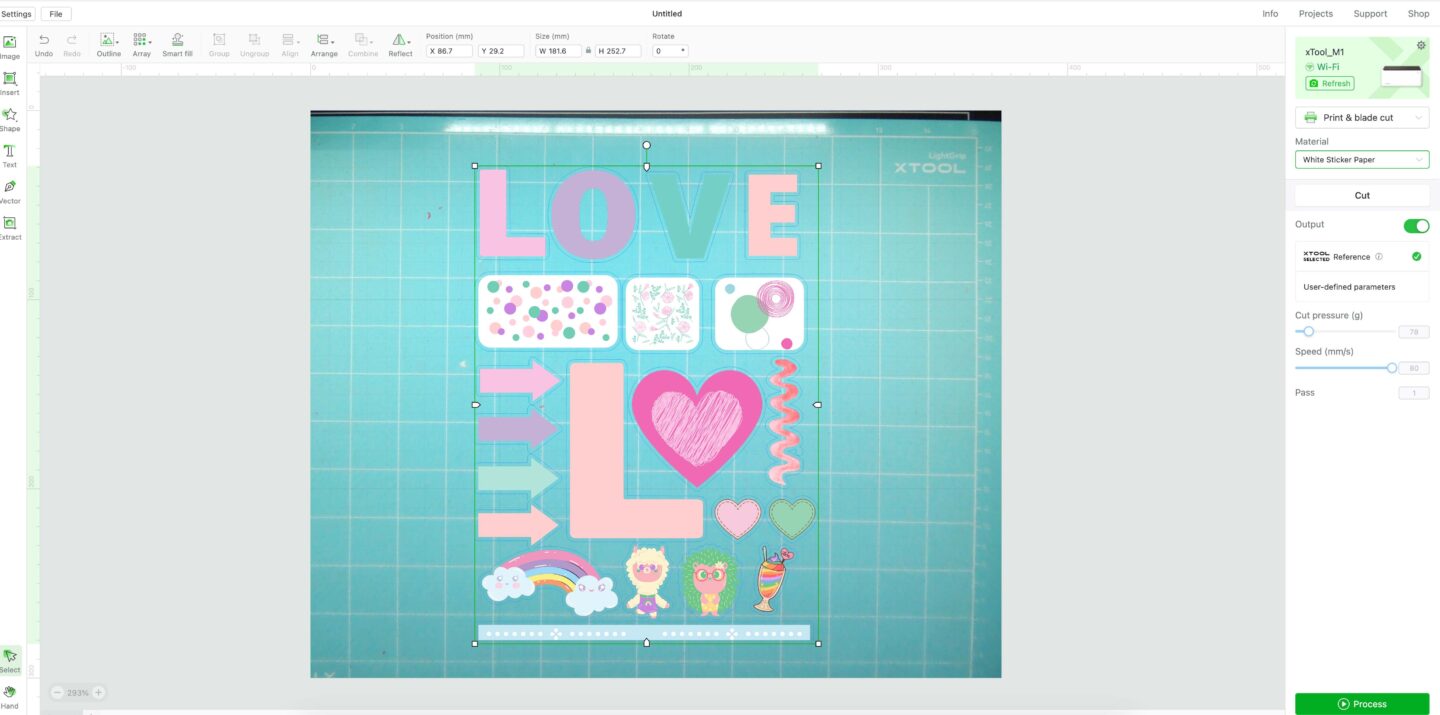
Start by turning on your xTool M1 so you can see your work area through the camera. I pop my mat in as I find it makes it easier to size my project. Now upload your PNG stickers to your xTool work space. To do this click file on the top left hand corner and choosing import image, not open project.
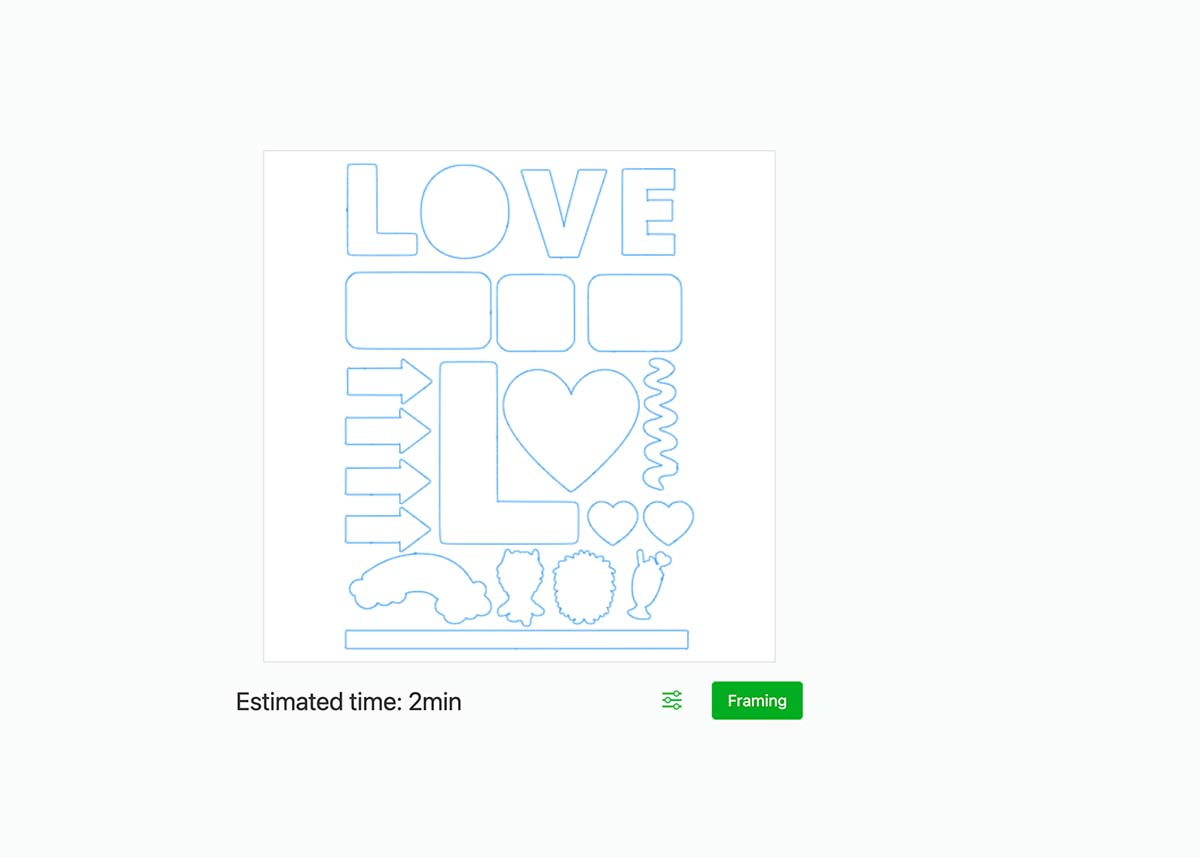
Once you have uploaded your stickers size them. You will now need to create a cutting path. This is so that once printed, the machine will know where to cut your stickers.
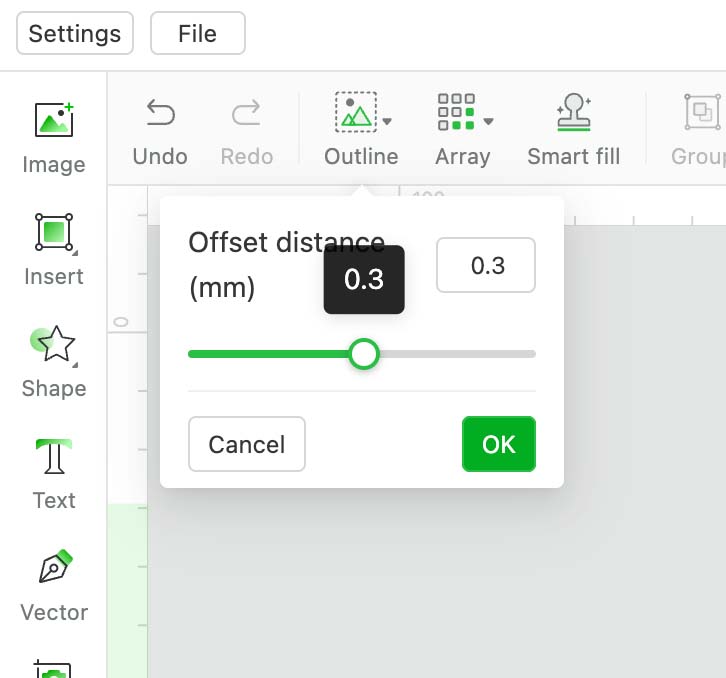
How To Create A Cutting Path
To do this you will need to create an offset, click outline on the top bar and make a tiny outline. I created an outline of 0.3 which was just enough to create an outline around your stickers. You can make this as big as you want, just make sure the outlines do not touch or overlap.
Send Your Project To Print And Cut
Click proceed in the bottom right hand corner and your xTool will send the print and cut stickers to print first. Select print and cut from the drop down on the right hand side and change the cut settings to user defined 80 pressure and 80 speed. There is a sticker setting but I found that wasn’t enough for my stickers. Don’t be afraid to alter settings to get the right pressure.
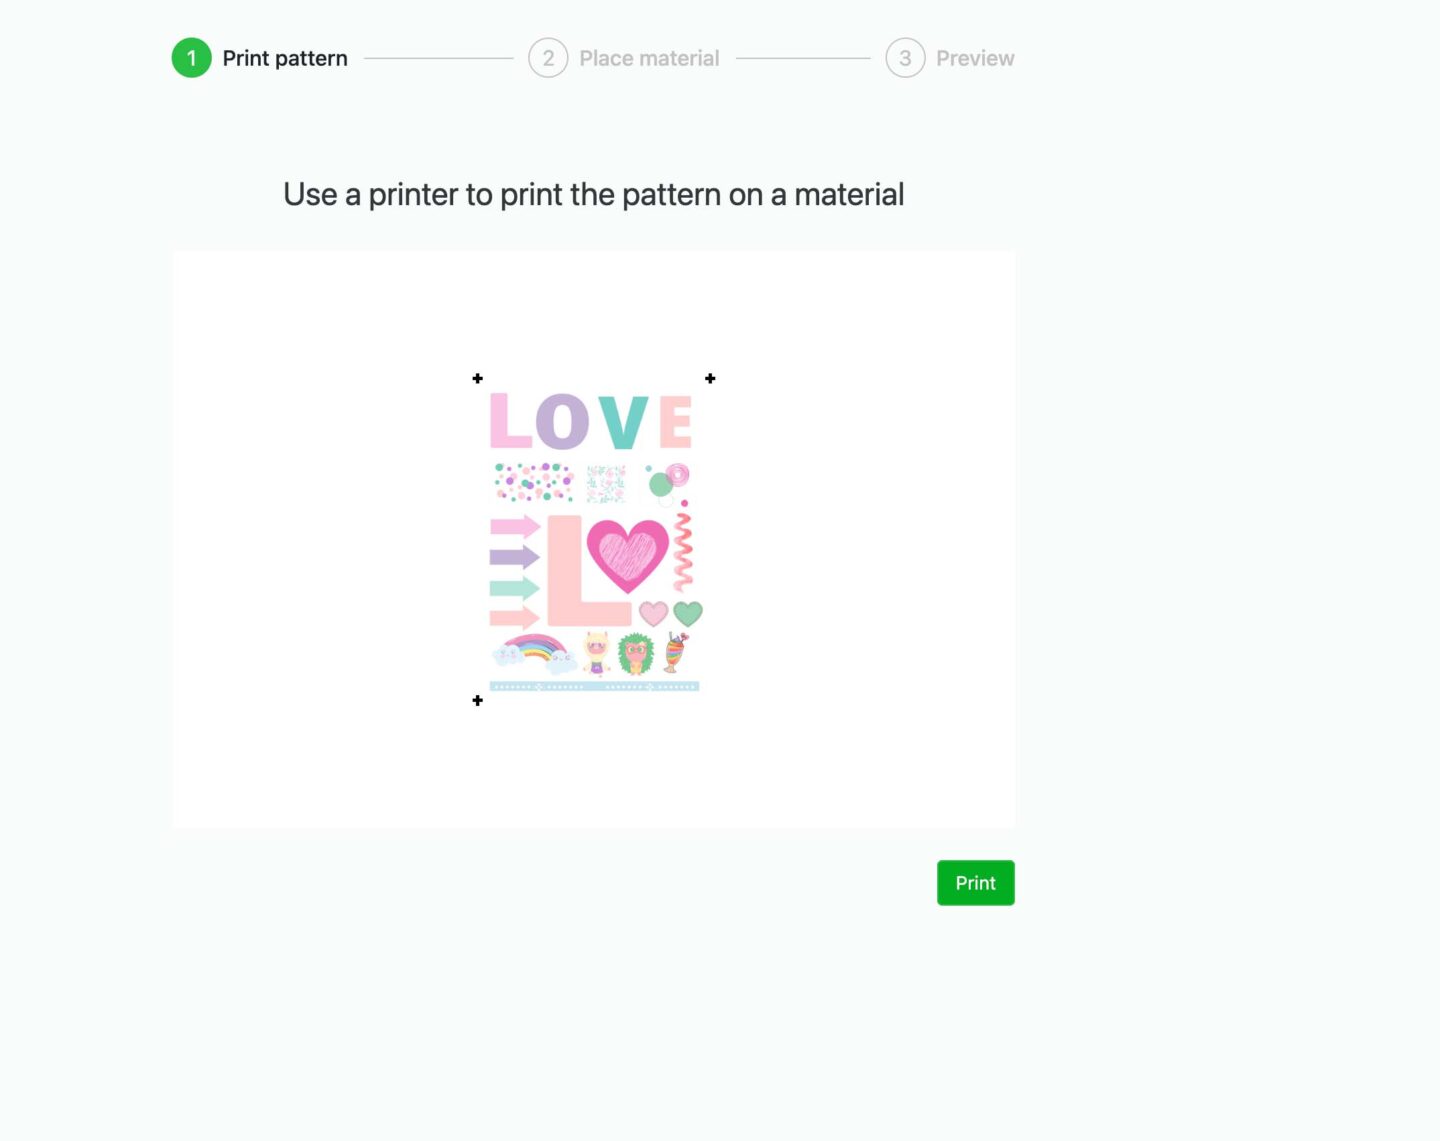
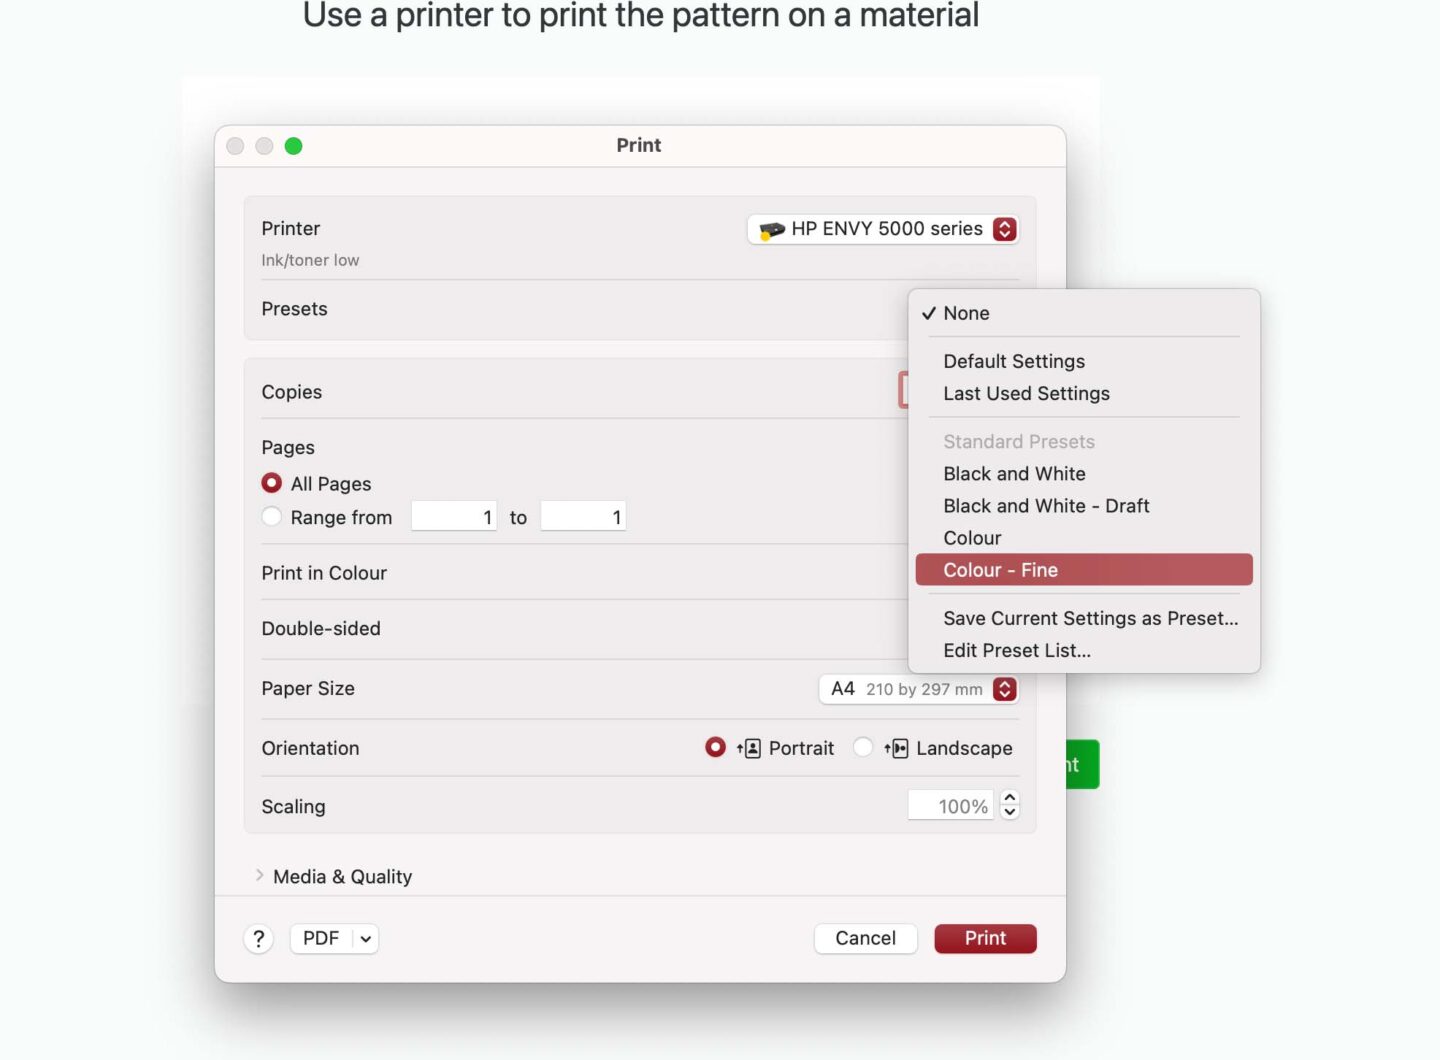
You will now see a print screen, then your printer settings, choose the fine or photo print setting for a better quality print.
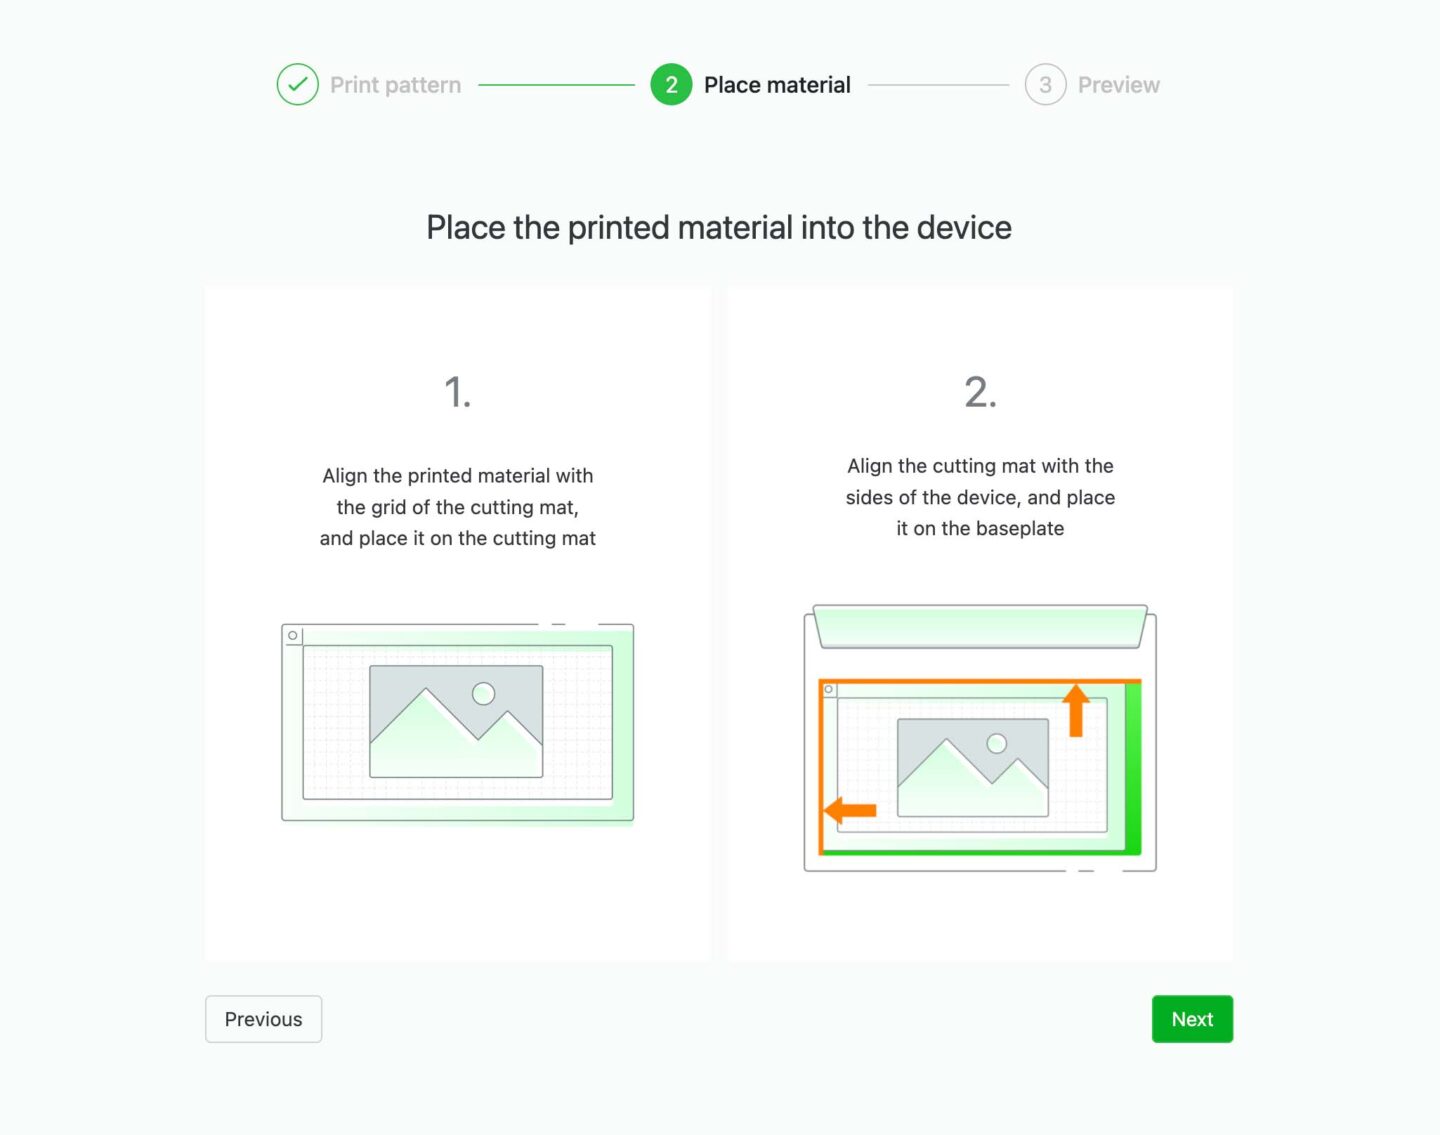
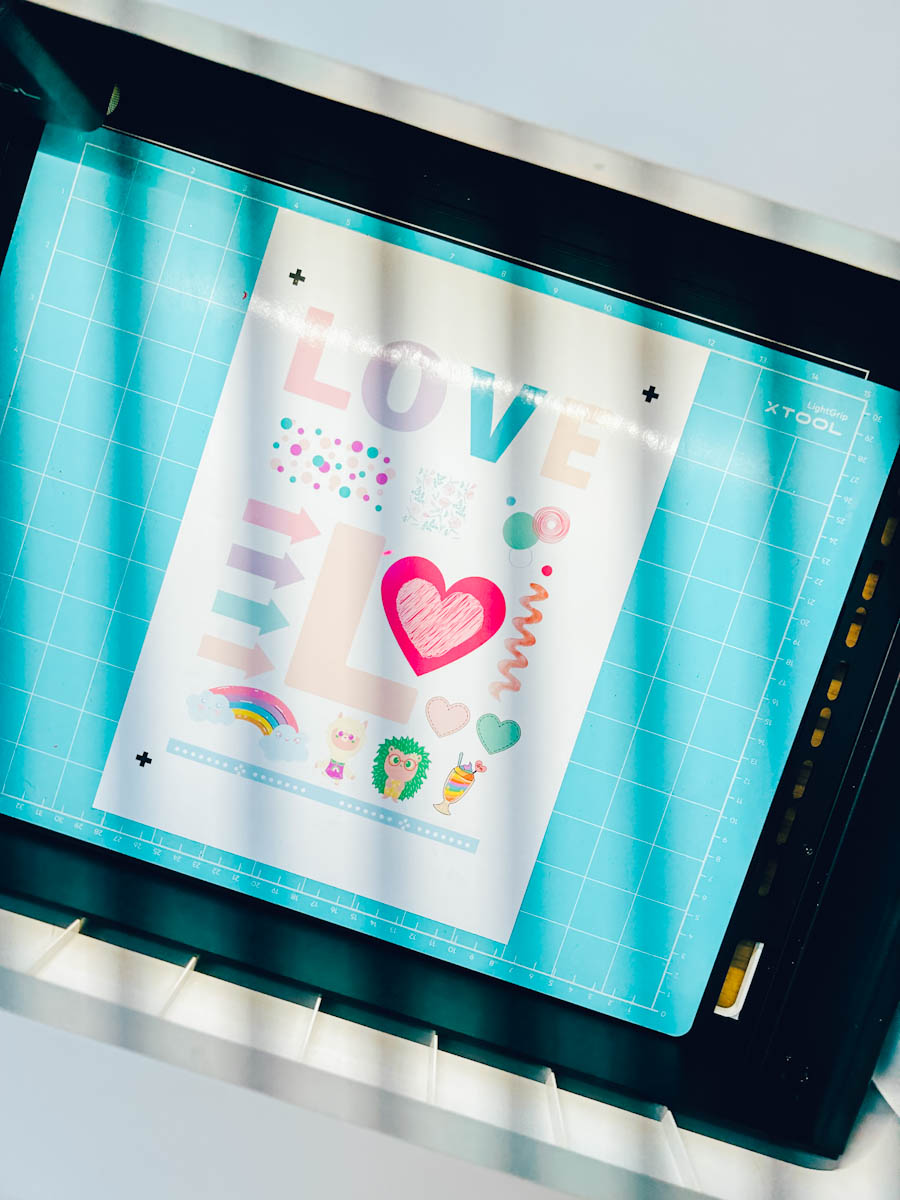
Once printed attach your sticker sheet to the cutting matt and place in your xTool M1 and close the lid and click frame. You have to press the go button on your xTool too. This will scan and frame the cut so the cut is calibrated perfectly.
Click Start And Press The Button To Cut
Your M1 will now cut out your stickers, this will take around 5 minutes to cut the outlines of your stickers.
If Your xTool M1 Disconnects?
If for whatever reason your machine disconnects? Simply leave the stickers in and reconnect the machine. Simply re-upload your stickers and create and offset again.
However if this does happen simply delete the image of the files once you have created an offset and keep the outlines. Now set the project to blade cut with the offset.

Before sending to cut, make sure your offset lines up with the printed sticker image in your machine. Exactly as it appears on your desktop.


And that’s it, like anything the first time you try a project its a learning curve. However once you complete your first sticker cut this on the xTool, this is such an easy way to cut stickers.
Also please do pop over to Instagram or TikTok and give me a follow. And if you make a project please do tag me! I love seeing everyone else’s makes and chatting crafting. I could do that all day! This is also where I share all my projects in progress.