
If you have ever stood in the Halloween aisle wondering what on earth to pop into the trick-or-treat bags this year, that isn’t just another handful of sweets. I have the answer for you. These holographic shaker bookmarks are genuinely one of my favourite makes this season, and they are so much easier than they look.
I made mine using our own Cute Kawaii 3D Ghost alphabet in Cricut Design Space, a bit of holographic vinyl, some sequins, and the We R Memory Keepers Fuse tool to seal the shaker pocket. The result is a gorgeous, glittery, double-sided bookmark that catches the light beautifully and gives every book a bit of sparkle. Whether you are new to the Fuse tool or you have been putting off trying it, this tutorial will walk you through exactly what I did, including the bits I got wrong the first time so you don’t have to.
This cute Kawaii 3D Halloween Ghost Alphabet and Number Set is also perfect for children’s Halloween parties, classroom displays, and autumn-themed celebrations. Making it easy to create unique keepsakes and decorations that little ones will love. Simply download the alphabet and start crafting today!

This post may contain affiliate links. Which means I may receive a small commission if you click a link and purchase something that I have recommended at no extra cost to yourself. As an amazon, Cricut and Glowforge associate, I earn from qualifying purchases.
What You Will Find Here
Project Ideas For Our 3D Halloween Ghost Clip Art PNG Alphabet
- Personalised Nursery Decor
- Cute Ghost Cake Toppers
- Ghost Themed Halloween Banners
- Planner Stickers
- Sublimation Mugs
- Halloween Decor
- Cute Halloween Scrapbooking Page Layouts
Try The Video Step by Step Tutorial

This post may contain affiliate links. Which means I may receive a small commission if you click a link and purchase something that I have recommended at no extra cost to yourself. As an amazon, Cricut and Glowforge associate, I earn from qualifying purchases.
How to Make Holographic Shaker Bookmarks with the We R Memory Keepers Fuse Tool
What You Need
- HP Printer
- We R Memory Keepers Fuse Tool (comes with a pointed cutting tip, a serrated fusing tip, a metal ruler, and a stand)
- Heat mat (not included with the tool — bought separately)
- Cricut portable trimmer with scoring attachment
- Fillings/embellishments I used sequins
- A small spoon (for adding glitter — and a tip: don’t leave it sitting in the pot, or it tips everywhere!)
- Cricut Design Space (free software)
- Standard Gripmat (green) I use or Shein
- White Printable Card
- Weeding tool (for removing small bits)
- Brayer (optional, to smooth cardstock on mat)
- E-Z Runner Grand Refillable Dispenser
1. Upload your files and start your design
Open Cricut Design Space and upload the letter files you want to use. If you are using the free two-letter sample, upload both files now. If you have the full alphabet, upload whichever letters you need to personalise your bookmark. Links are lower down.

2. Resize and arrange your letters
Your letters will come in quite large, so scroll out to see them properly. Duplicate any letters you need more than once, then resize them all together so they are a more manageable size to work with. Line them up so they are neatly spaced.

3. Flatten your letters
Once you are happy with the spacing, select all of your letters, right click, and choose flatten. This keeps them together as one image rather than separate pieces.
4. Build your bookmark shape
Go to the shapes menu on the left-hand side and add a square and a triangle. Drag the square to the back; this will become the outline of your bookmark. Change the triangle colour so you can see it clearly, then resize and position it over the bottom corner of the square. Select both shapes and click slice; this removes a small triangular section from the bottom to create the bookmark point.

5. Set up your print and cut layer
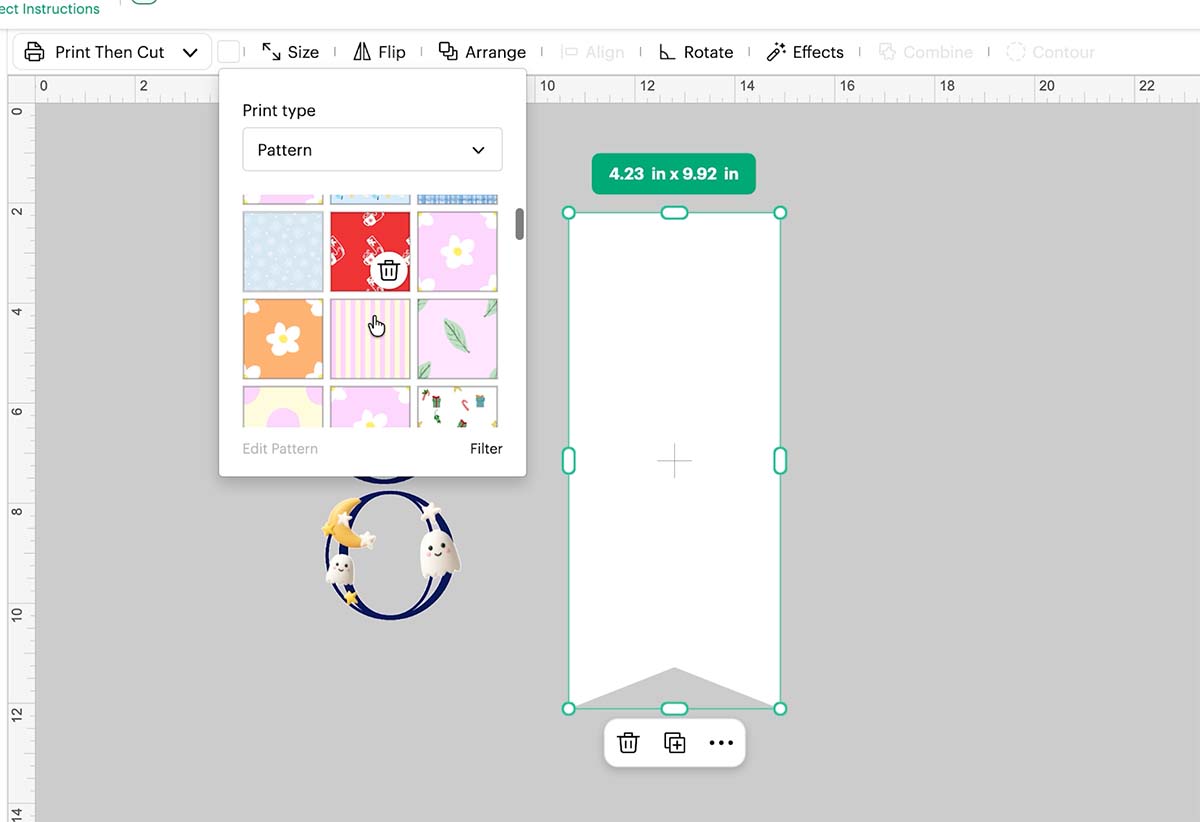
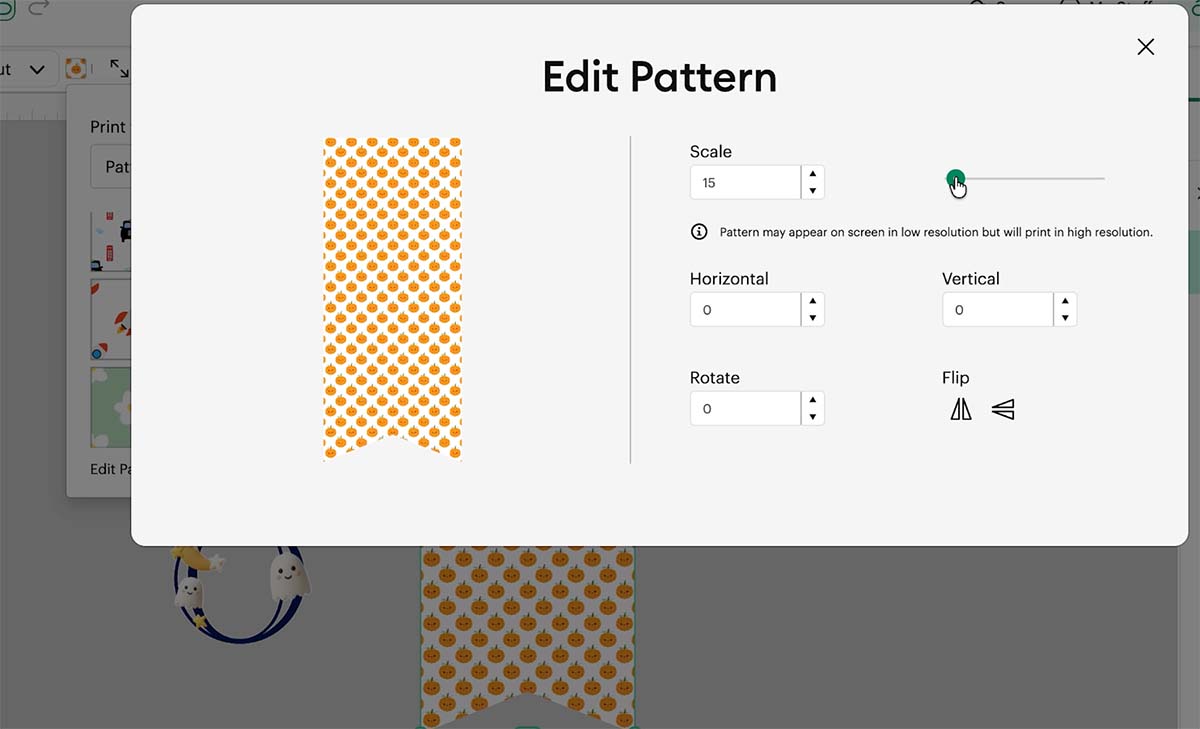
Send the sliced shape to the back if needed, then change its colour to white and set it to print and cut. Go to the colour menu at the top and choose the pattern option, then select a Halloween pattern.
6. Build up your layered look
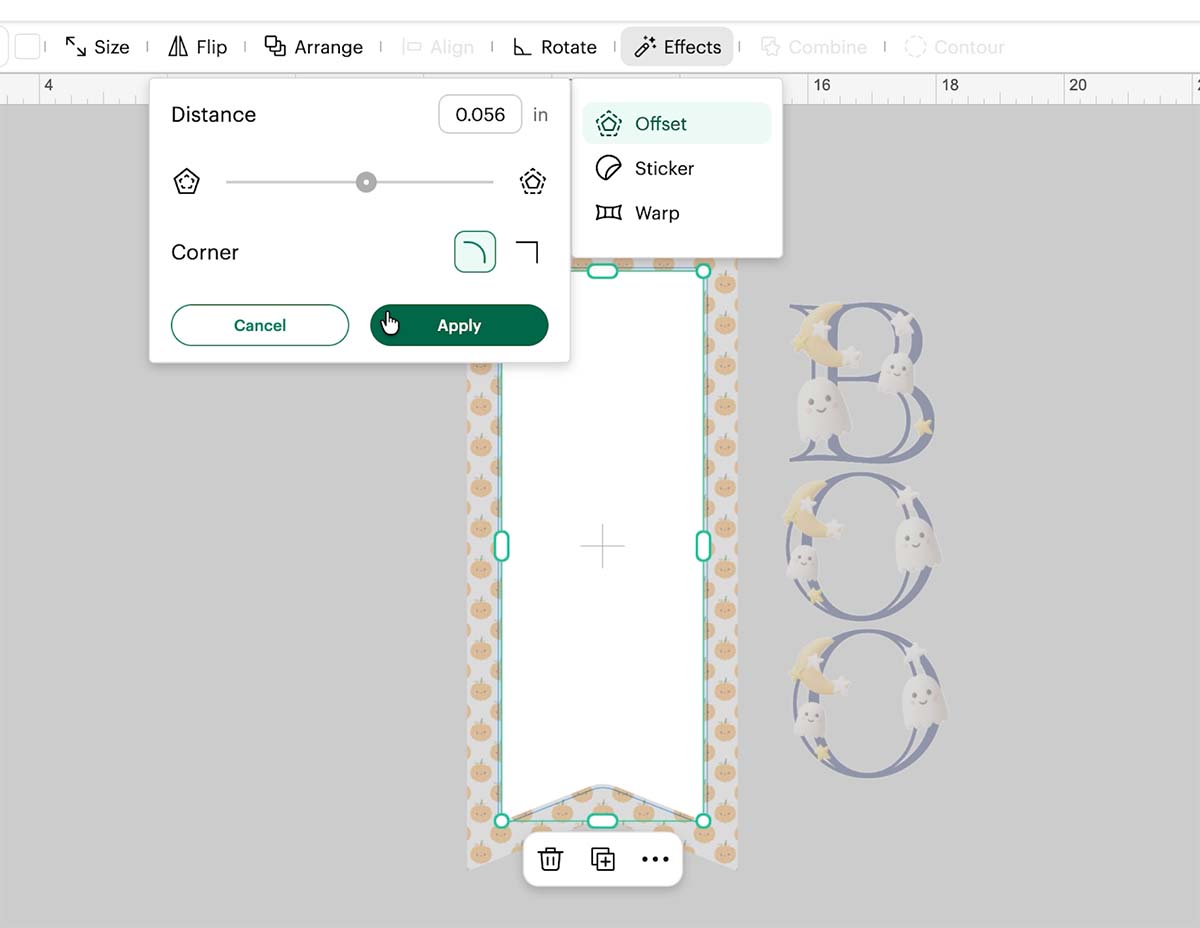
Use the effects menu and click offset, pulling the offset inward to create a second layer behind your pattern. Position your letters on top. For extra depth, click on the white layer, add another very slight offset outward, then change that layer to a colour that matches your letters, such as navy blue, so it frames everything nicely.
7. Flatten and duplicate for the shaker panel
Once your design layers look right, flatten them into one image. Duplicate this flattened design to create your shaker panel piece. On the duplicate, remove the patterned background so you are left with just the white shape and coloured outline, this becomes the panel used for your shaker pocket later.

8. Duplicate to create the double layer bookmark
Duplicate your main bookmark design again and position the two copies side by side, aligning them carefully, then flatten them together. This gives you a bookmark made of two matching halves that will be folded and joined for extra thickness.

9. Arrange everything to fit one sheet
Duplicate your double layer bookmark so you have two in total, plus one single shaker panel front. Position everything so it fits neatly onto one A4 sheet, this avoids wasting paper. Select everything together before resizing, so all pieces stay perfectly matched in scale.
10. Flatten and check your layout
Select all pieces, flatten, and check your canvas for any red warning dots, which would mean something does not fit on your material. Once everything fits, you are ready to send it to your machine.

11. Send to print and cut
Click make, then choose print and cut. Select your printer, click next, remove the bleed if prompted, open your printer’s system dialog, and choose your best quality print setting before printing.
12. Add holographic vinyl before cutting
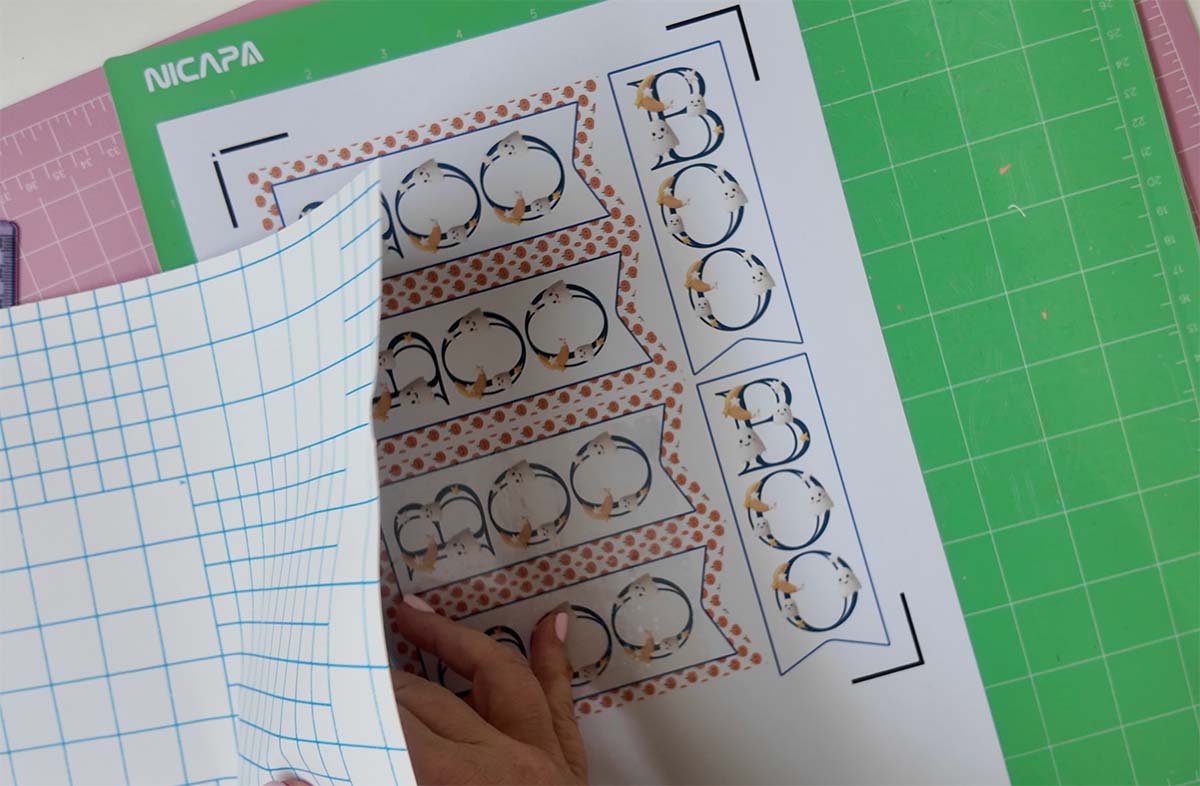
Once your sheets are printed, cover the printed area with holographic vinyl. This is a lovely place to use up any holographic scraps you have saved from other projects, since only the visible letter area needs covering.
13. Cut your pieces
Load your sheet and cut using your cardstock setting, cutting all the way through both the vinyl and card layers.
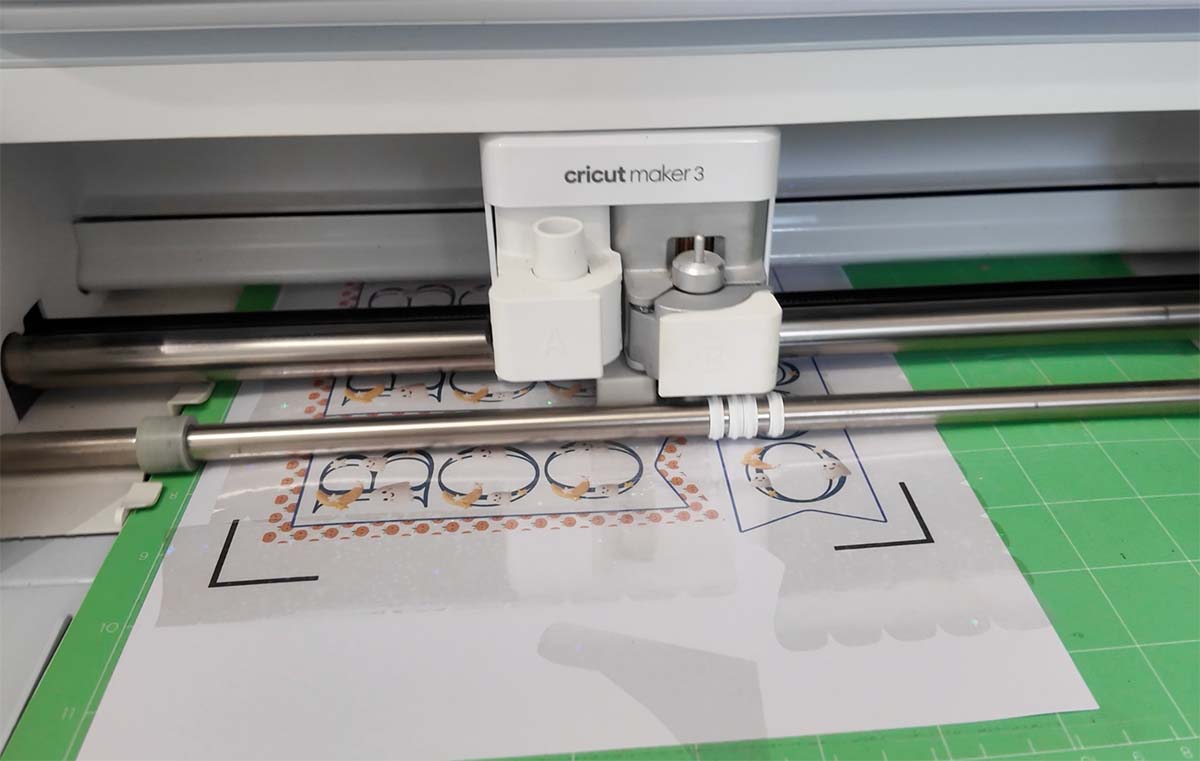
14. Reverse weed your design
Once cut, reverse weed your sheet so your bookmark pieces separate cleanly from the surrounding vinyl and card.
15. Score your bookmark halves
Using your scoring tool, line up the centre point of your double layer bookmark and score straight down the middle. This gives you a clean, accurate fold line.
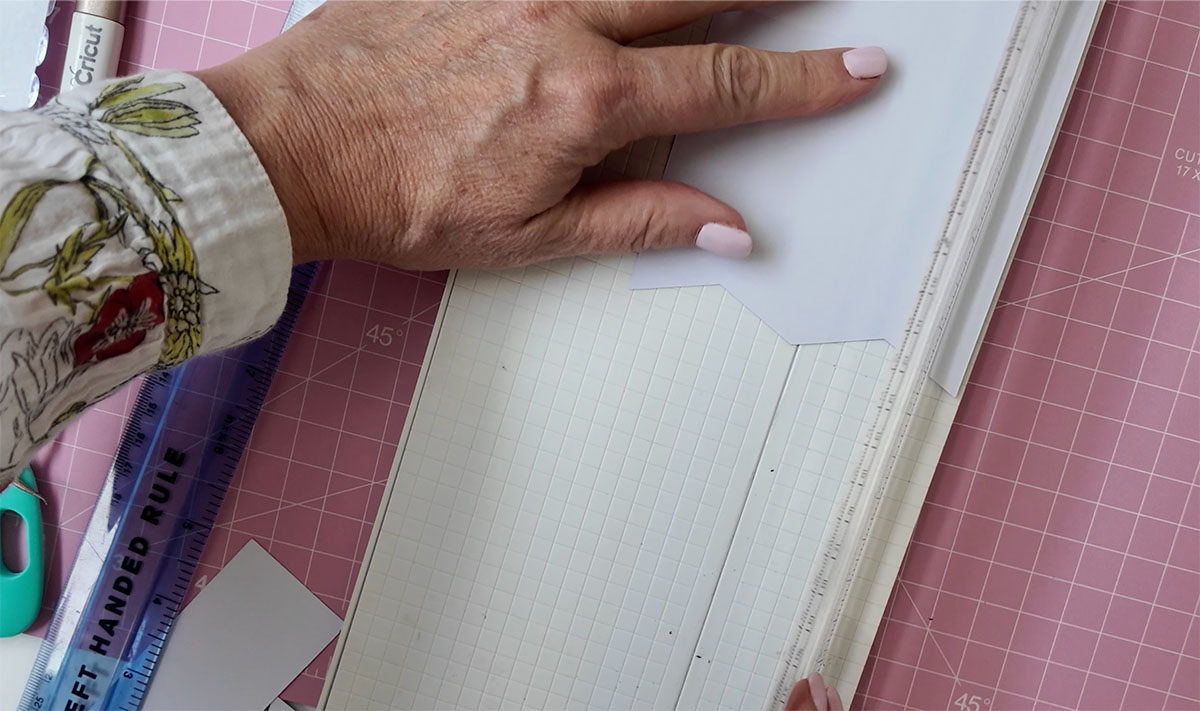
16. Fold and glue for extra thickness
Fold along your scored line so the two halves come together, back to back. Glue them firmly using an easy runner glue or similar strong adhesive, giving you a thicker, more durable bookmark.
17. Prepare your shaker pocket
Take your shaker panel piece and, using your We R Memory Keepers Fuse tool, seal along one edge, working slowly and keeping the piece steady. If you are newer to the tool, use the ruler guide, otherwise you can work freehand once you feel confident.

18. Add your sequins
Using a small spoon, add sequins into your shaker pocket. Start with a small amount, you can always add more, but it is much easier to add extra than to take too many back out.
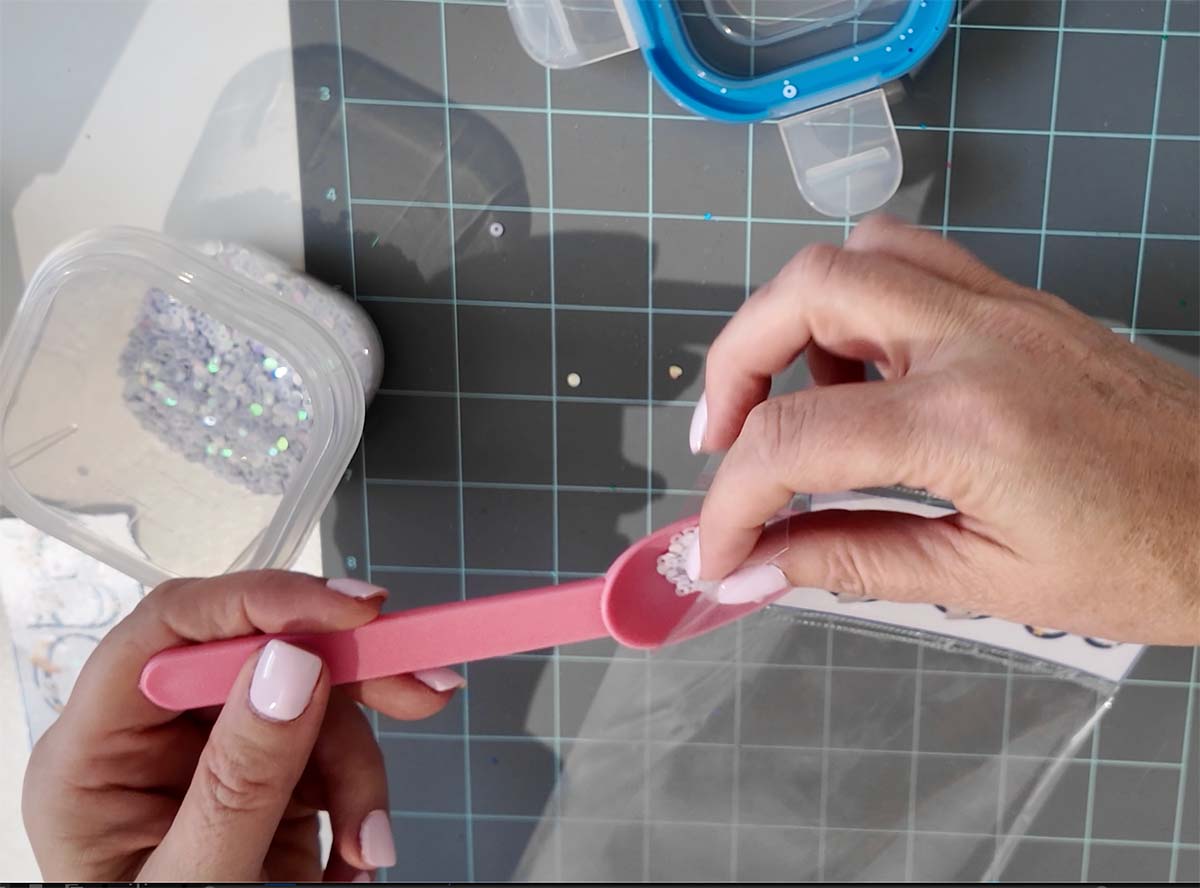
19. Seal the final edge
Once you are happy with the amount of sequins, seal the remaining open edge with your Fuse tool, working carefully along the line until it is fully closed.

20. Trim around the shaker piece
Using scissors, trim carefully around the edge of your sealed shaker pocket to neaten it up.
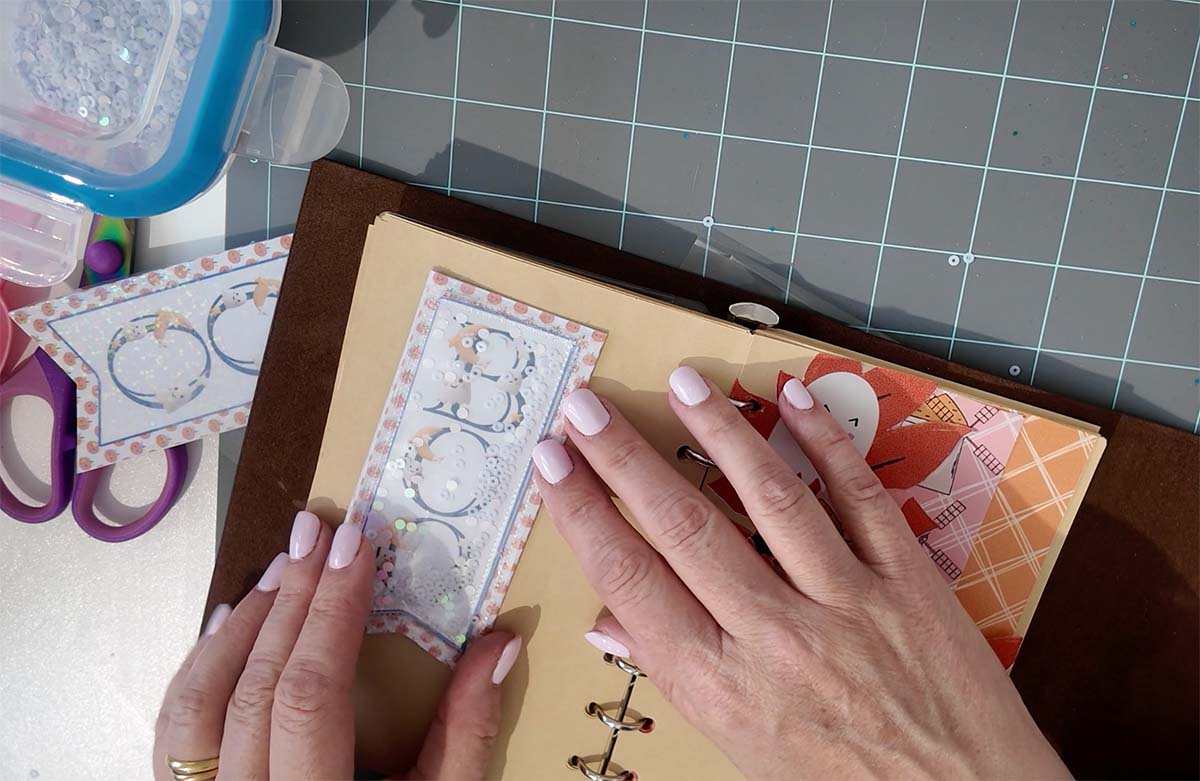
21. Attach the shaker panel to your bookmark
Glue your finished shaker panel onto the front of your assembled bookmark, lining it up neatly with the design underneath. The holographic base will still shine through beautifully around your shaker piece.
Your holographic shaker bookmark is now ready to gift, sell, or pop straight into a book.
How To Upload and Print Your Printable Kawaii Ghost Clip Art Alphabet Letters And Numbers To Cricut Design Space.
Follow this step-by-step guide to upload images, SVG and PNG files to Cricut Design Space. Once uploaded, click Make it; if you need help with this, follow our step-by-step print and cut guide.

If You Want To Use These Printable Ghost PNG Alphabet Letters And Numbers Template?
Click here or on the image below to visit our shop and get your download of our Printable Ghost PNG cut files. They are instant downloads from our shop. If you want the two free letters click here.
If You’re Having Problems?
Check out my troubleshooting page, hopefully it will answer any questions you may have.
Why This Project Works So Well
What I love about this make is that it ticks so many boxes at once. It is a brilliant alternative to sweets for Halloween; it gives children a genuine reason to pick up a book, and it is a fantastic little project if you sell at craft fairs, since it is quick to batch-make and always gets a lovely reaction thanks to that holographic shimmer.
It is also a wonderful project if you are trying to build confidence with your Fuse tool. Shaker cards can feel a bit fiddly at first, but once you get the hang of the sealing technique, it opens up a whole world of shaker projects, from cards to gift tags to journaling embellishments.
Tips And Advice For Using Cricut
- Cricut Design Space Guide
- How to upload to Cricut Design Space
- How To Make Print And Cut Stickers In Cricut Design Space
- Where Else To Get Free SVG Files
Also please do pop over to Instagram, or TikTok and give me a follow and if you make a project please do tag me! I love seeing everyone else’s makes and chatting crafting. I could do that all day! This is also where I share all my projects in progress.
