Now the secret is out it’s ok to shout about the Cricut foil tool and share my Cricut Foil Projects I have been busy creating. For me, the best thing about getting your hands on a new project is the playing and exploring. Yes, there have been frustrating moments, but that’s part and parcel of getting to know a new product. However my overriding feeling is that the Cricut Foil Transfer System is fantastic.
What You Will Find Here
6 Easy Cricut Foil Projects Plus A Subscribers Bonus Project!
What Do You Need To Use The Cricut Foil Transfer System For Foil Projects.
I have a detailed post and step by step instructions on how to use the foil system here. But what will you need to get started? I have also added the instruction card to this post to help you get started.
- Cricut Foil Tool (The Starter kit costs £39.99)
- Cricut Foil
- Maker Or Explore Machine.
- Card Stock
- Or Cricut Cards ( I use these on a cutting mat)
- Cricut Weeding Tool and Scraper
What Cricut Foil Projects Can You Make?
There are 6 projects with links to design space below, I also have a bonus for all my subscribers, I will be sharing my full Floral Alphabet Design Space link in my members area.
If you’re a subscriber check your emails, if not and you want to get your hands on my alphabet before the post goes live next week? You can subscribe by filling in the box on the side bar, alternatively if you are on mobile scroll down for the box.
Please note all links will currently only work on desk top and not on the app as the product is so new.

To give you an idea of just how versatile the Cricut Foil Tool is here are some other ideas for Cricut Foil Transfer System project ideas.
- Cards
- Invitations (The foil tool can be used on Velum)
- Elf Letters
- Santa Letters
- Wedding Decor
- Place Cards
- Business Cards
- Wall Art
6 Cricut Foil Projects To Try Out
There may be imperfections on some, however I am still sharing those as it’s important to share my progress, because working with Cricut Foil is all about getting it right and once you master that the possibilities are endless.
The beauty of Cricut Foil is all the the projects can be created with foil, but can also be used in the Cricut Draw feature using Cricut Pens to create your art or Print and Cut. However the foil option is bar far so much prettier and sparklier.
Christmas Tags
These super cute Christmas tags are pretty small and the foil tool coped well with intricate design. I love that you can create custom foil tags, these can also be used for personalised labels and place cards.

Personalised Alphabets
I adore my Floral Woodland Alphabet, which I also used to create this love design art work. I do have an error on this image, however love it even though it’s not quite perfect. The beauty about this project is because the images are attached, when you open in design space you can un-attach and tweak to personalise even more.
Create Your Own Halloween Artwork
My absolute favourite of all the projects I made was this gorgeous pumpkin, designed with draw images in Cricut Design Space this is perfect for framing for Halloween. It was inspired by my paper cut Halloween Pumpkin, however I wanted to create a bespoke design just for foil.

Create Christmas Cards
This Christmas Card Project took minutes using 2 image I pulled form images on Cricut Design Space. Another great idea would be to create multiple Christmas Card fronts on 12×12 card stock with 12×12 foil.

And Personalised Map Art
I have been dying to use the Cricut maps forever and they lend themselves perfectly to the foil system. If I made this again I would simply change my text to something a little more simple. However this is proudly hung on my wall and looks fabulous, just check out that detail it’s incredible.
To use this project simply go into the Project In Design Space and edit the family name and established date to make it your very own.

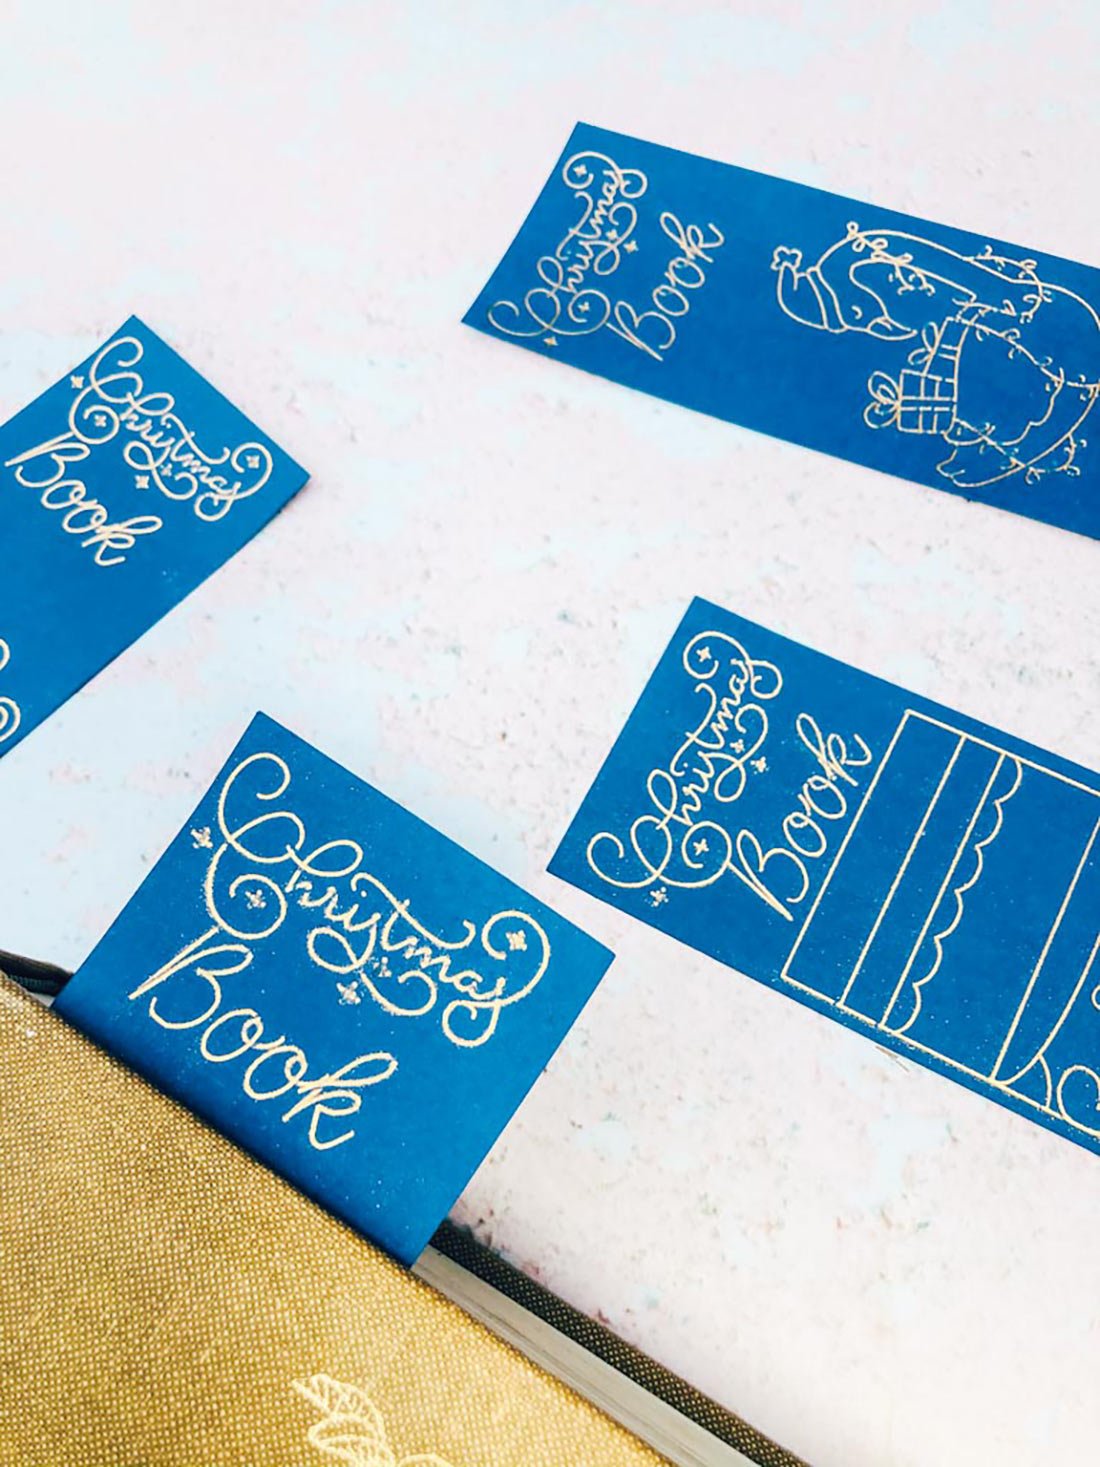
Make Christmas Bookmarks
These Christmas bookmarks were super easy to make with the foiling kit, and perfect for creating as Christmas card fillers and elf gifts. Check out Design Space to get the full set of bookmarks. To finish off the bookmarks and make them more durable I would suggest laminating them.

Please note I was gifted the foil system in return for my review, my opinions are all my own.

How To Use The Cricut Foil System
The Cricut Foil Transfer Kit, How Does It Work? How to use the Cricut transfer systemn and what can you make with the foil tool in this fab foiling kit.
Materials
- Cricut Foil
- Card Stock
- Or Cricut Cards ( I use these on a cutting mat)
Tools
- Cricut Foil Tool
- Maker Or Explore Machine.
- Cricut Weeding Tool and Scraper
Instructions
What Cricut Machines Does The Cricut Foil Tool Work On?
You ‘re able to use the Foil tool on the Cricut Maker and all Explore Family machines. The foiling tool fits into Clamp B on your Cricut, thats the clamp your knife blade also fits into. This enables the tool to apply the right amount of pressure to transfer the foil onto Cricut Projects. However it is not compatible with the Cricut Joy.
How Does Cricut Foil Work?
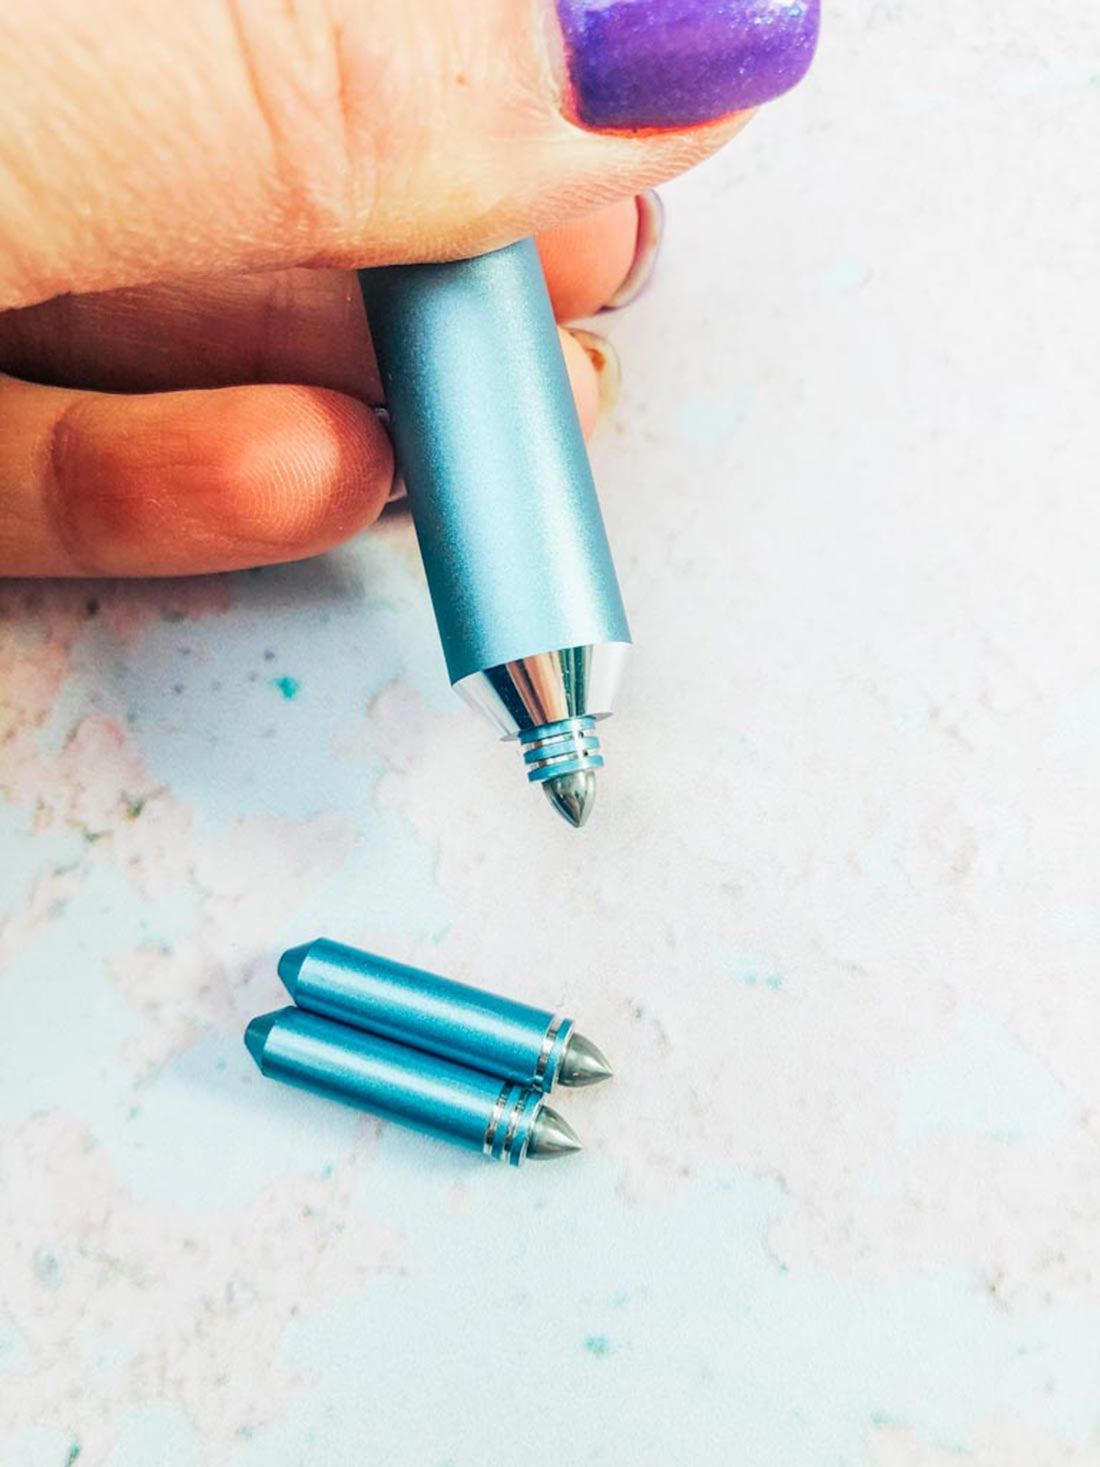
The Cricut Foil System works with pressure, thus there are no wires or heat, just the 3 in 1 foil tool which is a housing that has 3 different interchangeable tips; fine medium and bold.
These tips are magnetic and very easy to change, however are very small. I store mine in my Cricut draw, they stick nicely to the magnetic strip in the left hand compartment.
The foil tool works in conjunction with Cricut Design Space, here you can choose the size of your foil line by changing the tips to correspond with the line type you choose for your foil project in Cricut Design Space. ( My favourite is bold)
However it is important to get the right tool with the right pressure, using the wrong tool can cause your project to rip.
The foil comes in two different sizes, 12×12 for large or bulk projects or 4×6 which is perfect for smaller projects and cards and comes in a choice of colours including silver, gold, teal, green and purple. The pack also contains enough adhesive strips for all the foil in the pack.
How To Use The Cricut Foil Transfer Kit
Designing Images To Work On A Foil Project
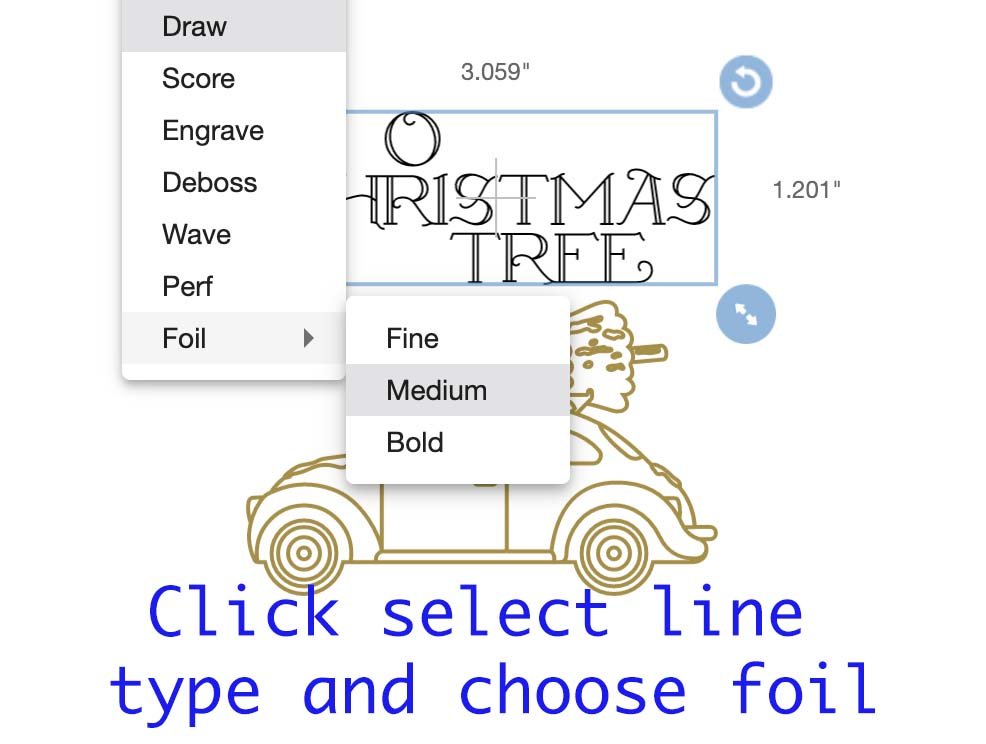
To be able to use a project as a foil image you must use a draw image, these can be found in Cricut Design Space in images under Art type in the left hand bar. I have found the foil system is great with quite complex projects, thus its ok to be a little daring.

Once you have chosen your draw image, click on line type and select foil, here you can choose your project colour and line thickness. You will also be able to choose your foil colour, this is a great help especially when working with multiple foil colours.
Handling The Foil
The Foil is fragile and will mark if you crease it, it will also stick to your Cricut Cutting Mat. If this happens the foil transfer layer will be removed from the back, it also marks the cutting mat. I only made this mistake once!
It also sticks together as you take it out of the pack, however Cricut have considered this and have made the foil packs into fully opening envelopes. Simple cut the plastic seals at the side of the packets and you are able to take foil out and put back in easily. This may only be a simple thing but it makes handing the foil so much easier, especially if you change your mind a lot like me.
Sticking The Cricut Foil Transfer Kit To Your Mat And Card
To attach your foil simply lay the foil over you card stock, taping each edge of the foil to the cutting mat. It’s important to get the foil as even as possible to ensure the transfer is even and the foil doesn’t rip. The more even the foil, the better the transfer. Its also important not to get the foil to tight as this can also rip the foil.
I found it worked to attach the two opposite edges first, then move onto the side. Use even tension to get the foil as even as possible.

Sending Your Project To Your Cricut
When you send your project from design space to your mat drag your image, this was it’s situated centrally on the the mat. Thus allowing a little space around the edge of the project.

Next ensure you slide the roller guides back on your Cricut Machine, this will prevent marks appearing on the foil.

What Order Does The Cricut Foil/ Cut In
Once you have attached your Cardstock and foil to your cutting mat you can send the project to foil/cut. The foil will transfer your design first.
Design space will prompt you to ensure you have the correct foil transfer kit tool in place. This is important as each tool works on pressure using the wrong tool can tear the project.
Once the foil transfer tool has finished you are prompted to remove the foil before your Cricut can go on to cut the project, this is also the point that you must swap back to the knife blade. IT IS IMPORTANT NOT TO UNLOAD THE MAT! Simply un-peel the tape and gently remove the foil.
Now you can continue with your project if it requires cutting.
Notes
What Materials can you Use The Cricut Foil Transfer Kit On?
Cardstock
Light
Heavy
Medium
Adhesive Backed
Faux Leather
Deluxe Paper
Foil Embossed
Watercolor Paper
Pearl Paper
Vellum
Printable Vinyl (and sticker paper)
Kraftboard
Using The Cricut Foil Kit, My Top Tips
- Don’t let the foil touch the cutting mat.
- I find the foiling kit works better with draw images. I spent a lot of time trying to make it work alongside my Papercut Alphabets. However, it works so much better when you think of it as a drawing tool. Forget cutting and think drawing and doodling. This way of thinking helped me to design and new Alphabet and Pumpkin designed just for drawing and foiling.
- Ensure you attach the foil to your cutting mat evenly and securely.
- Don’t unload your mat half way through the project, follow the on screen instructions.
- Enjoy creating, it was a learning curve for me, however the more I have used the Cricut Foil Kit the more I get excited about the projects I can create with it, its all about getting that foil secure and even on the mat.
Recommended Products
As an Amazon Associate and member of other affiliate programs, I earn from qualifying purchases.


Enjoyed reading your site.I have used foil on 80 or more wedding invitations, then all of a sudden in the middle of the design the foil started tearing. I have everything I could think of except lowering the pressure. I am using 100 pd. card stock to foil an image on the front. Any suggestions as what I can do ? I need to finish 45 more. Thanks, Sandy
Oh Sandy what a nightmare, I find its all about getting the foil tension perfect, if that’s not right I don’t get good results, hope this helps and good luck, Sarah x