I have become a little obsessed with cake toppers and have been dying to make a shaker cake topper for so long. However, it’s like everything: the more you learn, the more you want to achieve. Read on to learn ‘How To Make A Shaker Cake Topper’ for birthday parties, baby showers, weddings and christening celebrations and get your hands on my free template to make your own DIY Cake Topper.
Yes, it looks slightly complicated, however, shaker toppers arent difficult at all. So don’t let being a beginner put you off having a go at this Cricut project; it’s not difficult to cut and construct and looks amazing.
What You Will Find Here
How To Make A Shaker Cake Topper
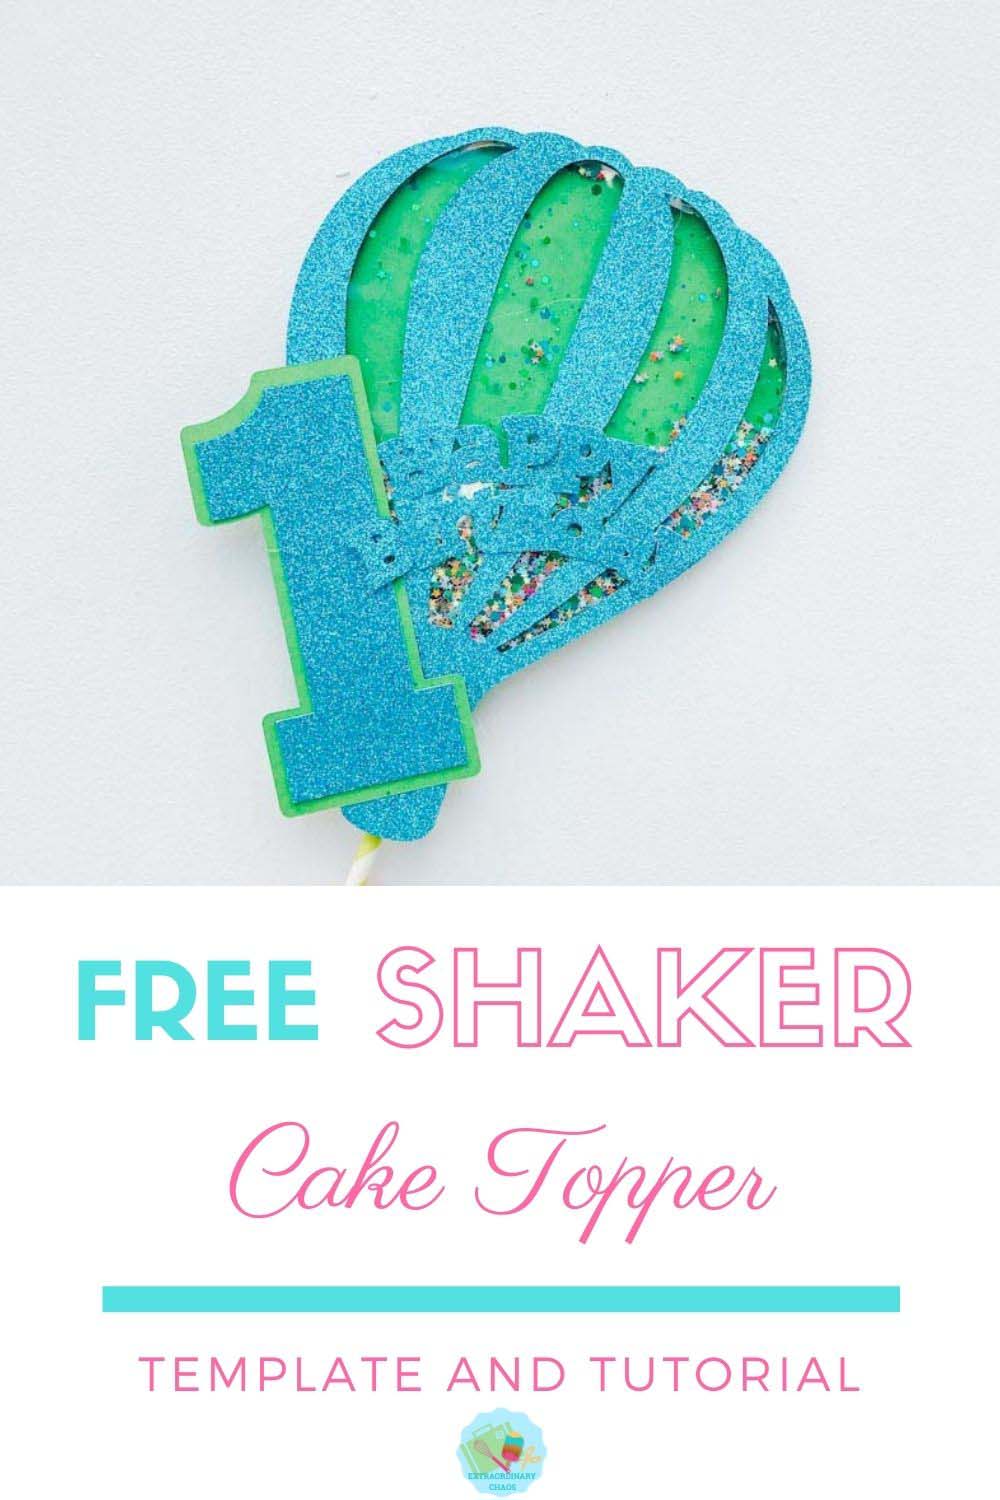
These shaker cake toppers can be made with many different materials, the images in this tutorial for shaker custom cake toppers I use craft board. However I do prefer using thick card stock and metalic poster board than craft board. The cricut takes forever to the cut the craft board.
This post may contain affiliate links. Which means I may receive a small commission if you click a link and purchase something that I have recommended at no extra cost to yourself. As an Amazon Associate in the Amazon Services LLC Associates Program , Cricut and Glowforge associate, I earn from qualifying purchases.
Shaker Cake Topper Supplies List

- 12×12 Glitter Card
- 12×12 Card Stock
- Heat Resistant Acetate
- 2ml Craft Board with a deep point blade, Or thick cardstock with a fine point blade ( I prefer to use cardstock)
- Hot Glue Gun or Accrylic Glue
- Cricut Tools
- Blue and Purple Cutting Mat
- Foam Tape (If using cardstock instead of craft board)
- Straws
- Wooden Dowel
- Glitter, Sequins or confetti, mix them all up for an extra sparkle.
- Cricut Maker 3 with a Cricut Knife Blade
You Dont Need To Use Craft Board

If you don’t have a Cricut Maker and can’t cut craft board, try using thick card and layering it to create a void for your glitter. I would suggest a delivery box as that is quite thick, but still cuttable. If you do struggle, cut a guide and use a craft knife.
Sizing Your Cake Topper In Cricut Design Space

Start by opening the project in Cricut design space. Once the project is either uploaded or opened, size it to the size you want your shaker cake topper to be.
The template does not include the number. However I used Birthday Bash layered text, simple choose your text and number, split the layers and colour to match your chosen shaker cake topper colours.
Once sized pull all the layers over the top of each other to ensure they fit, its vital you do this before cutting. Also make sure you colour code your project, I have colour coded in design space and the downloads.
- Blue for the top layer, happy birthday and top layer of my number.
- Green for the back layer of the balloon and the number
- Pale Blue for the craft board frame
- Cream for the acetate layer
This will ensure all elements of the cut are sent to design space on separate mats.
Sending Your Project To Cut
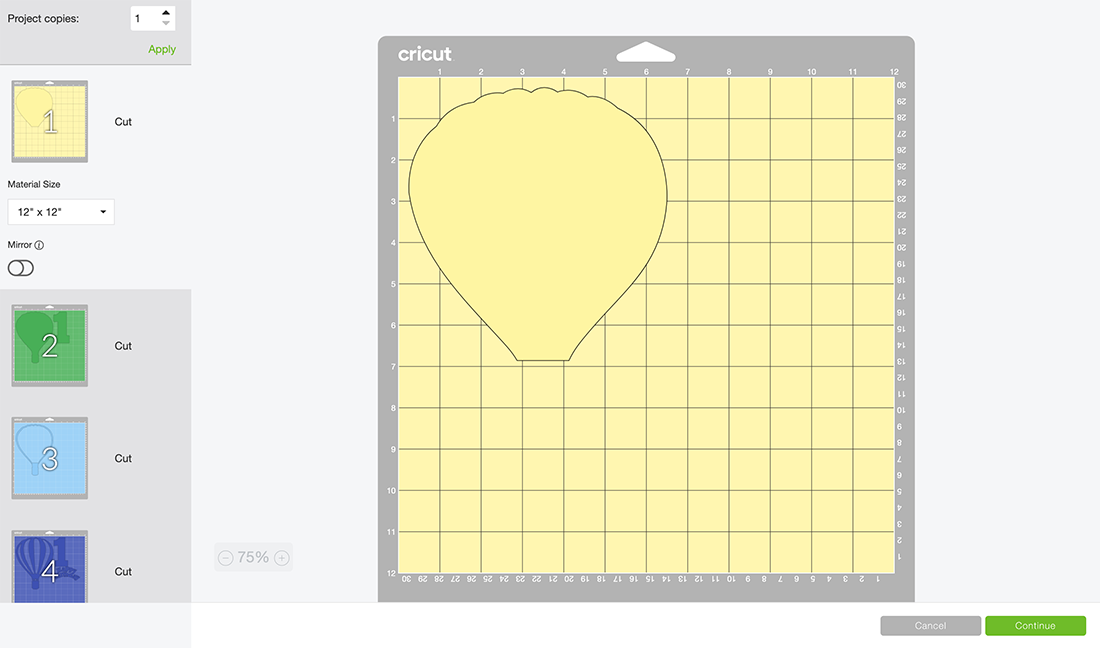
When you click ‘Make It’ to send your project to cut, design space will arrange the different colours into mats, it’s important to note which is which to get your cuts on the correct materials.
It’s also important to change your blade to a knife blade or deep cut blade for the craft board layer and tape the board to your purple cutting mat to ensure it’s secure.
Be sure to slide the rollers to the right-hand side of the roller bar before you load the poster board; failing to do this could could cause damage or a jam.
The knife blade sets to cut the board over many rotations, I think mine set to around 32 cuts. However, please note, you may not need all the cut rotations design space recommends. I didn’t use the official Cricut poster board, and it did not need as many cuts.
As a result, it cut through my cutting mat. Next time, I will stop about 3/4 of the way through. Also ensure you change the knife blade as soon as you poster board cut finishes and before you load your next mat. Or use poster board or thick card stock which cuts much better.
Constructing Your Shaker Cake Topper

You can choose to paint the chip board to match the front of the cake topper, however, I decided not to.
Start Glueing The Frame

Heat up the glue gun and start by glueing the chip board frame to the back layer, its a good idea to put all the pieces together first to get them the right way round as there is a right way. Be quick with the glue gun as it dries quickly, I did mine in two halves.
If you are using poster board or card stock, acrylic craft glue or double sided sticky tape works well.
Add The Glitter And The Top Acetate Layer

Once the glue is dry, add the glitter before glueing the acetate layer. Before moving on check the glitter shaker’ part void is fully sealed and no glitter is escaping.
Add The Top Layer

Now, glue the top layer of the balloon to your shaker cake topper. If you are using card stock, use the foam tape this will create a void for the glitter and sequins to move freely.
Build The Rest Of The Elements

Next, construct any numbers or names you may add and your happy birthday before glueing it to the top of your balloon and allowing it to dry.
Glue And Wooden Dowel Or Straw To The Back Of The Topper

Finally push the wooden dowel into the straw so it fits tightly, flatten the end of the straw and glue to the back of the balloon shaker cake topper to secure.
Get My Hot Air Balloon Template Shaker Cake Topper SVG
To get your free Cake Topper PNGs, simply click here on the image above to get the free download from the shop.
Happy Crafting and please do tag me with your makes on Instagram, I love to see everyones amazing creations.


How To Make A DIY Shaker Cake Toppers
How to make a DIY Shaker Cake Topper With Free Template to create a hot air balloon confetti shaker cake topper for childrens birthday cakes and parties.
Materials
- 12×12 Glitter Card
- 12×12 Card Stock
- Heat Resistant Acetate
- 2ml Craft Board
- Masking Tape
- Straws
- Wooden Dowel
- Glitter
Tools
- Hot Glue Gun
- Cricut Tools
- Blue and Purple Cutting Mat
- Cricut Maker with a Cricut Knife Blade
Instructions
Step 1 Sizing Your Cake Topper In Cricut Design Space
Start by opening the project in Cricut design space, once the project is either uploaded or opened size the project to the size you want your shaker cake topper to be.
The template does not include the number. However I used Birthday Bash layered text, simple choose your text and number, split the layers and colour to match your chosen shaker cake topper colours.
Once sized pull all the layers over the top of each other to ensure they fit, its vital you do this before cutting. Also make sure you colour code your project, I have colour coded in design space and the downloads.
Blue for the top layer, happy birthday and top layer of my number.
Green for the back layer of the balloon and number
Pale Blue for the craft board frame
Cream for the acetate layer
This will ensure all elements of the cut are sent to design space on separate mats.

Step 2 Sending Your Project To Cut
When you click ‘Make It’ to send your project to cut design space will arrange the different colours into mats, it’s important to note which is which, to get your cuts on the correct materials.
It’s also important to change your blade to knife blade for the craft board layer and tape the board to your purple cutting mat to ensure its secure.
Step 3 Be sure to slide the rollers to the right hand side of the roller bar before you load the poster board, failing to do this could could cause damage or a jam.
The knife blade sets to cut the board over many rotations, I think mine set to around 32 cuts. However please note, you may not need all the cut rotations design space recommends. I didn’t use official Cricut poster board and it did not need as many cuts. As a result it cut through my cutting mat. Next time I will stop about 3/4 of the way through.
Also ensure you change the knife blade as soon as you poster board cut finishes and before you load your next mat.
Step 4 Constructing Your Shaker Cake Topper
You can choose to paint the chip board to match the front of the cake topper, however I decided not not.
Heat up the glue gun and start by glueing the chip board frame to the back layer, its a good idea to put all the pieces together first to get them the right way round as there is a right way.
Be quick with the glue gun as it dries quickly, I did mine in two halves.
Once the glue is dry add the glitter before gluing the perspex layer. Before moving on check the glitter void is fully sealed and no glitter is escaping.
Now glue the top layer of the balloon to your shaker cake topper.
Next construct any numbers or name you may add and your happy birthday before glueing to the top of your balloon and allow to dry.
Finally push the wooden dowel into the straw so it fits tightly, flatten the end of the straw and glue to the back of the balloon shaker cake topper to secure.
Notes
If You Don’t Have A Cricut Maker?
If you don’t have a Cricut Maker and can’t cut craft board, try using thick card and layering it to create a void for your glitter. I would suggest a delivery box as that is quite thick, but still cuttable. If you do struggle, cut a guide and use a craft knife.
Recommended Products
As an Amazon Associate and member of other affiliate programs, I earn from qualifying purchases.