
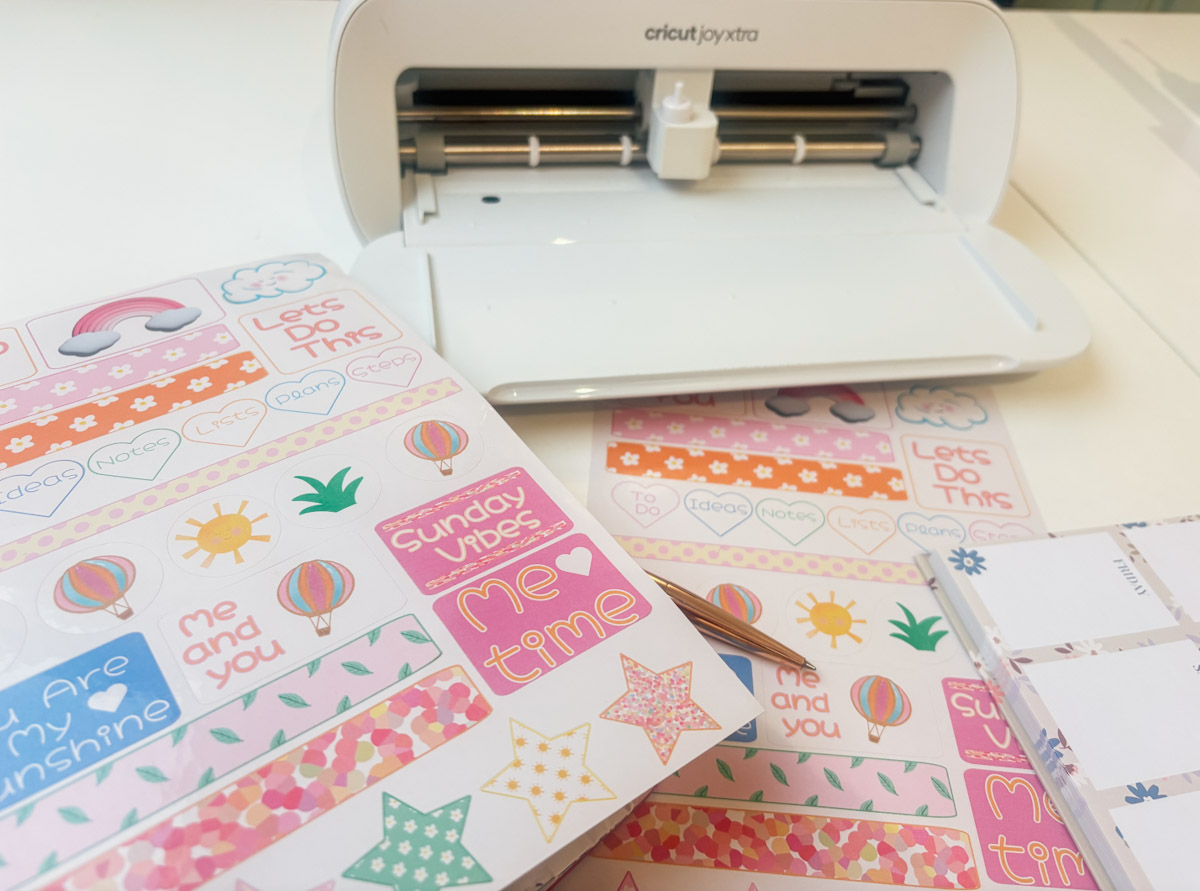
Today, I want to share how to make Stickers with Cricut Joy Xtra. I’ve had my Cricut Joy Xtra for a couple of months now, and I honestly love how versatile this little machine is. When I first set it up, I expected to use it mainly for quick labels and small vinyl projects, but it has quickly become one of my go-to tools for cutting and print-and-cut projects, especially sticker sheets.
One of my favourite things to make with the Cricut Joy Xtra is sticker sheets. They are perfect for planners, kids’ crafts, party bags, journals, reward charts, and personalised projects. Once you understand the setup, they are surprisingly quick to produce. Even better, you do not need pre-made downloads to get started.
What You Will Find Here
How To Make Stickers With The Cricut Joy Xtra, A Template and Kiss Cut and Die Cut Without Cricut Access
In this step-by-step Cricut Joy Xtra stickers tutorial, I am going to show you how to create your own sticker template directly inside Cricut Design Space so you can design layouts that fit exactly what you need. You will learn how to add images, text, and patterns, set up offsets correctly, and prepare your sheet for both kiss-cut stickers, where only the top layer is cut, and die-cut stickers, where the cut goes all the way through.
If you have been wanting to make your own stickers but felt unsure about template sizing, print-then-cut settings, or cut pressure differences, this method keeps everything simple and repeatable. Once you have made your first template, you can reuse it for different themes and designs.
Get The YouTube Tutorial

Let’s get started and build your sticker sheet from scratch.
What You Will Need/ Ad Affiliate
- Cricut Joy Xtra
- Cricut Design Space (free software)
- Standard Gripmat
- Weeding tool
- Brayer, great to use on older mats that are less sticky
- Glossy sticker printer paper
- Hp Printer

1. Create Your Sticker Sheet Template
Instead of downloading a template, you can build your own.
- Open Cricut Design Space
- Start a new canvas
- Go to the free shape bar on the left-hand side
- Insert a rectangle; this will be your outline cut layer
- Unlock proportions so you can resize freely ( you will find the padlock on the top bar)
- Resize to your preferred sticker sheet size, the optimum size is 11? x 8.5?
- Change the colour, you can add a pattern for the background or make your layer white.
- This rectangle becomes your working template area.
Tip: Drag it to maximise usable print space, but stay within Print Then Cut limits. If you get a red exclamation mark, it means it is too big.

2. Add Shape Guides for Sticker Placement
To help layout your stickers evenly:
- Add circles, squares, or rectangles; this is to make the shape of the stickers you will cut out
- Duplicate them to create rows
- Use Align and Distribute to space evenly to create a pattern
- Leave small gaps between shapes (important for clean cutting and to enable you to set offsets.
- When you are happy, right-click, select all, click Actions, change the shapes to print, then cut.
- You can move the white sticker background out of the way when you are happy. But you will need to put it back before you cut.
- Save this template as sticker template, this will be handy for future stickers
These act as placement guides for your sticker designs.

3. Colour the Shapes and Add Images and Graphics
You can use:
- Cricut free images
- Uploaded PNGs
- Your own artwork
- Themed elements (balloons, clouds, rainbows, icons)
To add images:
- Click Upload
- Insert your graphics
- Resize to fit each guide shape
- Place inside each template area

4. Add Text Stickers
Word stickers are great for sticker sheets.
- Click Text
- Type your words or phrases
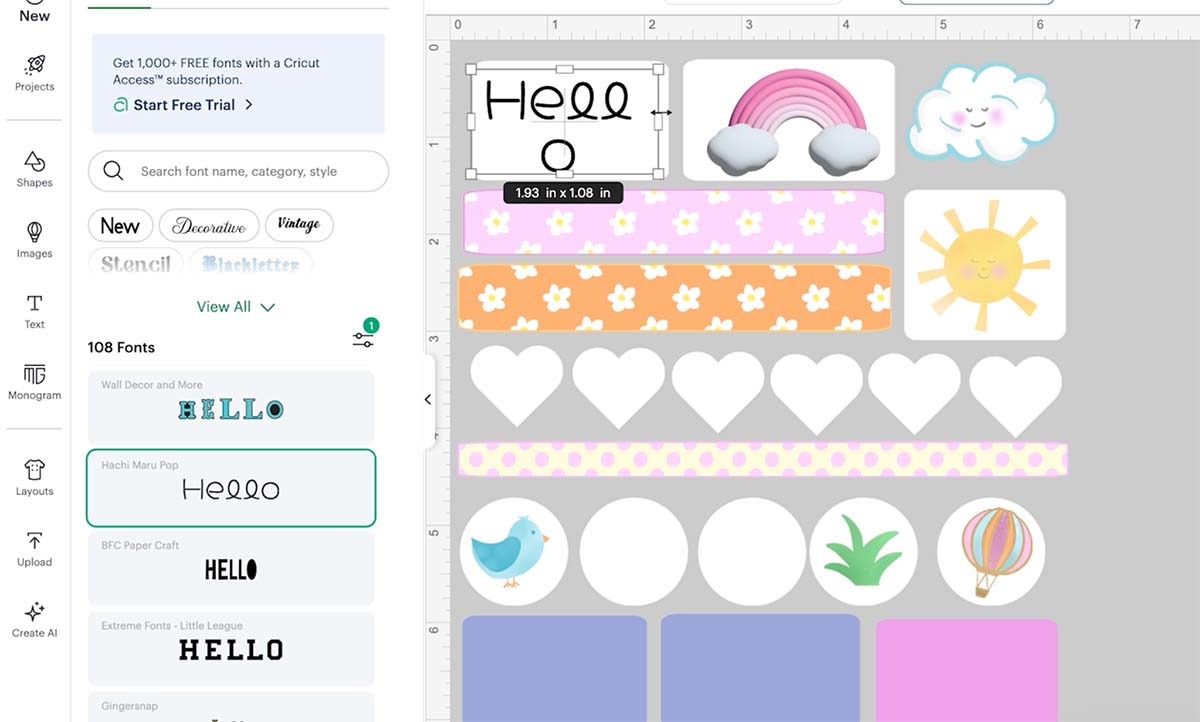
- Choose a font (filter Cricut Fonts for free fonts if needed, or click on system fonts, these are the fonts on your Mac/PC, or fonts you have uploaded )
- I used Hachi Maru Pop, a free Cricut font, change to print and cut and choose a colour
- Resize to fit your layout
- To make it thicker, I clicked on the offset tool and added a small offset, colour it a different colour, you can flatten now or at the end, I usually do it at the end
Examples:
- Hello You
- Sunshine
- Be Kind
- Love This
- You’ve Got This
5. Use Patterns for Visual Interest
Patterns add texture and personality.
- Select a shape
- Click Basic Cut, choose Print, then Cut, click Colour, and the bar drops down with pattern options. There are lots of free patterns in Design Space, or you can choose your own. See how to make them here.
- Adjust scale by clicking edit and slidingthe scale, you can also flip and rotate the. pattern (set to small/tiny if pattern looks too large)
You can also create patterns in Procreate or other design apps and upload them.

6. Add Offsets for Sticker Borders
Offsets create the cut border around each sticker.
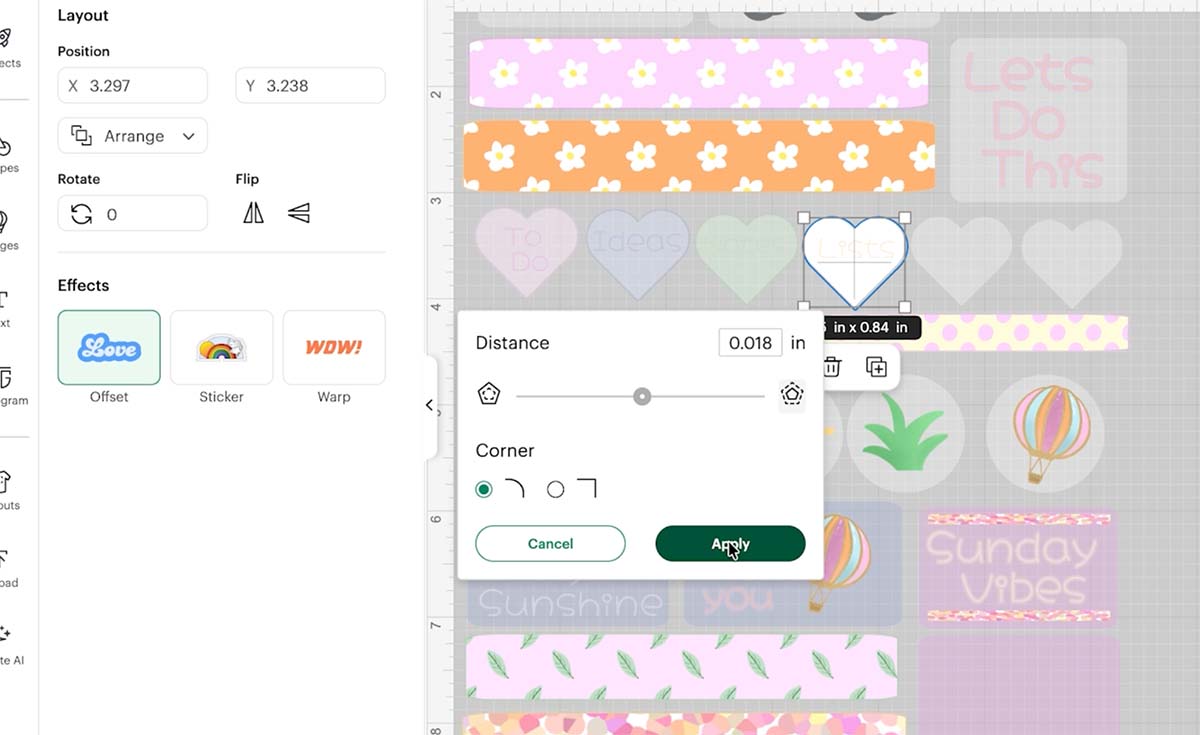
- Right click and select your image layers or text
- Click Offset
- Adjust the thickness, so that no two stickers are touching
- Click apply
- Change offset colour if desired
This offset becomes your sticker cut line. This is especially useful on patterned stickers.
7. Flatten Your Design
Flattening is critical for Print Then Cut.
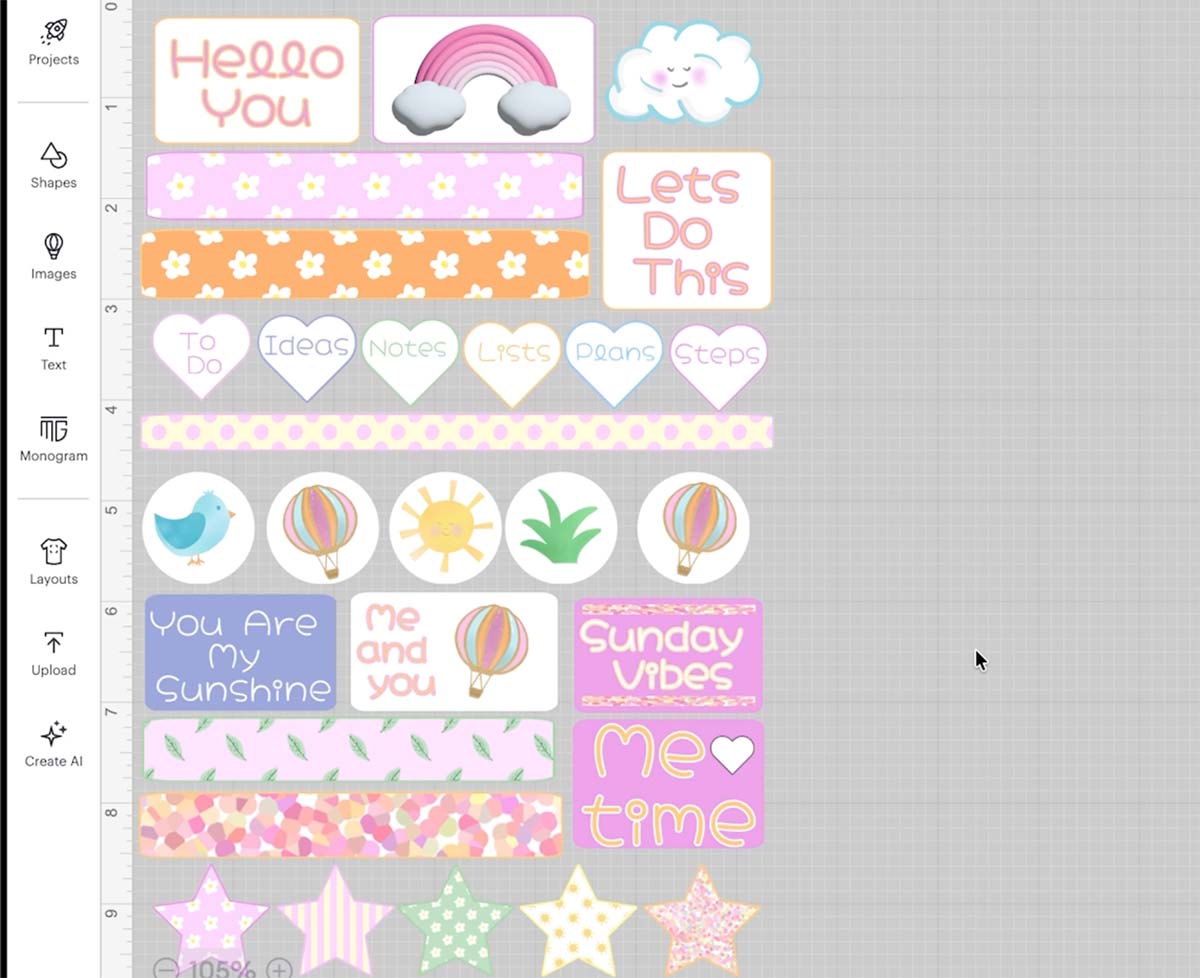
You can do this sticker by sticker, but I prefer to make my whole sticker sheet as a bunch.
- Right click and select the individual design or the whole set of sticker layers (Not including the back white layer, you don’t need that yet.
- Once highlighted, head to the bottom right corner and click flatten, the will flatten the stickers to one flat image.
This tells Cricut to print and cut the design as one image.
8. Create the Sticker Sheet Base for Kiss Cut
To make kiss cut stickers (cut through sticker layer only):
- Duplicate your base rectangle 3 times
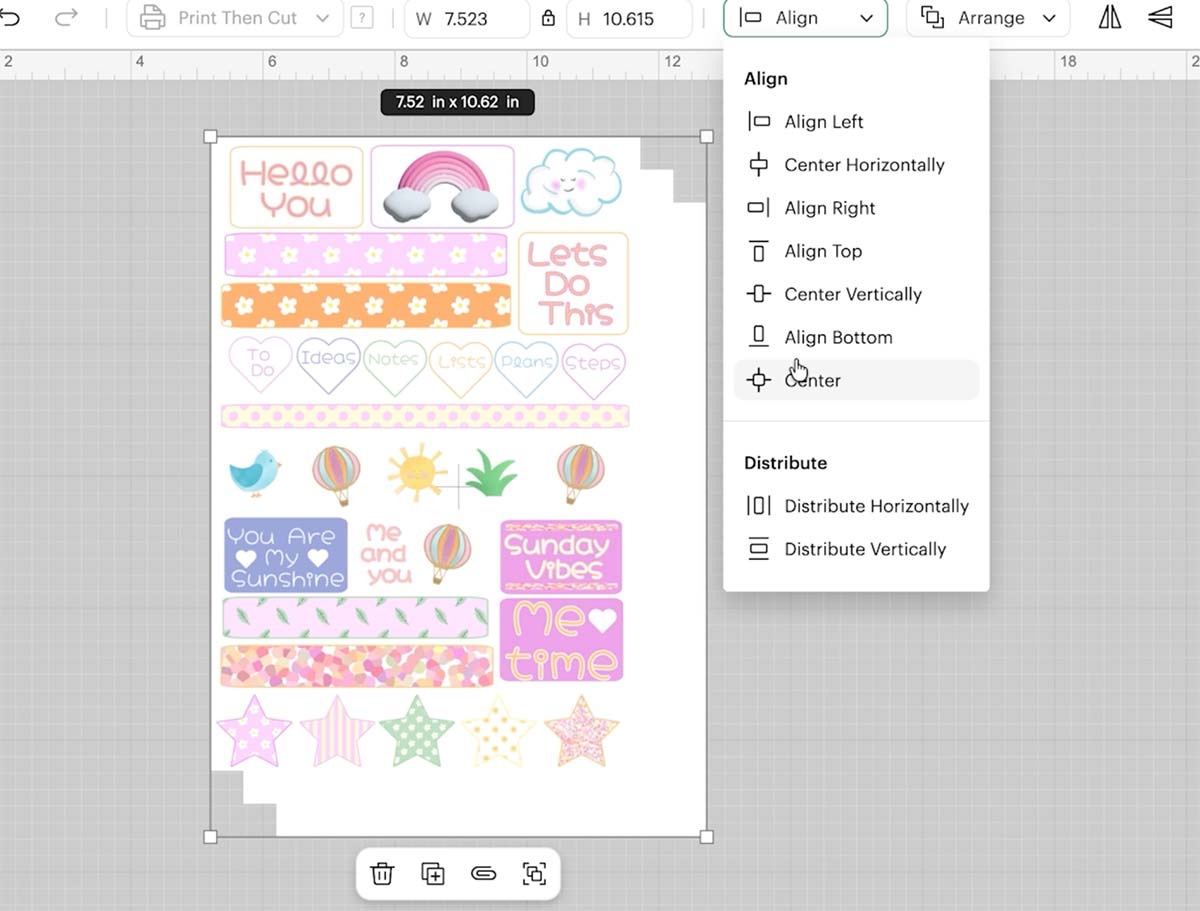
- Stack them behind the stickers so they are exactly aligned. You can do this by right-clicking and selecting all layers. Now, click the align tool at the top and choose centre.
- This will centre all the layers so they look like one
- This next step is very important to get right. You need to right-click, select all and click attach. DO NOT FLATTEN! Clicking attach maintains the layers, so you will have 4 layers. The top sticker layer ( This is flattened) and the 3 back layers. Now, when you cut the back layer, it will cut 3 times, and the top sticker layer will cut once. This gives you a kiss-cut and a die-cut result.
This creates multiple cut passes around the sheet edge while your individual stickers remain kiss cut.
9. Prepare Print Then Cut
- Click Make It
- Check layout preview and send it to print
- Turn the bleed off, then click Use system settings
- Print at Best Quality in your system setting and click print
Let the ink dry fully before putting on your Cricut Joy Xtra mat and cutting.

10. Load and Cut
- Place printed sheet on a cutting mat
- Align to the corner
- Load into Cricut Joy Xtra
- Click to start your cut, it will read the lines, then cut the stickers
- I used the printable vinyl setting with less pressure
Note: Make sure you put the stickers into your Cricut Joy Xtra the right way up; they must be exactly the same as they appear on the screen.

Stickers Made Simple with Cricut Joy Xtra
Making your own kiss-cut and die-cut sticker sheets with the Cricut Joy Xtra is easy, and once you have your template set up, it becomes a fast, repeatable system you can use again and again. By building your layout in Design Space, adding offsets, and controlling your cut settings, you get full creative control over every sheet you make.
This template method gives you flexibility for any theme or project, from planner stickers and party favours to classroom rewards and personalised labels. You can swap out graphics, change colours, test new patterns, and adjust sizing without starting from scratch each time.
If you are still experimenting with pressure settings, keep doing small test cuts. Every machine and material combination behaves slightly differently, and a quick test saves wasted sheets.
Once you have done this a couple of times, you will find sticker making becomes one of the most satisfying and versatile projects you can do with your Cricut Joy Xtra. Happy crafting and happy cutting.

