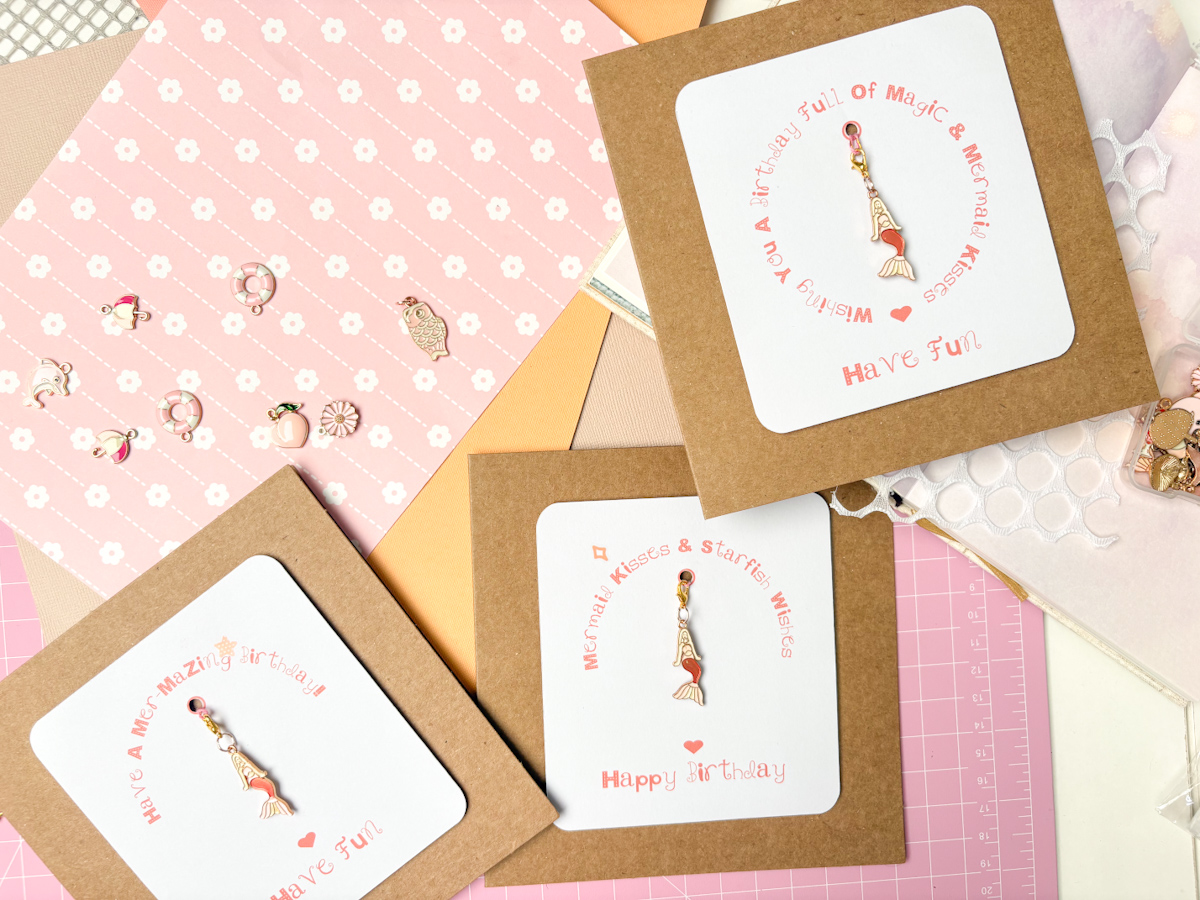
I’ve made the most gorgeous mermaid charm cards using my Cricut Joy print and cut feature, paired with the cutest little alloy enamel mermaid charms, and today I’m showing you exactly how I made them, start to finish.
If you’re a crafter that loves card making, this is a project you’re going to want to save. It’s a simple print and cut card front with a mermaid charm attached, and it’s such a different idea for something a bit special.
These charm cards are perfect for personalised cards, selling at craft fairs, stocking an Etsy store, or simply gifting to someone special. They’re easy to make, they look completely different to a standard card, and best of all, the charm can be taken off afterwards and kept or worn. It turns a card into a little gift in itself.

This post may contain affiliate links. Which means I may receive a small commission if you click a link and purchase something that I have recommended at no extra cost to yourself. As an amazon, Cricut and Glowforge associate, I earn from qualifying purchases.
What You Will Find Here
How to Make Cricut Joy Mermaid Charm Cards with Print and Cut
What You’ll Need for This Cricut Joy Charm Card Project
Below is my full tool and materials list for this project. Some of these links are affiliate links, which means I may earn a small commission at no extra cost to you if you choose to purchase through them.
Cutting Machine
Mats and Cardstock
Finishing Tools
- Weeding tool for removing small bits
- Brayer, optional, for smoothing cardstock onto the mat
- 300 pieces double sided foam sticky strips
Printing and Charms
See the step-by-step video tutorial

Mermaid Quotes and Sayings for Cards
If you’re making your own mermaid charm cards, here are some quotes and sayings you can use for the text on your card front.
Mermaid Birthday Card Sayings
- Have a fin tastic birthday
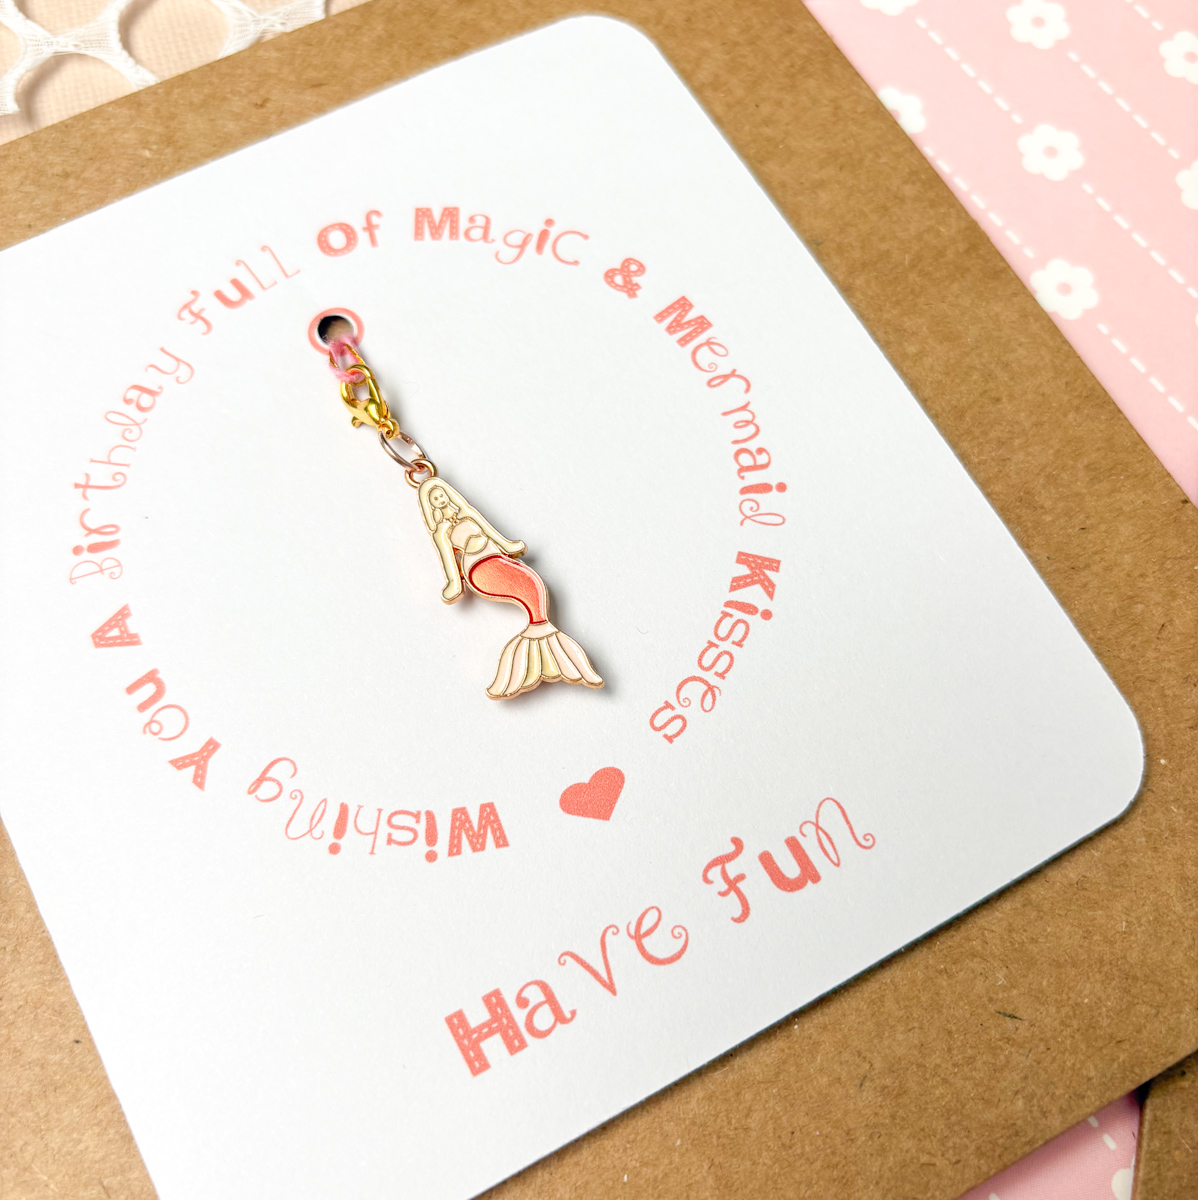
- Wishing you a birthday full of magic and mermaid kisses
- Hope your birthday makes a big splash
- Another year older, another year mer mazing
- Make a wish upon a starfish
- Birthday wishes from under the sea
- Hope your birthday is simply o fish al

Mermaid Friendship and Love Sayings
- Friends are the pearls of life
- You’re my favourite mermaid
- Every mermaid needs her pod
- You’re the pearl to my oyster
- Life is better with a mermaid friend
- You make my heart splash
Step by Step: How to Design Your Mermaid Charm Card in Cricut Design Space
1: Start a Blank Project and Add Your Text
Open a blank project in Cricut Design Space and add a text box. See above for ideas of mermaid quotes and sayings, so if you’re making a mermaid card, you can pick a phrase straight from that list rather than starting from scratch.
2: Add Your Card Shape
Add a shape for your card base. I went for a square with a rounded corner, then dragged it to get the exact shape I wanted, without worrying too much about sizing at this stage. Change the shape to white, then head to the bottom right corner and change the background colour so you can see your design clearly. I used grey, but any colour works.

3: Choose a Font and Curve Your Text
Go into the font selection bar and search free fonts, then filter by decorative. There are so many pretty free fonts to scroll through. I chose one called Mini Monograms because it suited the mermaid theme.

Once you’ve chosen your font, change it to Print Then Cut. Then go to the effects menu and choose curve, so your text curves round into a circle that almost meets at the bottom. This creates a lovely frame shape for your design.

4: Layer in Your Second Line of Text
Add a second text box, which will automatically pick up the same font. I typed a birthday message to sit at the bottom of the circle. Choose your colour here too, and make sure the text is set to Print Then Cut, because colours are always softer once printed and cut compared to how they look on screen. A colour that looks quite harsh in Design Space often looks much softer and more subtle once it’s printed.

5: Add a Decorative Heart or Motif
Find a heart shape in the shapes menu and place it between your two lines of text, facing the right way up. This finishes off the design nicely. Change it to Print Then Cut and match the colour to the rest of your design. Once everything is in place, select all and flatten your design.
6: Size Your Card to Fit Your Charm
Before finishing your design, measure your charm. Mine was around two inches long, so I sized my card at roughly four inches wide by four and a half inches deep, slightly oblong, so the charm would sit perfectly in the middle.
A handy trick here is to add a temporary shape, such as a pennant, sized to match your charm’s length. Use it as a guide to position your text and motifs around, then delete it once everything lines up. This means that when you come to attach your real charm later, it slots into exactly the right spot every time.

7: Add a Hole and a Frame
Use a small circle sized to your pennant guide to mark where your hole will be, so you know where to thread your ribbon or string later. Slice this out of your design.
For a finishing touch, add an offset around a circle to create a frame effect. Slice the offset out, position it on your card, and colour it to match your design. This small detail adds a lovely professional finish. If I made this again, I’d add an offset frame around the entire card edge too.

8: Save Your Card as a Template
Once your design is complete, select all and flatten. This is the point where I’d recommend saving your project as a template. That way, if you buy a box of charms in a new theme, whether that’s Christmas, football or something else entirely, you can open your saved file, swap the wording, and you have a brand new card ready to go in minutes.
How to Print and Cut Your Mermaid Card on a Cricut Joy
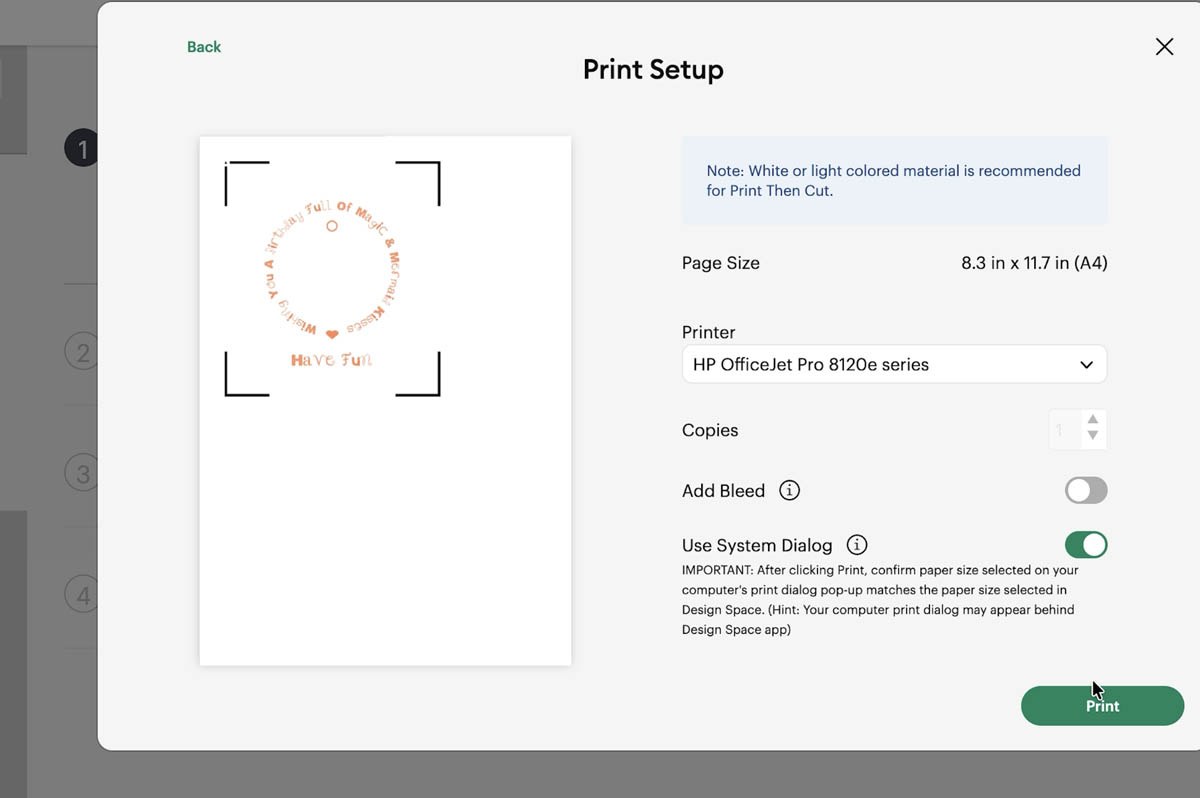
Once your design is ready, click Make It to review your artwork, then click next. This takes you through to the print screen. Select your printer, remove bleed, use system dialog, and choose your best quality print setting.
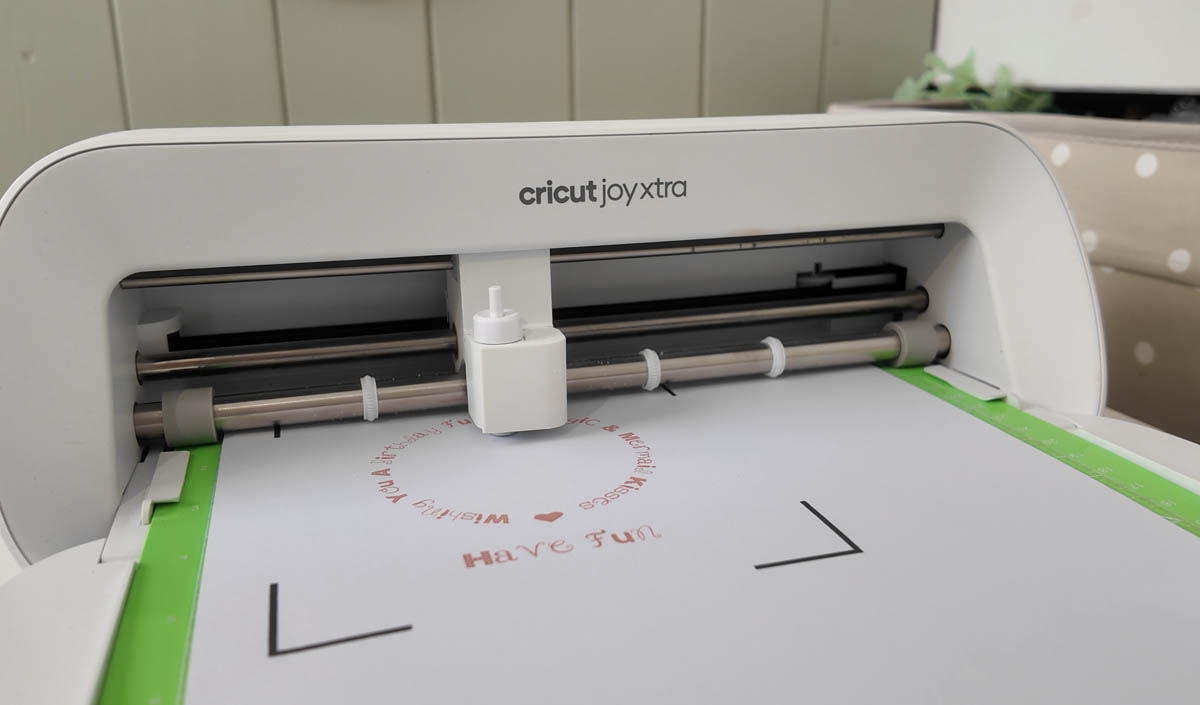
Load your printed sheet onto your Cricut mat, making sure it’s facing the correct direction so the machine can read it. On the Cricut Joy, select heavy cardstock, or default if you’re using a lighter card, then send it to cut.
One tip I’d pass on is to print several card fronts onto one sheet rather than just one at a time. It saves on cardstock and means less wastage.
How to Attach Your Mermaid Charm to Your Card
This is the part that makes the card, so it’s worth taking a little time over it.
- Take your charm and a jump ring from your attachment kit.
- Using a pair of jewellery pliers, gently open the jump ring just enough to slot the charm on. You don’t want to open it too wide, or it becomes harder to close neatly.
- Hook your charm onto the ring, then hook the ring through your card.
- Close the ring back up. As long as you haven’t over opened it, this closes easily.
- Secure the ring in place at the back of the card using tape or a sticky strip.
- Attach the card front to the card using sticky pad strips.
- If your charm still moves around a little, add a small foam sticky pad to the back of the charm to hold it snug against the card front. This is especially useful if the cards will be handled at a craft fair or displayed on a shelf.
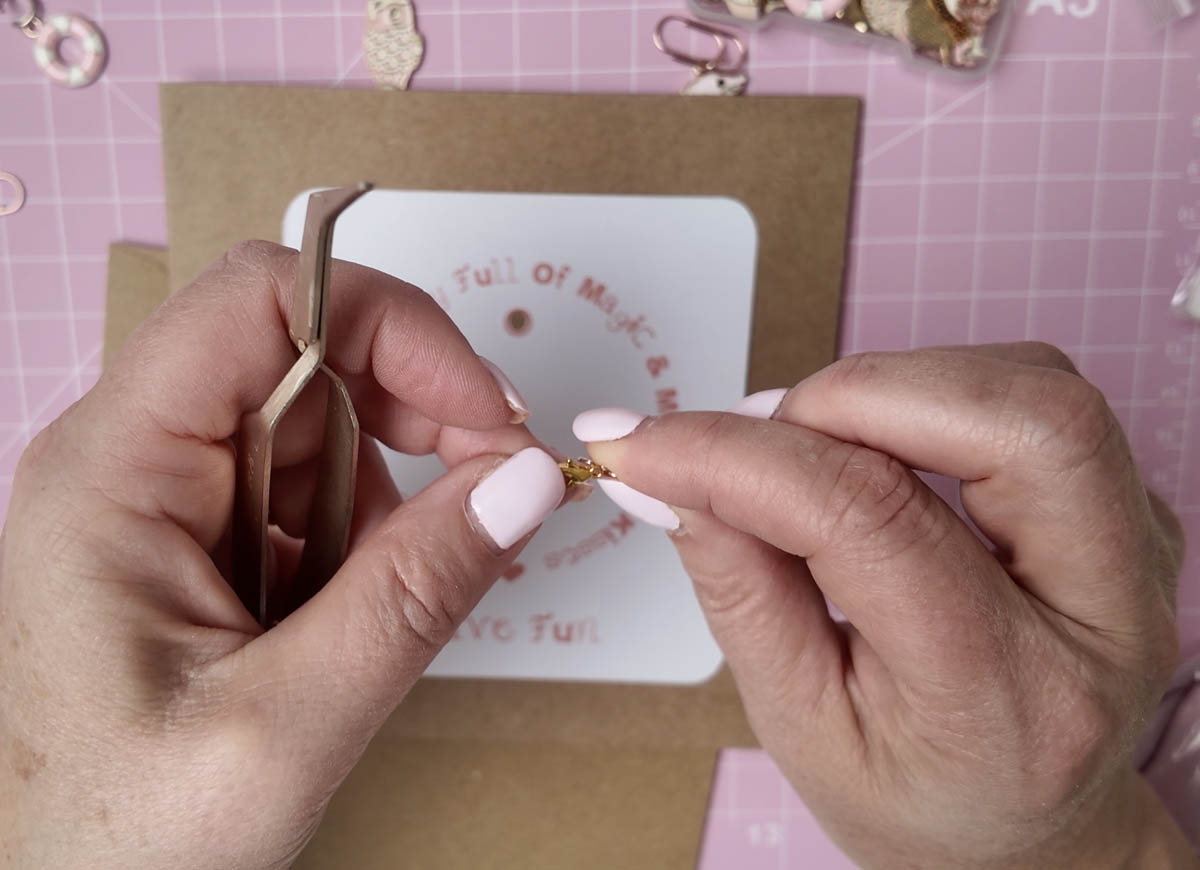

A lesson I learned the first time I made these is to hook the charm onto the card before you tape it down, not after. It makes the positioning far more accurate, and stops the charm sitting off to one side on the back of the card.
Because printable cardstock isn’t always the thickest, you may find you need a few sticky pads underneath to mount your design with a bit of dimension, which also helps it feel more special when it’s opened.
Why I Love This Project
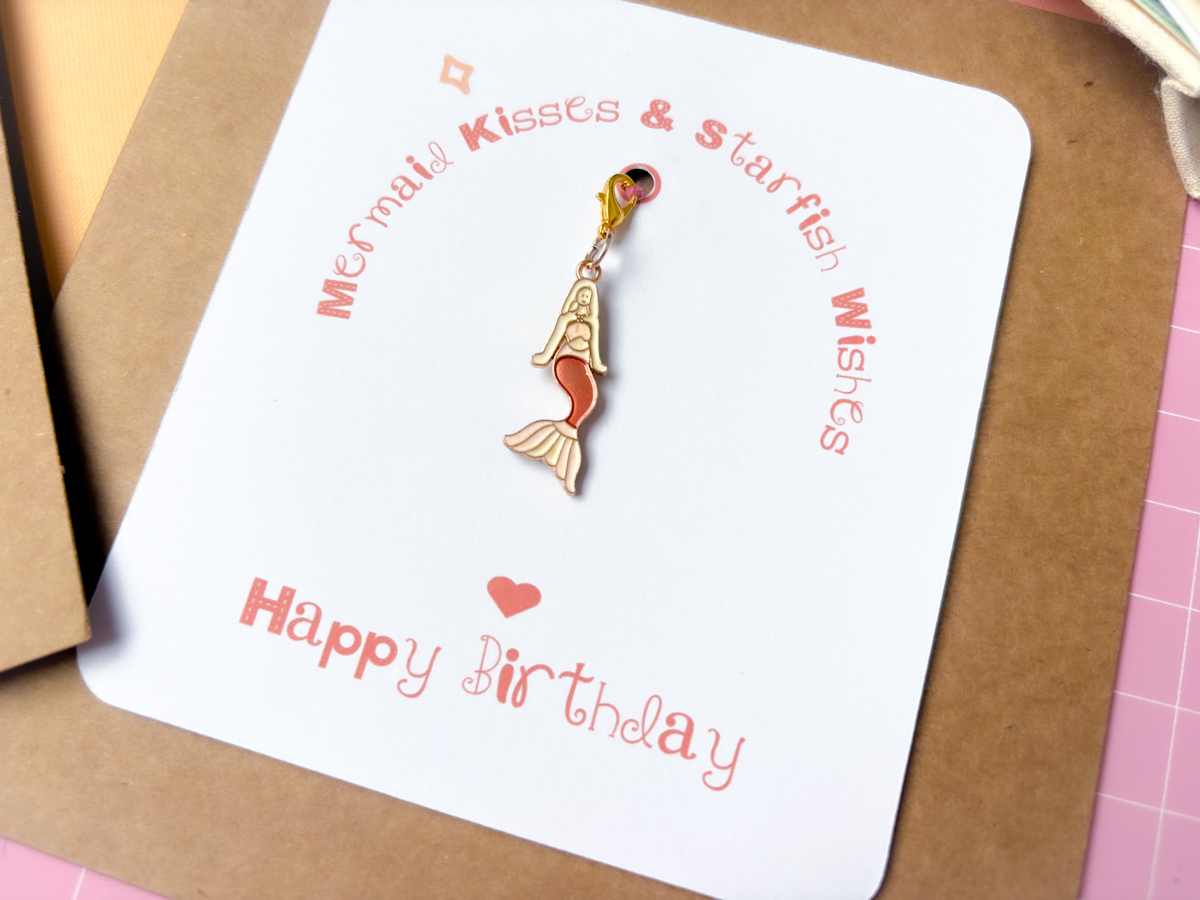
I’m genuinely obsessed with these cards. They’re understated, they’re beautiful, and the charms themselves are adorable. What I love most is that this isn’t just a card, it’s a small gift too. The charm clips off and can be worn or added to a keyring, so it becomes something the person can keep.
For me, that’s what good handmade cards are about. It’s not just about the card itself, it’s about creating something that lasts a little longer than a normal card would, whether that’s a charm, a coaster, or anything with a life beyond the envelope.
This is such a versatile project too. You could recreate this exact process for Christmas charm cards, football charm cards, or any theme you can find a charm pack for, which makes it a brilliant one to have in your craft toolkit if you sell at craft fairs or run an online shop.