
Whether you have just got your Cricut or you have had it a while and want an easy win. You are going to love this project. I have created a free baby pram SVG for you, and in this tutorial, I will walk you through exactly how to upload it into Cricut Design Space, cut it, and turn it into a beautiful layered baby card. No stress, no complicated steps, just a really satisfying project that looks far more advanced than it actually is.
This card is perfect whether you want to make handmade baby cards for friends and family or create designs to sell as part of your Cricut business. It is simple enough for beginners but polished enough to look professional.
This is a great project for building confidence, especially if you are still getting used to Cricut Design Space. And we have 2 levels. If you are an advanced crafter and want to learn how to make this baby’s pram out of shapes, click the link below and head over to my step-by-step YouTube tutorial.
If you are happy to simply download the files and create the card with my template, then keep reading and I will tell you how it’s done.

This post may contain affiliate links. Which means I may receive a small commission if you click a link and purchase something that I have recommended at no extra cost to you. As an Amazon Associate in the Amazon Services LLC Associates Program , Cricut and Glowforge associate, I earn from qualifying purchases.
What You Will Find Here
How To Make This Baby Card With Your Free Download
Download Your FREE Baby Pram SVG
Before we get started, grab your free file; we’ll use it to create the card. Scroll down to grab your file.

What You Will Need
Let’s get everything ready before we start so you can enjoy the process without stopping halfway through.
- Cricut Maker, Cricut Explore Air, or Cricut Joy Extra
- Weeding Tools
- Brayer
- Green Cutting Mat
- Fine Point Blade
- Cardstock, Silver Glitter Card, Yellow and Pink Cardstock and Peach for the Square Backgrounds
- Sticky Pads
- Glue, I use Cosmic Shimmer Acrylic Glue
- Card Blanks
- White Acrylic Paint Pen
Once you have everything ready, you can move straight into Design Space.
Want To Learn How I Made This Card From Shapes In Cricut Design Space

1: Upload the SVG to Cricut Design Space
This step is simple, and once you have done it a couple of times, it becomes second nature. Open Cricut Design Space, click Upload on the left-hand side. Choose your downloaded SVG files and click Upload, then Add to Canvas.
Your full design will now appear on your canvas with all layers ready to use. These are the layers you should have and the suggested colours.
- Pram Background, I cut this in yellow
- Pram Basinet, again cut in yellow
- Wheels, cut in silver glitter card stock
- 3 hood sections cut in yellow to give the head a textured look
- Hood accent, cut in pink
- Heart, duplicate this by 3 and cut in pink
2. Grab A Square From The Free Shapes Bar
You will need a square for the base of your card. I used a square with rounded corners, but this is totally your choice. Measure the size of your card blank, and the square needs to be slightly smaller.
3: Resize Your Design
Now we need to make sure your design fits your card properly.
- Select the full design and line it all up, adjusting all the layers so they all line up like the picture below.
- Resize to approximately 5 x 5 inches so it fits just inside the square.
- At this point, you can also add text, click the text bar on the left-hand side. Choose your font (I used Love and Beach from Creative Fabrica.
This size works well for a 6 x 6 card and leaves a small border around the edge.

4: Check Your Colours and Layers
This is where you can personalise your design.
- Each part of the pram is already separated into layers
- Assign colours based on your cardstock, see the colours I used above.
Keep it simple. Most colour combinations work beautifully with this design.
5: Click Make It and Cut Your Design
Now it is time to cut your project.
- Click Make It
- Check your mats are sorted by colour
- Load your cardstock onto the mat. I use a green cutting mat; I feel that they are super sticky, require more careful weeding, provide a more secure cut, and last longer.
- Select the correct material settings, select the material, e.g., Glitter Card Stock. Then pressure, I chose more.
- Start cutting
Repeat for each colour layer until all pieces are cut.
6: Prepare Your Cut Pieces
Before assembling, take a moment to organise everything.
- Carefully remove all pieces from the mat
- Keep small pieces safe as they are easy to lose
- Lay everything out so you can see how it fits together
- Use a tape gun with double-sided tape to attach the back square of the card.
This makes the assembly process much easier.

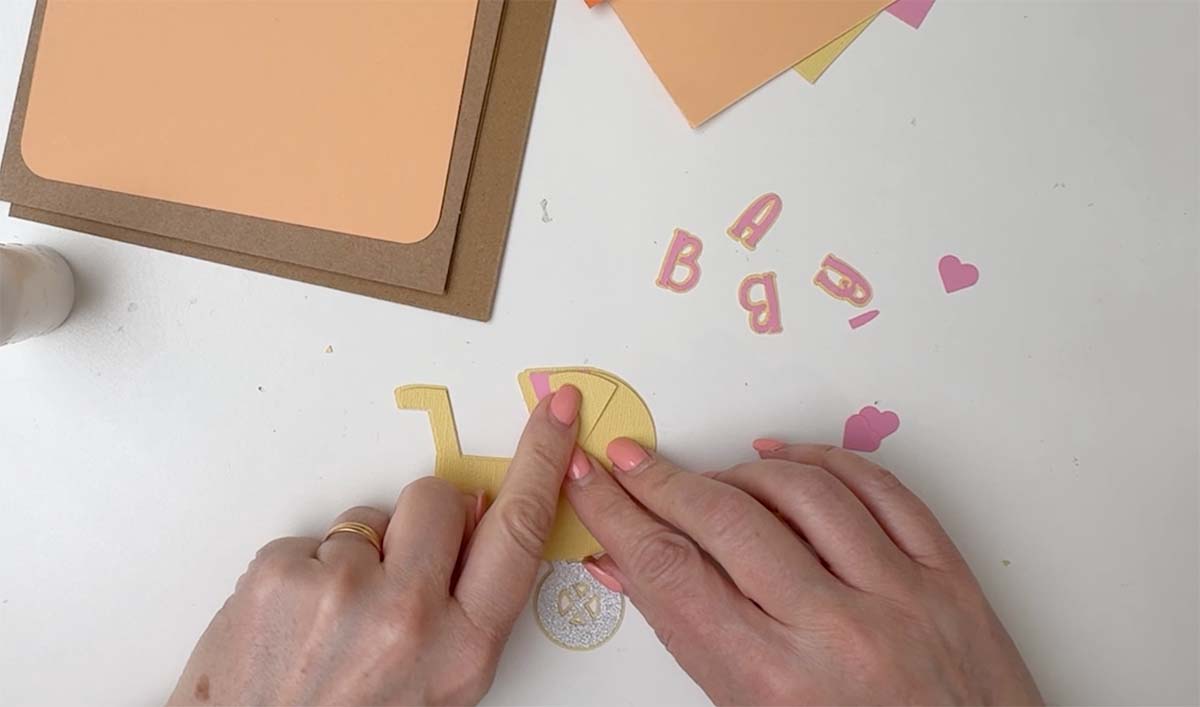
7: Assemble the Baby Pram
Now you can start building your design.
- Glue the pram base together
- Attach the wheels and lower elements
- Add the hood layers from back to front
- Add the hearts
Take your time and adjust pieces as needed to get a clean finish.
8: Add Dimension
This step makes a big difference to the finished look.
- Add foam pads behind the pram
- Attach it to your backing layer
This creates a subtle 3D effect that really lifts the design.

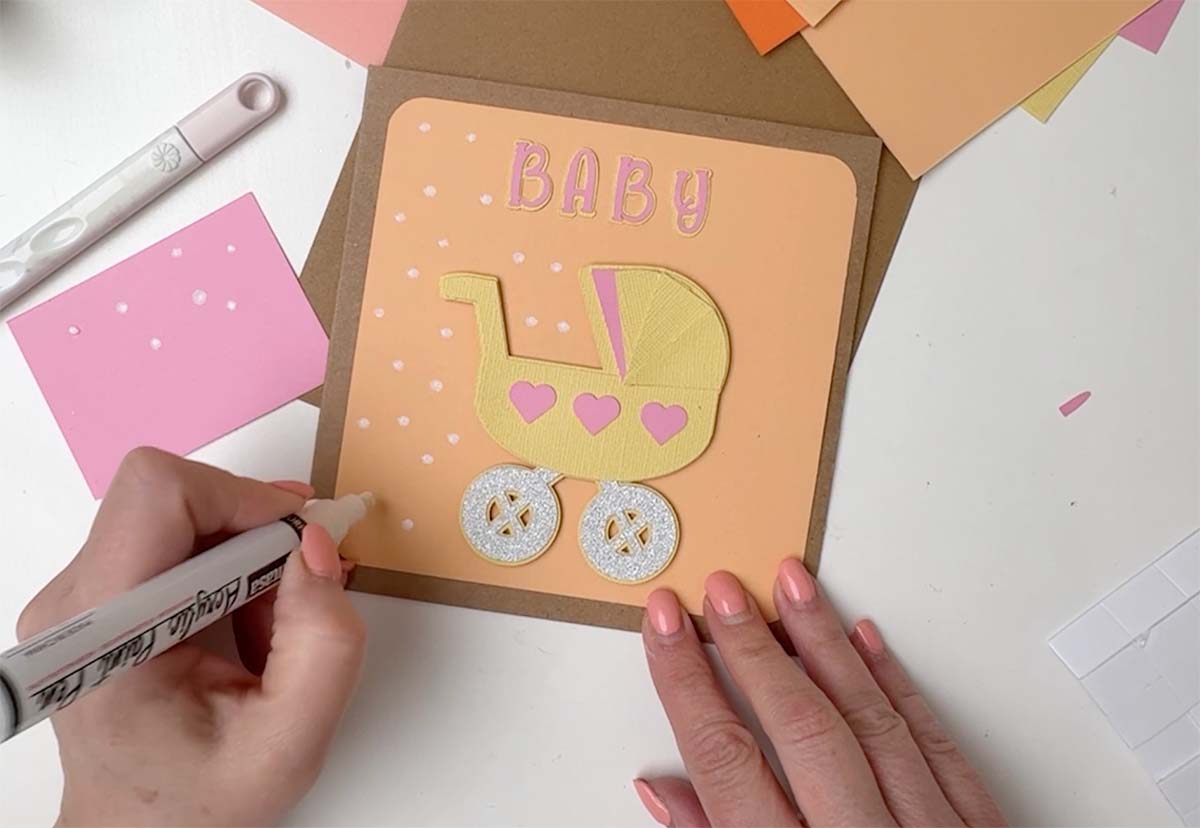
9: Add Final Details
If you want to add extra detail, this is the time.
- Use acrylic paint pens for dots or highlights
- Add small finishing touches
You can keep it simple or add detail depending on your style.
Cricut Beginner Tips
Here are a few simple tips to help you get the best results.
- Do a test cut when using new cardstock
- Use a green cutting mat for cleaner cuts and reverse weed it ( Flip and gently peel the project off the mat
- Keep your blade clean
- Take your time with small pieces
If You Want to use This Free SVG Baby Pram Template
Click here or on the image below to download our baby pram SVG and PNG cut files for free.
If You’re Having Problems?
Check out my troubleshooting page, hopefully it will answer any questions you may have.
Your Finished Cricut Baby Card Made With Our Baby Pram SVG
This is a great project to build your confidence with Cricut Design Space. You now have a beautiful handmade baby card created using your free SVG.
This project is perfect for
- Baby showers
- New baby gifts
- Selling handmade cards
- Practising Cricut layering skills
Once you have completed this card, you will feel much more comfortable working with layered designs and SVG files, and that opens the door to so many more creative projects.
