
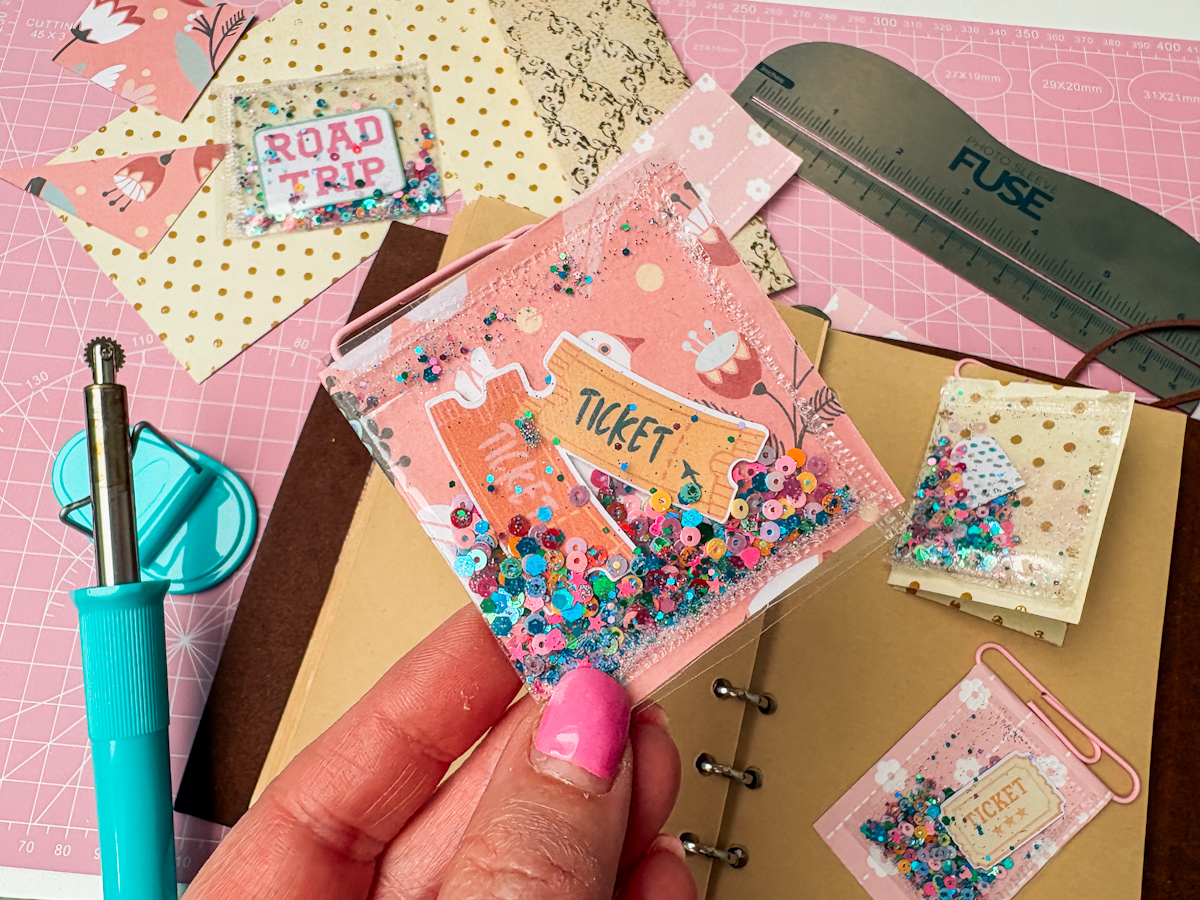
If you make cards, keep a journal or love a good planner, a shaker pocket is one of the most satisfying things you can add to a page. It clips open, it clips shut, and there is always a small thrill in tucking something inside it. In this post I am showing you exactly how I make paperclip shaker pockets using the We R Memory Keepers Fuse Tool, sharing my honest thoughts on the tool itself, and giving you a full shopping list so you can make your own.
These pockets are the ones I use in my American road trip planner, where they hold tickets, notes and little keepsakes from the trip. But the same method works just as well for cards, scrapbook layouts and shaker cake toppers, so keep reading even if planners are not your thing.
This post may contain affiliate links. Which means I may receive a small commission if you click a link and purchase something that I have recommended at no extra cost to yourself. As an amazon, Cricut and Glowforge associate, I earn from qualifying purchases.
What You Will Find Here
What is the We R Memory Keepers Fuse Tool?
The We R Memory Keepers Fuse Tool is a heat tool designed to bond two layers of plastic together, creating a sealed pocket. It comes with two interchangeable tips, a pointed tip for cutting and a serrated tip for fusing, along with a metal ruler and a small stand.
It is a popular choice among scrapbookers and card makers because it lets you build custom shaker pockets and pocket pages without relying on fiddly foam adhesive tabs.
What You Will Need
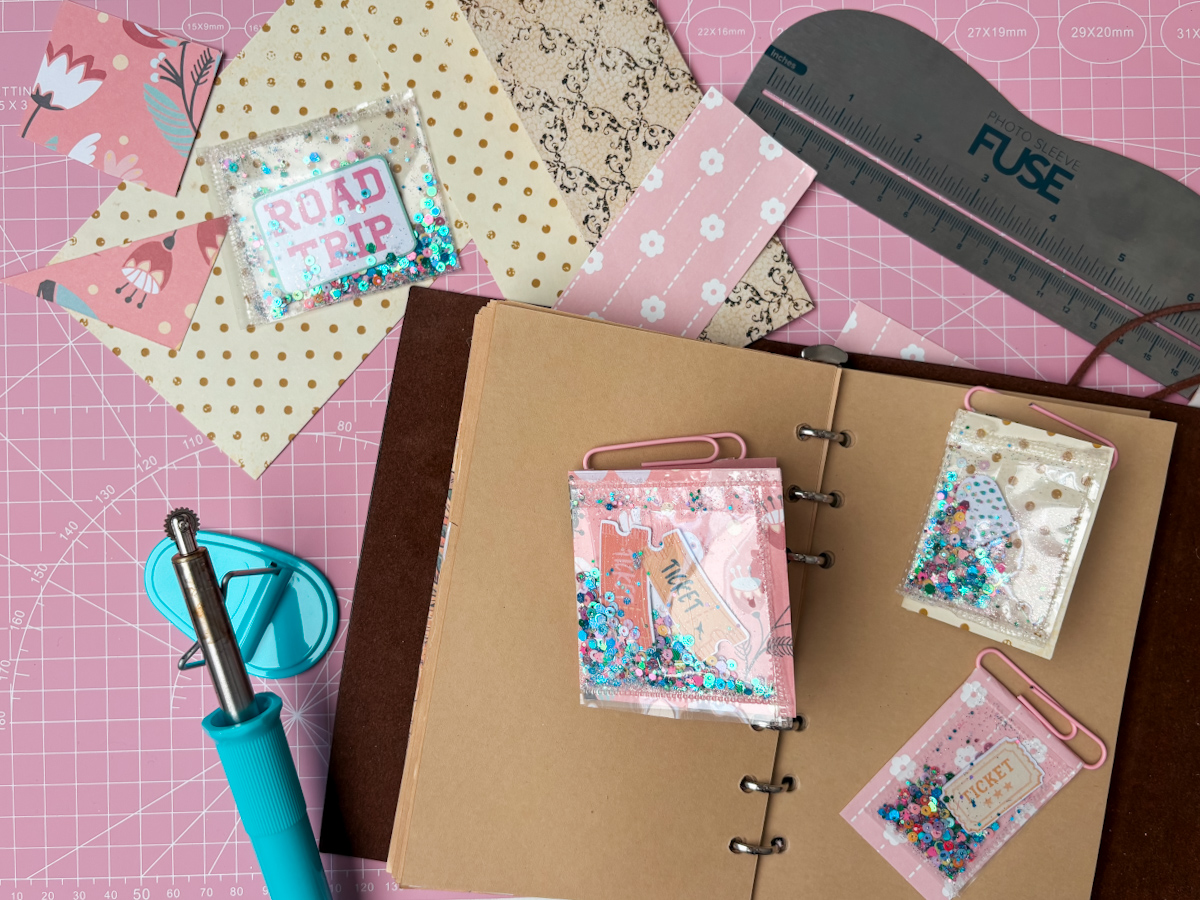
- We R Memory Keepers Fuse Tool (comes with a pointed cutting tip, a serrated fusing tip, a metal ruler, and a stand)
- Heat mat (not included with the tool — bought separately)
- Double-sided colour cardstock (patterned on both sides)
- Scrapbook plastic wallets/sleeves — this is the material that actually works best. Standard stationery plastic wallets are too thin and fragile once fused; acetate doesn’t bond properly either
- A5 Vintage Leather Journal
- Macron Paper Clips
- Craft knife or scissors (for trimming the plastic wallet by hand)
- Cricut portable trimmer
- Fillings/embellishments, Tickets, photos, or ephemera to tuck inside, Sequins
- A small spoon (for adding glitter — and a tip: don’t leave it sitting in the pot, or it tips everywhere!)
- Sticky dot roller (to attach the finished pocket to your page or planner)
A note on materials. I tried several types of plastic before settling on scrapbook plastic wallets. Standard stationery plastic wallets are too thin, so while they bond well they tear easily. Acetate is too thin as well and does not fuse properly. Thicker scrapbook plastic sleeves give the best balance of a strong bond and a durable finished pocket.

Step by Step: How to Make a Paperclip Shaker Pocket
1. Cut Your Plastic Wallet to Size
Cut a piece of scrapbook plastic wallet roughly double the size of your finished pocket, then fold it in half. This fold becomes the crease along one edge of your pocket.

2. Trim the Pocket Shape
Cut the bottom portion shorter than the back portion. Leaving a longer tab at the back is what allows the paperclip to slide on and hold the pocket shut. Trim just past your guideline on the front layer, then square off the sides.

3. Fit the Paperclip
Slide a paperclip over the longer back tab. This is what creates the opening and closing action of your shaker pocket, and it is what turns a simple plastic pocket into something that feels like a proper little envelope.

4. Warm Up the Fuse Tool
Give the tool around ten minutes to heat up before you start. You will notice a distinct burning smell once it is ready to use. This sounds odd but it is genuinely the easiest way to know it has reached temperature, since the tool has no on screen setting to tell you.

5. Fuse Your Line
Lay the metal ruler along the line you want to seal, then run the fusing tip firmly back and forth along it. You need a reasonably heavy hand here. Go slowly and check your seal by giving the pocket a gentle shake. If nothing falls out, it is properly fused.
6. Watch Your Timing
This is the step that takes the most practice. If the tool overheats, it will melt straight through the plastic instead of sealing it. If it has not warmed up enough, the layers will not bond at all. There is a genuine sweet spot, and the only way to find it is by practising on scrap plastic first.
7. Add a Second Pocket Layer
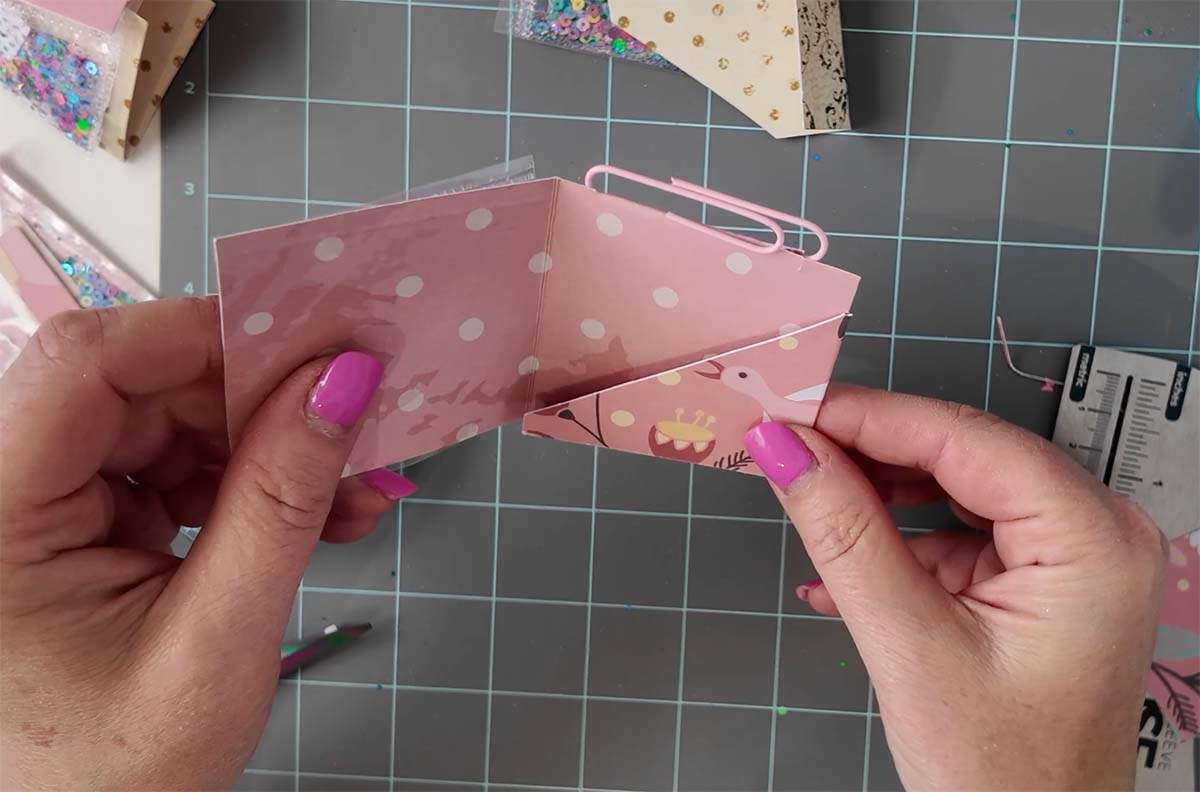
For an opening pocket with storage inside, cut a second smaller pocket from the reverse pattern side of your cardstock and fuse it to the inside of your main pocket. This gives you somewhere to slot in tickets, notes or photos, and it is the detail that makes these pockets genuinely useful rather than just decorative.

8. Fill and Attach
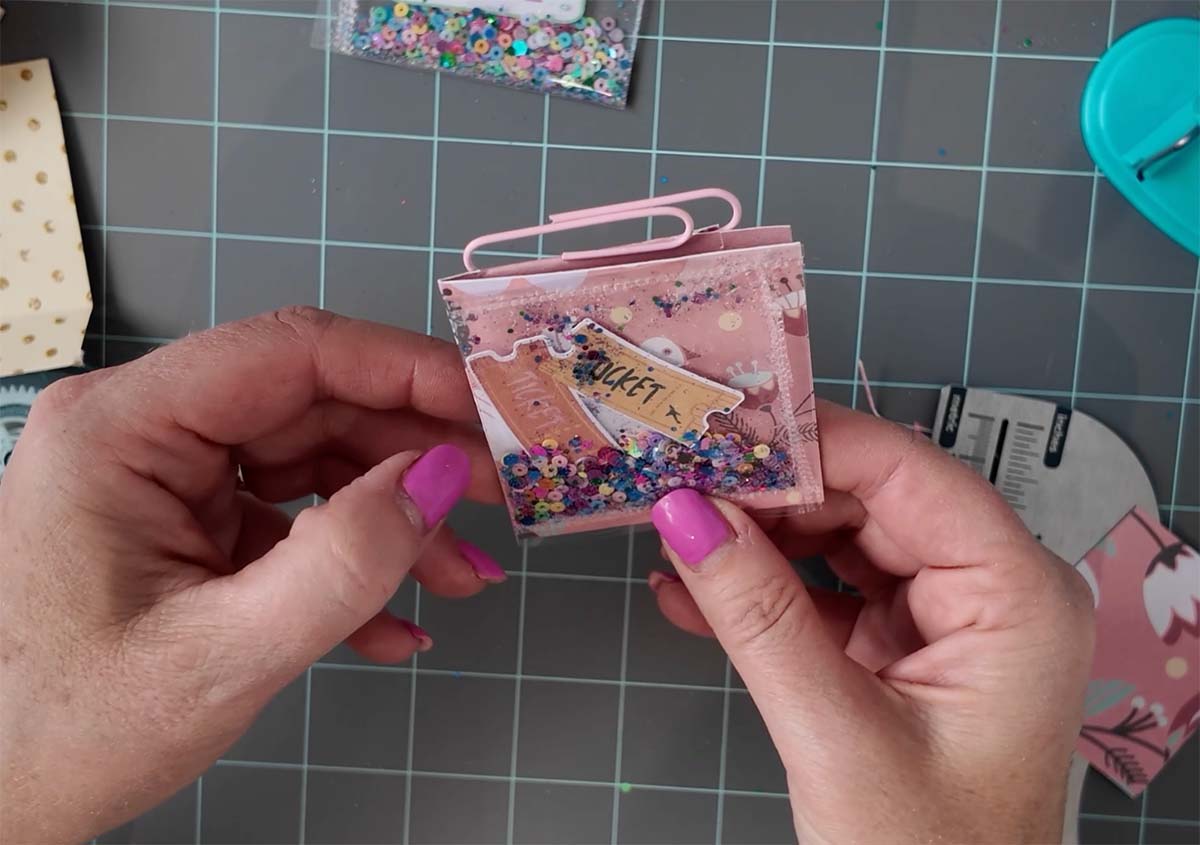
Once your pocket is fused and cooled, fill it with your tickets, ephemera or a pinch of fine glitter for a shaker effect. Use a sticky dot roller to attach the finished piece to your card, journal page or planner insert.
My Honest Thoughts on the We R Memory Keepers Fuse Tool
I bought this tool with my own money, and I want to be upfront that the UK version comes with a stand that is genuinely not great. It is flimsy, it does not feel stable, and I would not want it anywhere near children unsupervised given how hot the tips get.
That said, once you get past the stand, the tool does exactly what it claims to do. It fuses plastic cleanly, it is straightforward once you understand the timing, and it opens up a much easier way to make shaker pockets than fiddling with foam adhesive tabs, which I have never got on with.
The price sits at £36.99, and whether that feels worth it depends on how often you will use it. If you make shaker cards, shaker cake toppers or pocket-style planner inserts regularly, it earns its place on your desk. If it is a one-off project, it is a harder sell.
In short, this is a tool that could be better than it is, particularly with that stand, but it does the job well enough that I reach for it often.
Ways to Use Your Shaker Pockets
- Clip them into planner or journal pages to hold tickets and notes
- Use them on Christmas cards, with a clip on message that comes off to reveal a small money wallet underneath
- Make shaker cake toppers without relying on foam tabs
- Sell finished cards or toppers at craft fairs
Watch the Step-by-Step Video Tutorial Here
Frequently Asked Questions
What plastic works best with the We R Memory Keepers Fuse Tool? Scrapbook plastic wallets give the best results. They are thick enough to bond securely without tearing. Thin stationery plastic wallets and acetate are not recommended, as they either tear easily or fail to fuse properly.
How do I know when the Fuse Tool is ready to use? You will notice a strong burning smell once the tool has reached temperature. There is no digital display, so this is the most reliable way to judge it is ready.
Why did my plastic melt through instead of sealing? This usually means the tool has overheated. There is a limited window where the temperature is correct for fusing rather than melting, so practise on a scrap piece of plastic first to get a feel for the timing.
Can the We R Memory Keepers Fuse Tool be used for shaker cake toppers? Yes. It is a good alternative to foam adhesive tabs, which can be fiddly to work with, and creates a cleanly sealed shaker pocket.
Is the We R Memory Keepers Fuse Tool safe to use around children? The tips get very hot and the included stand is not especially stable, so it is best used with adult supervision only and kept well away from young children while in use.
Cute Shaker Paper Clip Pockets For Journals
Paperclip shaker pockets are a simple project with a genuinely lovely payoff, and the We R Memory Keepers Fuse Tool makes them achievable even if you have never fused plastic before. The stand lets it down, and you do need a bit of practice to nail the timing, but once you have made a couple, the process becomes second nature.
If you give this a go, I would love to see how yours turns out, and if you have your own tips for using the Fuse Tool, share them in the comments. You can also watch the full video tutorial and see the rest of the American road trip planner series linked on the channel.
