
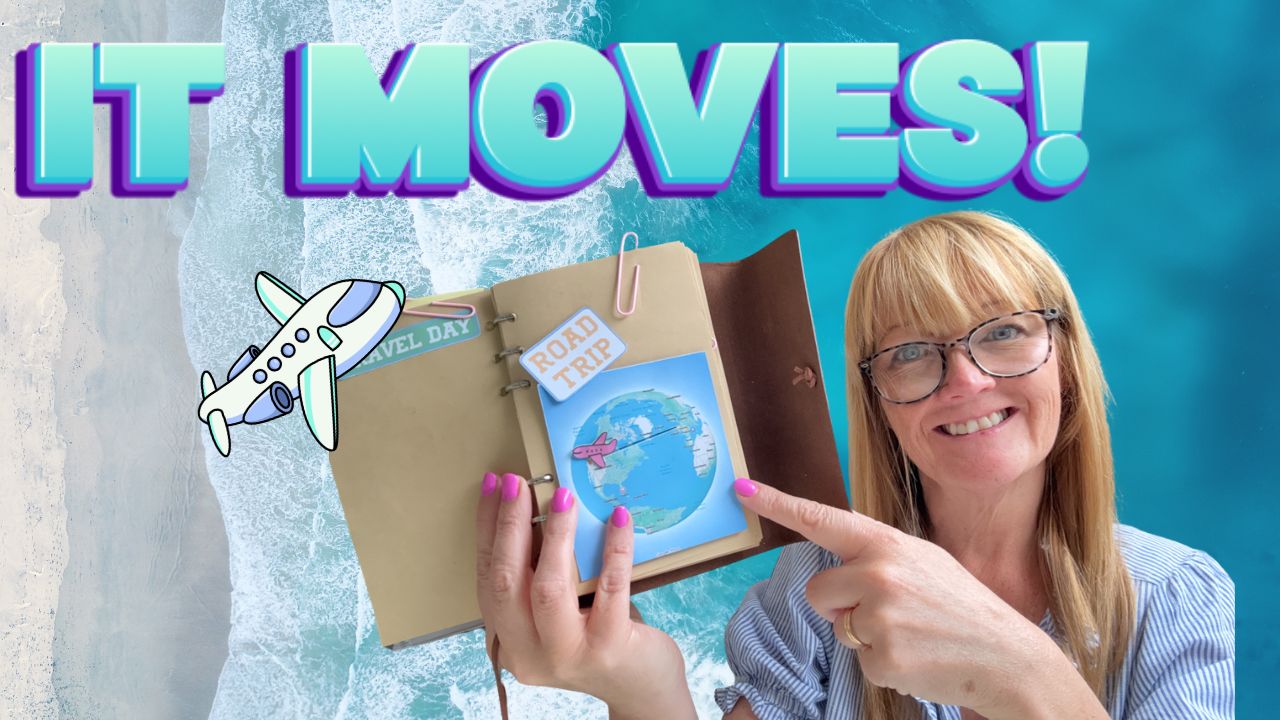
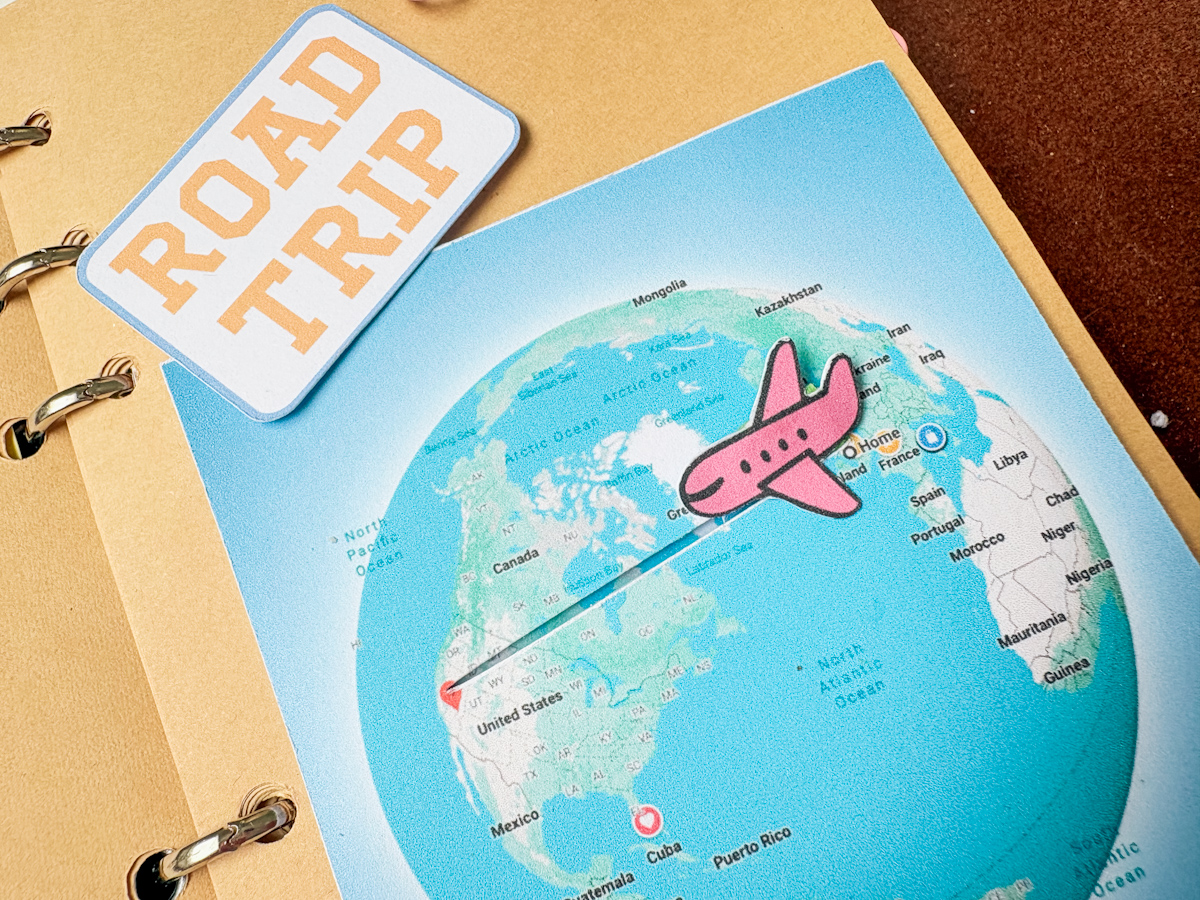
If you love journaling, planning or documenting your holidays, you are going to adore this project. Today I’m showing you exactly how I made a Cricut interactive moving travel map, a gorgeous journal page with a little aeroplane that actually slides across the world from your starting point to your destination.
I made this one to track our travel day for our California road trip, flying from Manchester Airport across to Las Vegas, and it has quickly become one of my favourite ever journal pages. It looks beautiful, it is genuinely interactive, and it is much easier to make than you might think once you know the steps.
In this post I’ll walk you through the whole process from start to finish, from grabbing your map image through to building the sliding mechanism, so you can make your own version for any trip, any planner and any destination.

This post may contain affiliate links. Which means I may receive a small commission if you click a link and purchase something that I have recommended at no extra cost to yourself. As an Amazon, Cricut and Glowforge associate, I earn from qualifying purchases.
What You Will Find Here
How to Make a Cricut Interactive Moving Travel Map for Your Travel Journal
Watch The Video Version
I have also created a step-by-step video which works alongside these instructions.
What You Will Need
Before we get started, here is everything you will need to make your own interactive travel map.
- Cricut machine + Design Space
- Cutting mat or from Amazon
- Basic Cricut tools
- A home printer
- Printable cardstock
- E-Z Runner Grand Refillable Dispenser
- A5 Vintage Leather Journal
- 300 Pieces Double-Sided Foam Sticky Strips
- Macron Paper Clips
Why Make an Interactive Travel Map
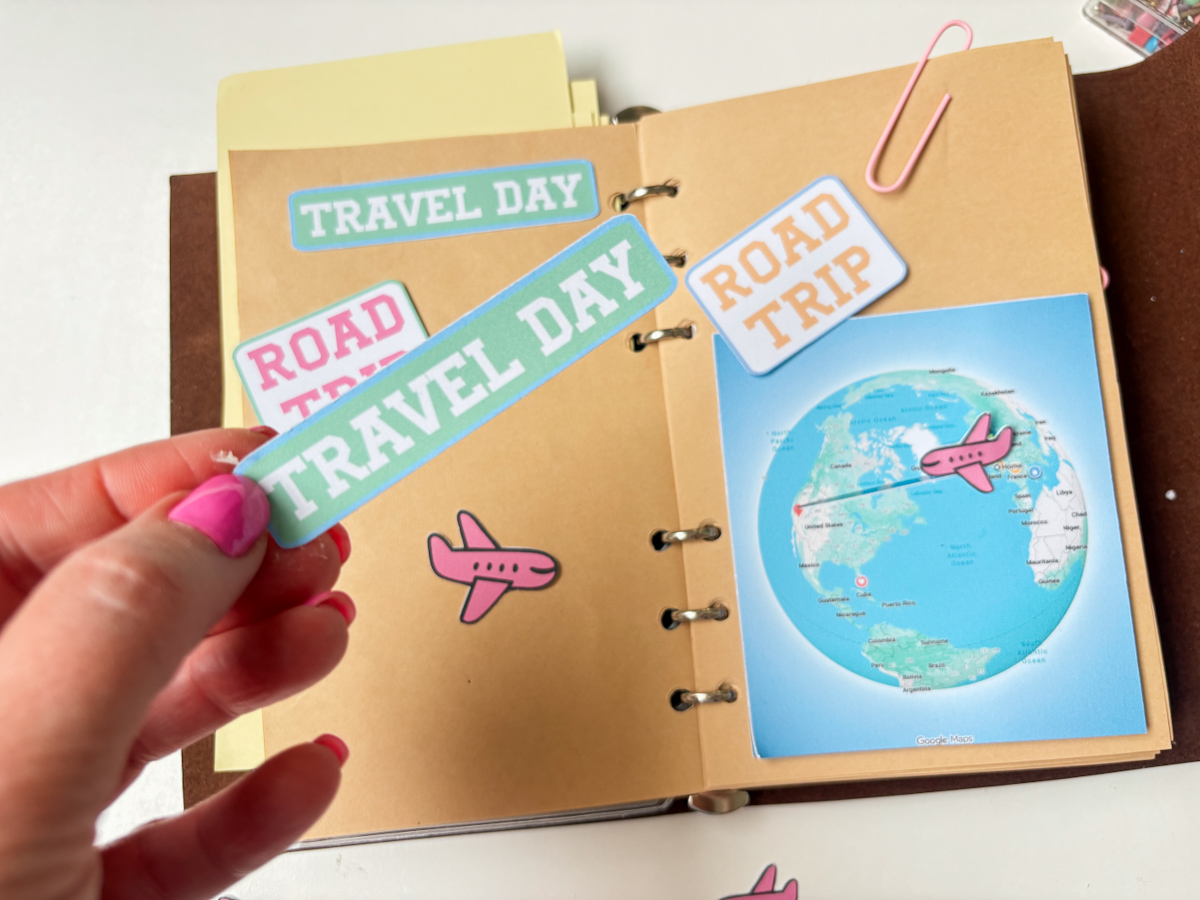
A moving map is such a lovely way to bring a travel journal spread to life. Instead of a flat, static page, you get a little aeroplane you can physically slide from one destination to the next, which makes it perfect for documenting road trips, flights and holidays.
It is not just for journals either. This same technique works beautifully for handmade cards, and it is especially fun for trip reveal cards, where you can slide a little plane or character towards a surprise destination to tell someone where you are taking them.
Step by Step: How to Make Your Cricut Interactive Travel Map
1. Find Your Map on Google Maps
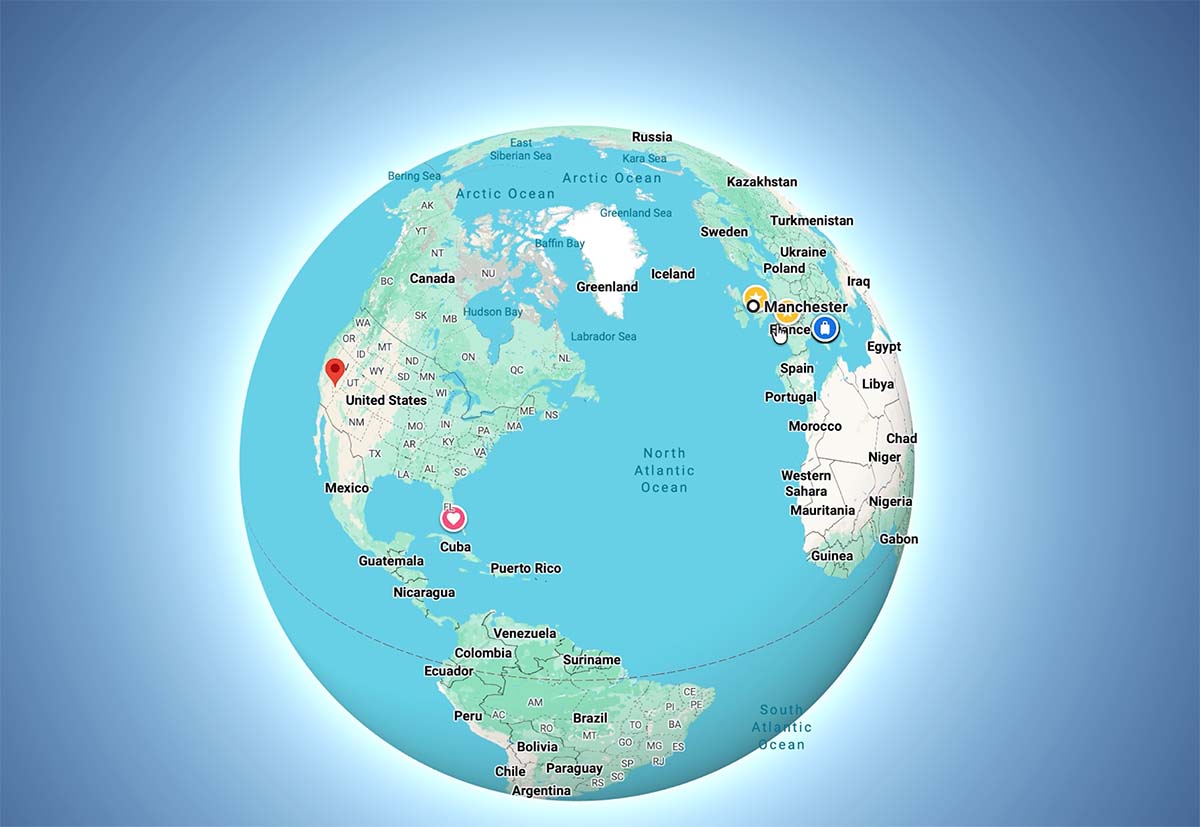
Start by heading to Google and searching for your journey, for example Manchester to Las Vegas. Click on the map tab that appears in your search results.
Switch the view to Earth, then click on the compass icon to remove the directional line so you are left with a clean globe. Hide the side information box and scroll the view out until you have the full globe with a lovely soft glow around the edge. This will look wonderful once it is printed.
Once you are happy with the view, take a screenshot of this section. This screenshot is what we will bring into Canva next.
2. Set Up Your Design in Canva
Open Canva and click Create, then choose an A4 portrait document. This is a good all round size for a journal or planner page.
In the sidebar, go to Uploads and upload your map screenshot. Drag it onto your document and resize it to fill as much of the page as possible. A larger image will give you a higher resolution once it is uploaded into Cricut Design Space.
3. Add a Free Aeroplane Graphic
Go to the Elements tab and search for plane. Choose a free option so you do not need a Canva Pro subscription. Pick one you like the look of.
If your aeroplane is facing the wrong way for your journey, use the flip tool at the top of the screen to turn it around. Then use the colour bar to change it to a shade you love. I went for a soft pink theme.

4. Create Your Slider Pieces
Next you will need two extra shapes to build the moving mechanism.
A circle: This needs to be bigger than your aeroplane and will sit on the back of the page to help the plane slide along the map. Choose a colour that will blend into your background, such as a soft blue or green.
A rectangle: Make this into a long, fairly thick strip, coloured to blend in as well. This piece becomes the bridge that connects your aeroplane to the circle underneath, so make sure it is on the thicker side rather than too thin, as this gives it the strength it needs to work well.
You can also use plain cardstock from your scrap box for this piece instead of printing it, which works just as well.
5. Download and Upload to Cricut Design Space
Once you are happy with your design, click Download. Keeping the background white makes it much easier to remove later, since there is no other white in the design.
Open Cricut Design Space and click Upload, then follow the prompts to bring your Canva file in.
6. Remove the Background
On the upload screen, click Select and use the tool to click on the white background to remove it. Use the eraser tool to tidy up any small marks left behind. Click Next, choose Flat Graphic, then click Upload. This process is free and does not require a Cricut subscription.

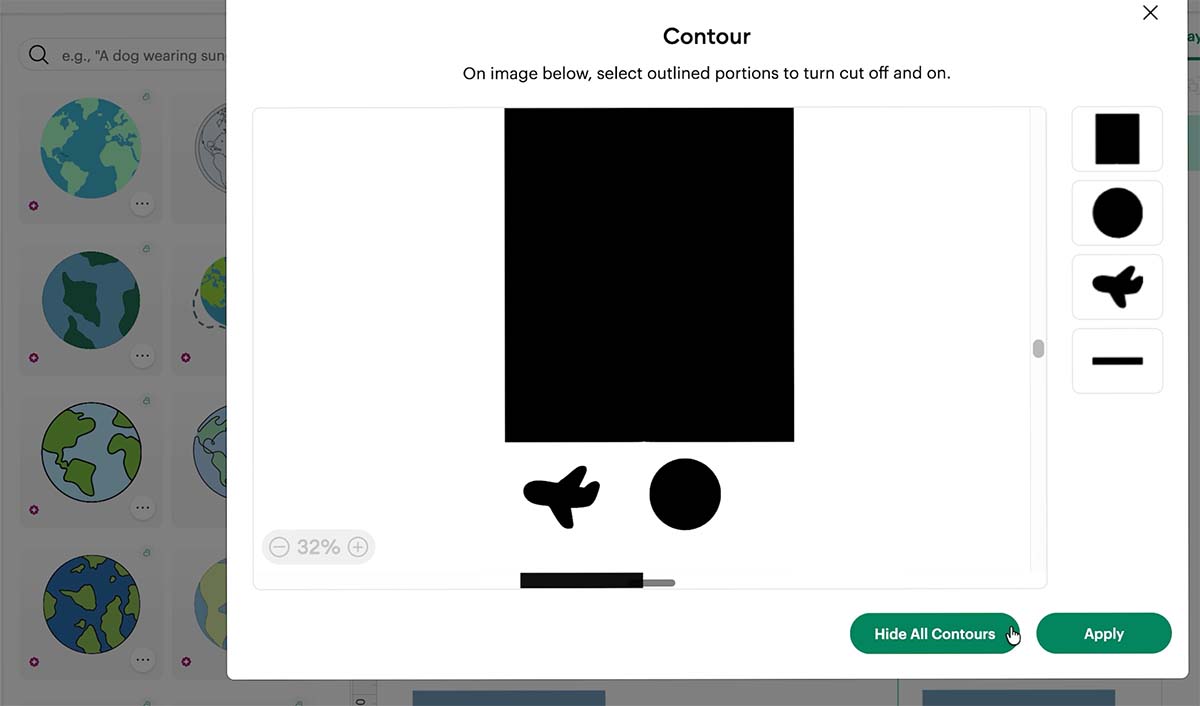
7. Separate Your Images with the Contour Tool
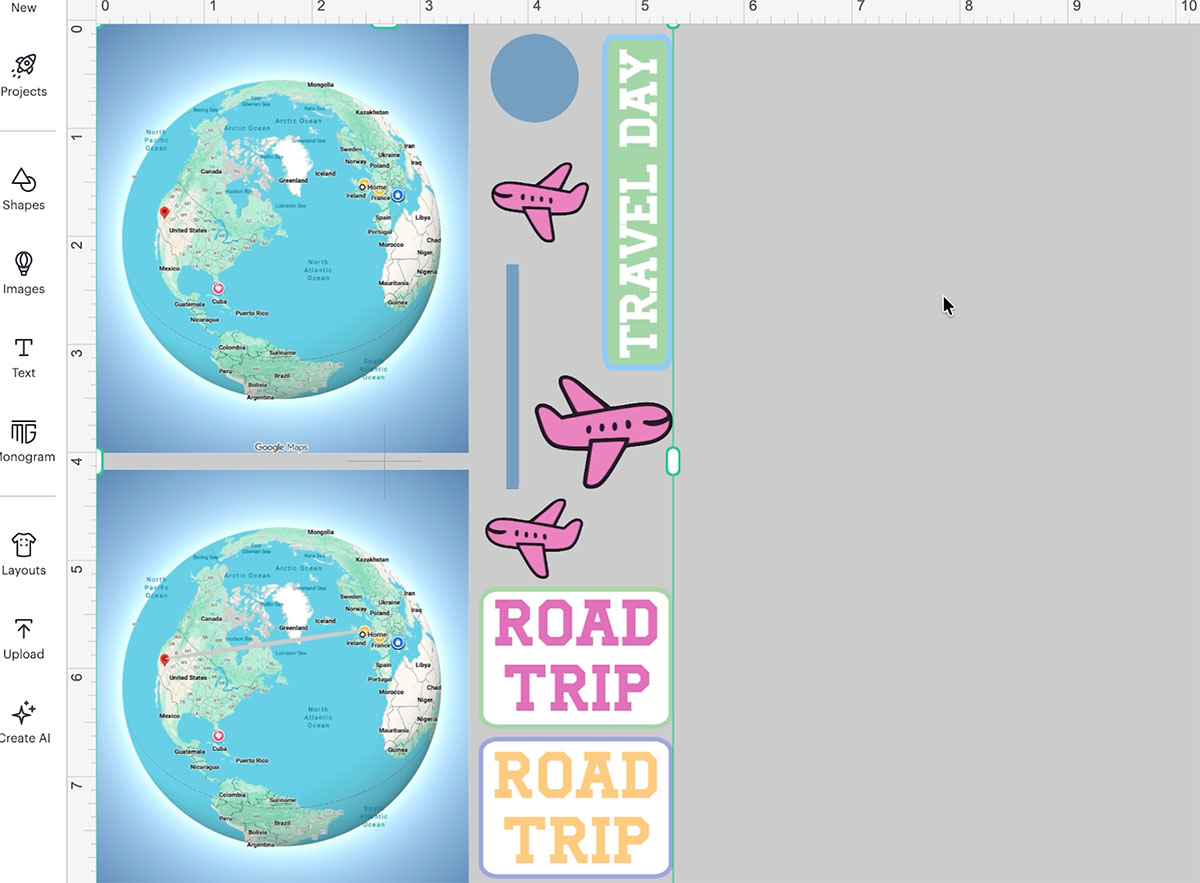
Once your image is in Design Space, duplicate it and use the Contour tool to remove sections you do not need, working through one duplicate at a time until each element, the map, the aeroplane, the circle and the rectangle, is fully separated into its own layer. This is a quick way to work and saves you needing to slice everything by hand.
8. Add Extra Ephemera
While you have your file open, it is worth making a few extra pieces to fill any gaps on your cutting mat and to use elsewhere in your journal.
Use the text tool to type a heading such as Travel Day. Go to the Fonts menu, filter for free fonts, and choose one you like the look of, then adjust the letter spacing so it looks neat.
Rather than cutting individual letters, place your text over a coloured rectangle or banner shape, add a slight offset for a border effect, then select everything and flatten it together. Repeat this for a few extra words such as Road Trip, in a couple of different colourways, so you have some spare ephemera ready to use in your planner.

9. Slice the Sliding Track into Your Map
Duplicate your map layer so you have one complete copy and one to slice. Go to the free shapes menu and choose an oval. Position this oval so it runs between your two destination points on the map, then adjust the size and angle until it sits exactly where you want the plane to travel.
Once it is in place, use the Slice tool to cut the oval shape out of your map. This creates the track your little paper tab will move along.

10. Prepare to Print and Cut
Arrange all of your pieces, checking that everything is sized correctly for your journal or planner and flatten. Click Send to Printer, choose Remove Bleed, and print using your system dialogue box on the best quality setting.
11. Cut Your Pieces
Load your printed sheet onto your Cricut mat, making sure the layout matches what is shown on your screen exactly, since the machine reads the printed guide marks to know where to cut. Set your material to heavy cardstock, then send your project to cut.
12. Build the Sliding Mechanism
This is the fun part where everything comes together.
Take your rectangle strip and fold it to create two gentle bends, so it can flex slightly as it moves. One end of this strip will hold your aeroplane, and the other end attaches underneath to your circle.
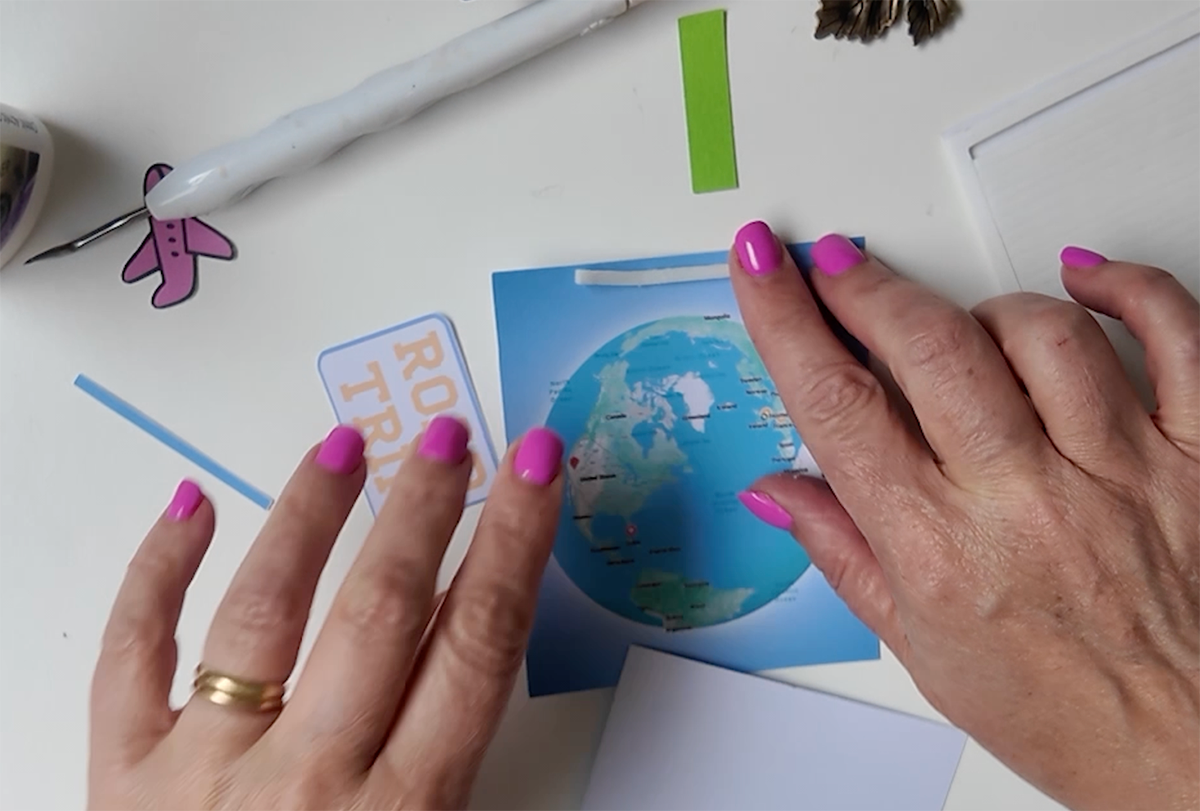
Glue the circle down first, keeping the glue away from the edges so the strip can move freely on top of it. Thread your folded strip through the slotted track in your map so the aeroplane sits on the front of the page and the circle sits behind it, holding everything in place.
Attach your aeroplane to the top of the strip, then use foam adhesive pads on the back of the map layer. This lifts the map slightly away from the page, giving the strip and aeroplane the space they need to slide smoothly.

13. Add It to Your Journal or Planner
Stick your finished map into your travel journal or planner page. Pop your aeroplane into place, and give it a gentle pull along the track to watch it glide from your starting point to your destination.
Ways to Use This Technique
Once you have mastered this method, there are so many ways to use it beyond a travel journal.
- Holiday reveal cards, sliding a little character or aeroplane towards a surprise destination
- Road trip planner pages for each leg of your journey
- Scrapbook layouts documenting a special trip
- Handmade cards for someone who loves to travel
And You Have A Cute Sliding Interactive Map
I hope you have enjoyed learning how to make this Cricut interactive travel map as much as I enjoyed designing it. It is such a fun little project, and there is something really satisfying about watching your own little aeroplane slide across a map you have made yourself.
If you make your own version, I would love to see it and hear where your dream road trip would take you. Do let me know in the comments, and keep an eye out for more travel journal projects coming soon on the channel, including my Hollywood sign journal page.
Happy crafting.
