
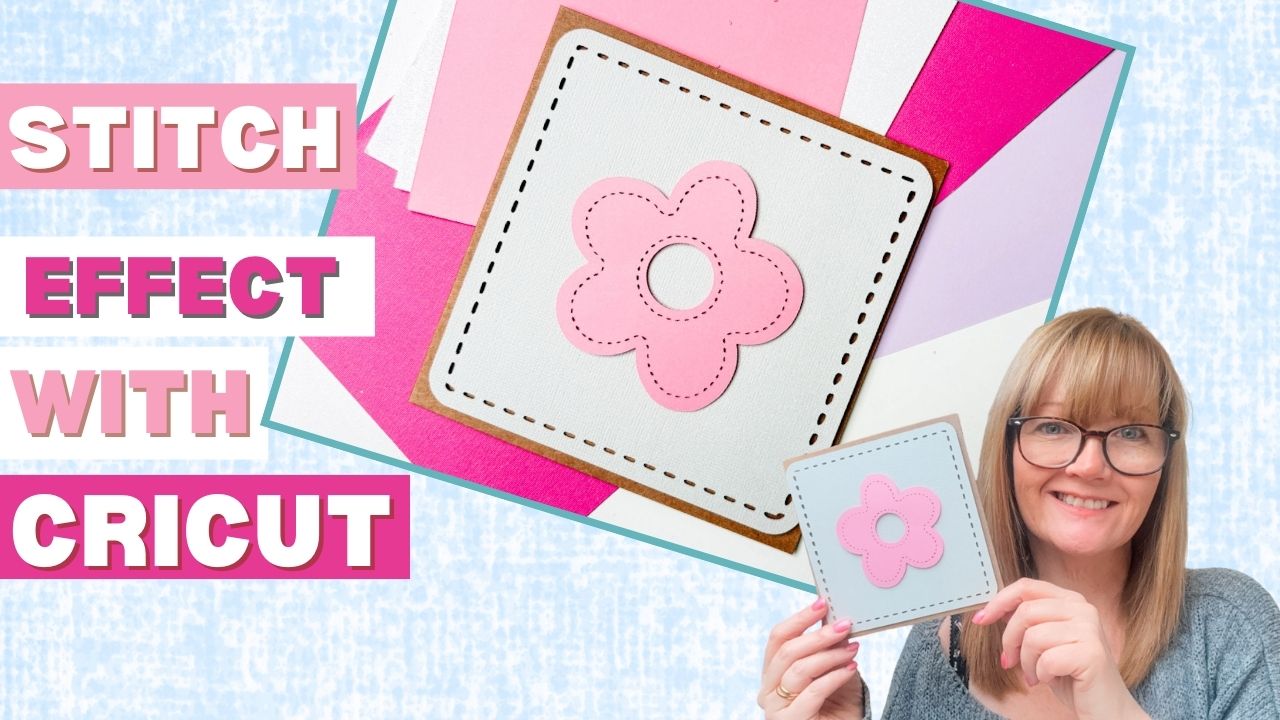
I love learning. new techniques on my Cricut machine, and this one is one of my favourites for a while. If you want to create beautiful stitched paper craft designs with your Cricut, this tutorial is perfect for you. Learning the Cricut stitch technique allows you to add professional-looking details to your cards, paper crafts, and layered projects.
In this step-by-step guide, I will show you how to use Cricut Design Space to create a layered stitched flower card, but this method also works for letters, borders, frames, and more.
Even if you are new to Cricut, this tutorial will help you master the stitched effect and improve your card-making skills.

This post may contain affiliate links. Which means I may receive a small commission if you click a link and purchase something that I have recommended at no extra cost to yourself. As an Amazon, Cricut and Glowforge associate, I earn from qualifying purchases.
What You Will Find Here
Cricut Stitch Technique: Step-by-Step Tutorial for Beginners
What You Need for Cricut Stitched Projects
Before we start, gather these Cricut tools and materials for the perfect stitched project:
- Cricut Joy Xtra or Cricut Maker
- Cricut Design Space (free software)
- Standard Cricut Joy Gripmat or Cricut Maker Mat
- Weeding tool
- Brayer, great to use on older mats that are less sticky
- Card Stock
- Card Blanks
- Sticky Pads
See My Cricut Stitch Video Step-by-Step Tutorial Here
How To Create A Stitch Effect
1 Create Your Shape in Cricut Design Space
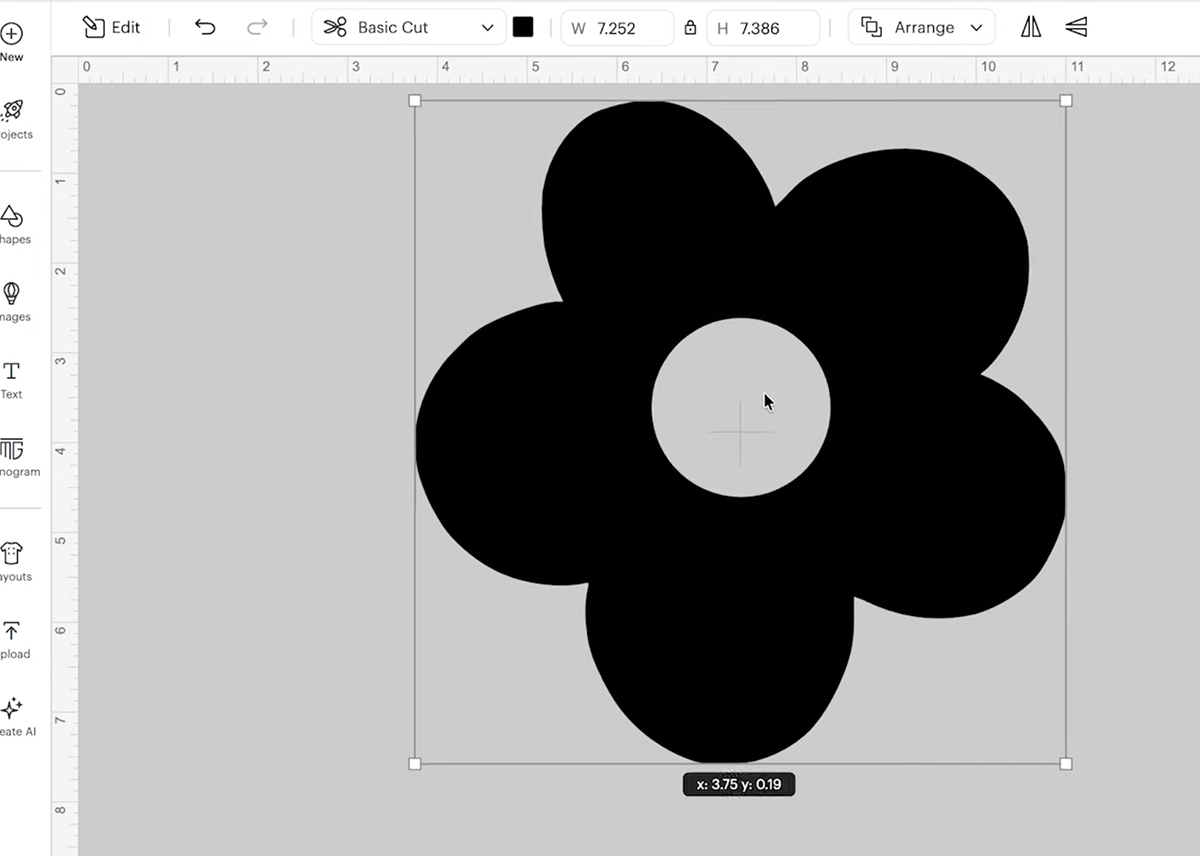
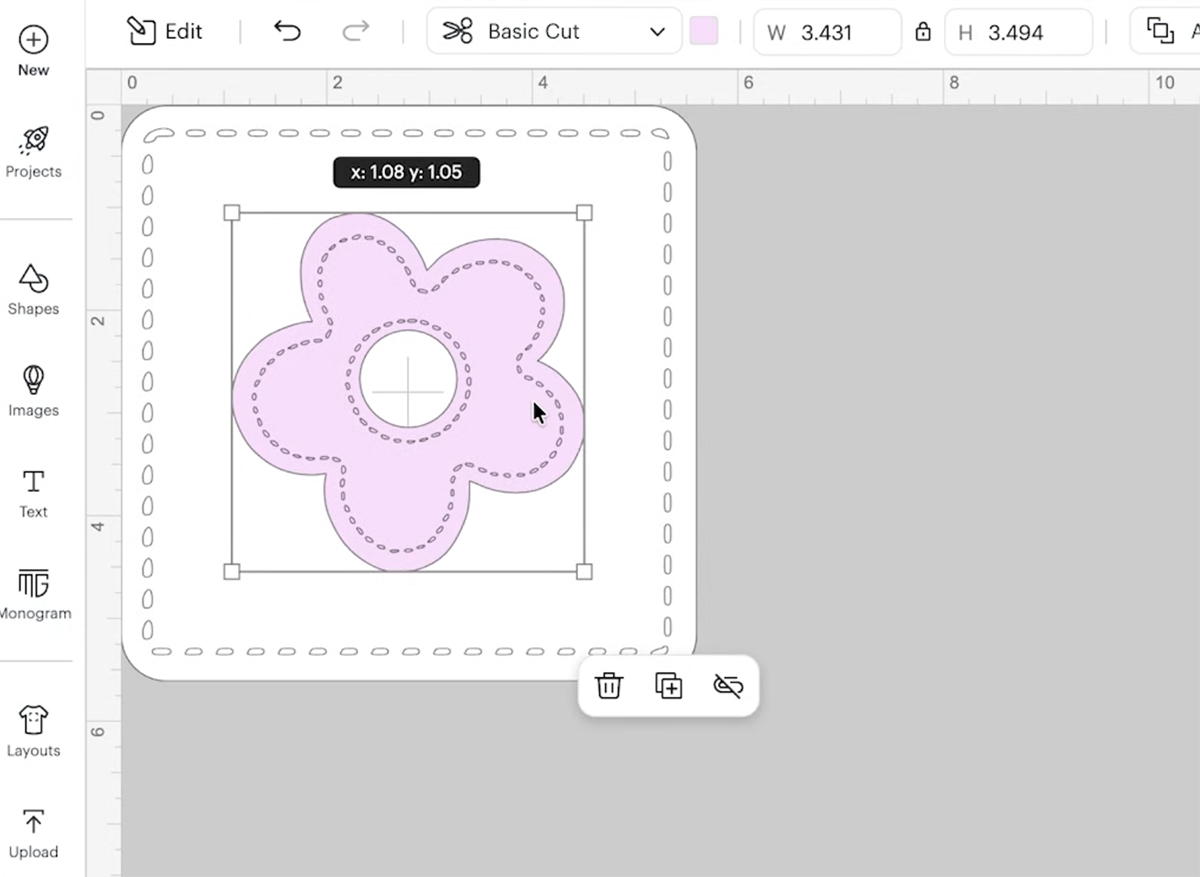
Start by opening Cricut Design Space and selecting a shape to add the stitched effect. For this tutorial, I am using a flower shape for a card, but you can use any shape, like letters, frames, or borders. It’s better if the image is quite simple.
Resize your shape to fit your project. If you are making a card, you will also want a shape to fit the front of your card blank. This needs to be slightly smaller than your card so it sits just inside. Then any image you are adding will sit inside that.
2. Add and Offset
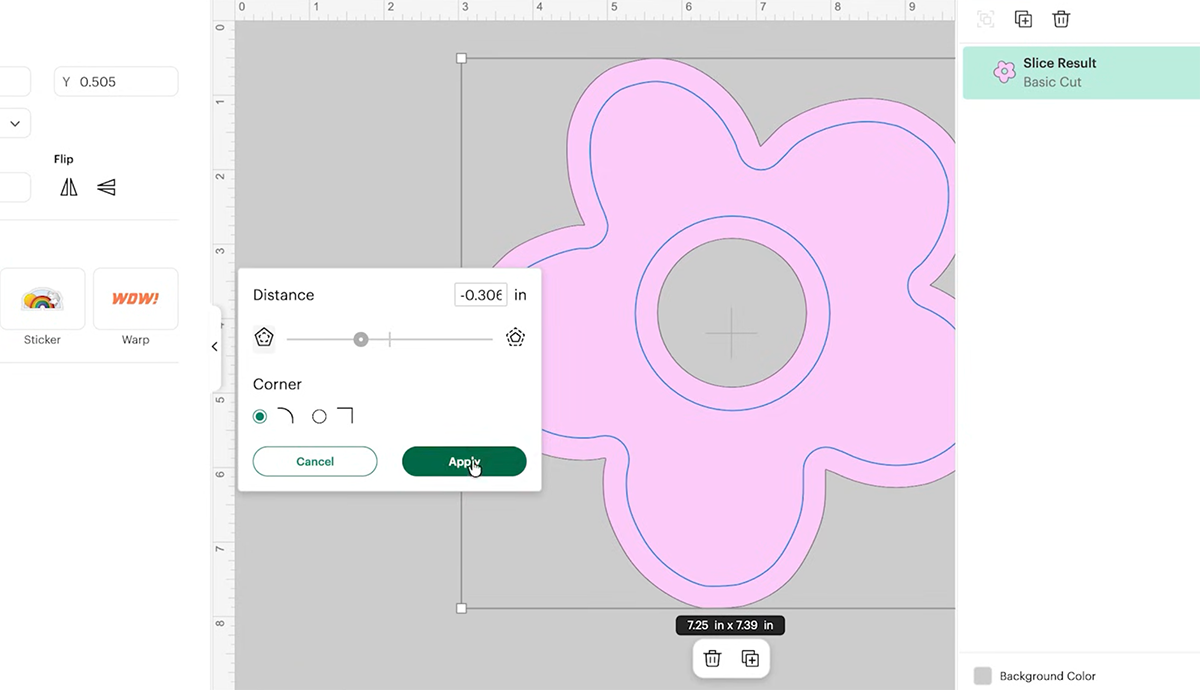
Once you have your shapes, add an offset. Instead of making the images bigger, drag the offset to a negative value, so they sit inside the image or shapes you have chosen. Once you have done this, click done. You will now have an initial shape and background shape for it to sit on. Plus two offset layers that sit just inside your origional shapes or images.
3. Add Score Lines to Create A Stitched Effect in Cricut
Next, click the negative offset layers, then click the cut action and choose the score line to convert your offset layers into a score line layer. These score lines will create the appearance of stitching when cut.

4. Screenshot Your Score Lines and Re-upload as a Cut File Cricut Stitch Layer
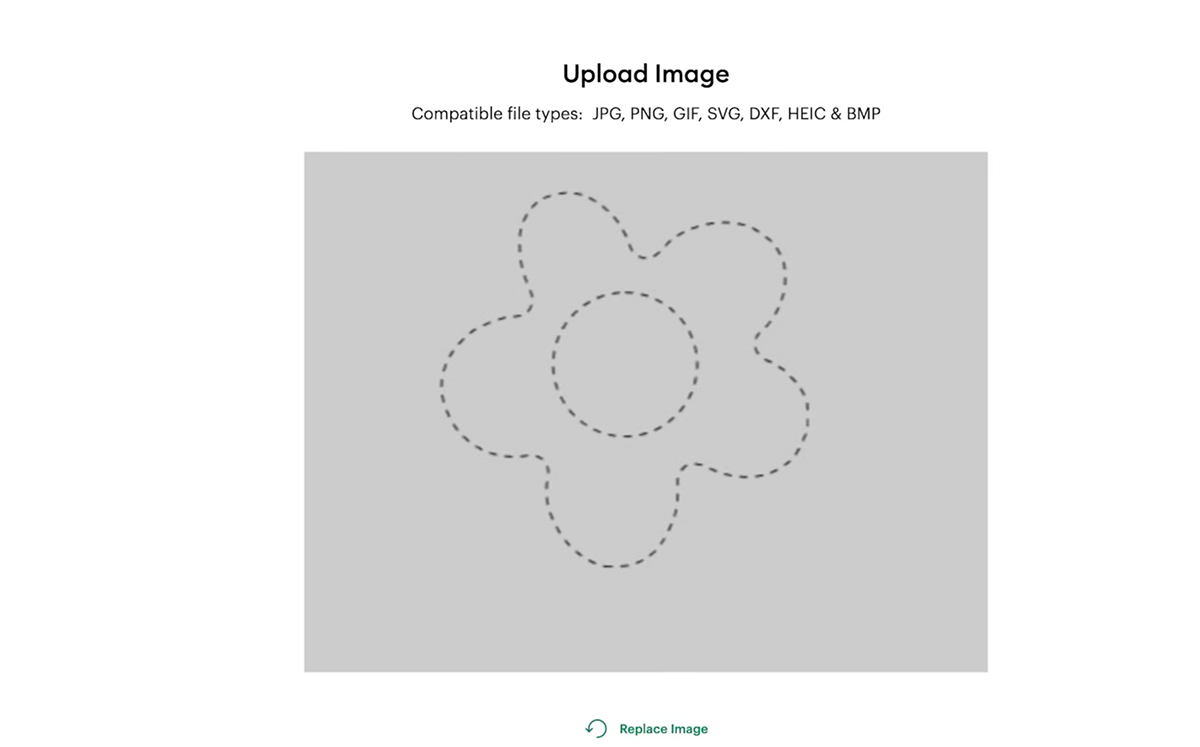
Now, since we want to convert the score lines into a cut layer, we need to take a screenshot. The more you scroll and enlarge your image, the smaller the score lines will become. Scroll out to make your image really small and screenshot it. I find it helps to make your background grey.
To screenshot on a Mac; To take a screenshot on a Mac, use keyboard shortcuts:
Command-Shift-4 to select an area, or Command-Shift-5 for the screenshot menu.
To screenshot on Windows, using keyboard shortcuts: Windows Key + Shift + S for the Snipping Tool (custom area) (copied to clipboard), or Windows Key + PrtScn to automatically save the full screen to your Pictures folder.
5. Re Upload The Score Lines As A Flat Image
You will now need to re-upload your score line screenshot as a cut file. As you upload, click on the background to remove it, and save as a flat image. You must remove the background, or you will upload a solid square. Now size your score cut file to fit just inside the original image.

Use the Attach tool in Cricut Design Space to keep layers in place. Properly layering shapes ensures your stitched details remain aligned during cutting and assembly. Do not weld, as this will remove stitch marks.
6. Prepare Your Mat and Material
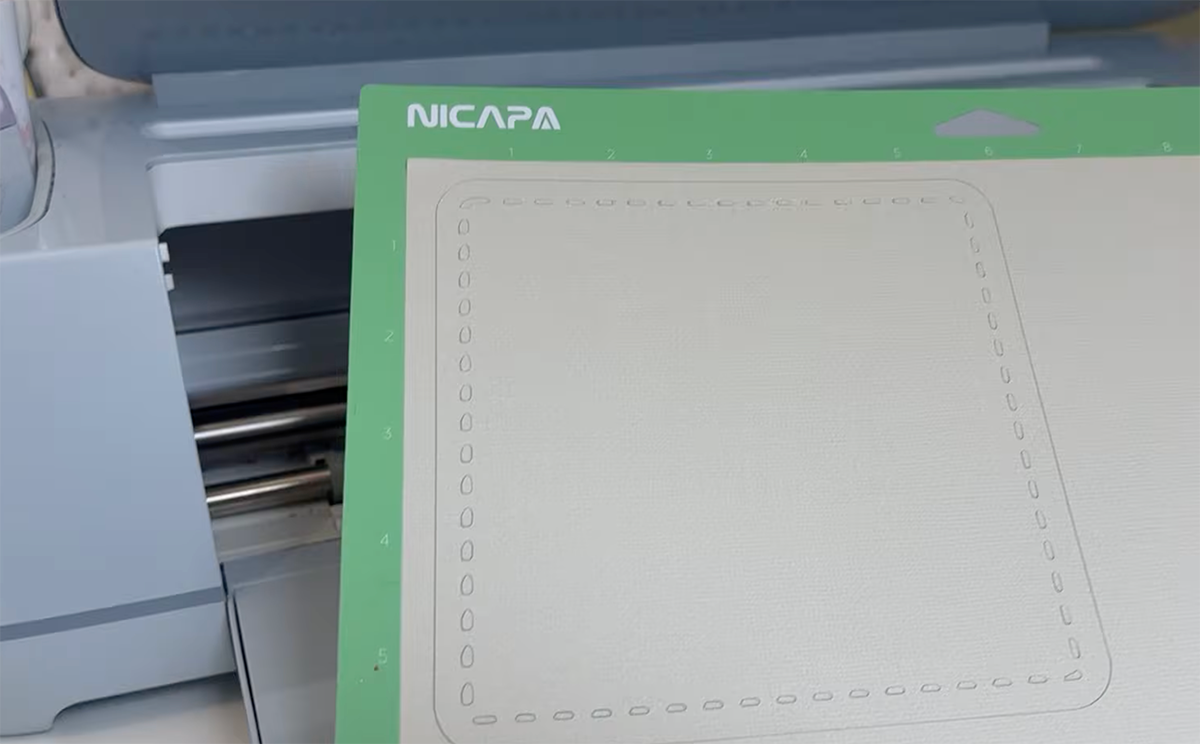
Place your cardstock on a StandardGrip green mat. This mat is ideal for small, detailed pieces and prevents movement during cutting.
Select the correct material settings for cardstock in Design Space. Now send the project to cut, and your Cricut will create crisp score lines that mimic stitching. Using the right mat and tool is essential for perfect Cricut stitched cards. I use heavy card stock setting on more and use a brayer to attach it to the mat.
7. Cut and Assemble Your Stitched Project
Once cut, carefully remove the cardstock from the mat. I find reverse weeding helps, flip the mat over and peel the layers away from the mat. Be careful not to bend the mat too much as it will snap. Now use a scraper to clean debris from. the mat.
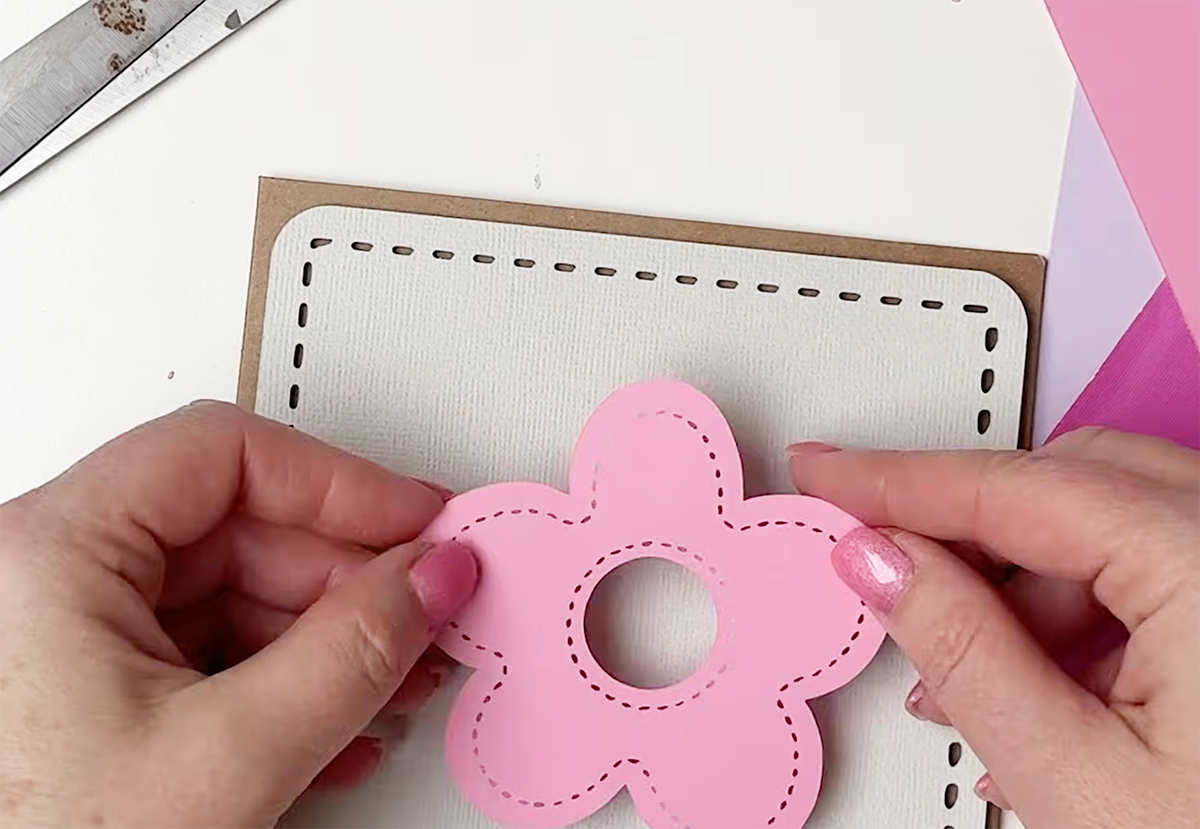
Assemble your layered shapes, using sticky pads to create depth to your card. Use adhesive or foam pads to create dimension. Your layered stitched flower card is now ready to impress friends or be given as a handmade gift.
Tips for Perfect Cricut Stitched Designs
- Always attach score lines to shapes before cutting.
- Use a StandardGrip mat for small or delicate pieces.
- Resize shapes and score lines proportionally to maintain detail.
- Experiment with different cardstock colours for layered stitched effects.
- Apply the Cricut stitch technique to letters, borders, or frames for versatile projects.
- Practice makes perfect, so try different shapes and layouts for more advanced Cricut stitched projects.
This Cricut Stitch Effect Is Perfect For Cards and Scrapbooking
Mastering this easy Cricut stitch technique is a simple way to take your card-making and paper crafts to the next level. With this method, even beginners can create stunning stitched effects in Cricut Design Space.
Share your creations with us on our Facebook page or leave a comment below. Happy crafting with your Cricut!

