
Today I am going to share how to Make Scrapbooking Paper and Journal Ephemera with AI. I have spent ages hunting for the perfect scrapbook paper for a project, scrolling through shop after shop, and just could not find it anywhere. Sound familiar?
If you’ve ever been there, elbow deep in a search bar at eleven at night looking for that one specific paper that exists only in your head, then pull up a chair, because this one’s for you.
I wanted sardine-themed paper and vintage Monterey, California maps for a travel journal I’m putting together, and nothing out there matched what I could picture. So I did what any slightly stubborn crafter does. I made it myself.
So grab a cuppa and get comfy, because by the end of this you’ll know exactly how I design custom scrapbook paper, vintage maps and ephemera using AI prompts, bring them into Canva to layer and crop them, and print them double sided ready to cut, fold and use in your journals, cards or craft fair projects. It’s so much easier than it sounds, I promise.

What You Will Find Here
How to Make Scrapbooking Paper and Journal Ephemera with AI
What You’ll Need for This AI Scrapbooking Paper Tutorial
- A free Adobe Firefly account
- Canva account (the free version works perfectly well)
- A printer that can print double-sided
- A paper trimmer or guillotine
- I also used my vintage journal
Designing Your Scrapbook Paper and Ephemera in Adobe Firefly
This first section is all about creating your base images, the patterns, maps and stamps that will become your finished scrapbook paper.
1. Set Up Your Free Adobe Firefly Account
Head over to Adobe Firefly and set up a free account. This is where all the magic starts. Once you’re in, you’ll see a text bar at the bottom of the screen where you type in your prompts, and a sidebar where you can change the shape and resolution of your images.
This bit is genuinely so much easier than people think. You don’t need any design experience or special software knowledge to make your own scrapbooking paper with AI.
2. Write Your First AI Prompt for Scrapbook Paper
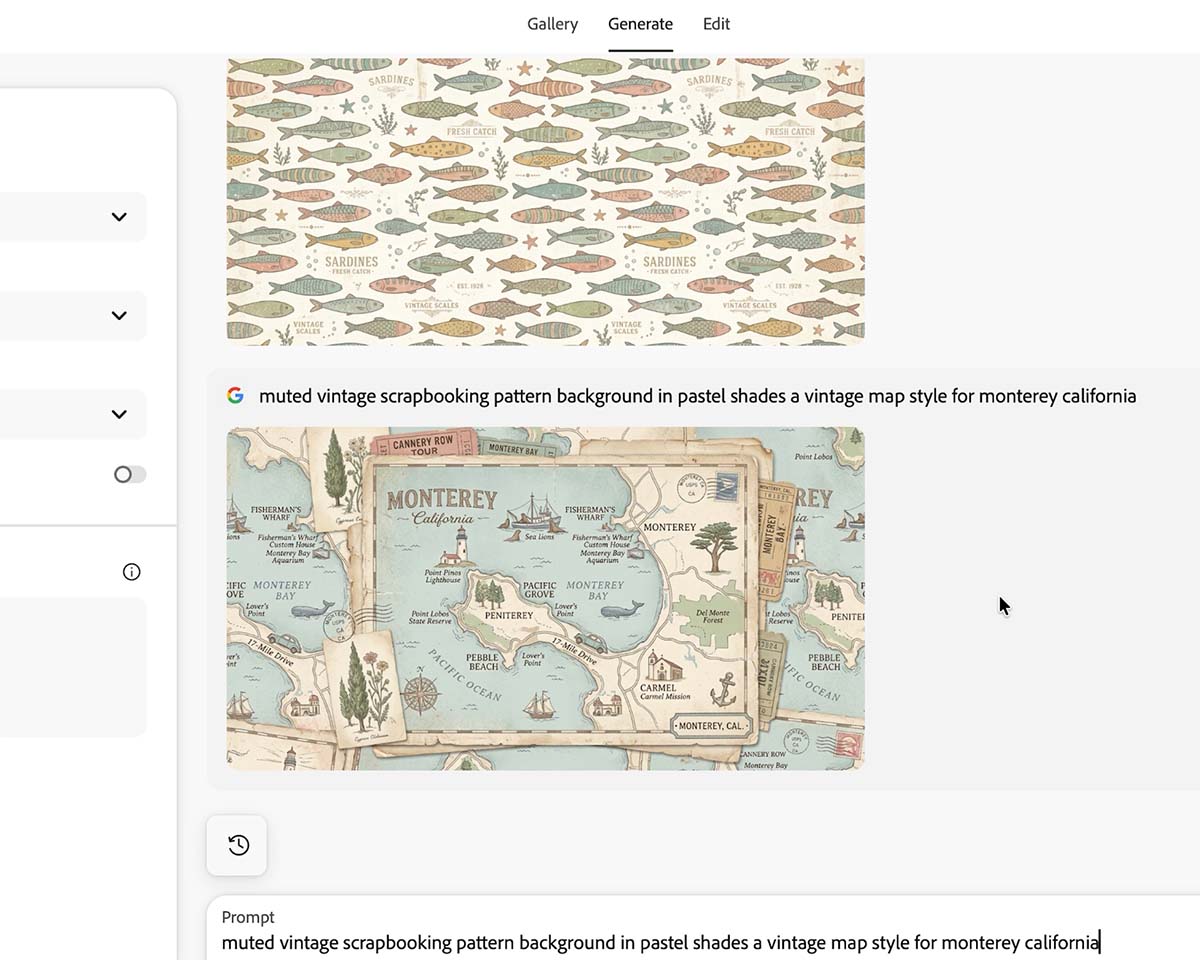
Type in exactly what you want, and be as descriptive as you can. For my first attempt I typed a muted vintage scrapbook paper in pastel shades in a sardine pattern.
Now here’s an honest bit for you. My first result wasn’t a pattern at all, it was just a picture of a piece of paper sitting on a table. Not useful. This is completely normal when you’re learning how to prompt AI for scrapbooking paper, so don’t be put off if your first go isn’t quite right.

3. Tweak Your Prompt Until You Get a Proper Pattern
This is the key to making AI-generated scrapbook paper, and it’s simpler than it sounds. I took the word paper out of my prompt and replaced it with pattern. So it became a muted vintage scrapbooking pattern in pastel shades in a sardine pattern.
That one small change made a massive difference. Adobe Firefly takes your wording quite literally, so swapping paper for pattern turned a flat image into an actual usable, repeating design. If your first result looks a bit odd, have a look at your wording before you give up.
4. Create a Set of Matching Vintage Ephemera
Once you’ve got a pattern you love, keep building on it so everything matches. I added a vintage map style prompt for Monterey, California, then a postage stamps prompt, all using similar wording and colour themes.
Keeping a consistent theme across your prompts is a brilliant tip for anyone making scrapbooking ephemera with AI, because it means all your pieces feel like part of the same collection when you come to use them in your journal.
Don’t worry about total accuracy either. My vintage map wasn’t geographically perfect, and that’s fine, because you’re going to be sticking things over the top of it anyway. It’s about capturing a vintage feel and a colour palette, not creating an atlas.

5. Choose Your Image Shape and Download Your Designs
On the left-hand side of Adobe Firefly, you’ll find a ratio option where you can switch between landscape, portrait and square, depending on what you’re planning to make. Once you’re happy with your patterns and ephemera, click each image and hit Download in the top-right corner.

Building Your Double Sided Scrapbook Paper in Canva
Once your AI images are downloaded, this is where you turn them into a proper, printable double sided sheet.
6. Bring Your AI Designs into Canva
Open Canva and click Create, then search for an A4 portrait flyer as your starting size. Go to Upload and add all of the AI images you’ve just downloaded from Adobe Firefly.
This next stage is where your scrapbooking paper really comes together, because you’re going to layer, duplicate and crop your images to build a proper double sided design.

7. Add a Background Layer for a Double Sided Finish
Pick a background; I went for a hessian texture, and drag it to fill the page. Click position at the top of the screen once it’s selected, then use the layers panel to send it right to the back.
You can also click on your background and change its colour using the colour picker at the top, which is such a useful trick for matching your paper to a specific project or colour scheme.

8. Duplicate and Crop to Build Your Ephemera Collection
Duplicate your page so you’ve got one page for your background and one for your images. Then start duplicating your maps, patterns and stamp designs, using the crop tool at the top of the screen to cut each one down into smaller pieces.
I made mini stamps, cropped sections of my map with just the lighthouse, little cutouts of sea lions, and pieces with just the place name on them. The idea is to give yourself a good range of pieces so you’ve got plenty of options when you sit down to actually put your journal or card together.
Leave a few edges uncropped here and there too. If you want fold up flaps or pieces that open to reveal a photo underneath, you’ll need that extra bit of paper left on.
Try My Video Tutorial Here
9. Set Up Your Pages in Printing Order
You should end up with four pages in total for 2 double-sided sheets: your first page of images, a background page, a second page of images, and another background page. This order matters because it determines what prints on the front and back of your paper.
10. Download Your Design as a Print Ready PDF
Click share, then download, and choose PDF print as your file type. This keeps everything in the correct order for double sided printing.
Printing, Cutting and Using Your Finished Paper
11. Print Your Scrapbooking Paper Double Sided
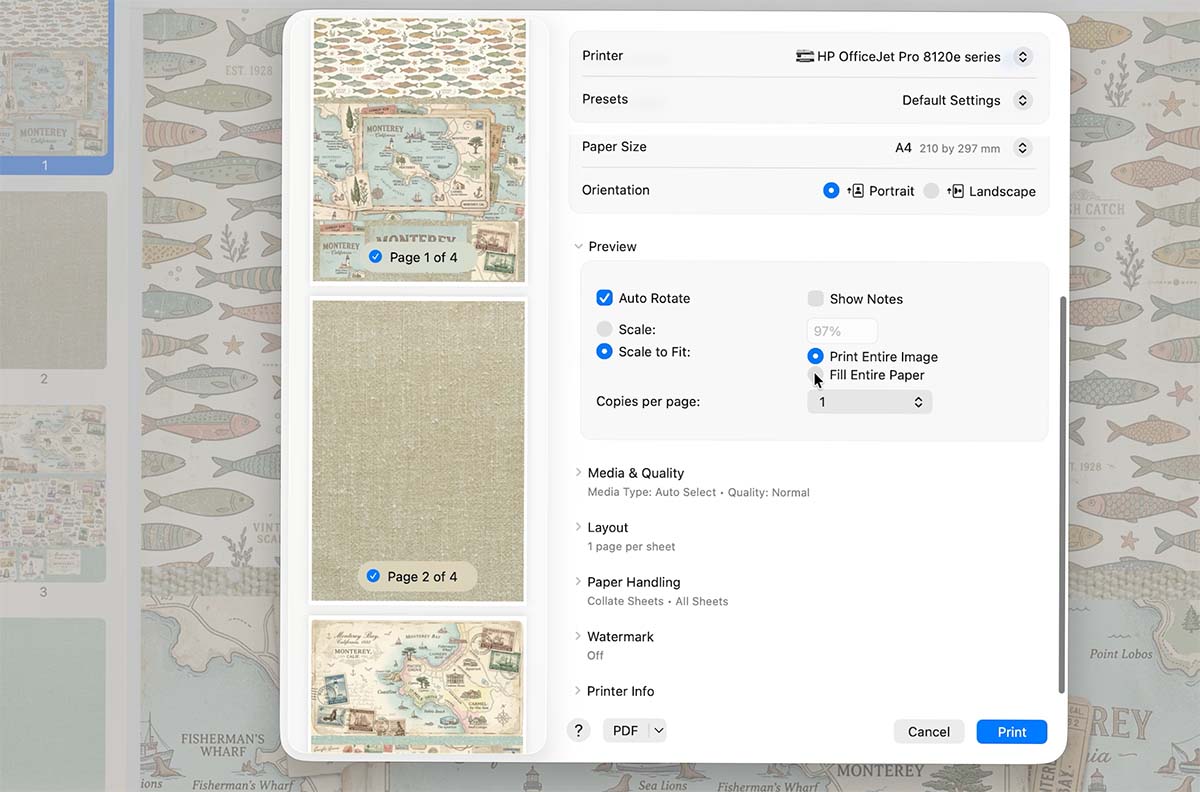
Open your PDF and go to print. Toggle on double sided printing, select fill entire paper, and set your media quality to best. This gives you the fullest possible page with the least amount of white border, so your finished scrapbook paper looks properly professional.

12. Cut, Fold and Use Your Finished Ephemera
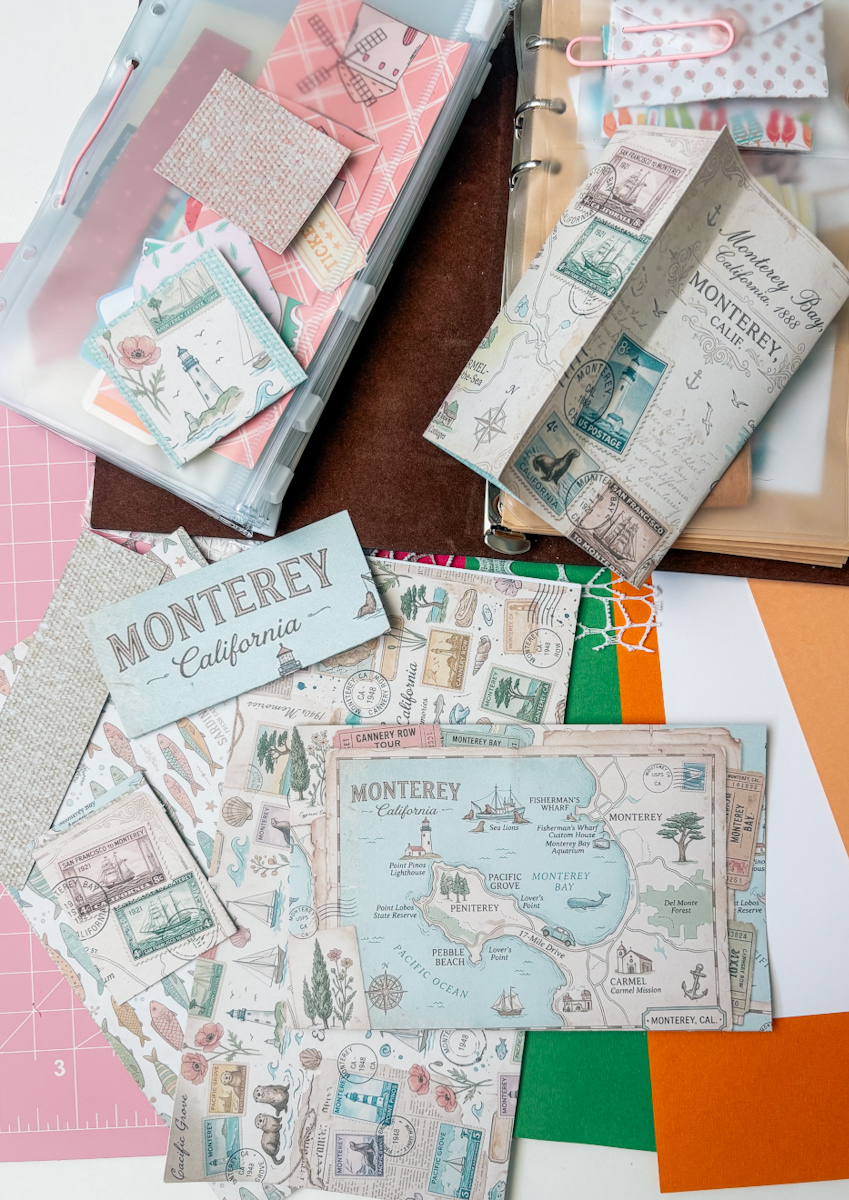
Once printed, trim your sheets down with a paper trimmer or guillotine, it really is that straightforward. Cut around your maps, stamps and pattern pieces, and start folding some of them into flip up or fold out ephemera for your journal.
I kept the top edge on some pieces so they’d flip up and reveal something underneath, and left others as flat background paper to tear and layer into my pages. Little touches like this are what make handmade journal ephemera feel really special.

A Quick Word on Using AI in the Craft Room
I want to be honest with you, because I think it matters. I do feel a bit torn about AI, and I stepped away from it myself for a while. But I’ve landed on using it as one more tool in my craft room, alongside my Cricut and my printer, rather than something that replaces the design process. I’m still choosing the colours, the theme, the layout and the finished look, the AI is simply helping me create the base images I couldn’t find anywhere else.
I will, however, still continue to draw and design my own files, because I feel that human-made products are important.

Frequently Asked Questions About Making Scrapbook Paper with AI
Is Adobe Firefly Free to Use for Scrapbooking Paper?
Yes, Adobe Firefly has a free account option that is more than enough for creating scrapbooking paper and journal ephemera at home. There are upgrade options for those who want to use it more.
Do I Need Canva Pro to Make Double Sided Scrapbook Paper?
No, the free version of Canva lets you upload, crop and layer your images, which is all you need for this tutorial.
Can I Make Scrapbook Paper for Any Theme with AI?
Yes, this method works for any theme or destination. Simply change your prompt wording to match what you’re after, whether that’s a city, a hobby, a season or a colour palette.
Why Did My First AI Prompt Not Work Properly?
This is really common. Small wording changes, such as swapping paper for pattern, can completely change your result. Keep adjusting your prompt until you get the design you’re after.
What You Can Make with Your Finished Ephemera
This method works brilliantly for travel journals, memory keeping pages, birthday cards, craft fair stock and gift tags. Once you’ve got the hang of writing prompts and building your pages in Canva, you honestly can whip up an entire matching paper collection for any theme in an afternoon, sardines, seaside towns, birthdays, whatever you fancy.
And look, I know AI in the craft room is a bit of a hot topic, and I don’t think there’s a right or wrong answer here. All I know is that this little project solved a problem I’d been stuck on, and I had a lot of fun doing it too.
So go on, have a play. Start with something silly and simple if you like, just to get a feel for how the prompts work, then build up to your dream project. I’d love to know how you get on, so please do drop a comment and tell me what theme you went for. I read every single one, and I always love seeing what this community creates.
