
Make Christmas Cards That Truly Surprise, If you’re looking for a unique Cricut Christmas project that feels personal and unforgettable, this hidden message Christmas card is perfect. It looks like a simple handmade card from the outside, but inside is a secret QR code that plays your own video message.
It’s a wonderful way to send love and connection across the miles, ideal for grandparents, family abroad, or anyone who treasures something heartfelt.
This easy step-by-step Cricut tutorial will show you exactly how to design, cut, and assemble your card using Cricut Design Space, along with how to safely link your private video to a scannable QR code.

What You Will Find Here
How To Make DIY Hidden Message QR Code Christmas Cards with Cricut
What You’ll Need
- Cricut machine (Explore or Maker)
- Canva
- Youtube
- Cricut Design Space (free software)
- Standard Grip Mat (green)
- Cardstock in your chosen colours, including glitter
- Weeding tool (for removing small bits)
- Brayer (optional, to smooth cardstock on mat)
- Foam pads
- 6×6 Cards and Envelopes
- Glue tips and bottles
- Pintasa Acrylic Paint Pens
- HP Printer
- Printable Printer Paper
See Our Video Tutorial Here

1: Record Your Personal Video Message
Start by recording a short video message. This could be you or your family wishing a Merry Christmas, sending festive greetings, or sharing a quick update. This doesnt need to be anything fancy, just record it landsape on your mobile phone.
Once your video is ready:
- Upload it to YouTube, to do this click on the dot with your face in the right hand corner, a drop down menu appears and click Youtube Studio
- Now click create in the right hand top corner, and you can upload your video
- Click through the options, you will have the chance to add a cover, this could be a family picture, a Merry Christmas message or you could leave it blank
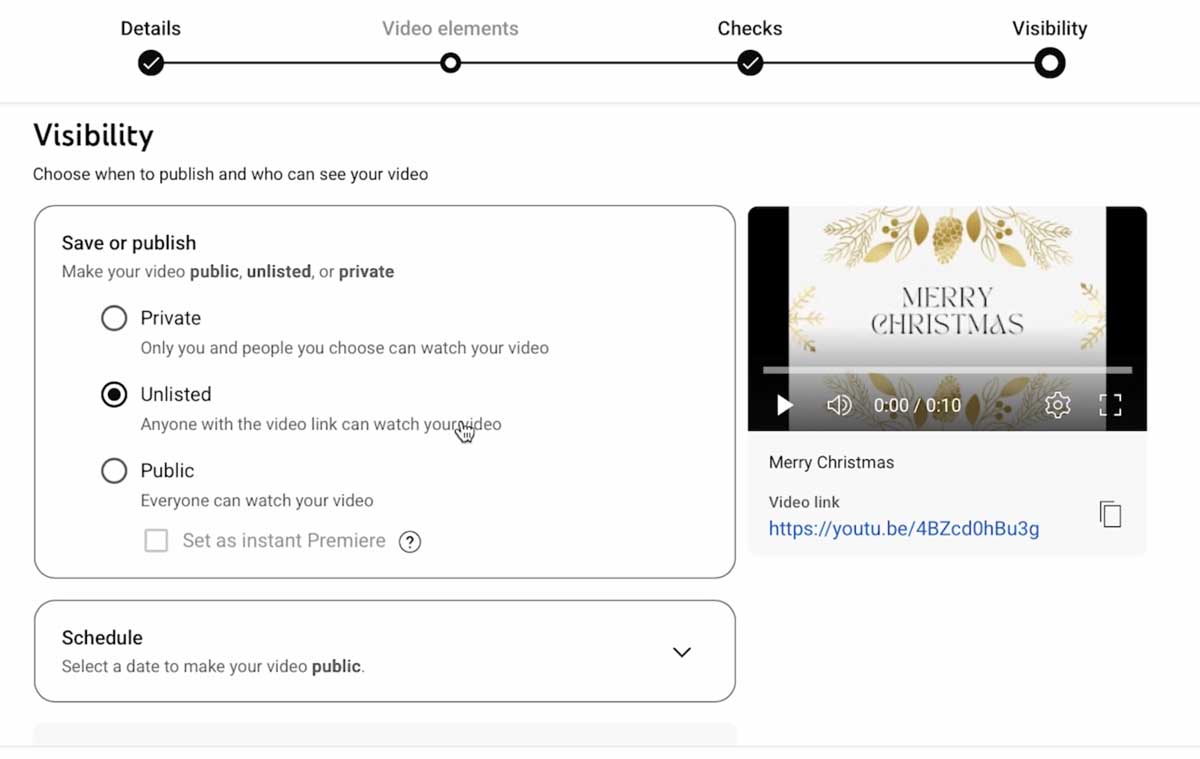
- Save it as unlisted Unlisted so it’s only visible to people with the link
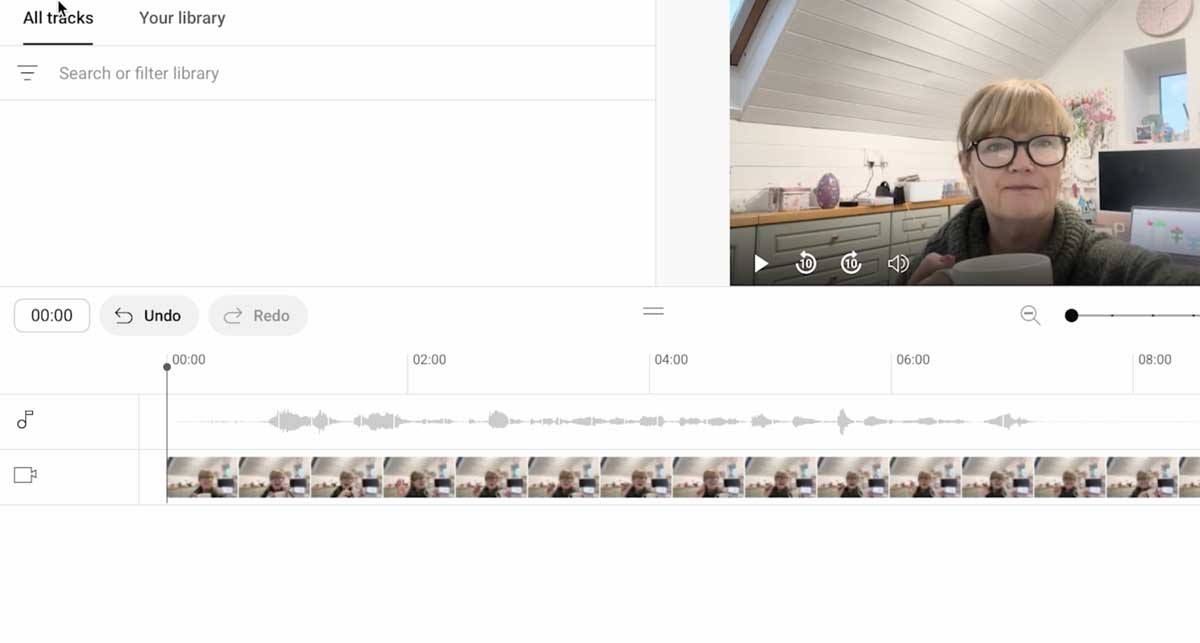
- Go back to the studio and choose content on the sidebar, click on the edit icon under the video and select editor in the sidebar to add music to the background
- If the music is too loud and overwrites speech, click on the music thread and click the mix level to bring the mix of speech and music lower
- Copy the video URL, which you’ll use to create your QR code.
Uploading as unlisted keeps your video private but still accessible via QR code, which is perfect for personalised messages.
2: Create a QR Code for Your Video
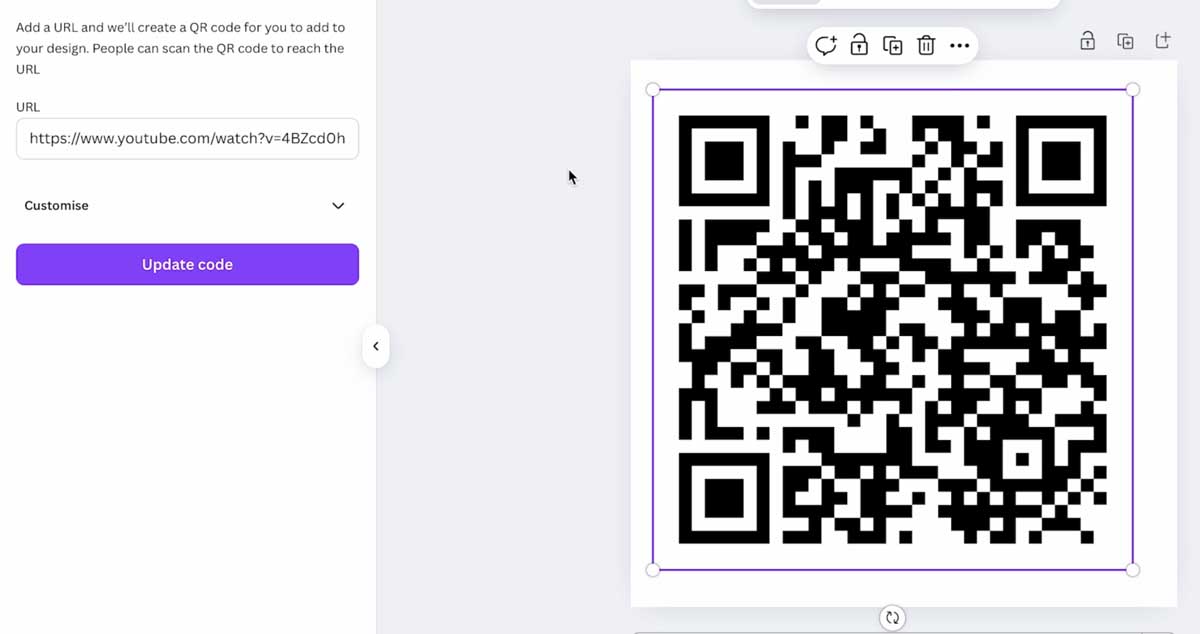
Head to a QR code generator in Canva under apps
- Paste your video link into the generator.
- Choose a simple black-and-white design for best scan results.
- Download your QR code as a PNG file.
You can print your QR code directly onto your Cricut design or cut it separately to stick inside the card.
3: Design Your Hidden Message Card in Cricut Design Space
- Open Cricut Design Space and click New Project.
- Click Shapes and select a square. This will be the base of your gift box card.
- Recommended size: 6 x 6 inches for a small card, or adjust larger if you want a bigger card.
- This will become the “box” shape that folds out.
- Choose a print-and-cut pattern and select one for your box
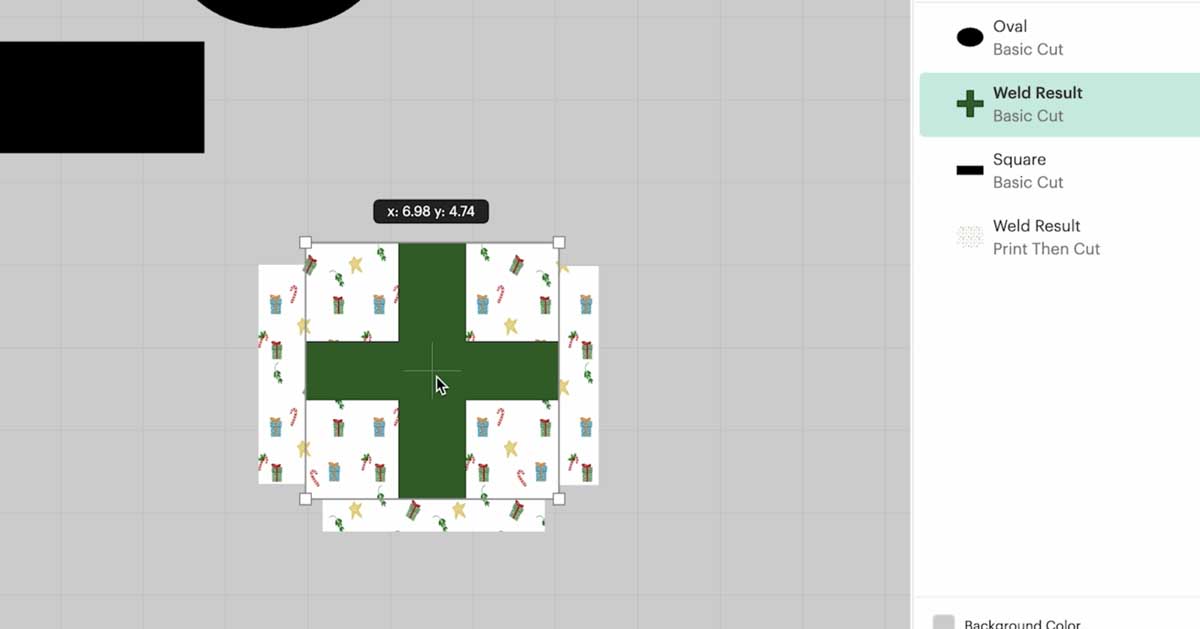
- Create another rectangle, slightly thinner than the interior of your box and twice as long. This rectangle will slide in and out of the card box
- On the pull-out tab rectangle, leave a blank area where your QR code will go (about 2 x 2 inches works well) Add The QR code and flatten
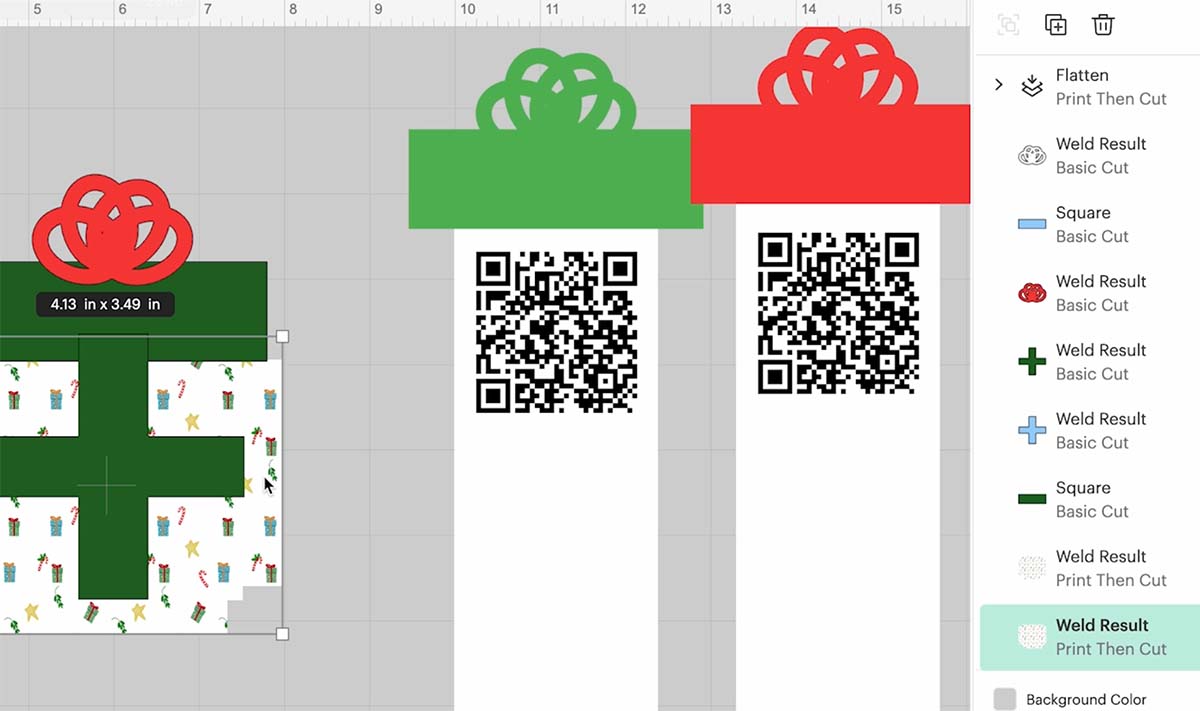
- See video to make a bow and ribbon to decorate the card
- Click Make It, print, cut your box, and insert.
4: Assemble the Card
- Begin with your card background and fold along the score lines using a ruler
- Create folds in the insert layer so it slides in and out of the box

- Add the box lid to the top of the insert layer
- Attach the box and decorative layers using double-sided tape or glue, and attach the insert to the back of the box before attaching.
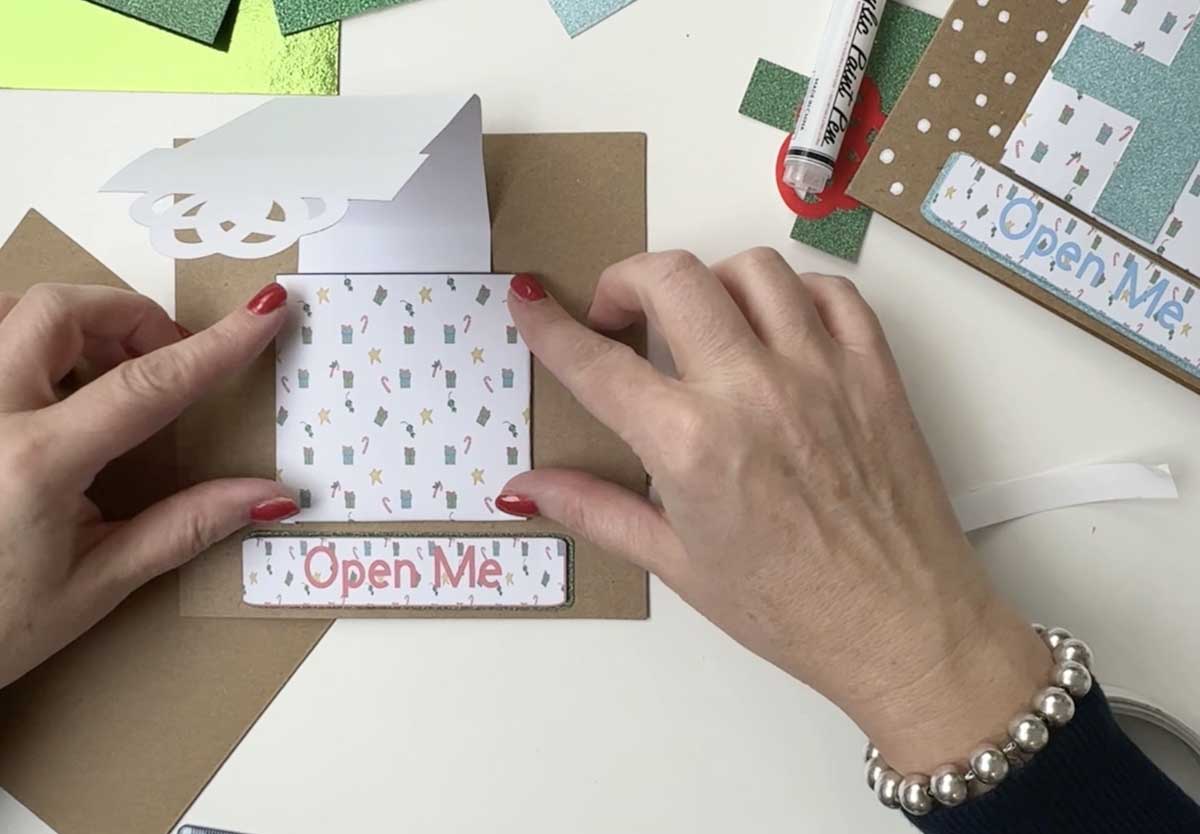
- Add all the decorations.
- Before sealing everything, scan it with your phone to ensure it links correctly to your video.
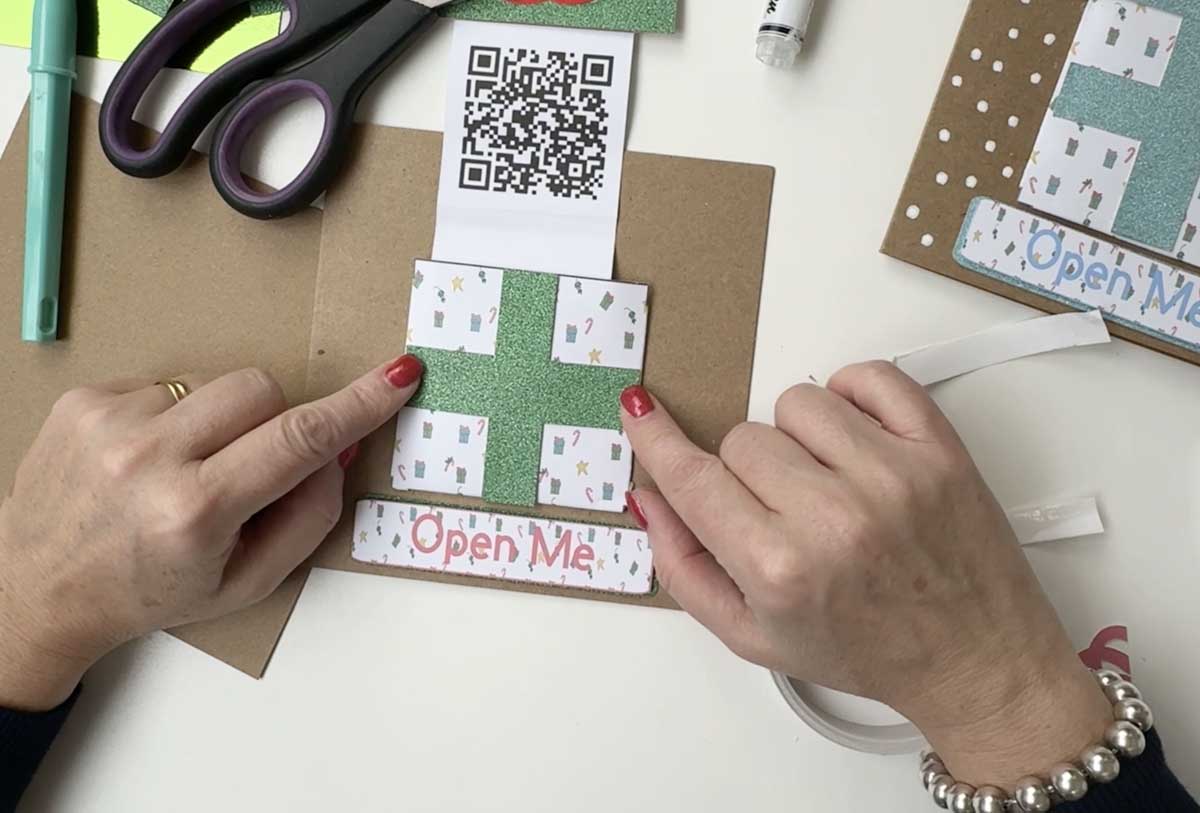
- Decorate with snow using printasa paint pens.
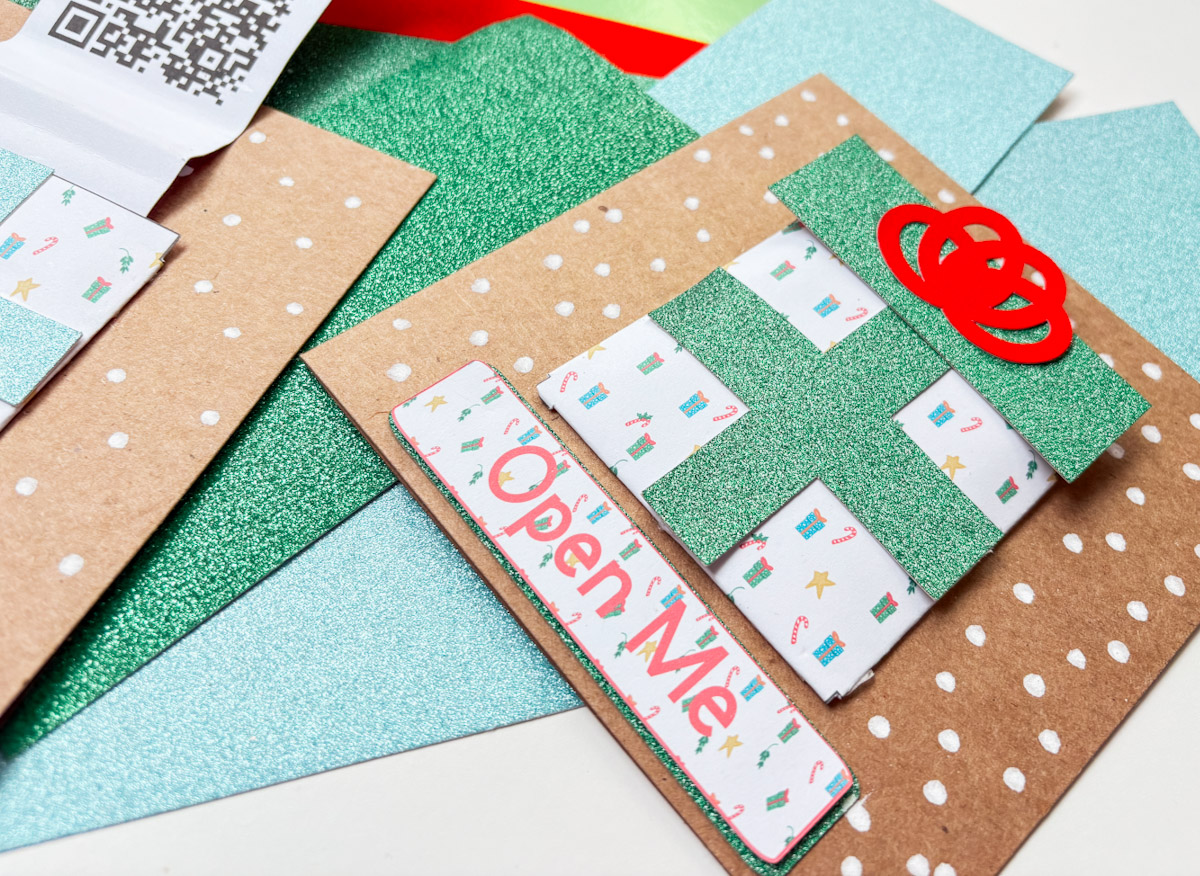
Step 7: Test and Send
Pull the tab in and out a few times to test it. Once everything’s secure and working perfectly, your card is ready to send.
The recipient simply scans the QR code with their phone camera and your video message plays instantly. It’s a personal surprise that makes your handmade card truly unforgettable.

Creative Variations to Try
- Family Compilation Cards: Combine clips from everyone in your household wishing a Merry Christmas. Perfect for relatives far away.
- Santa Message Cards: Record a message from Santa for the kids or grandchildren.
- Sticker QR Codes: Print QR codes as stickers and add them to store-bought cards for a quick, meaningful twist.
Bringing Your Cricut Christmas Card to Life
This Cricut Christmas card project combines handmade creativity with a touch of digital magic. Adding a hidden video message makes your cards personal, meaningful, and completely unique.
Whether you’re a beginner or an experienced Cricut maker, this project is a beautiful way to share festive cheer and stay connected with loved ones even when you can’t be together in person.
Happy crafting,
Sarah

